User Guide Gateway E-4100
Contents 1 Getting Help. . . . . . . . . . . . . . . . . . . . . . . . . . . . . . . . . . . . . . . . . . . . . . . . . . . . . . . . . . . . 1 Help and Support . . . . . . . . . . . . . . . . . . . . . . . . . . . . . . . . . . . . . . . . . . . . . . . . . . . . . . . . . . Searching for a topic . . . . . . . . . . . . . . . . . . . . . . . . . . . . . . . . . . . . . . . . . . . . . . . . . . . . Using Your Computer guide . . . . . . . . . . . . . . . . . . . . . . . . . . . . . . . . . . . . . . . . .
Using Drives and Ports . . . . . . . . . . . . . . . . . . . . . . . . . . . . . . . . . . . . . . . . . . . . . . . . 35 Using the diskette drive . . . . . . . . . . . . . . . . . . . . . . . . . . . . . . . . . . . . . . . . . . . . . . . . . . . Using the Zip drive . . . . . . . . . . . . . . . . . . . . . . . . . . . . . . . . . . . . . . . . . . . . . . . . . . . . . . . . Using the memory card reader . . . . . . . . . . . . . . . . . . . . . . . . . . . . . . . . . . . . . . . . . . . . . .
Computer . . . . . . . . . . . . . . . . . . . . . . . . . . . . . . . . . . . . . . . . . . . . . . . . . . . . . . . . . . . . Diskette drive . . . . . . . . . . . . . . . . . . . . . . . . . . . . . . . . . . . . . . . . . . . . . . . . . . . . . . . . . DVD drives . . . . . . . . . . . . . . . . . . . . . . . . . . . . . . . . . . . . . . . . . . . . . . . . . . . . . . . . . . File management . . . . . . . . . . . . . . . . . . . . . . . . . . . . . . . . . . . . . . . . . . . . . . . . . . . . . .
iv www.gateway.
Chapter 1 Getting Help ■ Using the Gateway Web site ■ Using Help and Support ■ Using Your Computer guide ■ Using Do More With Gateway ■ Using online help ■ Contacting Gateway 1
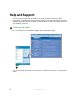
Help and Support Your computer includes Help and Support, an easily accessible collection of help information, troubleshooters, and automated support. Use Help and Support to answer questions about Windows and to help you quickly discover and use the many features of your Gateway computer. To start Help and Support: ■ Click Start, then click Help and Support. Help and Support opens. You can find help information by clicking a link, performing a search, or browsing the index. 2 www.gateway.
Searching for a topic To search for a topic in Help and Support, type a word or phrase (keyword) in the Search box located at the top of any Help and Support screen, then click the arrow button. For each search, you receive the following search result types: ■ Suggested Topics - These topics are located in Help and Support and are relevant to your search topic. ■ Full-text Search Matches - These topics are located in Help and Support and contain the words you entered in the Search box.
Online help Many programs provide information online so you can research a topic or learn how to perform a task while you are using the program. You can access most online help information by selecting a topic from a Help menu or by clicking a Help button. You can search for information by viewing the help contents, checking the index, searching for a topic or keyword, or browsing through the online help.
Chapter 2 Checking Out Your Gateway Computer ■ Identifying features ■ Locating your computer serial number ■ Locating the Microsoft Certificate of Authenticity ■ Locating the specifications for your computer ■ Purchasing accessories 5
Micro Tower Front Your computer includes the following components. Power button/ power indicator CD/DVD eject button CD/DVD/Recordable drive Zip drive eject button Zip drive/memory card reader (optional) USB ports Microphone jack Headphone jack Diskette drive (optional) Diskette eject button 6 www.gateway.
Component CD/DVD/Recordable drive Icon Description Use this drive to listen to audio CDs, install games and programs, watch DVDs, and store large files onto recordable discs (depending on drive type). This drive may be a CD, recordable CD, DVD, or recordable DVD drive. To identify your drive type and for more information about your drive, see “Identifying drive types” on page 41. Power button/ power indicator Press this button to turn the power on or off.
Back Your computer includes the following components: PS/2 keyboard port PS/2 mouse port USB ports Kensington lock slot Serial port Case cover shipping thumbscrew Parallel port Monitor port Ethernet (network) jack USB ports Microphone jack Audio input (line in) jack Headphone/speakers (line out) jack Power connector 8 Voltage switch www.gateway.
Component Icon Description PS/2 keyboard port Plug a Personal System/2® (PS/2) keyboard into this port. USB ports Plug USB (Universal Serial Bus) devices (such as a printer, scanner, camera, keyboard, or mouse) into these ports. For more information, see “Installing a printer, scanner, or other peripheral device” on page 33. Serial port Plug a serial device (such as a digital camera) into this port. For more information, see “Installing a printer, scanner, or other peripheral device” on page 33.
Component Icon Description Headphone/ speakers jack (line out) jack (green) Plug powered speakers, an external amplifier, or headphones into this jack. Voltage switch Before turning on your computer, make sure that this switch is in the correct position for the correct power available. The switch is preset at the factory with the correct voltage for your area. In the United States, the utility power is supplied at a nominal 115 volts at 60 Hz.
Mid Tower Front Your computer includes the following components. CD/DVD/ Recordable drive Optional CD/DVD/ Recordable drive Diskette drive/Zip drive/memory card reader (optional) Diskette eject button Power button/ power indicator USB ports Microphone jack Headphone jack www.gateway.
Component CD/DVD/Recordable drive Icon Description Use this drive to listen to audio CDs, install games and programs, watch DVDs, and store large files onto recordable discs (depending on drive type). This drive may be a CD, recordable CD, DVD, or recordable DVD drive. To identify your drive type and for more information about your drive, see “Identifying drive types” on page 41. Power button / power indicator Press this button to turn the power on or off.
Back Your computer includes the following components: Power connector Voltage switch Thumbscrew PS/2 mouse port PS/2 keyboard port Kensington lock slot USB ports Serial port Parallel port Monitor port Ethernet (network) jack USB ports Microphone jack Headphone/ Speakers jack Audio input jack Add-in monitor port (optional) S-Video out jack (optional) Thumbscrew Modem jack (optional) Telephone jack (optional) www.gateway.
Component Icon Description Power connector Plug the power cord into this connector. Voltage switch Before turning on your computer, make sure that this switch is in the correct position for the correct power available. The switch is preset at the factory with the correct voltage for your area. In the United States, the utility power is supplied at a nominal 115 volts at 60 Hz. The power supply should always be set to this when your computer is operating in the United States.
Component Icon Description PS/2 mouse port Plug a PS/2 mouse into this port. Kensington™ lock slot Secure your computer to an object by connecting a Kensington cable lock to this slot. Parallel port Plug a parallel device (such as a printer) into this port. For more information, see “Installing a printer, scanner, or other peripheral device” on page 33.
Desktop to tower conversion You can convert your case from desktop to tower configuration using the rotating foot included with your system. 16 www.gateway.
Locating your serial number The label on the side of your computer case contains information that identifies your computer serial number. Gateway Technical Support will need this information if you call for assistance. www.gateway.
Microsoft Certificate of Authenticity The Microsoft Certificate of Authenticity label found on the back or side of your computer includes the product key code for your operating system. Finding your specifications For more information about your computer, such as memory size, memory type, and hard drive size, visit Gateway’s eSupport page at support.gateway.com. The eSupport page also has links to additional Gateway documentation and detailed specifications. 18 www.gateway.
Accessories To order accessories, visit the Accessory Store at accessories.gateway.com. Memory Large programs, such as multimedia games or graphics programs, use a lot of memory. If your programs are running more slowly than you think they should, try adding more memory. Printers You can attach almost any type of printer to your computer. The most common types are inkjet and laser printers, which print in color or black and white.
USB flash drive Use a USB flash drive for storing files or transferring files to another computer. Uninterruptible power supplies A standby, uninterruptible power supply (UPS) protects your computer from data loss during a total power failure. A UPS uses a battery to keep your computer running temporarily during a power failure so you can save your work and shut down your computer correctly. A UPS may also provide protection from power surges. 20 www.gateway.
Chapter 3 Getting Started ■ Using your computer safely ■ Protecting your computer from power source problems ■ Turning your computer on and off ■ Adjusting the volume ■ Connecting the modem and network ■ Installing peripheral devices 21
Working safely Before using your computer, read the following recommendations for setting up a safe and comfortable work area and avoiding discomfort and strain. Top of screen is not higher than eye level Screen is perpendicular to your line of sight Hands and arms are parallel to the floor Feet are flat on the floor Reducing eye strain Sunlight or bright indoor lighting should not reflect on the monitor screen or shine directly into your eyes.
Setting up your computer desk and chair When you are setting up your computer desk and chair, make sure that the desk is the appropriate height and the chair helps you maintain good posture. ■ Select a flat surface for your computer desk. ■ Adjust the height of the computer desk so your hands and arms are positioned parallel to the floor when you use the keyboard and mouse. If the desk is not adjustable or is too tall, consider using a keyboard drawer.
Avoiding discomfort and injury from repetitive strain ■ Vary your activities to avoid excessive repetition. ■ Take breaks to change your position, stretch your muscles, and relieve your eyes. ■ Find ways to break up the work day, and schedule a variety of tasks. Protecting from power source problems During a power surge, the voltage level of electricity coming into your computer can increase to far above normal levels and cause data loss or system damage.
To set the voltage selection switch: ■ Use a tool such as an opened paper clip to slide the voltage selection switch to the correct voltage position. Micro Tower Voltage switch Mid Tower Voltage switch www.gateway.
Starting your computer To start your computer: 1 2 3 Connect the cables to your computer. See the setup poster for setup instructions. Turn on your computer. If you are starting your computer for the first time, follow the on-screen instructions to set up your computer. Important 4 Your computer has a built-in variable speed fan. In addition, your computer uses a powerful processor which produces heat.
Turning off your computer Warning When you turn off your computer, certain components in the power supply and system board remain energized. In order to remove all electrical power from your computer, unplug the power cord and modem cable from the wall outlets. We recommend disconnecting the power cord and modem cable when your computer will not be used for long periods.
Restarting (rebooting) your computer If your computer does not respond to keyboard or mouse input, you may have to close programs that are not responding. If closing unresponsive programs does not restore your computer to normal operation, you may have to restart (reboot) your computer. To close unresponsive programs and restart your computer: 1 2 3 4 5 Press CTRL+ALT+DEL. The Task Manager window opens. Click the Applications tab, then click the program that is not responding. Click End Task.
Using the keyboard Standard keyboard This keyboard is the basic model of keyboard available with your computer. Function keys Windows keys Navigation keys Application key Directional keys Indicators Numeric keypad Press these keys... To... Function keys Start program actions. Each program uses different function keys for different purposes. See the program documentation to find out more about the function key actions.
Multifunction keyboard This keyboard is the full-featured model available with your computer. Function keys Windows keys Navigation keys Application key Directional keys Indicators Numeric keypad Press these keys... To... Function keys Start program actions. Each program uses different function keys for different purposes. See the program’s help to learn more about function key actions.
Special-function buttons Previous Stop Play/Pause Next Volume down Volume up Special-function buttons Icons Mute Help My Documents Search E-mail Internet Press to... Previous Return to the previous CD track or DVD chapter. Play/Pause Start or pause the play of the CD or DVD. Stop Stop the play of CD or DVD. Next Move to the next CD track or DVD chapter. Volume down Decrease the volume. Volume up Increase the volume. Mute Turn off all sound. My Documents Opens the My Documents folder.
Adjusting the volume You can use the volume controls to adjust the overall volume and the volume of specific sound devices in your computer. To adjust the overall volume level using hardware controls: ■ If you are using external speakers, turn the knob on the front of the speakers. -ORUse the mute and volume control buttons on the keyboard. Tips & Tricks For instructions on how to adjust the volume in Windows, see “Adjusting the Volume” in Using Your Computer which has been included on your hard drive.
Connecting to a wired Ethernet network Your computer has a network jack that you can use to connect to a 10/100 wired Ethernet network. Important Your computer is equipped with a built-in Ethernet port. For information about setting up a wired or wireless Ethernet network, see “Networking Your Computer” on page 85. To connect to a wired Ethernet network: 1 Insert one end of the network cable into the network jack computer. 2 Insert the other end of the network cable into a network jack.
Parallel and serial port devices are not plug-and-play. See the device documentation for detailed information and installation instructions. Help and Support For more information about installing peripheral devices, click Start, then click Help and Support. Type the keyword installing devices in the Search box , then click the arrow. 34 www.gateway.
Chapter 4 Using Drives and Ports ■ Using the diskette drive ■ Using the Zip drive ■ Using the memory card reader ■ Using CD or DVD drives 35
Using the diskette drive The optional diskette drive uses 3.5-inch diskettes (sometimes called floppy disks). Diskettes are useful for storing files or transferring files to another computer. Micro Tower Eject button Activity indicator Diskette slot Mid Tower Activity indicator 36 Diskette slot Eject button www.gateway.
To use a diskette: 1 Insert the diskette into the diskette drive with the label facing up (or left, if using your Micro Tower case vertically). 2 To access a file on the diskette, click Start, then click My Computer. Double-click the drive letter (for example, the A: drive), then double-click the file name. 3 To remove the diskette, make sure that the drive activity light is off, then press the diskette eject button. www.gateway.
Using the Zip drive Iomega Zip drives, like diskette drives, use disks to store data. Zip disks can store 100 MB, 250 MB, or 750 MB of data. You can use the optional Zip drive to back up files you do not use so you can remove them from your hard drive. Zip drives also provide an easy way to transfer files between computers (if both computers have internal Zip drives or if you have one external, portable Zip drive).
Using the memory card reader You can use the optional memory card reader to transfer pictures from a digital camera to your computer. You can also use the memory card reader to transfer data between your computer and a device that uses memory cards, such as a PDA, MP3 player, or cellular phone. Each slot is assigned a different drive letter (for example, the E: and F: drives) so data can be transferred from one media type to another.
To remove a memory card: ■ 40 Wait for the media reader access indicator to stop blinking, then pull the card out of the slot. Caution Do not remove the card or turn off the computer while the card reader access indicator is blinking. You could lose data. Also, remove the card from the reader before you turn off the computer. Important Do not use the remove hardware icon in the taskbar to remove the memory card.
Using the CD or DVD drive You can use your computer to enjoy a wide variety of multimedia features. Identifying drive types Your Gateway computer may contain one of the following drive types. Look on the front of the drive for one or more of the following logos: If your drive has this logo... This is your drive type... Use your drive for... CD drive Installing programs, playing audio CDs, and accessing data. CD-RW drive Installing programs, playing audio CDs, accessing data, and creating CDs.
Inserting a CD or DVD Activity indicator Important Manual eject hole Eject button Some music CDs have copy protection software. You may not be able to play these CDs on your computer. To insert a CD or DVD: 1 2 Press the eject button on the CD or DVD drive. Place the disc in the tray with the label facing up (or to the left, if using your Micro Tower case vertically).
Playing a CD Use the music program or Windows Media Player on your computer to: ■ Play music CDs ■ Create MP3 music files from your music CDs ■ Edit music track information ■ Use your music files to build a music library ■ Listen to Internet Radio Tips & Tricks For more information about playing CDs, see “Playing CDs” in Using Your Computer which has been included on your hard drive. To access this guide, click Start, All Programs, then click Gateway Documentation.
44 www.gateway.
Chapter 5 Maintaining Your Computer ■ Caring for your computer ■ Updating Windows ■ Protecting your computer from viruses ■ Cleaning your computer ■ Restoring your system ■ Opening the computer case ■ Adding memory and replacing the battery 45
Caring for your computer To extend the life of your computer: ■ When transporting your computer, we recommend that you put it in the original packaging materials. ■ Keep diskettes and your computer away from magnetic fields. Magnetic fields can erase data on both diskettes and hard drives. ■ Avoid subjecting your computer to extreme temperature changes. ■ Keep all liquids away from your computer.
Protecting your computer from viruses A virus is a program that attaches itself to a file on a computer, then spreads from one computer to another. Viruses can damage data or cause your computer to malfunction. Some viruses go undetected for a period of time because they are activated on a certain date. Protect your computer from a virus by: ■ Registering and subscribing to Norton AntiVirus. You received a free, limited-time subscription to the Norton AntiVirus service when you purchased your computer.
2 Click Scan for Viruses. Scan 3 Click the type of scan you want to make in the Scan for Viruses area, then under Actions, click Scan. To remove a virus: 1 2 3 48 If Norton AntiVirus finds a virus, follow all on-screen instructions to remove the virus. Turn off your computer and leave it off for at least 30 seconds. Turn on your computer and rescan for the virus. www.gateway.
To update Norton AntiVirus: Tips & Tricks 1 2 You received a free, limited-time subscription to the Norton AntiVirus service when you purchased your computer. To update Norton AntiVirus after the free subscription period, you must extend your subscription. Make sure that you are connected to the Internet. Click Start, All Programs, Norton AntiVirus, then click LiveUpdate - Norton AntiVirus. The LiveUpdate wizard opens.
Your computer is cooled by air circulated through the vents on the case, so keep the vents free of dust. With your computer turned off and unplugged, brush the dust away from the vents with a damp cloth. Be careful not to drip any water into the vents. Do not attempt to clean dust from the inside of your computer. Cleaning the keyboard You should clean the keyboard occasionally by using an aerosol can of air with a narrow, straw-like extension to remove dust and lint trapped under the keys.
To clean your trackball mouse: 1 2 Turn the mouse upside down. 3 4 Remove any dust, lint, or dirt from the mouse ball with a soft cloth. Rotate the retaining ring on the bottom of the mouse counter-clockwise, then remove the retaining ring and mouse ball. Clean the mouse rollers with a cotton swab dipped in isopropyl alcohol. Mouse rollers 5 Replace the mouse ball and lock the retaining ring into place. www.gateway.
Cleaning CDs or DVDs Wipe from the center to the edge, not around in a circle, using a product made especially for the purpose. Restoring your system All programs that were preinstalled on your computer are available on the backup Restore CDs or DVDs that you created, the Restore CDs or DVD that shipped with your computer, or they are available on the hard drive.
Preventing static electricity discharge The components inside your computer are extremely sensitive to static electricity, also known as electrostatic discharge (ESD). Warning To avoid exposure to dangerous electrical voltages and moving parts, turn off your computer and unplug the power cord and modem and network cables before opening the case. Caution ESD can permanently damage electrostatic discharge-sensitive components in your computer.
Maintaining the Micro Tower case Opening the case Warning To avoid exposure to dangerous electrical voltages and moving parts, turn off your computer, then unplug the power cord and modem cable before opening the case. To open the case: 54 1 2 Follow the instructions in “Preventing static electricity discharge” on page 53. 3 4 Press the power button to drain any residual power from your computer. 5 For more stability, place your computer on its side with the rubber feet resting on your workspace.
7 Lift the side panel up. 8 Lift the side panel away from the case. www.gateway.
Closing the case To close the case: 1 Make sure that all of the internal cables are arranged inside the case so they will not be pinched when you close the case. 2 Align the door tabs into the case notches. Case notches 3 4 56 Swing the side panel toward the case until the release handle locks. Reconnect the cables and power cord. www.gateway.
Installing memory When you upgrade the computer memory, make sure that you install the correct type of memory module for your computer. Your computer uses DIMM memory. To install or replace DIMM memory: 1 2 Open the case by following the instructions in “Opening the case” on page 54. Find the memory module banks on your system board. www.gateway.
3 If you are removing a DIMM from the memory module bank, gently pull the plastic tabs away from the sides of the memory module and remove it. - OR If you are adding a DIMM to an empty memory module bank, gently pull the plastic tabs away from the sides of the memory module bank. 58 4 Align the notches on the new DIMM with the notches on the memory module bank and press the module firmly into the bank. The tabs on the sides of the memory module should secure the memory module automatically.
Replacing the system battery If the computer clock does not keep time or the settings in the BIOS Setup utility are not saved when you turn off your computer, replace the system battery. Use a battery of the same size and voltage as the original battery that was in your computer. Warning Danger of explosion if battery is incorrectly replaced. Replace only with the same or equivalent type recommended by the manufacturer. Dispose of used batteries following the manufacturer’s instructions.
Maintaining the Mid Tower case Opening the case Warning To avoid exposure to dangerous electrical voltages and moving parts, turn off your computer, then unplug the power cord and modem cable before opening the case. To open the case: 60 1 2 Follow the instructions in “Preventing static electricity discharge” on page 53. 3 4 5 Press the power button to drain any residual power from your computer.
Closing the case To close the case: 1 Make sure that all of the internal cables are arranged inside the case so they will not be pinched when you close the case. 2 3 4 5 Align the tabs on the bottom of the panel into the case notches. Swing the side panel toward the case until it is flush with the side of the case. Replace the thumbscrews. Reconnect the cables and power cord. www.gateway.
Removing the front bezel Some upgrading procedures may require you to remove the front bezel. To remove the front bezel: ■ 62 Position the computer where you can grasp the front bottom edge of the bezel, then pull the bezel out and away from the case. www.gateway.
To replace the front bezel: 1 Align the latch pins with the computer latch holes. 2 Press the bezel firmly into place. www.gateway.
Installing memory When you upgrade the computer memory, make sure that you install the correct type of memory module for your computer. Your computer uses DIMM memory. To install or replace DIMM memory: 1 2 Open the case by following the instructions in “Opening the case” on page 60. 3 If you are removing a DIMM from the memory module bank, gently pull the plastic tabs away from the sides of the memory module and remove it. Find the memory module banks on your system board.
4 Align the notches on the new DIMM with the notches on the memory module bank and press the module firmly into the bank. The tabs on the sides of the memory module should secure the memory module automatically. When the module is secure, you hear a click. 5 6 7 8 Close the case by following the instructions in “Closing the case” on page 61. Reconnect the cables and the power cord. Turn on your computer. Windows starts and the Windows desktop appears.
4 While pushing down on the battery release tab, place the edge of a small flat-head screwdriver under the battery and lift the battery up until it pops out of the socket. Battery 66 5 Make sure that the positive (+) side of the new battery is facing up, then press the battery into the socket until it snaps into place. 6 7 8 Close the case by following the instructions in “Closing the case” on page 61. Reconnect all external cables and the power cord. Turn on your computer. www.gateway.
Chapter 6 Troubleshooting ■ Troubleshooting typical hardware and software problems 67
Safety guidelines While troubleshooting your computer, follow these safety guidelines: ■ Never remove your computer case cover while your computer is turned on and while the modem cable and the power cord are connected. ■ Make sure that you are correctly grounded before accessing internal components. For more information about preventing damage from static electricity, see “Preventing static electricity discharge” on page 53.
Troubleshooting Add-in cards The computer does not recognize an add-in card ■ Shut down and restart your computer. ■ Make sure that you have installed the required software. For more information, see the documentation that came with your add-in card. Audio See “Sound” on page 83. Battery See “Power” on page 81. CD or DVD drives The computer does not recognize a disc or the CD or DVD drive ■ Make sure that the disc label is facing up, then try again. ■ Try a different disc.
Audio CD does not produce sound ■ Make sure that the disc label is facing up, then try again. ■ Some music CDs have copy protection software. You may not be able to play these CDs on your computer. ■ Make sure that the volume controls are turned up. For more information, see “Adjusting the volume” on page 32. ■ Make sure that the mute controls are turned off. For more information, see “Adjusting the volume” on page 32. ■ Make sure that the speaker cables are connected correctly and securely.
Computer The computer will not start ■ Make sure that the power cord is connected to an AC power source and your computer is turned on. Diskette drive The diskette drive is not recognized ■ Shut down and restart your computer. You cannot save a file to diskette or you see the message “disk is full or write-protected” ■ Make sure that the write-protection tab on the upper-right corner of the diskette is down (unprotected). ■ Delete unnecessary files on the diskette and try again.
■ Run Error checking on the diskette. For more information, see “Checking the hard drive for errors” in Using Your Computer which has been included on your hard drive. To access this guide, click Start, All Programs, then click Gateway Documentation. You see a “Non-system disk” or “Disk error” error message ■ Eject the diskette from the diskette drive, then press ENTER. ■ Make sure that the diskette you are using is IBM-compatible.
Hard drive You see an “Insufficient disk space” error message ■ ■ Delete unnecessary files from the hard drive using Disk Cleanup. For instructions on deleting unnecessary files, see “Using Disk Cleanup” in Using Your Computer which has been included on your hard drive. To access this guide, click Start, All Programs, then click Gateway Documentation. Empty the Recycle Bin by right-clicking the Recycle Bin icon, then clicking Empty Recycle Bin.
Internet You cannot connect to the Internet ■ If you are using a dial-up modem, make sure that the modem cable is plugged into the modem jack and not the Ethernet network jack. See “Back” on page 8 to make sure that the connections have been made correctly. - OR If you are using a cable or DSL modem, make sure that the modem cable is plugged into the Ethernet network jack and not the modem jack. See “Back” on page 8 to make sure that the connections have been made correctly.
■ Make sure that your account with your Internet service provider (ISP) is set up correctly. Contact your ISP for technical support. Keyboard The keyboard does not work ■ Make sure that the keyboard cable is plugged in correctly. For more information, see the poster that came with your computer. ■ Remove all extension cables and switch boxes. ■ Clean the keyboard by using an aerosol can of air with a narrow, straw-like extension to remove dust and lint trapped under the keys.
Memory card reader Drive letters for the memory card slots do not appear in the My Computer window ■ Reboot your computer. Modem (dial-up) Your modem does not dial or does not connect ■ Make sure that the modem cable is plugged into the modem jack and not the Ethernet network jack. See “Back” on page 8 to make sure that the connections have been made correctly. ■ Make sure that your computer is connected to the telephone line and the telephone line has a dial tone.
■ Make sure that you are not using a digital, rollover, or PBX line. These lines do not work with your modem. ■ Check for line noise (scratchy, crackling, or popping sounds). Line noise is a common problem that can cause the modem to connect at a slower rate, abort downloads, or even disconnect. The faster the modem, the less line noise it can tolerate and still work correctly. Listen to the line using your telephone. Dial a single number (such as 1). When the dial tone stops, listen for line noise.
■ If the modem shares the telephone line with another device, make sure that the telephone line is not in use (for example, someone is on the telephone, or another modem is in use). ■ Use the modem cable that came with your computer. Some telephone cables do not meet required cable standards and may cause problems with the modem connection. ■ Shut down and restart your computer. ■ Run Windows modem diagnostics. To run modem diagnostics: 1 2 3 4 5 Close all open programs.
3 4 5 Click the modem you want to adjust, then click Properties. Click the Modem tab, then adjust the Speaker volume control. Click OK twice to close the Phone and Modem Options dialog box. Monitor The screen resolution is not correct Change the screen resolution from the Display Properties dialog box. Tips & Tricks Help and Support For more information, see “Adjusting the color depth” in Using Your Computer which has been included on your hard drive.
■ You demagnetize the screen using the monitor’s degauss feature. For more information on degauss, see your monitor’s documentation. Why is there a horizontal line or wire visible across the monitor screen? Your monitor may use a thin damper wire, located approximately 1/3 of the way down from the upper screen edge and 1/3 of the way up from the lower screen edge, to stabilize the internal aperture grille. These wires are most obvious when the monitor displays a white background.
If you have an optical mouse, clean the mouse by wiping the bottom with a clean, damp cloth. Make sure that the optical sensor is clean and free of debris. If you have a trackball mouse, see “Cleaning the mouse” on page 50. Networks You cannot connect to your company network Every network is unique. Contact your company computer department or network administrator for help.
The printer is on but will not print ■ Check the cable between the printer and your computer. Make sure that it is connected to the correct port. ■ Make sure that the printer is online. Many printers have an online/offline button that you may need to press so the printer can start printing. Press the button to put the printer online. ■ Check the cable for bent or broken pins. ■ If the printer you want to print to is not the default printer, make sure that you have selected it in the printer setup.
Help and Support For more information about printer troubleshooting, click Start, then click Help and Support. Type the keyword printer troubleshooter in the Search box , then click the arrow. ■ Wait until files have been printed before sending additional files to the printer. ■ If you print large files or many files at one time, you may want to add additional memory to the printer. See the printer documentation for instructions for adding additional memory.
84 www.gateway.
Chapter 7 Networking Your Computer ■ Introducing networking ■ Creating an Ethernet network ■ Testing your network ■ Sharing your resources ■ Troubleshooting your Ethernet network 85
Introduction to networking A network is a collection of computers and other devices that communicate with each other. Using a network A network lets you: ■ Share a single Internet connection ■ Share computer drives ■ Share peripheral devices ■ Stream audio and video files ■ Play multi-player games Sharing a single Internet connection Each computer connected to the network can share the same broadband connection or modem and telephone line to access the Internet at the same time.
Playing multi-player games With a home network, you can play multi-player games. Load a game like Microsoft Racing Madness 2 on your computers, and in minutes, you and your friends can race in competing cars or on competing motorcycles. Help and Support For more information about using a network, click Start, then click Help and Support.
Important If your computer came equipped with an internal radio frequency wireless device, see “Safety, Regulatory, and Legal Information” in your user’s guide for general wireless regulatory and safety guidelines. To find out if your computer has an internal wireless device, check the device manager. For more information, see “Determining if wireless Ethernet is already installed on your computers” on page 91.
Network Type Speed Frequency Advantages IEEE 802.11g 54 Mbps 2.4 GHz ■ ■ Important Compatible with IEEE 802.11b networks Longer range (100 to 150 feet) than IEEE 802.11a Disadvantages ■ ■ Possible interference from cordless telephones and microwaves Not compatible with IEEE 802.11a networks The speed of a wireless network is related to signal strength.
Cable/DSL modem Access point USB wireless adapter Tips & Tricks To add the ability to access a wired Ethernet network to your wireless Ethernet network, connect an access point to the router or use a router that has a built-in access point, such as the Linksys wireless access point router with 4-port switch. For more information about accessing a wired Ethernet, see “Using a wired Ethernet network” on page 92.
Important IEEE 802.11b and IEEE 802.11g use the same radio frequency. IEEE 802.11a uses a different radio frequency than IEEE 802.11b and IEEE 802.11g. All wireless Ethernet components must use the same frequency. A combination of IEEE 802.11a and IEEE 802.11b or IEEE 802.11a and IEEE 802.11g components will not work. Some wireless devices can broadcast and receive signals on both frequencies. A mixture of IEEE 802.11b and IEEE 802.
Wired Ethernet network Create a wired Ethernet network by using special wires to connect all the computers and devices on your network. Wired Ethernet networks are typically faster than other network types.
Example router-based wired Ethernet network The following is an example of a wired Ethernet network. The network is made up of a router, a cable or DSL modem, your computers, and cables connecting each of these components. The router is the central control point for the network. Attached to the router are all of your computers or Ethernet-ready devices. Also connected to the router is a cable or DSL modem that provides access to the Internet.
Important For best results, all Ethernet components should be either standard Ethernet (10 Mbps), Fast Ethernet (100 Mbps or 10/100), or Gigabit Ethernet (1000 Mbps or 10/100/1000). A mixture of components rated at different speeds will result in your network running at the speed of the slowest rated component.
Making sure your broadband connection works Before you change anything about your home setup, make sure that your broadband connection is working correctly. To test the connection, log onto the Internet using your current setup. If the connection is not working, contact your Internet service provider. Important If you do not have a broadband connection already installed, make the necessary arrangements with your ISP. Be sure to find out how soon after the installation the line will be activated.
Configuring the TCP/IP protocol A networking protocol is a language computers use to talk to each other. One of several available protocols must be set up on each computer you plan to use on your network. We recommend you use the Transmission Control Protocol/Internet Protocol (TCP/IP), which is widely accepted and compatible for local area networks (LANs), as well as for Internet communications. When networking is set up in Windows XP, TCP/IP is automatically installed as the default protocol.
3 Right-click Local Area Connection, then click Properties. The Local Area Connection Properties dialog box opens. - OR If you do not have a LAN connection setup, click Create a new connection and follow the instructions in the New Connection Wizard. 4 Click to select the Internet Protocol (TCP/IP) check box in the This connection uses the following items list. If you do not see TCP/IP, drag the scroll bar to see more choices. 5 Click Properties.
6 7 8 9 10 11 Click the General tab. Click Obtain an IP address automatically. Click OK to close the Internet Protocol (TCP/IP) Properties dialog box. Click OK to close the Local Area Connection Properties dialog box. Click X to close the Network Connections window. Repeat this procedure for every computer on your network. Where to go from here If you are setting up a wireless Ethernet, go to “Setting up a wireless Ethernet network” on page 99.
Setting up a wireless Ethernet network See the instructions that came with your access point or wireless access point router for initial setup. How you set up your access point varies depending on the features of the access point and your networking situation. Mounting the access point When selecting a place to mount your access point, consider the following guidelines: ■ Mount your access point as high as possible (to avoid interference from natural obstacles and appliances).
8 9 10 In the browser’s Address box, type http://192.168.1.1, then press ENTER. When prompted for a username and password, leave the username box empty and type admin in the password box, then click OK. The setup page opens. Enter the following values in the appropriate fields: ■ ■ Host Name and Domain Name - Check with your ISP to see if entries are required in these fields and, if so, what entries are required.
Connecting to an access point network After you have set up your wireless access point, you need to set up the network connection on your computers. To connect to an access point wireless Ethernet network: 1 Before connecting to an access point, you must turn on the wireless Ethernet emitter by clicking Start, then clicking Control Panel. The Control Panel window opens. If your Control Panel is in Category View, click Network and Internet Connections. The Network and Internet Connections window opens.
Help and Support For more information about connecting to a wireless network, click Start, then click Help and Support. Type the keyword connecting to wireless network in the Search box , then click the arrow. Configuring computer settings for an access point If you are unable to connect to an access point in the Choose a wireless network list, the most likely cause is that the access point is using WEP security.
3 Click to select the access point network in the Preferred networks box, then click Properties. The network properties dialog box opens. The name of the network already appears in the Network name (SSID) box. 4 5 Click the arrow button to open the Data encryption list, then click WEP.
Adding an access point If an access point does not appear in the Available networks list, and you know the access point is turned on, you need to add it manually. This typically happens when you set the access point’s Allow Broadcast SSID to associate to No. For more information, see “Configuring the access point” on page 99. To manually add an access point wireless Ethernet network: 104 1 With the Wireless Network Connection window open, click Change order of preferred networks.
3 Click Add. The network properties dialog box opens. 4 5 Type the name of the network in the Network name (SSID) box. 6 If this is a security-enabled network, click the arrow button to open the Data encryption list, then click WEP. 7 If the WEP network key is not provided automatically, click to clear The key is provided for me automatically check box, then type the network key settings in the Network key and Confirm network key boxes to match those set on the access point.
Help and Support For more information about configuring a wireless network, click Start, then click Help and Support. Type the keyword wireless network in the Search box , then click the arrow. Setting up a wired Ethernet network We recommend using category 5, unshielded, twisted-pair cable (approximately 1/4” in diameter with a thin outer-jacket, containing eight color-coded wires), and equipment compatible with this type of cable.
In addition to a router, you need a straight-through cable for each computer you want to connect to the network. Cable/DSL modem Router WAN port To set up a network using a router: 1 Plug one end of the power adapter into the AC connector on the router and the other end into a grounded, 110V electrical outlet. 2 3 Turn on your computers. 4 Repeat Step 3 for each computer on the network. Plug one end of a straight-through network cable into any numbered port on the router (except the WAN port).
5 For an Internet connection, plug a straight-through cable into the WAN port on the router and the other end into the Ethernet jack on the DSL or cable modem. Configuring your router After you have named your computers and set up TCP/IP on them, you can configure your router using your Web browser.
Testing your network Now that your home network is set up, log onto one of your computers and access a favorite Internet Web site.
Sharing your resources Sharing an Internet connection Internet sharing lets all computers on the network access the Internet at the same time using one Internet service provider (ISP) connection. Important The Internet setup procedure uses the Windows XP New Connection Wizard and Internet Explorer. The example screens show those screens that typically appear in the course of using the wizard.
3 Click the Connections tab. 4 5 Click Setup. The New Connection Wizard opens. Click Next. The Network Connection Type screen opens. www.gateway.
6 Click Connect to the Internet, then click Next. The Getting Ready screen opens. 7 Click Set up my connection manually, then click Next. The Internet Connection screen opens. 8 9 10 112 Click the type of Internet connection you are setting up, then click Next. Click Finish. Repeat this procedure for each computer on your network. Go to “Accessing the Internet” on page 113. www.gateway.
Accessing the Internet To access the Internet from your computer: 1 2 Make sure that the router or access point is turned on. Open Internet Explorer and browse the Internet. Sharing drives and printers With a network, you can share drives (for example hard drives, diskette drives, and CD or DVD drives) and printers among the computers connected to the network. After the drives and printers on each network computer are shared, you can access them as though they were attached directly to your computer.
3 Click the Sharing tab. 4 If this is the first time you have shared a drive or folder, click Network Setup Wizard to enable remote access, then follow the on-screen instructions. - OR If you have previously enabled remote file access and you want to share a drive or folder with others on the network (network sharing), click to select the Share this folder on the network check box, type a shared name in the Shared name box.
Un-sharing drives, folders, and files To un-share drives or folders: 1 In My Computer or Windows Explorer, right-click the drive or folder that you want to un-share, then click Sharing and Security. 2 3 Make sure that the Share this folder on the network check box is not selected. Click OK. Sharing printers To share printers: 1 Click Start, then click Control Panel. The Control Panel window opens. If your Control Panel is in Category View, click Printers and Other Hardware.
Viewing shared drives and folders To view shared drives and folders: 1 2 Click Start, then click My Network Places. The My Network Places window opens. 3 4 Double-click Microsoft Windows Network. 5 Double-click the name of the computer containing the drive or folder you want to view. All shared drives and folders are listed. Click/Double-click Entire Network. The Entire Network window opens. If you do not see the contents of the network after you double-click Entire Network, click entire contents.
Opening files across the network To open files across the network: 1 2 3 4 Start the program for the file you want to open. Click File, then click Open. Browse to the network drive that contains the file you want to open. Double-click the folder containing the file, then double-click the file. Copying files across the network To copy files across the network: 1 2 Click Start, then click My Computer. The My Computer window opens. 3 4 5 Click the file.
Connecting to hotspots A hotspot is a high-speed wireless Internet access point available in public locations such as airports, airline clubs, libraries, book shops, and coffee houses. While you are away from your home office, hotspots let you send and receive e-mail, surf Web sites, or access your company’s network. Important If you want to access your company’s network through a hotspot, contact your network administrator for setup information.
Troubleshooting Your Ethernet network Wired Ethernet network You cannot see the other computers on your network ■ Make sure that your Ethernet cable is plugged into the Ethernet jack on your computer. Make sure that the other end is plugged into a router. ■ Make sure that all computers are plugged into a powered electrical outlet and turned on. ■ Make sure that the router is plugged into a powered electrical outlet and turned on. Most routers have lights that indicate they are working.
Wireless Ethernet network You turned the wireless on, but it takes a while to connect. ■ When the wireless emitter is turned on, it automatically scans for available connections, which can take approximately 30 seconds to complete. Your connection on the network seems intermittent.
3 Right-click Wireless Network Connection, then click Status. The Wireless Network Connection Status dialog box opens. The meter shows the signal strength for wireless Ethernet networking on your computer if other computers with the same network name are within range of your computer. You are in a wireless network, you can see the network, but cannot communicate, send files, print, or get to the Web.
122 www.gateway.
Appendix A Safety, Regulatory, and Legal Information ■ Safety information ■ Regulatory statements ■ Notices 123
Important safety information Your Gateway system is designed and tested to meet the latest standards for safety of information technology equipment. However, to ensure safe use of this product, it is important that the safety instructions marked on the product and in the documentation are followed. Warning Always follow these instructions to help guard against personal injury and damage to your Gateway system.
Warning Do not use Gateway products in areas classified as hazardous locations. Such areas include patient care areas of medical and dental facilities, oxygen-laden environments, or industrial facilities. Warning To reduce the risk of fire, use only No. 26 AWG or larger telecommunications line cord.
California Proposition 65 Warning Warning This product contains chemicals, including lead, known to the State of California to cause cancer, birth defects or reproductive harm. Telecommunications per Part 68 of the Code of Federal Regulations (CFR 47) (applicable to products fitted with USA modems) Your modem complies with Part 68 of the Code of Federal Regulations (CFR 47) rules.
Canada Industry Canada (IC) Unintentional emitter per ICES-003 This digital apparatus does not exceed the Class B limits for radio noise emissions from digital apparatus as set out in the radio interference regulations of Industry Canada. Le présent appareil numérique n’émet pas de bruits radioélectriques dépassant les limites applicables aux appareils numériques de Classe B prescrites dans le règlement sur le brouillage radioélectrique édicté par Industrie Canada.
Notices Copyright © 2004 Gateway, Inc. All Rights Reserved 14303 Gateway Place Poway, CA 92064 USA All Rights Reserved This publication is protected by copyright and all rights are reserved. No part of it may be reproduced or transmitted by any means or in any form, without prior consent in writing from Gateway. The information in this manual has been carefully checked and is believed to be accurate. However, changes are made periodically. These changes are incorporated in newer publication editions.
Index A C AC power connector 9, 14 access point adding 104 configuring 99, 102 connecting to 101 mounting 99 accessing Internet 113 shared drives 116 shared files 117 shared folders 116 accessories 19 safety precautions 124 activity indicators See indicators adding access point 104 application key 29, 30 arrow keys 29, 30 audio audio in jack 9, 15 front speaker jack 10, 14 headphone jack 10, 14 line in jack 9, 15 line out jack 10, 14 microphone jack 7, 9, 12, 14 muting 31, 32 side speaker jack 9, 15 strea
computer case 56, 61 unresponsive program 28 computers naming 95 configuring access point 99, 102 router 108 TCP/IP protocol 96 connecting modem 32 PS/2 keyboard 9, 14 PS/2 mouse 9, 15 to access point 101 to Ethernet network 9, 15, 33 to hotspots 118 to Internet 9, 15, 33 to network 9, 15, 33 connections audio in 9, 15 digital camera 7, 9, 12, 14, 33 Ethernet 9, 15, 33 external audio 9, 10, 14, 15 external speakers 10, 14 front speaker 10, 14 headphone 10, 14 keyboard 7, 9, 12, 14 line in 9, 10, 14, 15 line
identifying 41 locating drive 7, 12 troubleshooting 69, 72 using 41 Dynamic Host Configuration Protocol 96 E electrostatic discharge (ESD) 53 e-mail button 31 entering IP address 96 subnet mask 96 ergonomics 22 eSupport 18 Ethernet connecting 33 installing cards 94 installing drivers 94 jack 33 Ethernet jack 9, 15 Ethernet network creating 94 external audio jack 9, 10, 14, 15 F Fast Ethernet 92 faxes troubleshooting 77 files opening shared 117 troubleshooting 72 finding Help and Support topics 3 specifica
entering 96 LAN 108 WAN 100, 108 J jacks See connections K Kensington cable lock lock slot 9, 15 keyboard buttons 29, 31 cleaning 50 features 29 Multifunction keyboard features 30 PS/2 port 9, 14 troubleshooting 75 USB port 7, 9, 12, 14 keys application 29, 30 arrow 29, 30 directional 29, 30 function 29, 30 Multifunction keyboard 30 navigation 29, 30 numeric 29, 30 Windows 29, 30 L label Microsoft Certificate of Authenticity 18 LAN IP Address 108 laser printer 19 LCD panel troubleshooting 72, 79 lights S
playing DVD 43 using DVD drive 41 using Windows Media Player 43 multi-player game playing 87 muting sound 31, 32 My Documents button 31 N name computer 95 domain 100, 108 router 100, 108 workgroup 95 naming computers 95 workgroup 95 navigation keys 29, 30 network jack 33 testing 109 troubleshooting 81, 119 using 115 network connection selecting 87 network jack 9, 15 networking games 87 sharing devices 86 sharing drives 86 sharing Internet connections 86 sharing printers 86 streaming audio 86 streaming vide
PS/2 port keyboard 9, 14 mouse 9, 15 R RAM See memory rebooting computer 28 recordable drive 7, 12, 19 locating 7, 12 troubleshooting 69 recording CDs 43 DVDs 43 resetting computer 28 resources sharing 110 restarting computer 28 Resume mode 7, 12 router configuring 108 name 100, 108 S safety avoiding repetitive strain 24 caring for computer 46 general precautions 124 guidelines for troubleshooting 68 posture 23 reducing eye strain 22 setting up computer 23 static electricity 53 scanner installing 33 scree
voltage switch 10, 14, 25 volume adjusting 31, 32 adjusting modem 78 buttons 31 controls 31, 32 muting 31, 32 troubleshooting 83 DVD/CD drive 69 Ethernet network 119 faxes 77 files 72 general guidelines 68 hard drive 73 Internet connection 74, 77 keyboard 75 LCD panel 72, 79 memory 75 memory card reader 76 modem 76 monitor 79 mouse 80 network 81 passwords 81 power 81 printer 81 safety guidelines 68 screen 79 screen resolution 79 Web site connection speed 74 turning off computer 7, 12, 27, 28 turning on com
136 www.gateway.
NSK DWL E4100 USR GDE R2 9/04