SMCD3GN Wireless
SMC Networks 20 Mason Irvine, CA. 92618 U.S.A. Copyright © 2010 SMC Networks All Rights Reserved Information furnished by SMC Networks, Inc. (SMC) is believed to be accurate and reliable. However, no responsibility is assumed by SMC for its use, or for any infringements of patents or other rights of third parties which may result from its use. No license is granted by implication or otherwise under any patent or patent rights of SMC.
Contents Preface...................................................................................................................... v Key Features .............................................................................................................. vi Document Organization..............................................................................................vii Document Conventions ..............................................................................................
Contents Web Management Interface Menus .......................................................................... 29 System Settings Menu......................................................................................... 30 Password Settings Menu..................................................................................... 31 LAN Settings Menu.............................................................................................. 32 Ether Switch Port Control Menu .......................
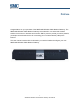
Preface Congratulations on your purchase of the SMCD3GN Wireless Cable Modem Gateway. The SMCD3GN Wireless Cable Modem Gateway is the ideal all-in-one wired and wireless solution for the home or business environment. SMC is proud to provide you with a powerful, yet simple communication device for connecting your local area network (LAN) to the Internet. This user manual contains all the information you need to install and configure your new SMCD3GN Wireless Cable Modem Gateway.
Preface Key Features The following list summarizes the Gateway’s key features. y Integrated, CableLabs-compliant DOCSIS 1.1/ 2.0 /3.0 cable modem. y Integrated cable modem port for Internet connection to cable modem service. y Four 10/100/1000 Mbps Auto-Sensing LAN ports with Auto-MDI/MDIX. y High-speed 300 Mbps IEEE 802.11n Wireless Access Point. y Internet connection to cable modem service via an integrated cable modem port.
Preface Document Organization This document consists of four chapters and two appendixes. y Chapter 1 - describes the contents in your Gateway package, system requirements, and an overview of the Gateway’s front and rear panels. y Chapter 2 - describes how to install your Gateway. y Chapter 3 - describes how to configure TCP/IP settings on the computer you will use to configure your Gateway. y Chapter 4 - describes how to configure your Gateway. y Appendix A - lists the Gateway’s specifications.
Preface Typographic Conventions This document also uses the following typographic conventions. Convention Description Bold Indicates text on a window, other than the window title, including menus, menu options, buttons, fields, and labels. Italic Indicates a variable, which is a placeholder for actual text provided by the user or system. Angled brackets (< >) are also used to indicate variables. screen/code Indicates text that is displayed on screen or entered by the user.
1 Getting to Know Your Gateway Before you install your SMCD3GN Wireless Cable Modem Gateway, check the package contents and become familiar with the Gateway’s front and back panels.
Getting to Know Your Gateway Unpacking Package Contents Unpack the items in your SMCD3GN Wireless Cable Modem Gateway contents and confirm that no items are missing or damaged. Your package should include: y One SMCD3GN Wireless Cable Modem Gateway y One Power adapter (12V/2A) y One Category 5E Ethernet cable y One CD that contains this User Manual If any items are missing or damaged, please contact your place of purchase.
Getting to Know Your Gateway Front Panel The front panel of your SMCD3GN Wireless Cable Modem Gateway contains a set of lightemitting diode (LED) indicators. These LEDs show the status of your Gateway and simplify troubleshooting. Figure 1 shows the front panel of the SMCD3GN Wireless Cable Modem Gateway. Table 1 describes the front panel LEDs. Figure 1.
Getting to Know Your Gateway Table 1. Front Panel LEDs LED POWER Color Green Description ON = power is supplied to the Gateway. OFF = power is not supplied to the Gateway. DS Green Blinking = scanning for DS channel. ON = synchronized on 1 channel only. Blue DS and US US ON = synchronized with more than 1 channel (DS Bond mode). Both DS and US blinking together = operator is performing maintenance. Green Blinking = ranging is in progress. ON = ranging is complete on 1 channel only.
Getting to Know Your Gateway Configuring Wireless Security The front panel has a WPS button for configuring wireless security automatically. Pressing this button for 5 seconds automatically configures wireless security. If the client device supports WPS Push Button Configuration (PBC), press the button within 60 seconds to automatically configure security on the client. After pressing this button for 5 seconds, the WPS LED on the front panel flashes.
Getting to Know Your Gateway Restoring Factory Defaults Using the Reset button on the back panel, you can power cycle the Gateway and return it to its original factory default settings. As a result, any changes you made to the Gateway’s default settings will be removed. To reset the Gateway and keep any overrides you made to the factory default settings, use the software reset method described under “Using the Reboot Menu to Reboot the Gateway” on page 59. 1. Leave power plugged into the Gateway. 2.
2 Installing Your Gateway This chapter describes how to install your SMCD3GN Wireless Cable Modem Gateway.
Installing Your Gateway Finding a Suitable Location Your SMCD3GN Wireless Cable Modem Gateway can be installed in any location with access to the cable network. All of the cables connect to the rear panel of the Gateway for better organization and utility. The LED indicators on the front panel are easily visible to provide you with information about network activity and status. For optimum performance, the location you choose should: y Be close to a working AC power outlet.
Installing Your Gateway 2. Connect the other end of the cable to your computer’s network-interface card (NIC) or to another network device (see Figure 4). Figure 4. Connecting the Gateway to the a Laptop or Desktop Computer Connecting the WAN To connect your Gateway to a Wide Area Network (WAN) interface: 1. Connect a coaxial cable to the port labeled Cable on the rear panel of the Gateway from a cable port in your home or office (see Figure 2 on page 13).
3 Configuring Your Computer for TCP/IP After you install your SMCD3GN Wireless Cable Modem Gateway, configure the TCP/IP settings on a computer that will be used to configure your Gateway. This chapter describes how to configure TCP/IP for various Microsoft Windows and Apple Macintosh operating systems.
Configuring Your Computer for TCP/IP Configuring Microsoft Windows 2000 Use the following procedure to configure your computer if your computer has Microsoft Windows 2000 installed. 1. On the Windows taskbar, click Start, point to Settings, and then click Control Panel. 2. In the Control Panel window, double-click the Network and Dial-up Connections icon. If the Ethernet adapter in your computer is installed correctly, the Local Area Connection icon appears. 3.
Configuring Your Computer for TCP/IP Configuring Microsoft Windows XP Use the following procedure to configure a computer running Microsoft Windows XP with the default interface. If you use the Classic interface, where the icons and menus resemble previous Windows versions, perform the procedure under “Configuring Microsoft Windows 2000” on page 19. 1. On the Windows taskbar, click Start, click Control Panel, and then click Network and Internet Connections. 2. Click the Network Connections icon. 3.
Configuring Your Computer for TCP/IP Configuring Microsoft Windows Vista Use the following procedure to configure a computer running Microsoft Windows Vista with the default interface. If you use the Classic interface, where the icons and menus resemble previous Windows versions, perform the procedure under “Configuring Microsoft Windows 2000” on page 19. 1. On the Windows taskbar, click Start, click Control Panel, and then select Network and Internet Icon. 2.
Configuring Your Computer for TCP/IP 6. In the Internet Protocol Version 4 Properties dialog box, click Obtain an IP address automatically to configure your computer for DHCP (see Figure 8). Figure 8. Internet Protocol Properties Window 7. Click the OK button to save your changes and close the dialog box. 8. Click the OK button again to save your changes. Figure 9.
Configuring Your Computer for TCP/IP Configuring an Apple® Macintosh® Computer The following procedure describes how to configure TCP/IP on an Apple Macintosh running Mac OS 10.2. If your Apple Macintosh is running Mac OS 7.x or later, the steps you perform and the screens you see may differ slightly from the following. However, you should still be able to use this procedure as a guide to configuring your Apple Macintosh for TCP/IP. 1. Pull down the Apple Menu, click System Preferences, and select Network.
4 Configuring Your Gateway After configuring your computer for TCP/IP using the procedure appropriate for your operating system, use that computer’s Web browser to configure your SMCD3GN Gateway. This chapter describes how to use your Web browser to configure your Gateway.
Pre-configuration Guidelines Before you configure your Gateway, observe the guidelines in the following sections. Disabling Proxy Settings Disable proxy settings in your Web browser. Otherwise, you will not be able to view the Gateway’s Web-based configuration pages. Disabling Proxy Settings in Internet Explorer The following procedure describes how to disable proxy settings in Internet Explorer 5 and later. 1. Start Internet Explorer. 2. On your browser’s Tool menu, click Options.
Configuring Your Gateway Disabling Proxy Settings in Safari The following procedure describes how to disable proxy settings in Safari. 1. Start Safari. 2. Click the Safari menu and select Preferences. 3. Click the Advanced tab. 4. In the Advanced tab, click the Change Settings button. 5. Choose your location from the Location list (this is generally Automatic). 6. Select your connection method. If using a wired connection, select Built-in Ethernet. For wireless, select Airport. 7. Click the Proxies tab. 8.
Configuring Your Gateway Accessing the Gateway’s Web Management After configuring your computer for TCP/IP and performing the preconfiguration guidelines on the previous page, you can now easily configure your Gateway from the convenient Webbased management interface. From your Web browser (Microsoft Internet Explorer or Netscape Navigator, versions 5.
Configuring Your Gateway 4. Click the Login button to access the Gateway. The Status page appears, showing connection status information about your Gateway. Understanding the Web Management Interface Screens The left side of the management interface contains a menu bar you use to select menus for configuring the Gateway. When you click a menu, information and any configuration settings associated with the menu appear in the main area of the interface (see Figure 12).
Configuring Your Gateway The bottom right side of the screen contains three buttons: y Help displays online help. y Apply click this button to save your configuration changes to the displayed page. y Cancel click this button to discard any configuration changes made to the current page. Web Management Interface Menus Table 3 describes the menus in the Web management interface. Table 3. Web Management Interface Menus Menu Description See Page System Settings Lets you enable or disable UPnP.
Configuring Your Gateway System Settings Menu The System Settings menu lets you: y Enable or disable UPnP and HNAP y Configure and manage your password y Set the system timeout settings To access the System Settings menu, click System in the menu bar. Figure 14 shows an example of the menu and Table 4 describes the setting you can select. Figure 14. System Settings Menu Table 4.
Configuring Your Gateway Password Settings Menu The Password Settings menu lets you change the Gateway’s default password. The first time you log in to the Web management interface, we recommend you change the Gateway’s default password to protect it from being tampered with. The Password Settings menu also lets you change the number of minutes of inactivity that can occur before your Web management session times out automatically. The default setting is 10 minutes.
Configuring Your Gateway Table 5. Password Settings Menu Options Option Description Current Password Enter the current case-sensitive password. For security purposes, every typed character appears as a dot (y). The default password is password. New Password Enter the new case-sensitive password you want to use. A password can contain up to 32 alphanumeric characters. Spaces count as password characters. For security purposes, every typed character appears as a dot (y).
Configuring Your Gateway Table 6. LAN Settings Menu Options Option Description IP Address IP address of the Gateway’s private LAN settings. Default IP address is 192.168.0.1. if you change this setting, the Gateway reboots after displaying a message. IP Subnet Mask Subnet mask of the Gateway’s private LAN settings. Default subnet mask is 255.255.255.0. Domain Name Domain name of the Gateway’s private LAN settings.
Configuring Your Gateway Figure 17. Ether Switch Port Control Menu The following procedure describes how to change the settings in the Ether Switch Port Control menu. 1. To change a port from auto-negotiation to a fixed speed and duplex setting: a. Uncheck the Auto check box for the port. b. Click the radio that corresponds to the fixed speed you want to use for that port. c. Under the Mode H/F column, leave the check mark for full-duplex mode or uncheck it for half-duplex mode. 2.
Configuring Your Gateway Wireless Basic Settings Menu The Wireless Basic Settings menu lets you enable or disable the Gateway’s wireless setting. To access the Wireless Basic Settings click Wireless in the menu bar. Figure 18 shows an example of the menu. By default, the setting is enabled. When wireless operation is enabled, you can use the submenus below the Wireless menu to configure the Gateway’s encryption, MAC filtering, and advanced wireless settings.
Configuring Your Gateway Wireless Encryption Settings Menu Using the Wireless Encryption Settings menu, you can protect the data transmitted across your wireless network. To access the Wireless Encryption Settings menu, click Wireless in the menu bar and then click the Encryption submenu. Figure 19 shows an example of the menu and Table 7 describes the settings you can select.
Configuring Your Gateway Table 7. Wireless Encryption Settings Menu Options Option Description SSID Network name of the of the primary wireless carrier. This field usually is predefined and cannot be changed by users. Security Mode Selects the security mode used to protect transmissions across the wireless network. • None = no security is used over the wireless network. • WEP = Wired Equivalency Privacy encryption is used over the wireless network.
Configuring Your Gateway Table 8. WEP Options Option Description WEP Key Length Level of WEP encryption applied to all WEP keys. Choices are 64-bit (10 hex digits) and 128-bit (26 hex digits). WEP Key 1 – WEP Key 3 Fields for entering up to three WEP keys manually. Alternatively, you can have the Generate Keys button to generate these keys automatically. Default WEP Key Specifies which of the three WEP keys the Gateway is to use. Authentication Authentication used.
Configuring Your Gateway Table 9. WPA-Personal Options Option Description WPA Mode Lets clients use WPA-PSK, WPA2-PSK, or both WPA modes. Default is Auto. Cipher type Algorithm encryption to be used. Choices are: • TKIP • AES • TKIP and AES (default) Group Key Update Interval Number of seconds that instructs the Gateway how often it should change the encryption keys. Usually the security level is higher if you set the period shorter to change encryption keys more often.
Configuring Your Gateway Figure 22. MAC Filtering Menu Table 10. MAC Filtering Options Option Description SSID Network name of the of the primary wireless carrier. This field usually is predefined and cannot be changed by users. MAC Filtering Mode Determines which wireless client stations can connect to your Gateway. Te choices are: • Allow- All = all wireless client stations can connect to the Gateway.
Configuring Your Gateway Advanced Wireless Settings Menu Using the Advanced Wireless Settings Filtering menu, you can configure advanced wireless settings for the Gateway. To access the Advanced Wireless Settings menu, click Wireless in the menu bar and then click the Advanced Wireless Settings submenu. Figure 23 shows an example of the menu and Table 11 describes the settings you can select.
Configuring Your Gateway Table 11. Wireless Advanced Settings Options Option BG Protection Mode Description This mode is a protection mechanism that prevents collisions among 802.11b/g modes. Choices are: Auto = BG protection mode goes on or off automatically as needed. Always-On = BG protection mode is always on. Always-Off = BG protection mode is always off. (default) IGMP Snooping Enables or disables the Gateway from forwarding multicast traffic intelligently.
Configuring Your Gateway Port Forwarding Menu The Port Forwarding menu lets you configure the Gateway to provide port-forwarding services that let Internet users access predefined services such as HTTP (80), FTP (20/21), and AIM/ICQ (5190) as well as custom-defined services. You perform port forwarding by redirecting the WAN IP address and the service port to the local IP address and service port. You can configure a maximum of 100 predefined and custom-defined services.
Configuring Your Gateway 4. To configure additional services (up to 100, including customer-defined services), repeat steps 1 through 3. When you finish, click Apply in the LAN Settings menu to save your settings. 5. To change the settings for a predefined service, click the radio button to the left of the service you want to change and click the Edit button. When the Predefined Service menu appears, edit the settings as necessary (see Table 7) and click Apply.
Configuring Your Gateway Table 12. Predefined Service Menu Options Option Description Service List of predefined services from which you can choose. LAN Server IP IP address of the LAN PC or server that is running the service. Remote IPs Forwards the service to any remote IP address, one remote IP address, or a range of remote IP addresses. Start IP To forward to: • A single remote IP address, enter the remote IP address.
Configuring Your Gateway 5. To change the settings for a customer-defined service, click the radio button to the left of the service you want to change and click the Edit button. When the Customer Defined Service menu appears, edit the settings as necessary (see Table 10) and click Apply. Click Apply in the LAN Settings menu to save your settings. 6. To delete a customer-defined service, click the radio button to the left of the service you want to delete and click the Delete button.
Configuring Your Gateway Table 13. Customer Defined Service Page Options Option Description Name Name for identifying the custom service. The name is for reference purposes only. Type The type of protocol. Choices are TCP, UDP, and TCP/UDP. Default is TCP. LAN Server IP IP address of the LAN PC or server that is running the service. Remote IPs Forwards the service to any remote IP address, one remote IP address, or a range of remote IP addresses.
Configuring Your Gateway Security Settings (Firewall) Menu The Security Settings (Firewall) menu lets you enable or disable the Gateway’s firewall.
Configuring Your Gateway Configuring Access Control The Access Control menu lets you enable access control to block traffic at the Gateway's LAN interfaces from accessing the Internet. To access the Access Control menu, click Firewall in the menu bar and then click the Access Control submenu in the menu bar. By default, your Gateway does not block attempts to access the LAN from the Internet. To enable access control, check Enable Access Control. Figure 28.
Configuring Your Gateway Assume, for example, that to use H.323 in a Net Meeting application, a local client starts a session A to a remote host. The remote host uses session A to communicate with the local host, but it also could initiate another session B back to the local host. Since there is only session A recorded in the NAT session table when the local host starts the communication, session B is treated as an illegal access from the outside and is blocked.
Configuring Your Gateway 3. Complete the fields in fields Trigger menu (see Table 14). (Or click Back to return to the Trigger menu or Cancel to cancel any selections you made.) 4. Click Apply. The Special Application menu reappears, with the trigger you configured shown in the Trigger Table. 5. To configure additional triggers (up to 20), repeat steps 1 through 4. When you finish, click Apply in the Special Applications menu to save your settings. 6.
Configuring Your Gateway Table 14. Trigger Menu Options Option Description Name Name for identifying the trigger. The name is for reference purposes only. Type The type of protocol you want to use with the trigger. Choices are TCP and UDP. Default is TCP. For example, to track the H.323 protocol, the protocol type should be TCP. Trigger Port From and To port ranges of the special application. For example, to track H.323 protocol, the From and To ports should be 1720.
Configuring Your Gateway Figure 31. URL Blocking Menu To enable URL blocking: 1. In the URL Blocking menu, check Enable Keyword Blocking. 2. To exempt a computer from URL blocking, enter the computer’s Media Access Channel (MAC) address in the Add exempted PC field and click the Add Trusted Host button. The Exempted PC List shows the MAC address you entered. Repeat this step for each additional computer (up to 10) you want to make exempt from URL blocking.
Configuring Your Gateway blocking. To remove a computer from being exempted, use the Delete or Delete All buttons next to the field to delete selected or all MAC addresses in the field. 4. Click Apply. Configuring Schedule Rules Schedule rules work with the Gateway’s URL blocking feature (described on page 52) to tell the Gateway when to perform URL blocking. To access the Schedule Rule menu, click Firewall in the menu bar and then click the Schedule Rule submenu in the menu bar.
Configuring Your Gateway Configuring Email and Syslog Alerts Your Gateway inspects packets at the application layer, and stores TCP and UDP session information, including timeouts and number of active sessions. This information Is helpful when detecting and preventing Denial of Service (DoS) and other network attacks.
Configuring Your Gateway Figure 33. Email/Syslog Alert Menu Configuring Email Alerts The following procedure describes how to configure the Gateway to send email notifications. This procedure assumes that your mail server is working properly. 1. In the Email/Syslog menu, under Mail Server Configuration, enter the following information: – SMTP Server Address – IP address of the SMTP server that will forward the email notification to recipients.
Configuring Your Gateway 3. Under Recipient list, click Add. When the Recipient Adding menu appears (see Figure 34), enter the name of the person who will receive email notifications and the person’s email address, and then click Apply. (Or click Back to return to the Email/Syslog Alert menu or Cancel to cancel any selections you made.) The email account you defined appears below this field. To send email to additional email accounts (up to 4), repeat this step. 4.
Configuring Your Gateway Configuring DMZ Settings If you have a local client computer that cannot run an Internet application properly behind the NAT firewall, you can configure it for unrestricted two-way Internet access by defining it as a Virtual DMZ host. Adding a client to the Demilitarized Zone (DMZ) may expose your local network to various security risks because the client is not protected, so use this option as a last resort.
Configuring Your Gateway Using the Reboot Menu to Reboot the Gateway One way to reboot the Gateway to the factory default settings is by using the Reset switch on the Gateway’s rear panel. Another way is to use the Reboot menu. Note: Rebooting the Gateway keeps any customized overrides you made to the default settings. To reboot the Gateway and return to the factory-default settings, use the Reset switch on the rear panel of the Gateway (see page 14).
Configuring Your Gateway Figure 37. Precautionary Message Viewing Status Information The Status page is a read-only screen that shows the Gateway’s wired and wireless status. The Status page also provides network, client, and cable modem event log information, with buttons for clearing and refreshing the logs, and releasing IP. The Status menu appears when you first log in to the Web management interface. You can also display it by clicking Status in the menu bar.
Configuring Your Gateway Figure 38.
Configuring Your Gateway Viewing Cable Status Information The Cable Status page is a read-only screen that shows the user’s cable initialization procedures, along with the cable upstream and downstream status. The Cable Status menu appears when you first log in to the Web management interface. You can also display it by clicking Status in the menu bar and then clicking the Cable Status submenu. Figure 39 shows an example of the cable status information shown. Figure 39.
Appendix A - Specifications Compatibility y Platform independent – works with PC,OSX, Linux, MAC, UNIX y DOCSIS 1.0/1.1/2.0/3.0 compliant y IEEE 802.3, 802.3u y SPI firewall meet ICSA guidelines Network Interface y 10/100/1000 Base-T-Ethernet y USB2.0 port* y Wireless .11N MIMO Ports y Four ports 10/100/1000 MDI/MDIX auto sensing switch y TR-68 coloring for 1 USB 2.
Specifications y SAMBA for USB port connection of USB hard drives* y GUI/SNMP/CLI addition to present PHY usage (multiple channels parameters) y Port forwarding y 64/256QAM auto detection y Independent resets for downstream and upstream blocks y Fragmentation and concatenation enabling Quality of Server (QoS) features y Supports 64/128/256 bit RC4 authentication and encryption Network Protocols y IEEE 802.
Specifications Security y Password protected configuration access with multiple levels y VPN Passthrough (IPSec, PPTP, L2TP) y Stateful Packet Inspection (SPI) Firewall y Multiple User Profiles y Network Address Translation (NAT) y Dynamic Address-User Mapping y Application Level Gateways (ALG) y Web-based authentication y Intrusion Detection y Comprehensive Logging y Denial of Service (DoS) prevention y Domain Validation y Trojan Horse Prevention y Content and Filtering Features
Specifications y Frequency Range: 5 to 42MHz (edge to edge) DOCSIS LEDs y Power y DS ( Downstream) y US (Upstream) y Online y Link y Diag y WPS y LAN (1-4) y WiFi y USB Dimensions y L x W x H: 26.8 x 15.5 x 3.5 mm (10.6 x 6.1 x 1.4 in) y Weight: 0.50kg (1.
Appendix B - Compliances FCC Interference Statement This equipment has been tested and found to comply with the limits for a Class B digital device pursuant to Part 15 of the FCC Rules. These limits are designed to provide reasonable protection against radio interference in a commercial environment. This equipment can generate, use and radiate radio frequency energy and, if not installed and used in accordance with the instructions in this manual, may cause harmful interference to radio communications.
Index firewall, 48 A idle timeout, 31 login password, 31 Access control, 49 port forwarding, 43 Access Control menu, 49 Adding customer-defined service port forwarding, 45 private LAN IP address, 32 Connecting LAN, 16 Adding predefined service WAN, 17 port forwarding, 43 Advanced Wireless Settings menu, 41 Alerts, 55 Apple Macintosh TCP/IP configuration, 23 Auto-negotiation, 33 Conventions in this document, vii Customer-defined service port forwarding, 45 Customer-defined service table, 43 D B D
Index F L Factory defaults LAN connection, 16 restoring, 14 LAN ports Firefox, disabling proxy settings, 25 Firewall enabling or disabling, 33 LAN Settings menu, 32 configuring, 48 Lease time, 32 disabling, 26 LEDs, 12 Front panel, 11 Locating the Gateway, 16 LEDs, 12 Logging in to Web management, 27 Login password, 31 G M Gateway configuring, 24 MAC Filtering menu, 39 connecting to the LAN, 16 Menus connecting to the WAN, 17 Access Control, 49 front panel, 11 Advanced Wirerless Se
Index P customer-defined, 43 predefined, 43 Package contents, 10 Password Settings menu, 31 Password, changing, 31 Special Application menu, 50 Special applications, 49 Specifications, 63 Port forwarding adding customer-defined service, 45 adding predefined service, 43 Port Forwarding menu, 43 SSID setting, 36 Status menu, 60 Syslog alerts, 55 Syslog entries, 57 Port triggering, 50 Ppowrting-on the Gateway, 17 Preconfiguration guidelines, 25 System requirements, 10 System Settings menu, 30 T Prede
Index Reboot menu, 59 URL Blocking menu, 52 Schedule Rules menu, 54 URL Email/Syslog Alert menu, 55 screens, 28 Wireless Basic Settings menu, 35 Security Settings (Firewall) menu, 48 Wireless Encryption Settings menu, 36 Special Application menu, 50 Wireless Basic Settings menu, 35 Status menu, 60 Wireless Encryption Settings menu, 36 System Settings menu, 30 Wireless security, 13 Trigger menu, 50 WPA mode, 36 71 SMCD3GN Wireless Cable Modem Gateway User Manual
14037RES03182010