
Quick Reference Guide

Replacing the DVD drive
www.gateway.com
37
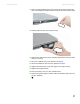
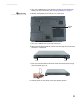
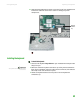
11 Insert a straightened paper clip into the DVD drive’s manual eject hole,
push in the paper clip to eject the drive tray, then pull the drive tray open.
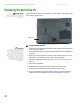
12 Carefully slide the drive out of the drive bay.
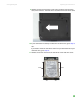
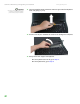
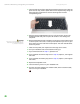
13 Slide the new DVD drive into the drive bay. Make sure that the drive fits
securely in the bay.
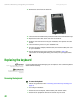
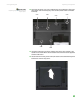
14 Turn your notebook over so the bottom is facing up.
15 Secure the DVD drive with the screw removed in Step 9.
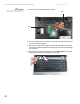
16 Replace the memory bay cover, then tighten the captive screws.
17 Replace the keyboard screw.
18 Insert the battery, then turn your notebook over.
19 Connect the power adapter, modem cable, and network cable, then turn
on your notebook.