
Quick Reference Guide


Table Of Contents
- Contents
- About This Reference
- Checking Out Your Notebook
- Setting Up and Getting Started
- Working safely and comfortably
- Connecting the AC adapter
- Connecting the dial-up modem
- Connecting to a broadband modem or network
- Starting your notebook
- Turning off your notebook
- Restarting (rebooting) your notebook
- Using the status indicators
- Using the keyboard
- Using the EZ Pad touchpad
- Adjusting brightness
- Adjusting the volume
- Turning your wireless radio on or off
- Using Drives and Accessories
- Managing Power
- Traveling with Your Notebook
- Maintaining Your Notebook
- Upgrading Your Notebook
- Troubleshooting
- Safety guidelines
- First steps
- Troubleshooting
- Audio
- Battery
- CD drives
- Diskette drive (external)
- Display
- DVD drives
- Ethernet
- File management
- Hard drive
- Internet
- Keyboard
- Media Center
- The Media Center video display looks bad on your TV
- You need to configure your Media Center to output to a TV
- You want to change display settings to get better TV or DVD image quality
- You want to know whether you can burn videos that were recorded with your Media Center computer to a DVD
- You want to know whether you can play recorded videos on other computers
- You want to know whether you can play recorded videos on your home DVD player
- Memory
- Memory card reader
- Modem (cable or DSL)
- Modem (dial-up)
- Your modem does not dial or does not connect
- You cannot connect to the Internet
- Your 56K modem does not connect at 56K
- Your fax communications program only sends and receives faxes at 14,400 bps when you have a 56K modem
- The modem is not recognized by your notebook
- The modem is noisy when it dials and connects
- Mouse
- Networks (wired)
- Networks (wireless)
- You turned wireless networking on, but it takes a while to connect
- Your connection on the network seems intermittent or your wireless network is running slower than you expect
- You are in a wireless network, you can see the network, but cannot communicate, send files, print, or get to the Web
- You are in a wireless network, but no available networks are listed in the Connect to a network dialog box
- Your wireless network is listed as a preferred network, but it has an “x” on it
- Internet Explorer is unable to access the Internet
- You cannot see other computers on your network
- You cannot connect to your network
- Passwords
- PC Cards
- Pointing device
- Power
- Printer
- Sound
- Status indicators
- Touchpad or pointing device
- Video
- Telephone support
- Legal Information
- Index
www.gateway.com
75
4 Insert a blank, recordable disc into a recordable disc
drive, then click Next. If an AutoPlay dialog box opens,
click the x in the upper-right corner to close it.
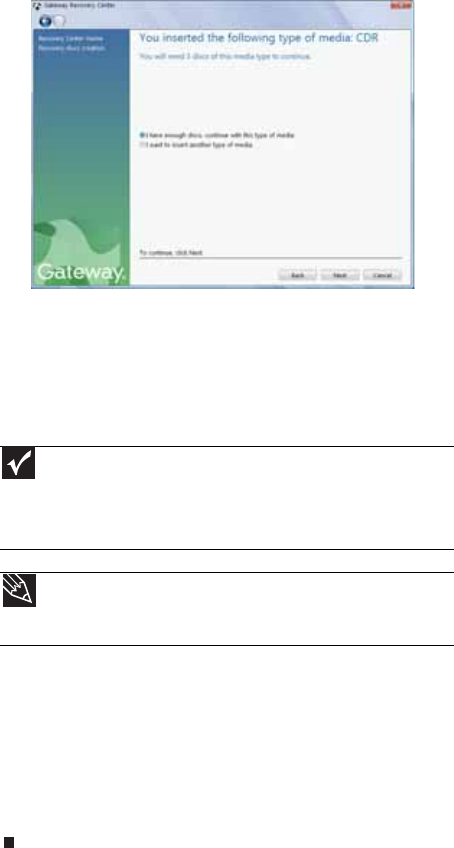
A dialog box opens that tells you the number of blank
discs you need to create a full set of recovery discs.
5 If you have enough blank discs of the specified type,
click I have enough discs, then click Next. If you do
not have enough discs, choose a different disc type, or
click Cancel.
The disc recording begins. Label the discs as they are
completed.
6 If multiple discs are required, insert the additional blank
disks when prompted.
7 When the process is finished, the Congratulations!
window opens.
8 Click Finish.
9 Remove your final disc, then label all of the discs and
store them in a safe place.
Important
Use a permanent marker to label each disc “Software and Driver
Recovery,” along with a short description of which computer the discs
are for. If you are recording multiple discs, as you remove each disc
from the drive, use the marker to label each disc 1 of x, 2 of x, 3ofx,
and so on.
Tip
After a recovery disc is created, your computer names the disc
Recovery13 for disc 1 of a 3-disc set, Recovery23 for disc 2, and
so on.