
Quick Reference Guide


www.gateway.com
57
To reset drives to non-RAID status:
1 Start (or restart) your notebook. During startup, the RAID
option screen appears.
2 While the RAID option screen is open, press CTRL+I. The
Matrix Storage Manager opens.
3 Highlight 3. Reset Disks to Non-RAID, then press ENTER.
The Reset RAID Data menu opens.
4 Press ↑ or ↓ to highlight each of the drives you want to
reset, press the spacebar to select (mark with a green
triangle) each drive you want to reset, then press E
NTER.
A warning message appears.
5 Type Y to confirm the drive reset.
Getting help
For more information on RAID concepts, configuration, and
maintenance, search for RAID FAQ information on the Gateway
Technical Support Web site (www.gateway.com
) and the Intel
Support & Downloads Web site (support.intel.com).
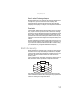
Using an eSATA (external SATA)
hard drive
To connect your eSATA hard drive to your notebook:
1 Turn off your notebook.
2 Connect one end of the eSATA cable to your external hard
drive.
3 Connect the other end of the cable to the eSATA port on
your notebook.