07334.book Page i Friday, December 29, 2000 10:23 AM Contents 1 Computer Basics . . . . . . . . . . . . . . . . . . . . . . . . . . . . . . . . . . . . . . . . . . . . . . . . 1 Controls . . . . . . . . . . . . . . . . . . . . . . . . . . . . . . . . . . . . . . . . . . . . . . . . . . . . . . . . . . . Computer front . . . . . . . . . . . . . . . . . . . . . . . . . . . . . . . . . . . . . . . . . . . . . . . . . . Computer back . . . . . . . . . . . . . . . . . . . . . . . . . . . . . . . . . . . . . . .
07334.book Page ii Friday, December 29, 2000 10:23 AM 6 Using the Internet . . . . . . . . . . . . . . . . . . . . . . . . . . . . . . . . . . . . . . . . . . . . . . .41 Learning about the Internet . . . . . . . . . . . . . . . . . . . . . . . . . . . . . . . . . . . . . . . . . . .42 Setting up an Internet account . . . . . . . . . . . . . . . . . . . . . . . . . . . . . . . . . . . . . . . . .43 Accessing your Internet account . . . . . . . . . . . . . . . . . . . . . . . . . . . . . . . . . . . .
07334.book Page iii Friday, December 29, 2000 10:23 AM Keyboard . . . . . . . . . . . . . . . . . . . . . . . . . . . . . . . . . . . . . . . . . . . . . . . . . . . . . . . . . Modem . . . . . . . . . . . . . . . . . . . . . . . . . . . . . . . . . . . . . . . . . . . . . . . . . . . . . . . . . . . Monitor . . . . . . . . . . . . . . . . . . . . . . . . . . . . . . . . . . . . . . . . . . . . . . . . . . . . . . . . . . . Mouse . . . . . . . . . . . . . . . . . . . . . . . . . . . . . . . . . . . . . . .
07334.
07334.
07334.book Page 2 Friday, December 29, 2000 10:23 AM Controls The following illustrations show the controls and features on the computer and the keyboard.
07334.
07334.book Page 4 Friday, December 29, 2000 10:23 AM Keyboard features Your system comes with a standard keyboard. Function keys Windows keys 4 Indicator lights Application key Additional keys Directional keys Numeric keypad ■ Function keys start program actions. Refer to the program documentation to find out more about the function key actions. Each program uses different function keys for different purposes.
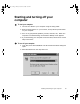
07334.book Page 5 Friday, December 29, 2000 10:23 AM Starting and turning off your computer To start your computer: 1 Connect the cables to your computer using the setup poster. 2 Press the power button on your monitor, then press the power button on your computer. 3 Turn on any peripherals (speakers, printers, scanners, etc.). When the computer is finished starting, the Windows desktop screen appears. 4 If you are starting your computer for the first time, follow the on-screen setup instructions.
07334.book Page 6 Friday, December 29, 2000 10:23 AM 3 Click OK. Windows shuts down your computer. If for some reason you cannot use the Shut down option in Windows to shut down your computer, press the power button for about five seconds. Warning When you shut down your computer the power turns off, but some electrical current still flows through the computer. To avoid possible injury from electrical shock, unplug the power cable and modem cable from the wall outlets.
07334.book Page 7 Friday, December 29, 2000 10:23 AM Using the mouse The mouse is a device that controls the pointer and cursor movement on screen. This illustration shows the standard Gateway mouse. Right button Left button As you move the mouse, the pointer (arrow) on the screen moves in the same direction. You can use the left and right buttons on your mouse to select objects on the screen.
07334.book Page 8 Friday, December 29, 2000 10:23 AM For more information on using special features of your mouse and changing mouse settings, see HelpSpot. To... Do this... Move the pointer on the screen Move the mouse around on the mouse pad. If you run out of space on your mouse pad and need to move the pointer farther, pick up the mouse, set it down in the middle of the mouse pad, then continue moving the mouse. Select an object on the screen Position the pointer over the object.
07334.book Page 9 Friday, December 29, 2000 10:23 AM Working safely Before using your computer, read the following recommendations for setting up a safe and comfortable work area and avoiding discomfort and strain. Top of monitor is not higher than eye level Hands and arms are parallel to the floor Feet are flat on the floor Improving monitor legibility and reducing eye strain Sunlight or bright indoor lighting should not reflect off the screen of the computer monitor or shine directly into your eyes.
07334.book Page 10 Friday, December 29, 2000 10:23 AM Setting up your computer table and chair When you are setting up your computer table and chair, make sure that you use a computer table that is the appropriate height and use a chair that helps you maintain good posture, distributes your weight evenly, and keeps your body relaxed. ■ Select a flat surface for your computer table.
07334.book Page 11 Friday, December 29, 2000 10:23 AM Avoiding discomfort and injury from repetitive strain ■ Vary your activities to avoid excessive repetition. ■ Take breaks so that you can change your position, stretch your muscles, and relieve your eyes. ■ Find ways to break up the work day, scheduling a variety of tasks.
07334.
07334.book Page 13 Friday, December 29, 2000 10:23 AM Getting Started 2 This chapter helps you get started with your new computer by walking you through the initial Windows Welcome screens. Set up your system by following the Setup poster, then start your computer.
07334.book Page 14 Friday, December 29, 2000 10:23 AM To get started: 1 Start your computer. The Windows Welcome window opens. 2 Click Next on the first Windows Welcome window. An optional mouse tutorial opens. 3 You may complete or skip the mouse tutorial. 4 Click to select your time zone from the list, then click Next.
07334.book Page 15 Friday, December 29, 2000 10:23 AM 5 Read the End User License Agreement, then select Yes and click Next. 6 Register your copy of Windows with Microsoft by selecting Yes, I want to register online, then click Next. After completing the registration process, the Get connected to the Internet window opens. - OR Do not register you copy of Windows by selecting No, I do not want to register at this time, then click Next. The Get connected to the Internet window opens.
07334.book Page 16 Friday, December 29, 2000 10:23 AM 7 Read the information in this window to determine which Internet connection option you have. If a special Internet offer was included with your system purchase you should follow the instructions in your Internet Offer Pack. - OR If a special Internet offer was not included with your system purchase you can sign up for the America Online or Gateway.net ISPs by double-clicking the America Online or Gateway.net icons on the Windows Desktop. 8 Click Next.
07334.book Page 17 Friday, December 29, 2000 10:23 AM 9 Click Finish to complete the Windows setup and start using your computer.
07334.
07334.book Page 19 Friday, December 29, 2000 10:23 AM Getting Help 3 This chapter tells you about additional information resources available to help you use your computer. If these resources do not provide the information you need, technical support resources are available.
07334.book Page 20 Friday, December 29, 2000 10:23 AM For more information . . . Gateway has provided these additional resources to help you get the most out of your Gateway PC. HelpSpot HelpSpot is an easily accessible set of Help files, troubleshooters, instructional videos, and automated support. Use HelpSpot to answer questions about Windows and to help you quickly discover and use the many features of your Gateway computer.
07334.book Page 21 Friday, December 29, 2000 10:23 AM 2 Find help or information by clicking a link, performing a search, or browsing the index. 3 To watch an introductory video about HelpSpot, click Gateway Videos on the main HelpSpot page, then click the Introduction to HelpSpot video link. For more information . . .
07334.book Page 22 Friday, December 29, 2000 10:23 AM 4 To learn about how to work with documents and programs, use your mouse, and much more, click the Getting Started link on the HelpSpot main page.
07334.book Page 23 Friday, December 29, 2000 10:23 AM Online help Many programs provide information online so you can research a topic or learn how to perform a task while you are using the program. Most online help information can be accessed by selecting a topic from a Help menu or by clicking a Help button. You can search for information by viewing the help contents, checking the index, searching for a topic or keyword, or browsing through the online help. For more information . . .
07334.book Page 24 Friday, December 29, 2000 10:23 AM Gateway Web site Gateway provides a variety of information on its Web site to help you use your computer. Visit the Gateway Web site at www.gateway.com for: ■ Technical documentation and product manuals ■ Technical tips and support ■ Hardware drivers ■ A glossary of computer terms ■ Frequently asked questions (FAQs) For more information about connecting to the Internet, see “Learning about the Internet” on page 42.
07334.book Page 25 Friday, December 29, 2000 10:23 AM Windows Basics 4 Read this chapter to get basic information on how to: ■ Work on the Windows desktop ■ Work with document and program windows ■ Manage files and folders ■ Use shortcuts For more detailed information about Windows, see HelpSpot.
07334.book Page 26 Friday, December 29, 2000 10:23 AM About the Windows environment After your computer starts, the first screen you see is the Windows desktop. The desktop is like the top of a real desk. Think of the desktop as your personalized work space where you open programs and perform other tasks. Your desktop may be different from the example shown below, depending on how your computer is set up. My Documents My Computer Recycle Bin Internet Explorer Gateway.
07334.book Page 27 Friday, December 29, 2000 10:23 AM Desktop components Icons are graphic representations of objects on the desktop that you select and open, such as a drive, folder, document, or program. Buttons are graphic representations of controls that you use to change the state of desktop elements such as the window size. Desktop icons, buttons, and elements Description My Documents is a folder where you store your personal files.
07334.book Page 28 Friday, December 29, 2000 10:23 AM Desktop icons, buttons, and elements Description Microsoft Internet Explorer is a program called a browser that lets you view Web sites and Web pages on the Internet. Double-click this icon to open the browser. Gateway has provided an easily accessible interactive guide called HelpSpot, designed to provide help information and let you quickly discover and use the features of your computer. Double-click the HelpSpot icon to begin. The Gateway.
07334.book Page 29 Friday, December 29, 2000 10:23 AM Window components When you double-click the icon for a drive, folder, document, or program a window opens on the desktop. This example shows Local Disk (C:) in My Computer after double-clicking the Local Disk (C:) icon. Close button Maximize button Minimize button Title bar Menu bar Every program window looks a little different because each has its own menus, icons, and controls. To find out more about window controls, see HelpSpot.
07334.book Page 30 Friday, December 29, 2000 10:23 AM Using the Start menu You can start programs, open documents, customize your system, get help, search for files and folders, and more using the Start menu. To open the Start menu, click the Start button on the lower left of the Windows desktop. The Start menu opens showing you the first level of menu items.
07334.book Page 31 Friday, December 29, 2000 10:23 AM Working with files and folders You can organize your documents and programs to suit your preferences much like you would store information in a file cabinet. You can store these files in folders and copy, move, and delete the information just as you would reorganize and throw away information in a file cabinet. About drives Drives are like file cabinets because they hold many files and folders. A computer almost always has more than one drive.
07334.book Page 32 Friday, December 29, 2000 10:23 AM About folders and files Folders are much like the folders in a file cabinet. They contain files and other folders. Files are much like paper documents – letters, spreadsheets, and instructions – that you keep on your computer. In fact, all information on a computer is stored in files. Folders Files To create a folder: 1 Double-click the My Computer icon on the desktop. The My Computer window opens.
07334.book Page 33 Friday, December 29, 2000 10:23 AM Using Your Computer 5 This chapter provides basic information about your Gateway computer.
07334.book Page 34 Friday, December 29, 2000 10:23 AM Using the CD drive You can use your computer to enjoy a wide variety of multimedia features, such as making recordings and listening to audio CDs. Inserting a CD CD drive CD drive eject button CD drive activity light To insert a CD: 1 Press the CD drive eject button. The CD drive tray opens. 2 Insert the CD in the tray with the label up.
07334.book Page 35 Friday, December 29, 2000 10:23 AM . Important When you place a CD in the tray, make sure that the label side is facing up. If the disc has two playable sides, place the disc so that the name of the side you want to play is facing up. 3 Press the eject button again. The CD drive tray closes. 4 Depending on the type of CD you inserted, a program opens, such as an audio CD music player for music CDs or a program for program CDs.
07334.book Page 36 Friday, December 29, 2000 10:23 AM Adjusting the volume You can use the volume controls to adjust the overall volume and the volume of specific sound devices in your computer. Depending on the sound hardware installed in your computer, you may have additional volume controls available through the Start menu. To adjust overall volume level: ■ Click the speaker icon on the taskbar, then drag the slider to change the volume or click to select the Mute check box.
07334.book Page 37 Friday, December 29, 2000 10:23 AM Working with documents Whether you are creating a spreadsheet, writing a letter, or drawing a picture, you are working with a document (file). The basic methods of creating, saving, opening, and printing a document apply to most programs. The following examples illustrate the concepts for creating, saving, opening, and printing a document in Microsoft® Word.
07334.book Page 38 Friday, December 29, 2000 10:23 AM Saving a document After you create a document, you need to save it if you want to use it later. To save a document in Microsoft Word: 1 Select File, then Save. The Save As dialog box opens. 2 Select the folder from the Save in drop-down box, type the new file name, then click Save. File folder File name Opening a document To view, revise, or print an existing document, you need to open it. Open the document from the program it was created in.
07334.book Page 39 Friday, December 29, 2000 10:23 AM 3 Find the file you want to open in the Look in drop-down box. File folder File name 4 Double-click the document file name. The document opens. Printing a document To print a document, you must have a printer connected to your computer or have access to a network printer. For more information about installing or using your printer, refer to the printer documentation.
07334.
07334.book Page 41 Friday, December 29, 2000 10:23 AM Using the Internet 6 This chapter provides information about the Internet and the World Wide Web, and tells you how to set up Gateway.netSM or America Online® (AOL) Internet services so that you can send and receive e-mail and access other Internet resources.
07334.book Page 42 Friday, December 29, 2000 10:23 AM Learning about the Internet The Internet is a worldwide network of computers linked together to provide information to people everywhere. The two most popular services on the Internet are e-mail and the World Wide Web. You can access this network by connecting your computer to a telephone line and signing up with an Internet Service Provider (ISP). Internet Servers store information so other computers can access it from the Internet.
07334.book Page 43 Friday, December 29, 2000 10:23 AM Setting up an Internet account Before you can view the information on the Word Wide Web, you need to set up an Internet account with an Internet Service Provider (ISP). If you have chosen Gateway.net or America Online (AOL) as an ISP, follow these instructions to set up and connect to your account. To set up an Internet account with Gateway.net or AOL: 1 Double-click the Register with Gateway.net or the America Online icon.
07334.book Page 44 Friday, December 29, 2000 10:23 AM Using the World Wide Web The World Wide Web is a multimedia window to the Internet that gives you access to millions of information sources. Information on the Web comes to you on Web pages, which are electronic documents that you view using a Web page display program called a browser. There are many Web browsers that you can use, one of which is Microsoft Internet Explorer, which comes installed on your new computer.
07334.book Page 45 Friday, December 29, 2000 10:23 AM Connecting to a Web site After you set up an account with an Internet Service Provider (ISP) such as Gateway.net or AOL, you can access the many information sources on the World Wide Web. To connect to a Web site: 1 Connect to your Internet account. After the computer connects, the default opening page, your home page, opens.
07334.book Page 46 Friday, December 29, 2000 10:23 AM Downloading files Downloading is the process of transferring files from a computer on the Internet to your computer. To protect your computer against viruses, make sure that you scan the files you download. For more information about scanning for viruses, see “Protecting your computer from viruses” on page 50. To download files or programs from a Web site: 1 Connect to your Internet account.
07334.book Page 47 Friday, December 29, 2000 10:23 AM Using e-mail E-mail (electronic mail) lets you send messages to anyone who has an Internet connection and e-mail address. E-mail is a free service of your Internet account. The Internet never closes, so you can send e-mail messages at any time. Your e-mail messages arrive at most e-mail addresses in minutes.
07334.book Page 48 Friday, December 29, 2000 10:23 AM Checking your e-mail To check your e-mail using Gateway.net or AOL: 1 Connect to your Gateway.net or AOL account. 2 Click Read Mail. - OR Click Read. For more information about managing and organizing your e-mail messages, see the online help in your e-mail program.
07334.book Page 49 Friday, December 29, 2000 10:23 AM 7 Maintaining Your Computer This chapter provides basic information about maintaining your computer hardware and software. Use the following table to set up the best maintenance schedule.
07334.book Page 50 Friday, December 29, 2000 10:23 AM Protecting your computer from viruses A virus is a program that attaches itself to a program or data file on a computer and then spreads from one computer to another. Viruses can damage data, cause computers to malfunction, and can display annoying or offensive messages. Some viruses can go unnoticed for long periods of time because they are activated on a certain date or time.
07334.book Page 51 Friday, December 29, 2000 10:23 AM Optimizing and maintaining your data Windows provides several utilities you can use to manage your hard drive space and keep your hard drive running efficiently. Windows utilities Scanning the hard drive for errors ScanDisk is a utility that examines the hard drive for errors and file problems and corrects them so that your computer performs correctly. If you use your computer several hours every day, you probably want to run ScanDisk once a week.
07334.book Page 52 Friday, December 29, 2000 10:23 AM Using the Maintenance Wizard The Maintenance Wizard lets you schedule maintenance tasks such as running Disk Defragmenter and ScanDisk and deleting unnecessary files. Windows maintenance Checking hard drive space In Windows, you can see a chart of the available hard drive space. Backing up files Backing up files and removing them from the hard drive frees space for new files on the hard drive.
07334.book Page 53 Friday, December 29, 2000 10:23 AM Running the Windows utilities using HelpSpot HelpSpot contains information about all of these Windows utilities and maintenance steps, along with instructions on how to use them. To run Windows utilities: 1 Start HelpSpot. For instructions on how to start HelpSpot, see “HelpSpot” on page 20. 2 Under the Fixing & Contacts section, click Maintenance & Fixing.
07334.book Page 54 Friday, December 29, 2000 10:23 AM 3 For more information about a Windows Utility, as well as information on how to start the Windows Utilities, click the Utility topic you are interested in.
07334.book Page 55 Friday, December 29, 2000 10:23 AM Customizing Your Computer 8 This chapter provides information about customizing your computer by adding new hardware devices and changing settings in Windows.
07334.book Page 56 Friday, December 29, 2000 10:23 AM Adjusting the screen and desktop settings You can adjust the screen settings for brightness, contrast, and horizontal and vertical image position using the controls on the front of your monitor. For more information about these adjustments, see your monitor guide. Adjusting the color depth and screen area are two of the basic settings you may need to change.
07334.book Page 57 Friday, December 29, 2000 10:23 AM Applying a color scheme A color scheme is a set of colors that you can apply to your Windows environment. You can change the appearance of the desktop, windows, dialog boxes, and other Windows components by selecting a new color scheme. If you do not want to use the color schemes that Windows provides, you can create and save your own schemes.
07334.book Page 58 Friday, December 29, 2000 10:23 AM Adjusting your settings using HelpSpot HelpSpot contains instructions for changing display settings. To adjust Windows settings: 1 Start HelpSpot. For instructions on how to start HelpSpot, see “HelpSpot” on page 20. 2 Under the Learning & Using section, click Personalizing FAQ.
07334.book Page 59 Friday, December 29, 2000 10:23 AM 3 For more information about a Windows setting, as well as information on how to customize your settings, click the customizing topic you are interested in.
07334.book Page 60 Friday, December 29, 2000 10:23 AM Changing the mouse settings You can adjust the double-click speed, pointer speed, left-hand or right-hand configuration, and other mouse settings. To change your mouse settings: 1 Click Start, then select Settings, then Control Panel. The Control Panel window opens. 2 If you do not see the Mouse icon, click view all Control Panel options. 3 Double-click the Mouse icon. The Mouse Properties dialog box opens.
07334.book Page 61 Friday, December 29, 2000 10:23 AM Power management Using Standby mode Computer equipment can account for a significant portion of energy use in the home and office environment. You may not want to shut down your computer each time you leave it, especially if you plan to be away for only a short time. Windows lets you use the Standby mode to conserve energy when the system is not in use. Always save your work before using the Standby mode.
07334.book Page 62 Friday, December 29, 2000 10:23 AM Changing power settings You can change power management settings, such as the power button function and power-saving timers, by changing power settings in Windows. You can also adjust power schemes, adjust advanced power settings, and enable Hibernate mode. Power schemes (groups of power settings) let you change power saving options such as when the monitor or hard drive is automatically turned off.
07334.book Page 63 Friday, December 29, 2000 10:23 AM 3 Double-click the Power Options icon. The Power Options Properties dialog box opens. 4 Select a defined power scheme from the drop-down list. - OR Set the timers for System stand by, Turn off monitor, and Turn off hard disks, then save your custom power scheme by clicking Save As and typing in a name for the scheme. 5 Apply the changes by clicking OK.
07334.book Page 64 Friday, December 29, 2000 10:23 AM 4 Click the Advanced tab. 5 Change the settings, then save them by clicking OK. To enable Hibernate mode: 1 Click Start, then select Settings, then Control Panel. The Control Panel window opens. 2 If you do not see the Power Options icon, click view all Control Panel options. 3 Double-click the Power Options icon. The Power Options Properties dialog box opens.
07334.book Page 65 Friday, December 29, 2000 10:23 AM 4 Click the Hibernate tab. 5 Select the Enable hibernate support check box, then click Apply. Hibernate mode is now an option you can select in the Advanced tab. 6 Click the Advanced tab. 7 Select Hibernate as one of the advanced power settings, then save the changes by clicking OK.
07334.book Page 66 Friday, December 29, 2000 10:23 AM About installing a printer, scanner, or other peripheral device Your computer has one or more Universal Serial Bus (USB) connectors, serial ports, and parallel ports for connecting peripheral devices such as printers, scanners, and digital cameras to your computer. USB ports are plug-and-play, which means that you usually can use a USB device by just plugging it into the USB connector.
07334.book Page 67 Friday, December 29, 2000 10:23 AM Restoring Software 9 If your computer is not working properly, try the following options to correct the problem: ■ Troubleshooting. For more information, see “Troubleshooting” on page 71. ■ Reinstall the device drivers. For more information, see “Reinstalling device drivers” on page 68. ■ If the options above do not correct the problem, you can use the Gateway PC Recovery CDs to reinstall Windows and other software.
07334.book Page 68 Friday, December 29, 2000 10:23 AM Reinstalling device drivers Device drivers are programs that control devices such as monitors, CD drives, and modems. Drivers translate information between computer devices and programs. Drivers for your original computer hardware are installed at Gateway. Also, if you just reinstalled Windows, the device drivers were automatically reinstalled. However, if you install a new device, you need to install the drivers provided by the device manufacturer.
07334.book Page 69 Friday, December 29, 2000 10:23 AM Reinstalling Windows The Gateway PC Recovery CD steps you through reinstalling Windows. It automatically reinstalls the hardware device drivers and some software. The remaining software is installed using the CDs that came with your computer. Warning All files and partitions you have created or software that you have installed since your system left the factory will be erased.
07334.book Page 70 Friday, December 29, 2000 10:23 AM 7 Click Install. 8 Follow any additional on-screen instructions. Depending on the program you are reinstalling, you may only need to restart your computer to complete the installation. However, if a setup wizard opens when you restart your computer, follow the on-screen instructions. To reinstall a program from a CD: 1 Place the program CD in your CD drive. 2 Complete the reinstallation by following the instructions included with the program CD.
07334.book Page 71 Friday, December 29, 2000 10:23 AM Troubleshooting 10 This chapter provides some solutions to common computer problems. Use the information to troubleshoot and correct typical hardware and software issues. If the suggestions in this chapter do not correct the problem, see “Getting Help” on page 19, for more information about how to get help.
07334.book Page 72 Friday, December 29, 2000 10:23 AM Safety guidelines While troubleshooting your computer, follow these safety guidelines: ■ Never remove your computer cover. ■ Do not attempt to open the monitor. To do so is extremely dangerous. Even if the power is disconnected, energy stored in the monitor components can be dangerous. Also, opening the monitor voids the warranty.
07334.book Page 73 Friday, December 29, 2000 10:23 AM CD drive The computer does not recognize the CD drive ■ Make sure the CD label is facing up, then try again. ■ Try a different CD. Occasionally CDs are flawed and cannot be read by the CD drive. ■ Shut down and restart your computer. ■ Clean the disc. For instructions, see “Cleaning CDs” on page 74. ■ Reinstall the device driver. For instructions, see “Reinstalling device drivers” on page 68.
07334.book Page 74 Friday, December 29, 2000 10:23 AM Cleaning CDs Clean CDs by wiping from the center to the edge, not around in a circle, using a product made especially for the purpose. Computer The computer will not start ■ 74 Make sure the power cable is connected to an AC power source and the computer is turned on.
07334.book Page 75 Friday, December 29, 2000 10:23 AM File management A file was accidentally deleted If the file was deleted at a DOS prompt, it cannot be restored. To restore files that were deleted in Windows: 1 Double-click the Recycle Bin icon. 2 Right-click the file you want to restore, then select Restore. Hard drive You receive an “Insufficient disk space” error message ■ Delete unnecessary files from the disk using Disk Cleanup. For more information, see “Using Disk Cleanup” on page 51.
07334.book Page 76 Friday, December 29, 2000 10:23 AM Internet You cannot connect to the Internet ■ Make sure your computer is connected to the telephone line and the telephone line has a dial tone. Use the Setup poster to make sure that the connections have been made correctly. ■ If you have the call waiting feature on your telephone line, make sure it is disabled. ■ Make sure your account with your Internet Service Provider (ISP) is set up properly. Contact your ISP technical support for help.
07334.book Page 77 Friday, December 29, 2000 10:23 AM Keyboard The keyboard does not work ■ Make sure the keyboard cable is plugged in correctly. ■ Try a keyboard that you know works to make sure the keyboard port works. ■ Reinstall the keyboard device driver. For instructions, see “Reinstalling device drivers” on page 68. ■ If you spilled liquid in the keyboard, turn off the computer and unplug the keyboard. Clean the keyboard and turn it upside down to drain it.
07334.book Page 78 Friday, December 29, 2000 10:23 AM ■ If you have additional telephone services such as call waiting, call messaging, or voice mail, make sure that all messages are cleared and call waiting is disabled before using the modem. Contact your telephone service to get the correct code to temporarily disable the service. Also make sure the modem dialing properties are set appropriately. To check the dialing properties: 1 Click Start, then select Settings, then Control Panel.
07334.book Page 79 Friday, December 29, 2000 10:23 AM You cannot connect to the Internet ■ The ISP may be having technical difficulties. Contact your ISP technical support for help. ■ See if the modem works with a different communications program. The problem may be with just one program. Your 56K modem does not connect at 56K Current FCC regulations restrict actual data transfer rates over public telephone lines to 53K.
07334.book Page 80 Friday, December 29, 2000 10:23 AM The modem is not recognized by the computer ■ Make sure the line connected to the modem is working and plugged into the appropriate connection on the modem. Use the Setup poster to make sure that the connections have been made correctly. ■ If the modem shares the telephone line with another device, make sure the telephone line is not in use (for example, someone is on the telephone, or another modem is in use).
07334.book Page 81 Friday, December 29, 2000 10:23 AM The modem is noisy when it dials and connects When your modem tries to connect to another modem, it begins handshaking. Handshaking is a digital “getting acquainted” conversation between the two modems that establishes connection speeds and communication protocols. You may hear unusual handshaking sounds when the modems first connect. If the handshaking sounds are too loud you can turn the modem volume down.
07334.book Page 82 Friday, December 29, 2000 10:23 AM You receive an “Unable to establish protocols” error message ■ Reinstall dial-up networking and dial-up networking components. To reinstall dial-up networking: 1 Click Start, then select Settings, then Control Panel. The Control Panel window opens. 2 Click/Double-click Add/Remove Programs, then click the Windows Setup tab. 3 Double-click Communications. 4 Click to clear the Dial-Up Networking check box, then click OK twice.
07334.book Page 83 Friday, December 29, 2000 10:23 AM Monitor The screen area is not correct ■ Change the screen area from the Display Properties dialog box. For instructions to change the screen area, see “Adjusting the screen area” on page 56. The computer is running but there is no display ■ Make sure the monitor is plugged in and turned on. If the monitor is turned on, the power LED should be lit. ■ Make sure the monitor cable is connected to the video connection on the back of your computer.
07334.book Page 84 Friday, December 29, 2000 10:23 AM Mouse The mouse does not work ■ Make sure that the mouse cable is plugged in correctly. ■ Try a mouse you know is working to make sure the mouse port works. ■ Shut down and restart your computer. ■ Reinstall the device driver. For instructions, see “Reinstalling device drivers” on page 68. The mouse works erratically ■ Clean the mouse.
07334.book Page 85 Friday, December 29, 2000 10:23 AM 4 Remove any dust, lint, or dirt from the mouse ball with a soft cloth. 5 Clean the mouse rollers with a cotton swab dipped in isopropyl alcohol. 6 Replace the mouse ball and lock the retaining ring into place.
07334.book Page 86 Friday, December 29, 2000 10:23 AM Power My system is turned on but nothing is getting power ■ If your system is plugged into a surge protector, make sure the surge protector is securely connected to an electrical outlet, switched on, and working properly. Plug a working device, such as a lamp, into the outlet and turn it on to test the outlet. ■ Make sure all components are connected securely to the surge protector and properly switched on.
07334.book Page 87 Friday, December 29, 2000 10:23 AM ■ If you print large files or many files at one time, you may want to add additional memory to the printer. Consult the printer documentation for instructions for adding additional memory. To make sure the printer is not set to work offline: 1 Click Start, then select Settings, then Printer. 2 Double-click the icon for the printer you want to use. 3 Select Printer. If there is a Use Printer Offline option on the menu, click to clear the check mark.
07334.book Page 88 Friday, December 29, 2000 10:23 AM Before calling for technical support If you have a technical problem with your computer, follow these recommendations before contacting Gateway technical support: ■ Make sure that your computer is connected properly to a grounded AC outlet that is supplying power. If you use a power strip, make sure that it is switched on. ■ If a peripheral device such as a keyboard or mouse does not appear to work, make sure that all cables are plugged in securely.
07334.book Page 89 Friday, December 29, 2000 10:23 AM Technical support resources Gateway offers a wide range of customer service, technical support, and information services. If you have questions or problems, contact the Gateway service that is most appropriate for your needs: Resource Service description How to reach Automated troubleshooting system (ATS) Use an automated menu system and your telephone keypad to find answers to common problems.
07334.book Page 90 Friday, December 29, 2000 10:23 AM Resource Service description How to reach Gateway.net Get support for your ISP account. 877-247-2051 (US) AOL 800-827-6364 (US) 888-265-4357 (Canada) CompuServe Sales, accounting, and warranty 90 800-848-8990 (US) Get information about available systems, pricing orders, billing statements, warranty service, or other non-technical issues.
07334.book Page 91 Friday, December 29, 2000 10:23 AM Safety, Regulatory, and Legal Information A Important safety information Your Gateway system is designed and tested to meet the latest standards for safety of information technology equipment. However, to ensure safe use of this product, it is important that the safety instructions marked on the product and in the documentation are followed.
07334.book Page 92 Friday, December 29, 2000 10:23 AM ■ If your system is fitted with a TV Tuner, cable, or satellite receiver card, make sure that the antenna or cable system is electrically grounded to provide some protection against voltage surges and buildup of static charges. Care during use ■ Do not walk on the power cord or allow anything to rest on it. ■ Do not spill anything on the system. The best way to avoid spills is to avoid eating and drinking near your system.
07334.book Page 93 Friday, December 29, 2000 10:23 AM Regulatory compliance statements United States users FCC Part 15 This device has been tested and found to comply with the limits for a Class B digital device, pursuant to Part 15 of the FCC rules. These limits are designed to provide reasonable protection against harmful interference in a residential installation.
07334.book Page 94 Friday, December 29, 2000 10:23 AM FCC part 68 (applicable to products fitted with USA modems) Your modem complies with Part 68 of the Federal Communications Commission (FCC) rules. On the computer or modem card is a label that contains the FCC registration number and Ringer Equivalence Number (REN) for this device. If requested, this information must be provided to the telephone company. An FCC-compliant telephone line cord with a modular plug is required for use with this device.
07334.book Page 95 Friday, December 29, 2000 10:23 AM Canadian users ICES-003 This digital apparatus does not exceed the Class B limits for radio noise emissions from digital apparatus as set out in the radio interference regulations of Industry Canada. Le présent appareil numérique n’émet pas de bruits radioélectriques dépassant les limites applicables aux appareils numériques de Classe B prescrites dans le règlement sur le brouillage radioélectrique édicté par Industrie Canada.
07334.
07334.book Page 97 Friday, December 29, 2000 10:23 AM Japanese users VCCI statement This equipment is in the Class B category (Information Technology Equipment to be used in a residential area or an adjacent area thereto) and conforms to the standards set by the Voluntary Control Council for Interference by Information Technology Equipment aimed at preventing radio interference in such residential areas. When used near a radio or TV receiver, it may become the cause of radio interference.
07334.book Page 98 Friday, December 29, 2000 10:23 AM Australia and New Zealand users EMI statement This device has been tested and found to comply with the limits for a Class B digital device, pursuant to the Australian/New Zealand standard AS/NZS 3548 set out by the Australian Communications Authority and Radio Spectrum Management Agency.
07334.book Page 99 Friday, December 29, 2000 10:23 AM Laser safety statement All Gateway systems equipped with CD and DVD drives comply with the appropriate safety standards, including IEC 825. The laser devices in these components are classified as “Class 1 Laser Products” under a US Department of Health and Human Services (DHHS) Radiation Performance Standard. Should the unit ever need servicing, contact an authorized service location.
07334.
07334.book Page 101 Friday, December 29, 2000 10:23 AM Notices Copyright © 2001 Gateway, Inc. All Rights Reserved 4545 Town Centre Court San Diego, CA 92121 USA All Rights Reserved This publication is protected by copyright and all rights are reserved. No part of it may be reproduced or transmitted by any means or in any form, without prior consent in writing from Gateway. The information in this manual has been carefully checked and is believed to be accurate. However, changes are made periodically.
07334.
07334.book Page 103 Friday, December 29, 2000 10:23 AM Index A accessories safety precautions 92 advanced power settings 62 changing 63 applications.
07334.book Page 104 Friday, December 29, 2000 10:23 AM Web address 24 Web site 24 Gateway PC Recovery CD using to reinstall programs 69 using to reinstall Windows 69 gateway.your.
07334.
07334.