FUSION 5000L ™ A 3 L A M I N AT O R S start here démarrez ici starten sie hier iniziare qui
FUSION 5000L ™ A 3 L A M I N AT O R S GB F D I instruction manual manuel d’utilisation bedienungsanleitung manuale d’istruzioni 4 10 16 22
GB professional finish… automatically! Welcome to the new GBC 5000L laminator which allows lamination to be completed quickly and simply with GBC quality lamination output. Perfect for novice users choosing automatic self setting to expert users with multiple pouch thicknesses and document sizes. For best lamination results and performance, use only GBC branded pouches. Please take a little time to study these instructions to ensure you get the best results out of your machine.
GB points to note m m m • Use this unit only for its intended use of laminating documents • Only use 75mic, 125mic, 175mic or 250mic pouches with this laminator • Do not laminate an empty pouch • The unit must be connect to a supply voltage corresponding to the electrical rating shown on the unit • The socket-outlet shall be installed near the equipment and shall be easily accessible.
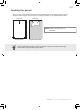
GB getting ready to laminate Easy Set Up 1 Remove the plastic exit tray from the box and place into the two holes on the back of the laminator and extend to use. Ensure that there is sufficient space behind the laminator for the item to be removed. 2 Take the electrical plug and place in an appropriate power source, which is near the table you intend to use. 3 The laminator will briefly flash the GBC logo on the control panel and will make an audible beep.
GB loading the pouch 1 Take your item to be laminated and place into the laminating pouch. Ensuring it is firmly placed along the sealed edge of the pouch. This is to help ensure that you get optimal quality output. SEALED EDGE SEALED EDGE NOTE: Do not cut pouches prior to lamination. A3, A4, A5, etc. Irregular shaped item Before laminating important or unique documents, always run a test pouch through the laminator using a similar type document.
GB laminating 1 On the front of the laminator there are adjustable guides to help you feed your pouch accurately. Move the guides to appropriate line which matches your pouch/ item to be laminated. Accurate Feed Guides 2 Feed the sealed edge of the pouch, into the laminator between the guides. The laminator will grip the pouch and guide it through to the exit tray. NOTE: Do not force guides against pouch 3 Do not force guides tightly against pouch.
GB additional features Intelligent Status Alert If pouch misfeeds or jam starts to occur a series of beeps will be heard - and the laminator will automatically reverse the document out ( ). NOTE: Never reuse a misfed or jammed pouch Intelligent Pouch Reverse To recover a partially fed pouch press and hold the “Reverse” ( ) button and the pouch will be quickly reversed out of the laminator. You will hear a series of single beeps until Reverse button ( ) is released.
F plastification professionnelle… …automatiquement ! Merci d’avoir choisi la nouvelle plastifieuse GBC Fusion 5000L au fonctionnement simple et rapide, qui offre la qualité de plastification supérieure associée à la marque GBC. Idéale tant pour les utilisateurs novices grâce aux réglages automatiques que pour les utilisateurs expérimentés qui peuvent choisir entre de nombreux formats et épaisseurs.
F remarques m • Utilisez cet appareil uniquement pour plastifier des documents. • Avec cette plastifieuse, utilisez uniquement des pochettes de 75 microns, de 125 microns, de 175 microns ou de 250 microns. • N’insérez pas de pochette vide dans la machine. m • L’appareil doit être branché sur une prise de courant correspondant à la tension précisée sur l’appareil. • Avant d’alimenter une nouvelle pochette, vérifiez toujours qu’il ne reste aucune autre pochette dans l’appareil.
F préparation à la plastification Installation facile 1 Retirez le plateau de réception en plastique du carton. Insérez-le dans les deux trous situés à l’arrière de l’appareil et déployez-le avant toute utilisation. Veillez à laisser suffisamment d’espace derrière la plastifieuse pour que l’article plastifié puisse être retiré sans difficulté. 2 Branchez la plastifieuse sur une prise de courant appropriée, située à proximité de la table sur laquelle vous souhaitez l’utiliser.
F chargement du document dans la pochette 1 Placez le document à plastifier dans la pochette de plastification de la taille appropriée. Assurez-vous de le placer fermement contre le bord collé de la pochette pour optimiser la qualité de plastification. Bord scellé Bord scellé REMARQUE : N e coupez pas les pochettes avant la plastification. A3, A4, A5, etc.
F plastification 1 Des butées réglables situées à l’avant de la plastifieuse permettent d’alimenter la pochette avec précision. Faites glisser les butées sur les lignes appropriées correspondant au format de la pochette/l’article à plastifier. Guides alimentaires précises 2 Alimentez le bord collé de la pochette dans la plastifieuse, entre les butées. La plastifieuse saisit la pochette et la guide jusqu’à sa sortie sur le plateau de réception.
F fonctions supplémentaires L’état d’alerte intelligente En cas de mauvaise alimentation de la pochette ou de bourrage, l’appareil émet une série de bips sonores et fait automatiquement ressortir le document par l’avant ( ). Remarque : Ne réutilisez jamais une pochette qui a été mal alimentée ou qui a fait l’objet d’un bourrage.
D automatisch ein professionelles ergebnis! Diese Anleitung enthält Informationen zur Verwendung des Laminiergeräts GBC Fusion 5000L, anhand derer die Laminierung in der von GBC gewohnt hochwertigen Qualität einfach und schnell durchgeführt werden kann. Das Gerät ist ideal geeignet für unerfahrene Benutzer, die eine automatische Einstellung wählen können, ebenso wie für Experten, die alle durch unterschiedliche Laminiertaschenstärken und Dokumentformate gebotenen Möglichkeiten nutzen möchten.
D wichtige hinweise m • Das Gerät ausschließlich zum Laminieren von Dokumenten und nie für einen nicht vorgesehenen Zweck verwenden. • Nur Laminiertaschen der Stärke 75 bzw. 125 μm, 175 μm oder 250 μm in diesem Laminiergerät verwenden. m m • Keine leere Laminiertasche in das Gerät einführen. • Das Gerät muss an eine geeignete Stromquelle (s. Hinweis auf dem Gerät) angeschlossen werden.
D vorbereitung Einfache Einrichtung 1 Das Kunststoffausgabefach auspacken, in die beiden Löcher an der Geräterückseite einsetzen und ausziehen. Darauf achten, dass hinter dem Laminiergerät ausreichend Platz ist für die Ausgabe und Entnahme der laminierten Artikel. 2 Den Netzstecker an eine geeignete Stromquelle in unmittelbarer Nähe des Aufstellorts anschließen. 3 Das GBC-Logo am Bedienfeld blinkt auf und es wird ein Tonsignal ausgegeben.
einlegen der dokumente in die laminiertasche D 1 Das zu laminierende Material in die Laminiertasche einlegen. Darauf achten, dass es eng an der versiegelten Taschenkante anliegt, um die optimale Laminierqualität zu gewährleisten. VERSIEGELTE KANTE VERSIEGELTE KANTE HINWEIS: Die Laminiertaschen vor dem Laminiervorgang nicht schneiden. A3, A4, A5, etc.
D laminiervorgang 1 Die einstellbaren Führungen vorne am Gerät erleichtern die richtige, gradlinige Zufuhr der Laminiertaschen. Die Führungen auf die Markierung einstellen, die der Laminiertaschengröße entspricht. Genaue Feed Führungen 2 Die Laminiertasche mit der versiegelten Kante nach vorne und innerhalb der Führungen in das Gerät einführen. Die Laminiertasche wird vom Gerät erfasst, zugeführt und im Ausgabefach abgelegt.
D weitere funktionen Intelligente Meldungsfenster Im Fall eines Fehleinzugs oder eines Staus ertönt eine Reihe von Signalen und das Dokument wird automatisch im Rückwärtsbetrieb ausgegeben ( ). HINWEIS: Falsch eingezogene oder bei einem Stau entfernte Laminiertaschen nicht wiederverwenden. Intelligente Tasche Umgekehrter Zur Wiederentnahme einer teilweise eingezogenen Laminiertasche die Rücklauftaste ( ) drücken und halten. Auf diese Weise wird die Tasche im Rückwärtsbetrieb wieder ausgegeben.
I risultati professionali…..automaticamente! Benvenuti alla nuova plastificatrice GBC Fusion 5000L che consente di plastificare documenti in maniera più semplice e veloce offrendo la stessa elevata qualità di plastificazione che contraddistingue i prodotti GBC. È adatta sia per principianti, che possono selezionare l’impostazione automatica, che per progrediti, e offre la possibilità di utilizzare pouches di diversi spessori e documenti di svariati formati.
I informazioni importanti m • Utilizzare la macchina esclusivamente per le funzioni per cui è stata progettata, ossia per la plastificazione dei documenti. • Utilizzare solo pouches da 75, 125, 175 o 250 micron con questa plastificatrice. m • Non inserire pouches vuote nella macchina. • L’unità deve essere collegata a una tensione di alimentazione corrispondente alle specifiche elettriche riportate sulla macchina.
I preparazione della plastificatrice Facile impostare 1 Rimuovere il vassoio di raccolta in plastica dalla confezione, inserirlo nei due fori posti sul retro della plastificatrice ed estenderlo per l’uso. Controllare che vi sia sufficiente spazio dietro la plastificatrice per consentire la rimozione dei documenti plastificati. 2 Inserire la spina in una presa di corrente appropriata in prossimità del tavolo su cui si intende utilizzare la macchina.
inserimento del documento nella pouch I 1 Inserire il documento da plastificare nella pouch dal formato appropriato. Controllare che il documento sia posizionato contro il lato presigillato della pouch per garantire di ottenere un’ottimale qualità di plastificazione. Lato presigillato Lato presigillato NOTA: Non tagliare le pouches prima della plastificazione del documento. A3, A4, A5, etc.
I plastificazione 1 Sulla parte frontale della plastificatrice sono riportate delle guide di allineamento regolabili per consentire l’accurato inserimento della pouch. Portare le guide di allineamento sulla linea appropriata corrispondente alla pouch/documento da plastificare. Guide di alimentazione accurate 2 Inserire il lato presigillato della pouch nella plastificatrice tra le guide. La pouch viene quindi afferrata e alimentata nella plastificatrice fino a raggiungere il vassoio di raccolta.
I funzioni addizionali Stato di avviso intelligente In caso di errato inserimento di una pouch o di inceppamento, la macchina emetterà una serie di segnali acustici e la plastificatrice farà uscire automaticamente il documento ( ). NOTA: N on riutilizzare mai una pouch alimentata in maniera errata oppure inceppata. Sacchetto retromarcia intelligente Per recuperare una pouch parzialmente inserita, premere e mantenere premuto il pulsante “Reverse” ( ) e la pouch uscirà velocemente dalla plastificatrice.
service addresses A AUS B ACCO Deutschland GmbH & Co. KG, Arnoldstrasse 5, 73614 Schorndorf, Germany Tel: + 49 7181 887 120 Fax:+ 49 7181 887 198 info.de@acco.com Pelikan Artline Pty Ltd, 2 Coronation Avenue, Kings Park, NSW, Australia 2148 Tel: +61 2 9674 9000 Fax: +61 2 9674 0910 custsupport@pelikanartline.com.au ACCO Brands Benelux B.V., Peppelkade 64, 3992AK Houten, Nederland/Les Pays-Bas Tel: 0800-73362 Fax: 02-4140784 info@accobenelux.be www.accobenelux.
IS JPN LT LUX ACCO Brands Nordic AB, Makadamgatan 5, 254 64 Helsingborg, Sweden Tel: +46 42 38 36 00 Fax: +46 42 38 36 10 service.nordic@acco.com GBC-Japan K.K., 14F Harmony Tower, 1-32-2 Honcho, Nakano-ku, Tokyo 164-8721 Tel: (81)-03-5351-1801 Fax: (81)-03-5351-1831 serv@gbc-japan.co.jp ACCO Brands Nordic AB, Makadamgatan 5, 254 64 Helsingborg, Sweden Tel: +46 42 38 36 00 Fax: +46 42 38 36 10 service.nordic@acco.com ACCO Brands Benelux B.V.
www.accobrands.