
Full Product Manual


Grace Vycor
®
Plus ashing is available in a range of widths: 4 in.
(100 mm), 6 in. (150 mm), 9 in. (225 mm), 12 in. (300 mm) and
18 in. (450 mm) to accommodate a variety of job requirements.
Ripcord
®
split release on demand is available in 6 in. 150 mm), 9
in. (225 mm) and 12 in. (300 mm) wide membranes.
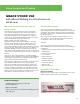
Features & Benets
Ripcord
®
—With the sophistication of construction practices
it becomes a must to follow the proper sequencing principles.
Ripcord
®
split release offers the exibility to install half the
membrane before and the other half after the other building enve-
lope components are installed, i.e. housewrap or felt. Only in this
way are the proper installation principles followed.
Easy to work with—Membrane installation is fast and easy—
simply remove the release paper and press onto the substrate.
With Grace Vycor
®
Plus ashings contractors can ash more
windows with better quality.
Superior adhesion capabilities—
The membrane creates a strong bond to the substrate for long-
lasting waterproong protection.
Seals around fasteners—The specially formulated rubberized
asphalt adhesive seals around fasteners, allowing no water to
penetrate and get to the substrate.
Forms water-tight laps—Grace Vycor
®
Plus ashing superior
adhesion properties ensure strong laps, even in seams in the ash-
ing.
Measurement markings—The membrane surface is clearly
marked at every 6 in.
(150 mm) and 12 in. (300 mm) intervals to facilitate the installa-
tion procedure.
Highly conformable and exible—
Can accommodate settlement and shrinkage movement.
Proven track record—Grace Vycor
®
Plus ashing employs the
same proven technology as our Grace Ice & Water Shield
®
—the
market leader in self-adhered underlayments for over 35 years.
Long-lasting waterproong protection—Both the polyethylene
lm and the specially-formulated rubberized asphalt components
create a water and moisture barrier that does not degrade from the
effects of the environment.
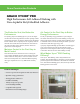
Usage
Grace Vycor
®
Plus self-adhered ashing is a unique solution,
appropriate for working around a number of detail areas, includ-
ing, but not limited to:
• Window and door openings (headers, sills, jambs, thresholds,
nailing anges)
• Deck-to-wall intersections
• Inside and outside corners of sheathing
• Wall-to-wall tie-ins
• Foundation sill plates
• Sheathing panel seams
• Under stucco nishes
• Masonry walls
• Other non-roof detail areas
Application Instructions
Surface Preparation
Apply Grace Vycor
®
Plus ashing in fair weather
when the air, surface and membrane are at temperatures of 25°F
(-4°C) or higher. After precipitation, allow a minimum of 24
hours for drying before installing the ashing.
Install directly onto a clean and dry surface. Some compatible
substrates include wood, plywood, oriented strand board, metal,
concrete and masonry. Remove dust, dirt, and loose nails. Protru-
sions must be removed. Surfaces shall have no voids, damaged,
or unsupported areas. Repair surfaces before installing the
membrane.
Priming is generally not required for most substrates provided
they are clean and dry. However, on concrete, masonry and
DensGlass Gold
®
, apply Perm-A-Barrier
®
WB Primer. If adhesion
is found to be marginal, prime wood composition and gypsum
sheathing also with Perm-A-Barrier
®
WB Primer. The coverage
rate for Perm-A-Barrier
®
WB Primer is 250–350 ft
2
/gal (6–8
m
2
/L). Allow primer to dry completely, approximately 1 hour
depending on weather conditions, before application of ashing.
Membrane Installation
Using the 6 in. (150 mm) and 12 in. (300 mm) measurement
markings, cut the membrane to the desired length. Peel back the
release paper to expose the adhesive. Align the membrane and
press into place with heavy hand pressure.
Laps must be a minimum of 3 in. (75 mm). Mechanically fasten
the membrane at all vertical terminations. Use only smooth shank
fasteners.
Consistent with good construction practice, install the membrane
such that all laps shed water (following the shingle principle).
The top membrane layer should go over the bottom layer. Always
work from the low point to the high point. When needed, use
Ripcord
®
split release on demand to split the release paper and
adhere
72