
Installation Guide

Installation Instructions
29
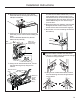
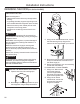
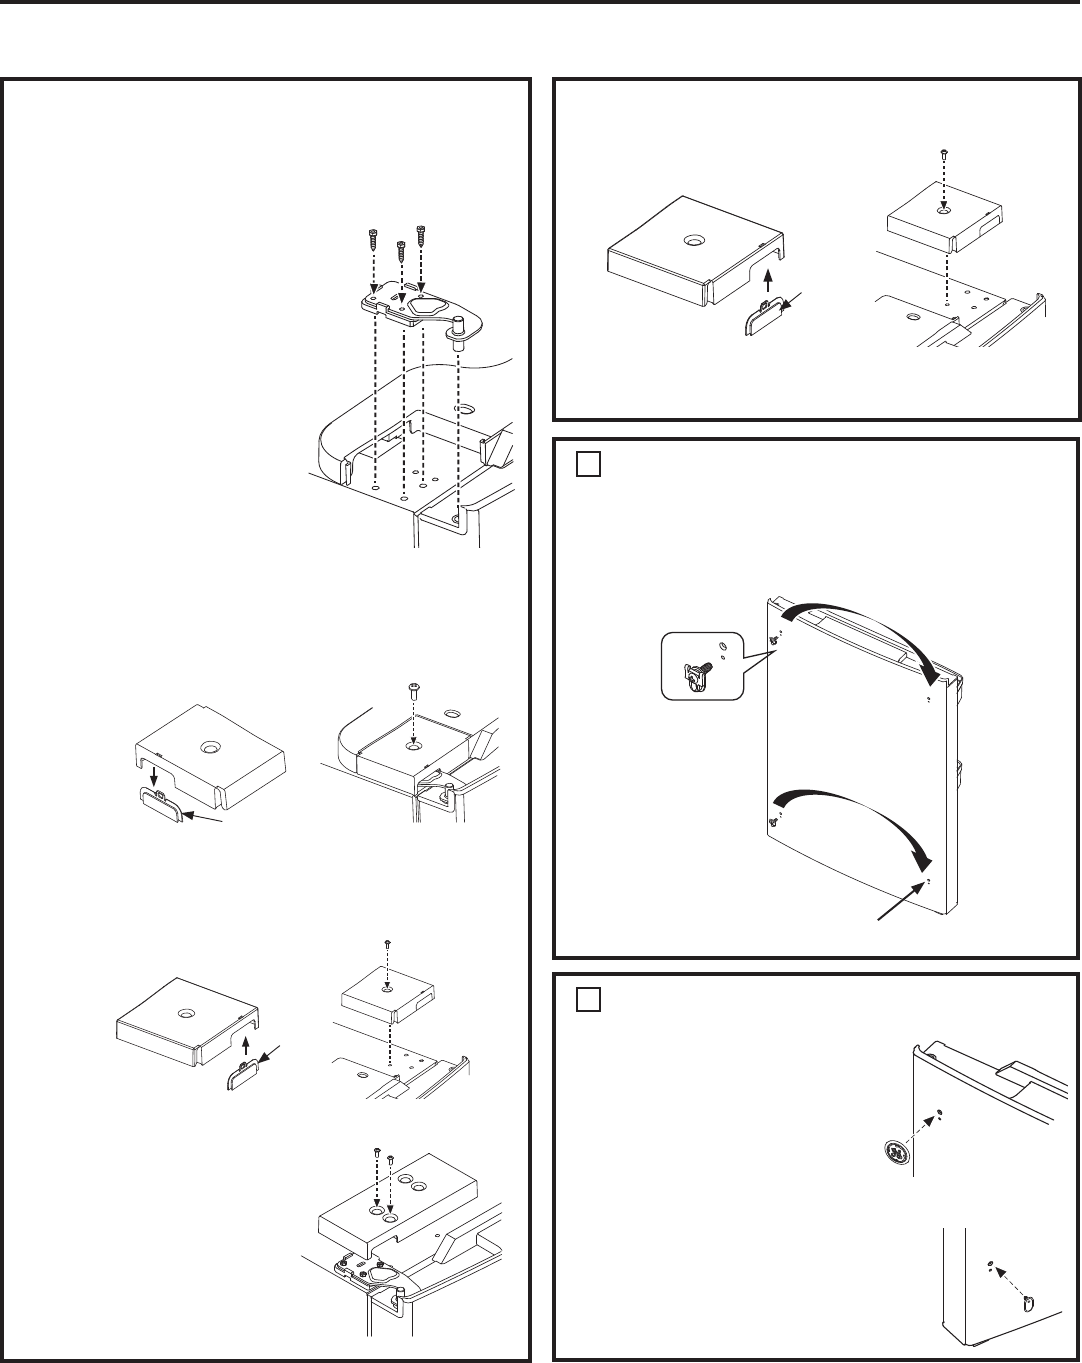
H. Insert the top hinge pin inside the hole in the
top left of the fresh food door. Make sure the
door is aligned with the cabinet. Attach the
hinge to the top of the cabinet loosely with
the bolts that were removed previously.
Make sure the gasket
on the door is flush
against the cabinet
and not folded.
Su p p o r t t h e d o o r o n
the handle side and
make sure the door is
straight and the gap
between the doors is
even across the front.
While holding the
door in place, tighten
the screws to 60 in-lb.
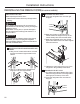
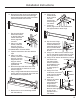
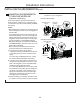
For Models with a Freezer DRAWER:
I. Re m ove t h e f r o n t i ns e r t f r o m t h e l e f t h in g e
cover. Install the left hinge cover using a
Ph il li ps scr ew dr i ver a nd t h e scr ew r em o ved
earlier.
J. Install the front insert into the right hinge
cover. Install the right hinge cover using a
Ph il li ps scr ew dr i ver a nd t h e scr ew s r em o ved
earlier.
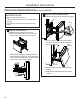
For Models with a Freezer DOOR:
I. Locate the left
hinge cover that
comes with the
kit. Using a Phillips
screwdriver, install
the cover with the
screws provided.
Front
insert
Front in ser t
J. Locate the insert for the right hinge cover
that comes with the kit and install.
K. Using a Phillips screwdriver, install the right
hinge cover with screws provided.
Fron t i nser t
4
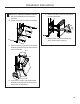
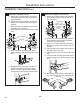
TRANSFER HANDLE MOUNTING FASTENERS
A. Re m ov e t h e p l u g f r o m t h e l ow e r r i g h t w h o l e .
B. Using a Phillips screwdriver remove the
screws holding the mounting brackets from
the left side and install them on the right side.
5
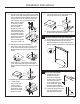
INSTALLING LOGO BADGE
A. Locate the new logo
badge from the kit.
Re m ove t h e a d h e s i v e
backing paper and align
the pins on the back
of the badge with the
holes in the door. Apply
pressure to the badge to
ensure it sticks to the door.
B. Locate the butt on plug from
the kit and install it in the
opposite side of handle.
Re m o v e p l u g