Microwave Oven Safety Instructions . . . . . . .2–10 Operating Instructions Auto Feature . . . . . . . . . . . . . . . . . 20 Care and Cleaning . . . . . . . . . 28-29 Changing Power Level . . . . . . . . . 13 Features of Your Microwave Oven . . . . . . . . . . .11, 12 Microwave Terms . . . . . . . . . . . . . 27 Other Features . . . . . . . . . . . . 25, 26 Sensor Features . . . . . . . . . . . . 21-24 Time Features . . . . . . . . . . . . .
IMPORTANT SAFETY INSTRUCTIONS READ ALL INSTRUCTIONS BEFORE USING This is the safety alert symbol. This symbol alerts you to potential hazards that can kill or hurt you and others. All safety messages will follow the safety alert symbol and the word “DANGER”, “WARNING”, or “CAUTION”. These words are defined as: DANGER Indicates a hazardous situation which, if not avoided, will result in death or serious injury.
Use this appliance only for its intended purpose as described in this Owner’s Manual. Read and follow the specific precautions in the Precautions to Avoid Possible Exposure to Excessive Microwave Energy section above. This appliance must be grounded. Connect only to a properly grounded outlet. See the Grounding Instructions section on page 8. Install or locate this appliance only in accordance with the provided Installation Instructions.
IMPORTANT SAFETY INSTRUCTIONS READ ALL INSTRUCTIONS BEFORE USING WARNING ARCING If you see arcing, press the CANCEL/OFF pad and correct the problem. Arcing is the microwave term for sparks in the oven. Arcing is caused by: Metal, such as twist-ties, poultry pins, or gold-rimmed dishes, in the microwave. Metal or foil touching the side of the oven. Recycled paper towels containing small metal pieces being used in the microwave. Foil not molded to food (upturned edges act like antennas).
SUPERHEATED WATER Liquids, such as water, coffee or tea, are able to be overheated beyond the boiling point without appearing to be boiling. Visible bubbling or boiling when the container is removed from the microwave oven is not always present. THIS COULD RESULT IN VERY HOT LIQUIDS SUDDENLY BOILING OVER WHEN THE CONTAINER IS DISTURBED OR A SPOON OR OTHER UTENSIL IS INSERTED INTO THE LIQUID.
IMPORTANT SAFETY INSTRUCTIONS READ ALL INSTRUCTIONS BEFORE USING WARNING MICROWAVE-SAFE COOKWARE Make sure all cookware used in your microwave oven is suitable for microwaving. Most glass casseroles, cooking dishes, measuring cups, custard cups, pottery or china dinnerware which does not have metallic trim or glaze with a metallic sheen can be used. Some cookware is labeled “suitable for microwaving.
“Boilable” cooking pouches and tightly closed plastic bags should be slit, pierced or vented as directed by package. If they are not, plastic could burst during or immediately after cooking, possibly resulting in injury. Also, plastic storage containers should be at least partially uncovered because they form a tight seal. When cooking with containers tightly covered with plastic wrap, remove covering carefully and direct steam away from hands and face. Use foil only as directed in this guide.
IMPORTANT SAFETY INSTRUCTIONS READ ALL INSTRUCTIONS BEFORE USING WARNING Improper use of the grounding plug can result in a risk of electric shock. GROUNDING INSTRUCTIONS This appliance must be grounded. In the event of an electrical short circuit, grounding reduces the risk of electric shock by providing an escape wire for the electric current. This appliance is equipped with a power cord having a grounding wire with a grounding plug.
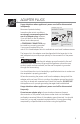
ADAPTER PLUGS Usage situations where appliance’s power cord will be disconnected infrequently. (Adapter plugs not permitted in Canada) Because of potential safety hazards under certain conditions, Align large prongs/slots we strongly recommend against the use of an adapter plug. However, if you still elect to use an adapter, where local codes permit, Ensure proper grounding and firm a TEMPORARY CONNECTION may TEMPORARY connection before 0(7+2' be made to a properly grounded use.
IMPORTANT SAFETY INSTRUCTIONS READ ALL INSTRUCTIONS BEFORE USING WARNING (;7(16,21 &25'6 A short power supply cord is provided to reduce the risks resulting from becoming entangled in or tripping over a longer cord. Extension cords may be used if you are careful in using them.
About the features of your microwave oven. Throughout this manual, features and appearance may vary from your model. 1100 Watts Features of the Oven Door Latches. Window with Metal Shield. Screen allows cooking to be viewed while keeping microwaves confined in the oven. Convenience Guide. Touch Control Panel and Display. Door Latch Release. Press latch release to open door. Removable Turntable. Turntable and support must be in place when using the oven. The turntable may be removed for cleaning.
About the features of your microwave oven. You can microwave by time, with the sensor features or with the auto feature. Not all features on all models. Express Cook 1 4 2 5 3 6 Vegetable Potato Chicken Rice time/weight Defrost Fish Soup Side Dish Frozen Dinner Enter TIME COOK Amount of cooking time DEFROST TIME/WEIGHT Press Twice Amount of defrosting time BEVERAGE Starts immediately! EXPRESS COOK Starts immediately! ADD 30 SEC.
About changing the power level. The power level may be entered or changed immediately after entering the feature time for TIME COOK. The power level may NOT be changed during time countdown. Power Level Express Cook 1 2 3 4 5 6 7 8 9 0 display on/off Start 1 2 3 Press TIME COOK. 4 5 Select desired power level 1–10. Enter cooking time. Press POWER LEVEL. Press START/PAUSE. Pause Variable power levels add flexibility to microwave cooking.
About the time features. Time Cook Time Cook Time Cook I Express Cook 1 2 3 4 5 6 7 8 9 0 display on/off Start Pause Allows you to microwave for any time up to 99 minutes and 99 seconds. Power level 10 (High) is automatically set, but you may change it for more flexibility. 1 Press TIME COOK. 2 Enter cooking time. 3 &KDQJH SRZHU OHYHO LI \RX GRQ·W ZDQW IXOO SRZHU 3UHVV POWER LEVEL. Select a desired power level 1–10.) 4 Press START/PAUSE.
Cooking Guide for Time Cook NOTE: Use power level High (10) unless otherwise noted. Vegetable Amount Time Comments Asparagus (fresh spears) 1 lb. (frozen spears) 10-oz. package 5 to 8 min., Med-High (7) 4 to 7 min. In 11ø2-qt. oblong glass baking dish, place 1/4 cup water. In 1-qt. casserole. Beans (fresh green) 1 lb. cut in half 10 to 15 min. (frozen green) 10-oz. package 4 to 8 min. (frozen lima) 10-oz. package 4 to 8 min. In 11ø2-qt. casserole, place 1/2 cup water. In 1-qt.
About the time features. Vegetable Amount Time Comments Corn (frozen kernel) 10-oz. package 2 to 6 min. In 1-qt. casserole, place 2 tablespoons water. Corn on the cob (fresh) 1 to 5 ears (frozen) Mixed vegetables (frozen) 10-oz. package 2 to 6 min. In 1-qt. casserole, place 3 tablespoons water. Peas (fresh, shelled) 2 lbs. unshelled 7 to 10 min. (frozen) 10-oz. package 2 to 6 min. In 1-qt. casserole, place 1/4 cup water. In 1-qt. casserole, place 2 tablespoons water.
Time Defrost Defrost time/weight Express Cook 1 2 3 4 5 6 7 8 9 0 display on/off Start Pause Allows you to defrost for a selected length of time. See the Defrosting Guide for suggested times. (Weight Defrost explained in the About the Auto Feature section.) 1 2 3 Press DEFROST TIME/WEIGHT twice. 4 5 Turn food over when the oven signals. Enter defrosting time. Press START/PAUSE. Press START/PAUSE. Power level is automatically set at 3, and you may not change it.
About the time features. Defrosting Guide Food Time Breads, Cakes Bread, buns or rolls (1 piece) Sweet rolls (approx. 12 oz.) 1/4 min. 2 to 4 min. Fish and Seafood Fillets, frozen (1 lb.) Shellfish, small pieces (1 lb.) 6 to 9 min. 3 to 7 min. Fruit 3ODVWLF SRXFK³ RU (10-oz. package) 2 to 5 min. Franks (1 lb.) 2 to 5 min. Ground meat (1 lb.) Roast: beef, lamb, veal, pork 4 to 6 min. 9 to 13 min. per lb. 4 to 8 min. per lb. Poultry Chicken, broiler-fryer cut up (21ø2 to 3 lbs.
Express Cook Express Cook 1 2 3 4 5 6 This is a quick way to set cooking time for 1–6 minutes. Press one of the Express Cook pads (from 1 to 6) for 1–6 minutes of cooking at power level 10. For example, press the 2 pad for 2 minutes of cooking time. Add 30 Seconds Add 30 Sec You can use this feature two ways: It will add 30 seconds to the time counting down each time the pad is pressed. It can be used as a quick way to set 30 seconds of cooking time.
About the auto feature. WEIGHT DEFROST Defrost time/weight Express Cook 1 2 3 4 5 6 7 8 9 0 display on/off Start Pause The DEFROST TIME/WEIGHT feature gives you two ways to defrost frozen foods. Press DEFROST TIME/WEIGHT once for WEIGHT DEFROST or twice for TIME DEFROST. Use WEIGHT DEFROST for meat, poultry and fish. Use TIME DEFROST for most other frozen foods.
About the sensor features. Humidity Sensor The Sensor Features detect the increasing humidity released during cooking. The oven automatically adjusts the cooking time to various types and amounts of food. 'R QRW XVH WKH 6HQVRU )HDWXUHV WZLFH LQ VXFFHVVLRQ RQ WKH VDPH IRRG SRUWLRQ³LW PD\ UHVXOW LQ VHYHUHO\ RYHU FRRNHG RU EXUQW IRRG ,I IRRG is undercooked after the countdown, use Time Cook for additional cooking time. The proper containers and covers are essential for best sensor cooking.
About the sensor features. Popcorn Popcorn Use only with prepackaged microwave popcorn weighing 1.75 to 3.5 ounces. NOTE: Do not use this feature twice in succession on the same IRRG SRUWLRQ³LW PD\ UHVXOW LQ severely overcooked or burnt food. To use the Popcorn feature: 1 Follow package instructions, using Time Cook if the package is less than 1.75 ounces or larger than 3.5 ounces. Place the package of popcorn in the center of the microwave. 2 Press POPCORN. The oven starts immediately.
Reheat Reheat NOTE: Do not use this feature twice in succession on the same IRRG SRUWLRQ³LW PD\ UHVXOW LQ severely overcooked or burnt food. The Reheat feature reheats single servings of previously cooked foods or a plate of leftovers. 1 Place covered food in the oven. Press REHEAT. The oven starts immediately. 2 The oven signals when steam is sensed and the time remaining begins counting down.
About the sensor features. Sensor Cooking Vegetables, Potatoes, Fish, Chicken Pieces, Soup, Side Dish, Rice, Frozen Dinner Vegetable Potato Chicken Fish 1 Rice Soup 2 The oven signals when steam is sensed and the time remaining Side Dish Frozen Dinner Place covered food in the oven. Press the food pad. For vegetables, press the VEGETABLE pad. The oven will start immediately. begins counting down. Turn or stir the food if necessary.
About the other features. Clock Clock Express Cook 1 2 3 4 5 6 7 8 9 0 display on/off AM or PM Press to enter the time of day or to check the time of day while microwaving. 1 2 3 4 Press CLOCK. Enter time of day. Select AM or PM. Press START/PAUSE or CLOCK. Start Pause Start/Pause Start Pause In addition to starting many functions, START/PAUSE allows you to stop cooking without opening the door.
About the other features. Control Lock-Out Cancel You may lock the control panel to prevent the microwave from being accidentally started or used by children. Off To lock or unlock the controls, press and hold CANCEL/OFF for about three seconds. When the control panel is locked, LOC will be displayed to the extreme right.
Microwave terms. Term Definition Arcing Arcing is the microwave term for sparks in the oven. Arcing is caused by: metal or foil touching the side of the oven. foil that is not molded to food (upturned edges act like antennas). metal such as twist-ties, poultry pins, gold-rimmed dishes. recycled paper towels containing small metal pieces. Covering Covers hold in moisture, allow for more even heating and reduce cooking time.
Care and cleaning of the microwave oven. Helpful Hints An occasional thorough wiping with a solution of baking soda and water keeps the inside fresh. Unplug the cord before cleaning any part of this oven. How to Clean the Inside Walls, Floor, Inside Window, Metal and Plastic Parts on the Door Some spatters can be removed with a paper towel, others may require a damp cloth. Remove greasy spatters with a sudsy cloth, WKHQ ULQVH ZLWK D GDPS FORWK 'R QRW XVH DEUDVLYH FOHDQHUV RU VKDUS utensils on oven walls.
How to Clean the Outside Do not use cleaners containing ammonia or alcohol on the microwave oven. Ammonia or alcohol can damage the appearance of the microwave. Case Clean the outside of the microwave with a sudsy cloth. Rinse and then dry. Wipe the window clean with a damp cloth. Control Panel and Door :LSH ZLWK D GDPS FORWK 'U\ WKRURXJKO\ 'R QRW XVH FOHDQLQJ VSUD\V large amounts of soap and water, abrasives or sharp objects on the SDQHO³WKH\ FDQ GDPDJH LW 6RPH SDSHU WRZHOV FDQ DOVR VFUDWFK WKH contr
Before you call for service… Troubleshooting Tips Save time and money! Review the charts on the following pages first and you may not need to call for service. Problem Possible Causes What To Do Oven will not start A fuse in your home may be blown or the circuit breaker tripped. • Replace fuse or reset circuit breaker. Power surge. • Unplug the microwave oven, then plug it back in. Plug not fully inserted into wall outlet. • Make sure the 3-prong plug on the oven is fully inserted into wall outlet.
Before you call for service… Problem Possible Causes What To Do “LOCKED” (or LOC) appears in display The control has been locked. • Press and hold CANCEL/ OFF or about three seconds to unlock the control. Food amount too large for Sensor Reheat Sensor Reheat is for single • Use Time Cook for large servings of recommended amounts of food. foods.
Before you call for service… Things That Are Normal With Your Microwave Oven Steam or vapor escaping from around the door. Light reflection around door or outer case. 'LPPLQJ RYHQ OLJKW DQG FKDQJH LQ WKH EORZHU VRXQG DW SRZHU levels other than high. 'XOO WKXPSLQJ VRXQG ZKLOH RYHQ LV RSHUDWLQJ TV/radio interference might be noticed while using the microwave. Similar to the interference caused by other small appliances, it does not indicate a problem with the microwave.
Notes.
Notes.
GE Microwave Oven Warranty. All warranty service provided by our Factory Service Centers, or an authorized Customer Care® technician. To schedule service, on-line, 24 hours a day, visit us at GEAppliances.com, or call 800.GE.CARES (800.432.2737). Please have serial and model numbers available when calling for service. Staple your receipt here. Proof of the original purchase date is needed to obtain service under the warranty.
Consumer Support. GE Appliances Website GEAppliances.com Have a question or need assistance with your appliance? Try the GE Appliances Website 24 hours a day, any day of the year! For greater convenience and faster service, you can now GRZQORDG 2ZQHU·V 0DQXDOV RUGHU SDUWV FDWDORJV RU HYHQ VFKHGXOH VHUYLFH RQ OLQH
Horno Microondas Instrucciones de Seguridad.. . . . . . . . . . . . . . . . .2–10 Instrucciones de Funcionamiento Función Automática . . . . . . . . . . 20 Cuidado y Limpieza . . . . . . . . 28-29 Cambio del NIvel de Potencia . . 13 Funciones de Su Horno Microondas . . . . . . . . .11, 12 Términos del Microondas . . . . . . 27 Otras Funciones. . . . . . . . . . . 25, 26 Funciones del Sensor . . . . . . . 21-24 Funciones de Tiempo . . . . . .
INSTRUCCIONES IMPORTANTES DE SEGURIDAD LEA TODAS LAS INSTRUCCIONES ANTES DE USAR. Éste es el símbolo de alerta de seguridad. El mismo alerta sobre potenciales riesgos que le pueden producir la muerte o lesiones tanto a usted como a otras personas. Todos los mensajes de seguridad estarán a continuación del símbolo de alerta de seguridad y con la palabra “PELIGRO”, “ADVERTENCIA” o “PRECAUCIÓN”.
Use este electrodoméstico sólo para su propósito original, como se describe en el Manual del Propietario. Este horno microondas no está aprobado ni evaluado para uso marítimo. Para reducir el riesgo de incendio en la cavidad del horno: Para su instalación en mostrador: ³ 1R FRFLQH HQ H[FHVR OD FRPLGD 3UHVWH especial atención cuando se coloque papel, plástico u otros materiales combustibles dentro del horno mientras se cocina.
INSTRUCCIONES IMPORTANTES DE SEGURIDAD LEA TODAS LAS INSTRUCCIONES ANTES DE USAR. ADVERTENCIA ARCO ELÉCTRICO Si observan arcos eléctricos, presione la tecla CLEAR/OFF (Borrar/ Apagar) y corrija el problema. Arco eléctrico es el término que se usa para definir la producción de chispas en el horno microondas. Los arcos eléctricos son producidos por: Metales, tales como precintos, pinchos de ave, o platos con rebordes dorados, en el microondas.
AGUA SOBRECALENTADA Los líquidos, tales como el agua, café o té se podrán sobrecalentar más allá de su punto de hervor sin que parezca que esto está sucediendo. No siempre se observan burbujas o hervor cuando el envase es retirado del horno microondas. ESTO PODRÍA PROVOCAR QUE LÍQUIDOS MUY CALIENTES DE PRONTO HIERVAN CUANDO SE MUEVA EL ENVASE O CUANDO SE INSERTE UNA CUCHARA U OTRO UTENSILIO EN EL LÍQUIDO.
INSTRUCCIONES IMPORTANTES DE SEGURIDAD LEA TODAS LAS INSTRUCCIONES ANTES DE USAR. ADVERTENCIA UTENSILIOS DE COCINA SEGUROS PARA MICROONDAS Asegúrese de que todos los utensilios usados en el horno microondas sean para uso en el mismo. Se puede usar la mayoría de las cacerolas de vidrio, platos de cocción, tazas graduadas, tazas para postre, vajillas de cerámica o porcelana que no posean bordes metálicos o vidriados con un brillo metálico. Algunos utensilios cuentan con la etiqueta “para uso en microondas”.
Las bolsas plásticas “para hervir” y las bolsas plásticas de cierre hermético aptas para hervir se deberán cortar, perforar o ventilar, como se indica en el paquete. De no ser así, el plástico podría explotar durante o inmediatamente después de la cocción, lo cual podrá ocasionar lesiones. Además, los envases de plástico deberán estar por lo menos parcialmente descubiertos debido a que forman un sellado hermético.
INSTRUCCIONES IMPORTANTES DE SEGURIDAD LEA TODAS LAS INSTRUCCIONES ANTES DE USAR. ADVERTENCIA El uso inadecuado del enchufe de conexión a tierra puede provocar riesgos de descargas eléctricas. INSTRUCCIONES DE CONEXIÓN A TIERRA Este electrodoméstico deberá estar conectado a tierra. En caso de que se produzca un cortocircuito, la conexión a tierra reduce el riesgo de descarga eléctrica, brindando un cable para la salida de la corriente eléctrica.
ADAPTADORES DE ENCHUFE Situaciones de uso en que el cable de corriente del electrodoméstico será desconectado con poca frecuencia. (Enchufes adaptadores no permitidos en Canadá) Debido a los posibles riesgos sobre la Alinee las seguridad bajo ciertas condiciones, patas/ ranuras recomendamos enfáticamente no usar largas adaptadores de enchufe.
INSTRUCCIONES IMPORTANTES DE SEGURIDAD LEA TODAS LAS INSTRUCCIONES ANTES DE USAR. ADVERTENCIA PROLONGADORES Se brinda un cable de corriente corto a fin de reducir riesgos de enredo o tropiezos con un cable más largo. Se podrán usar prolongadores siempre que se tenga el debido cuidado.
Acerca de las funciones de su horno microondas. Es posible que las funciones y apariencias varíen con relación a su modelo a lo largo del manual. 1100 Watts Funciones del Horno Pestillos de la Puerta. Ventana con Protector Metálico. La pantalla permite que la cocción pueda ser observada mientras se mantienen las microondas dentro del horno. Guía de Acciones Convenientes. Panel y Pantalla de Control Táctil. Liberar Pestillos. Presione liberar pestillos para abrir la puerta. Plato Giratorio Extraíble.
Acerca de las funciones de su horno microondas. Puede cocinar con microondas por tiempo, con las funciones del sensor o con la función automática. No todos los modelos cuentan con todas las funciones. Express Cook 1 4 2 5 3 6 Time Cook time/weight Power Level Add 30 Sec Defrost Popcorn Beverage Reheat Vegetable Potato Chicken Rice time/weight Defrost Fish Soup Side Dish Frozen Dinner Controles de Cocción Consulte la Guía de Acciones Convenientes antes de comenzar.
Acerca de cómo cambiar el nivel de potencia Power Level Express Cook 1 2 3 4 5 6 7 8 9 0 display on/off Start Pause El nivel de potencia se puede ingresar o modificar de forma inmediata luego de introducir la función de tiempo para TIME COOK (Cocción por Tiempo). El nivel de potencia NO se podrá modificar durante la cuenta regresiva. 1 2 3 Presione TIME COOK (Cocción por Tiempo). 4 5 Seleccione el nivel de potencia deseado de 1 a 10. Ingrese el tiempo de cocción.
Acerca de las funciones del temporizador. Cocción por Tiempo Time Cook Time Cook I (Cocción por Tiempo I) Express Cook 1 2 3 4 5 6 7 8 9 0 display on/off Start Pause Le permite cocinar en el horno microondas por cualquier tiempo hasta 99 minutos y 99 segundos. Power level 10 (Nivel de potencia 10) se configura de forma automática, pero lo puede modificar para una mayor flexibilidad. 1 2 3 Presione TIME COOK (Cocción por Tiempo). 4 Presione START/PAUSE (Iniciar/ Pausar).
Guía de Cocción para la Cocción por TIempo NOTA: Use nivel de potencia Alto (10) a menos que se indique lo contrario. Verdura Cantidad Tiempo Comentarios Espárragos (tallos frescos) 1 lb. 5 to 8 min., Med-High (7) En un plato de horneado de vidrio rectangular de 11ø2 cuartos, coloque 1/4 de taza de agua. En cazuela de 1 cuarto. (tallos congelados)Paquete de 10 oz 4 a 7 min. Habas (verdes frescas) 1lb.cortadaalamitad 10 a 15 min. (verdes cogeladas)Paquete de 10 oz 4 a 8 min.
Acerca de las funciones del temporizador. Vegetable Amount Maíz (granos congelados) Paquete de 10 oz 2 a 6 min. Elote de Maíz (fresco) (congelado) Mezcla de verduras (congelado) Guisantes (fresco, descascarados) (congelado) 1 to 5 ears 1 ear 2 to 6 ears En una cazuela de 1 cuarto coloque 2 cucharadas grandes de agua. 11/4 a 4 min. En un plato de horneado de por mazorca vidrio rectangular de 2 cuartos coloque maíz.
Descongelación con Temporizador Defrost time/weight Express Cook 1 2 3 4 5 6 7 8 9 0 display on/off Start Pause Le permite descongelar durante un período de tiempo seleccionado. Consulte los tiempos sugeridos en la Guía de Descongelación. (Weight Defrost (Descongelación por Peso)) se explica en la sección About the Auto Features (Acerca de las Funciones Automáticas)). 1 Presion DEFROST TIME/WEIGHT (Descongelación por Tiempo/ Peso) dos veces. 2 Ingrese el tiempo de descongelación.
Acerca de las funciones del temporizador. Guía de Descongelación Comida Tiempo Panes, Tortas Pan, buñuelos o arrollados (1 trozo) 1/4 min. Arrollados dulces (approx. 12 oz.) 2 a 4 min. Pescado y Mariscos Filetes, congelados (1 lb.) 6 a 9 min. Mariscos, trozos pequeños (1 lb.) 3 a 7 min. Fruta Bolsa de plástico 1 a 5 min. ³ RU (Paquete de 10-oz.) Carne 2 a 5 min. Tocino (1 lb.) 18 Salchichas (1 lb.) 2 a 5 min. Carne picada (1 lb.
Cocción Express Express Cook 1 2 3 4 5 6 Ésta es una forma rápida de configurar el tiempo de cocción entre 1 y 6 minutos. Presione una de las teclas de Express Cook (Cocción Express) (de 1 a 6) para una cocción entre 1 y 6 minutos en Power Level 10 (nivel de potencia 10). Por ejemplo: presione la tecla 2 para un tiempo de cocción de 2 minutos. Agregar 30 Segundos Add 30 Sec Puede usar esta función de dos formas: Agregará 30 segundos a la cuenta regresiva cada vez que la tecla se presione.
Acerca de la función automática. DESCONGELACIÓN POR PESO Defrost time/weight Express Cook 1 2 3 4 5 6 7 8 9 0 display on/off Start Pause Guía 20 La función DEFROST TIME/WEIGHT (Descongelación por Tiempo/ Peso) le da dos formas de descongelar las comidas congeladas. Presione DEFROST TIME/WEIGHT (Descongelación por Tiempo/Peso) una vez para WEIGHT DEFROST (Descongelación pro Peso) o dos veces para TIME DEFROST (Descongelación por Tiempo).
Acerca de las funciones del Sensor. Sensor de Humedad Sensor Features (Funciones del Sensor) detecta la humedad creciente liberada durante la cocción. El horno ajusta de forma automática el tiempo de cocción a diferentes tipos y cantidades de comida. No use Sensor Features (Funciones del Sensor) dos veces seguidas en la misma porción de comida; esto podrá hacer que la comida se sobrecaliente de forma excesiva o que se queme.
Acerca de las funciones del Sensor. Palomitas de Maíz Popcorn Use sólo palomitas de maíz preempaquetadas para hornos de microondas que pesen entre 1,75 y 3.5 onzas. NOTA: No use esta función dos veces seguidas en la misma porción de comida; esto podrá hacer que la comida se sobrecaliente de forma excesiva o que se queme. Para usar la función de Popcorn (Palomitas de Maíz): 1 Siga las instrucciones del paquete, usando Time Cook (Cocción con Temporizador) si el paquete pesa menos de 1.
Recalentar Reheat NOTA: No use esta función dos veces seguidas en la misma porción de comida; esto podrá hacer que la comida se sobrecaliente de forma excesiva o que se queme. La función Reheat (Recalentar) vuelve a calendar las porciones de comidas cocinadas previamente o un plato con restos de comida. 1 Coloque la comida cubierta en el horno. Presione REHEAT (Recalentar). El horno se inicia de inmediato.
Acerca de las funciones del Sensor. Cocción con Sensor Vegetable Potato Chicken Fish Rice Soup Side Dish Frozen Dinner Verduras, Papas, Pescado, Trozos de Pollo, Sopa, Guarnición, Arroz, Comida Congelada 1 Coloque la comida cubierta en el horno. Presione la tecla de comida. Para verduras, presione la tecla VEGETABLE (Verdura). El horno se iniciará de inmediato. 2 El horno emite una señal cuando se produce vapor y el tiempo restante comienza la cuenta regresiva.
Acerca del resto de las funciones. Reloj Clock Express Cook 1 2 3 4 5 6 7 8 9 0 display on/off AM or PM Presione para ingresar la hora del día o para completar la hora del día mientras cocina con microondas. 1 Presione CLOCK (Reloj). 2 Ingrese la hora del día. 3 Seleccione AM o PM. 4 Presione START/PAUSE (Iniciar/ Pausar) o CLOCK (Reloj). Start Pause Iniciar/ Pausar Start Pause Además de iniciar muchas funciones, START/PAUSE (Iniciar/Pausar) le permite dejar de cocinar sin abrir la puerta.
Acerca del resto de las funciones. Bloqueo del Control Cancel Puede bloquear el panel de control para evitar que el microondas se inicie de forma accidental o sea usado por niños. Off Para bloquear o desbloquear los controles, mantenga presionado CLEAR/OFF (Borrar/ Apagar) durante unos tres segundos. Cuando el panel de control está bloqueado, LOC aparecerá en el extremo derecho de la pantalla.
Términos del Microondas. Término Definición Arco Eléctrico Arco eléctrico es el término que se usa para definir la producción de chispas en el horno microondas. Los arcos eléctricos son producidos por: metal o papel de aluminio en contacto con el lateral del horno. papel de aluminio no moldeado a la comida (los extremos doblados actúan como antenas. metales, tales como precintos, pinchos de ave, o platos con rebordes dorados. toallas de papel reciclable que contengan pequeños trozos de metal.
Cuidado y limpieza del horno microondas. Consejos Útiles Una limpieza completa de forma ocasional con una solución de bicarbonato y agua mantiene el interior fresco. Desenchufe el cable antes de limpiar cualquier parte del horno. Cómo Limpiar el Interior Paredes, Piso, Ventana Interior, Partes Metálicas y Plásticas de la Puerta Some spatters can be removed with a paper towel, others may require a damp cloth. Remove greasy spatters with a sudsy cloth, then rinse with a damp cloth.
Cómo Limpiar el Área Exterior No use limpiadores que contengan amoníacos o alcohol en el horno microondas. El amoníaco o el alcohol pueden dañar el aspecto del horno microondas. Cubierta Superior Limpie el área exterior del horno microondas con una tela con jabón. Enjuague y luego seque. Limpie la ventana con una tela húmeda. Panel de Control y Puerta Limpie con una tela húmeda. Seque totalmente.
Antes de Solicitar el Servicio Técnico… Troubleshooting Tips... ¡Los Consejos para la Solución de Problemas le Permiten Ahorrar tiempo y dinero! Primero revise los cuadros que aparecen en las siguientes páginas y es posible que no necesite solicitar reparaciones. Problema Causas Posibles Qué Hacer El horno no se inicia Es posible que un fusible • Reemplace el fusible de su hogar se haya o reinicie el disyuntor. quemado o que el disyuntor se haya desconectado. Pico de tensión.
Antes de Solicitar el Servicio Técnico… Problema Causas Posibles Qué Hacer En la pantalla se visualiza Durante un programa con • Cierre la puerta, presione “SENSOR ERROR” (or Err) Palomitas de Maíz, Papa, CANCEL/OFF (Cancelar/ (“Error del Sensor” o Err) Verdura, Arroz, Sopa, Apagar) y comience Comida Congelada, nuevamente. Guarnición, Pollo o Pescado, la puerta fue abierta antes de que el vapor fuera detectado. No se detectó vapor en una cantidad de tiempo máxima.
Antes de Solicitar el Servicio Técnico… Cosas que son Normales de su Horno Microondas Vapor que sale alrededor de la puerta. Reflejo de luz alrededor de la puerta o la cubierta exterior. Luz del horno tenue y cambio del sonido del pitido en niveles de potencia que no son altos. Ruido de golpes secos mientras el horno está en funcionamiento. Podrá observar interferencias de TV/ radio mientras usa el horno microondas.
Notas.
Notas.
Garantía del Horno Microondas de GE. Todo el servicio de garantía es provisto por nuestros Centros de Servicio de Fabricación, o un técnico autorizado de Servicio al Cliente (Customer Care®). Para programar una consulta del servicio técnico a través del Internet, las 24 del día, visítenos en GEAppliances.com, o llame al 800. GE.CARES (800.432.2737). Cuando llame para solicitar el servicio, tenga los números de serie y modelo disponibles. Abroche su recibo aquí.
Soporte al Cliente. Sitio Web de Electrodomésticos GE GEAppliances.com ¿Desea realizar una consulta o necesita ayuda con su electrodoméstico? ¡Intente a través del Sitio Web de Electrodomésticos de GE las 24 horas del día, cualquier día del año! Para mayor conveniencia y un servicio más rápido, ahora puede descargar el Manual del Propietario, ordenar piezas, catálogos o incluso programar el servicio técnico a través de Internet.