
Getting Started Guide

Getting Started Guide:
The box should contain the following items, check that everything is present.
x1 Monica Novii™ Interface Device
x3 Monica Novii™ PODs
x1 Power Supply for Interface Device
x3 Cables to connect interface to fetal monitor*
x2 Monica Novii™ Patches
x1 Getting Started Guide; x1 Troubleshooting Guide
x1 CD containing IFU & other support/training materials
x1 3M Red Dot 2236 Skin Prep Tape
*FECG, TOCO and MECG input cables for Corometrics 259cx maternal/fetal monitor are supplied. Each cable will be clearly marked.
The monitor must be equipped with 1442AAO GEHC Y-adapter cable.
One of the x3 PODs should remain in its box and the box placed in a secure location that does not see extremes in temperature or
humidity, as a backup/replacement device for POD loss, damage or breakdown.
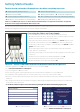
Connecting the Cables and Power Supply
For more information please refer to the User Manual on the CD, section 5.
1. The output sockets for the three cables speciic to the Corometrics 259cx Series fetal
monitor, are clearly labelled on the back of the Interface.
2. Connect the three cables, which are clearly marked, to the correct Interface socket.
3. The UA cable connects directly to the TOCO (white) port of the Coro 259cx Series
monitor, but you will need the ‘Y’ adapter to connect both the FHR (black) and MHR
(green) cables to the monitor.
4. The DC power input socket is on the rear of the Interface to the left of UA/TOCO
socket. There is no on/o switch.
5. Connect the power supply cord to the Interface and then plug into an AC power outlet
to power on.
6. The irst screen to be displayed is the SELECT LANGUAGE screen (1).
7. Press the forward arrow keys to save selection and restart Interface.
8. The Novii Registration Screen will now be displayed (2).
The Novii™ Interface and PODs cannot be used until they have been registered
1. From the registration screen (2) make a note of the access code shown in red.
2. Go to www.monicahealthcare.com/support.
3. Log on or Register for a Monica account.
4. Once you have logged in, select ‘Register Novii Device’ from the menu and follow the on screen instructions.
5. On completion of the registration process you will be given a pass code to enter on the Interface display.
6. The pass code when entered (the back arrow can be used to delete the last number(s) entered if a mistake has been made)
will unlock.
7. Any un-registered POD placed in the Interface charging bay will bring up the Registration display and the process will need to
be repeated to unlock the POD(s).
8. To avoid any confusion register one POD at a time, by placing the POD in the left hand charging bay only.
(1) Press forward arrow key (2) To unlock the device, note the red access code
and go to www.monicahealthcare.com/support
SELECT LANGUAGE ENGLISH
REGISTRATION REQUIRED
To obtain PASS CODE, visit
www.monicahealthcare.com/support
and enter access code below:
(case-sensitive)
TA002050X05G
ENTER PASS CODE:
7433
1 2 3
4 5 6
7 8 9
0