
GE MultiLink Condenser Installation Manual


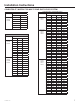
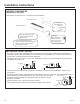


Table Of Contents

31-5000560 Rev. 1 3
IMPORTANT – This product** has been designed and manufactured to meet ENERGY STAR 6.1 criteria for energy
efficiency when matched with appropriate coil components. However, proper refrigerant charge and proper air flow are
critical to achieve rated capacity and efficiency. Installation of this product should follow the manufacturer’s refrigerant
charging and air flow instructions. Failure to confirm proper charge and airflow may reduce energy efficiency and shorten
equipment life. Please check the following steps (optional) for installation capability per ENERGY STAR 6.1 CAC/HP
specification.
Step 1: Please make sure all mechanical and electrical connections established per manufacturer’s guidance.
Step 2: After completing step 1, power the unit on and check the display on the indoor or outdoor unit. If the display
shows “CC”, the unit is ready to begin entering installation test mode. Proceed to step 3. If the display does not
show “CC”, the indoor and outdoor unit combination is not Energy Star compliant and is not capable of executing the
installation testing. The unit is now ready for normal use if “CC” is not displayed.
Step 3: While the indoor and outdoor unit display shows “CC”, please set the indoor mode to Heat or Cool and set
the indoor temperature to 77°F (25°C). The installation test will start within 5 seconds. The unit will test the following
parameters and change the display to indicate it is progressing through the test parameters.
1. Fan mode test, total 3 mins, indoor display flashes Fn and N1 and outdoor display shows N1.
2. Heating and/or cooling performance depending on the current outdoor temperature.
• 2A: When the outdoor ambient temperature is 14~75°F (-10~24°C), the system will run heating and cooling mode for
10 minutes each, the indoor and our door display will show N2 and N3 accordingly.
• 2B: When the outdoor ambient temperature is -4~14°F (-20~-10°C), the system will only run heating mode for 15
minutes, indoor and outdoor display will show N2
• 2C: When the outdoor ambient temperature is 75~115°F (24~46°C), the system will only run cooling mode for 15
minutes, indoor and outdoor display will show N3
Upon finishing and passing all test, the indoor and outdoor display will show PS. The unit can now be used normally. If the
unit does not pass all the automatic tests, the indoor and outdoor display will show an error code and the testing will stop.
Please refer to the service manual for this model to correct the error. The automatic testing will need to be restarted via
the procedure above starting with Step 2 after the error has been corrected.
Note: The automatic tests can also be by-passed by setting the indoor mode to dry and then setting the temperature
to 68°F (20°C) while the unit is flashing CC after initial power has been applied to the unit. The indoor display should
read BP for 5 seconds then go into stand-by mode. The unit can then be used normally. If installation test mode has been
started, it will not be able to by-pass the test unless the power has been recycled prior to finishing the installation tests.
Note: If the outdoor temperature is exceeding normal operation range, (eg. below -4°F (-20°C) or above 115°F(46°C)),
running pre-programmable test may result in error code. Manufacturer suggests to by-pass the test during the severe
weather and go back to the jobsite and run the test when outdoor temperature permits.
Note: If there is a need to run the pre-programmed installation tests again after successfully completing them initially, set
the remote controller to cool, high fan speed, 60°F (16°C), and then press the sleep button 4 times continuously. After
hearing 5 beeps on the indoor unit, power cycle.
**Listed Energy Star Models
ASH218JCDDA1
ASH324JCDDA1
Energy Star Models (Installation Capabilities)