
Installation instructions


Table Of Contents
- Design Information
- Installation Preparation
- Installation—Vented to the Outside
- Installation—Recirculating
- Ductwork, Wiring Locations
- Step 1, Install Framing for Hood Support
- Step 2, Install Mounting Bracket
- Step 3, Install Duct Bracket
- Step 4, Prepare the Hood
- Step 5, Mount the Hood
- Step 6, Level the Hood
- Step 7, Size and Cut Duct Piece
- Step 8, Connect Electrical
- Step 9, Install Duct Covers
- Step 10, Install Filters
- Step 11, Finalize Installation
11
Installation Instructions
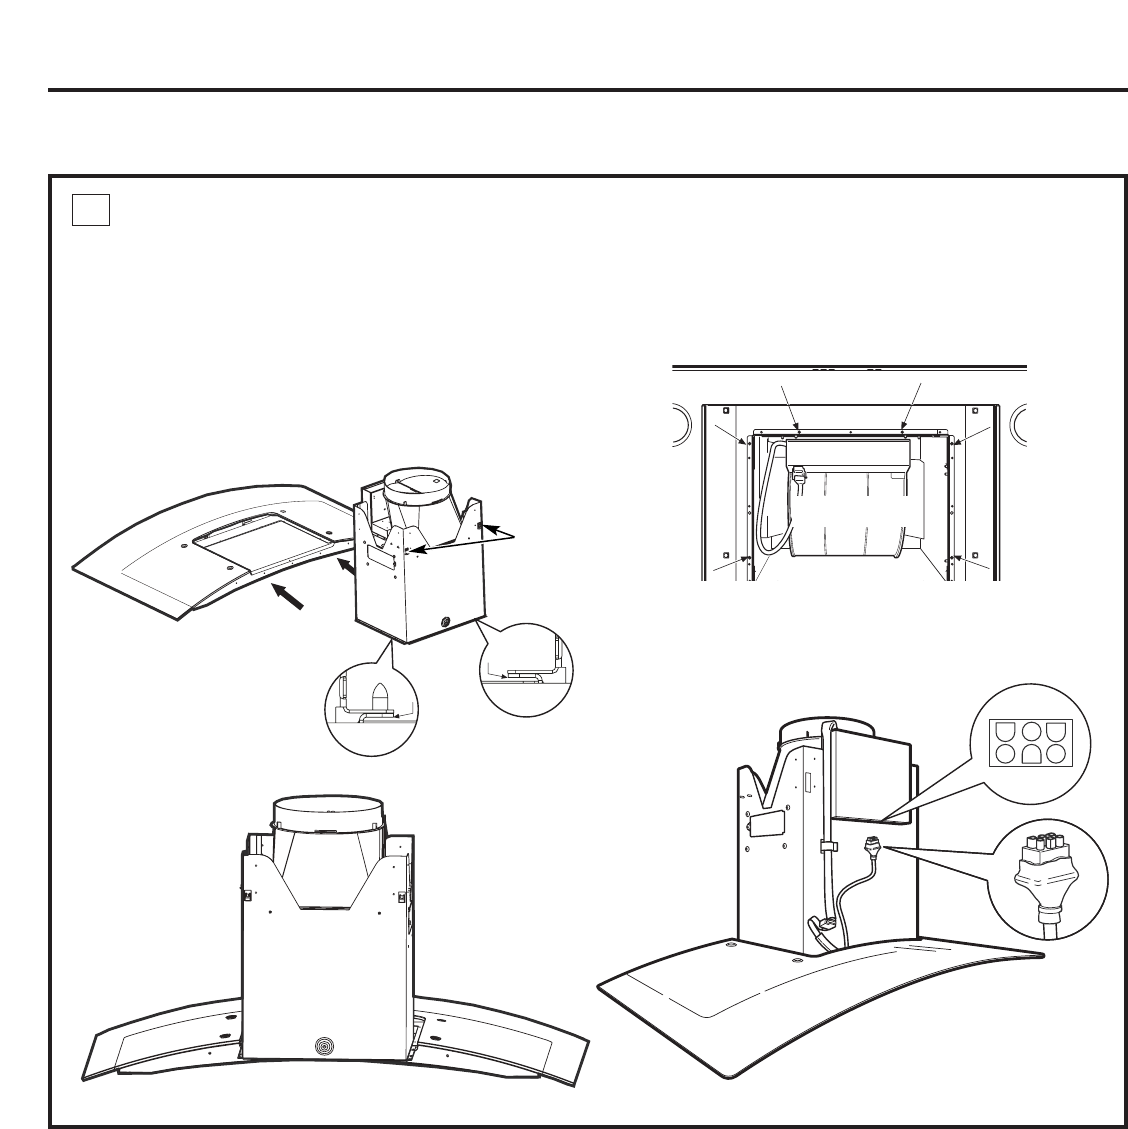
PREPARE THE HOOD
• Place the hood on a padded surface.
• Position the motor housing at the back of the hood.
Electrical connectors should face the front, with
rear mounting hooks at the back.
• Slip the bottom flange of the motor housing into
the side slots at the top rear opening.
• Carefully lay the hood on its back.
• Fasten the hood to the motor housing from the
bottom, using 6 screws.
• Join two cable connectors at the front of the hood.
4
Rear
mounting
hooks
INSTALLATION—VENTED TO THE OUTSIDE
Engage flange on motor
housing into slots
Rear view
Bottom view
Rear side
Front side
To Lights
To
Control
Panel