
Installation Guide


BEFORE YOU BEGIN
Read these instructions completely
and carefully.
•
IMPORTANT ³ Save these instructions
for local inspector’s use.
•
IMPORTANT ³ Observe all governing
codes and ordinances.
•
Note to Installer – Be sure to leave t hese
instructions with the Consumer.
• Note to Consumer – Keep these inst ructions
for future reference.
• Skill level – Installation of this appliance requires
basic mechanical skills.
• Completion time –
Ref r i g e r a t o r I n s t a l l a t i o n
30 minutes
Water Line Installation
30 minutes
• P r o p e r i n s t a l l a t i o n i s t h e r e s p o n s i b i l i t y o f
the installer.
• P r o d u c t f a i l u r e d u e t o i m p r o p e r i n s t a l l a t i o n i s n o t
covered under the Warranty.
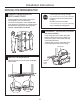
If the refrigerator has already been installed,
remove the base grille (see Step 2 in Moving
the Refrigerator), then skip to Step 5 in Installing
the Refrigerator.
Questions? Call 800.GE.CARES (800.432.2737) or Visit our Website at: ge.com
In Canada, call 1.800.561.3344 or Visit our Website at: geappliances.ca
Installation
Ref r i ger at o r
Instructions
Models 22, 23, 25, 26, 27 and 29
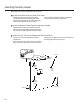
If the refrigerator has an ice maker, it will have
to be connected to a cold water line. A GE water
supply kit (containing tubing, shutoff valve, fittings
and instructions) is available at extra cost from your
dealer, by visiting our Website at ge.com (in Canada
at geappliances.ca) or f rom Par t s and Accessor ies,
800.626.2002 (in Canada 1.888.261.3055).
PREPARATION
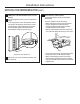
WATER SUPPLY TO THE ICE MAKER
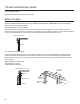
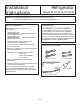
TOOLS YOU WILL NEED
26
Ph ill i p s Head Sc r ew d r i ve r
3/8” and 5/16” Socket 1/2” and 7/16” Wrench
Pl a st i c Pu t t y Kn i f e
1/8” Hex Wrench