COOKTOP Radiant SAFETY INFORMATION .......... 3 OWNER’S MANUAL USING THE COOKTOP Cooktop Features. . . . . . . . . . . . . . . . . . . . . . . 5 Radiant Glass Cooktop . . . . . . . . . . . . . . . . . . 6 Home Canning Tips . . . . . . . . . . . . . . . . . . . . . 6 Cookware for Radiant Glass Cooktop. . . . . . 7 Element Cycling . . . . . . . . . . . . . . . . . . . . . . . . 8 Operating The Cooking Elements . . . . . . . . . 8 Adjust Burner Size . . . . . . . . . . . . . . . . . . . . . .
THANK YOU FOR MAKING GE APPLIANCES A PART OF YOUR HOME. Whether you grew up with GE Appliances, or this is your first, we’re happy to have you in the family. We take pride in the craftsmanship, innovation and design that goes into every GE Appliances product, and we think you will too. Among other things, registration of your appliance ensures that we can deliver important product information and warranty details when you need them. Register your GE appliance now online.
READ ALL INSTRUCTIONS BEFORE USING THE APPLIANCE WARNING Read all safety instructions before using the product. Failure to follow these instructions may result in fire, electrical shock, serious injury or death. WARNING GENERAL SAFETY INSTRUCTIONS Ŷ 8VH WKLV FRRNWRS RQO\ IRU LWV LQWHQGHG SXUSRVH DV described in this Owner’s Manual. Ŷ %H VXUH \RXU FRRNWRS LV SURSHUO\ LQVWDOOHG DQG grounded by a qualified installer in accordance with the provided installation instructions.
SAFETY INFORMATION IMPORTANT SAFETY INFORMATION READ ALL INSTRUCTIONS BEFORE USING THE APPLIANCE WARNING COOKTOP SAFETY INSTRUCTIONS Ŷ ,Q WKH HYHQW RI D ILUH GR QRW XVH ZDWHU RU JUHDVH RQ ILUHV 1HYHU SLFN XS D IODPLQJ SDQ 7XUQ WKH FRQWUROV off. Smother a flaming pan on a surface unit by covering the pan completely with a well-fitted lid, FRRNLH VKHHW RU IODW WUD\ 8VH D PXOWL SXUSRVH GU\ chemical or a foam-type fire extinguisher.
Throughout this manual, features and appearance may vary from your model. 1 2 5 30” wide cooktop 3 4 6 7 8VHU ,QWHUIDFH &RQWUROV 1 2 5 USING THE COOKTOP: Cooktop Features Cooktop Features 36” wide cooktop 3 4 6 7 8VHU ,QWHUIDFH &RQWUROV 1. Cooking Element(s): See page 9. 2. Power Level Arc: See page 9. 3. Sync Burners: See page 10. 4. All Off: See page 10. 5. Lock: See page 11. 6. Timer Select: See page 11. 7. Display: See page 11. 49-80747 Rev.
USING THE COOKTOP: 5DGLDQW *ODVV &RRNWRS +RPH &DQQLQJ 7LSV 6 Radiant Glass Cooktop The radiant cooktop features heating units beneath a smooth glass surface. NOTE: A slight odor is normal when a new cooktop is used for the first time. It is caused by the heating of new parts and insulating materials and will disappear in a short time. NOTE: This cooktop has Rapid Response surface units. The cooktop will automatically heat up or cool down to the desired power level setting in the quickest time possible.
The following information will help you choose cookware which will give good performance on glass cooktops. NOTE: Follow all cookware manufacturer’s recommendations when using any type of cookware on the ceramic cooktop. Recommended Avoid/Not Recommended Stainless Steel Enamel (painted) on Steel: Aluminum: Heavy weight recommended Good conductivity. Aluminum residues sometimes appear as scratches on the cooktop but can be removed if cleaned LPPHGLDWHO\ %HFDXVH RI LWV ORZ PHOWLQJ point, thin weight al
USING THE COOKTOP: (OHPHQW &\FOLQJ 2SHUDWLQJ 7KH &RRNLQJ (OHPHQWV $GMXVW %XUQHU 6L]H 8 Element Cycling Surface elements will cycle on and off to maintain the temperature you have selected. All radiant surface elements have a temperature limiter that protects the glass cooktop from getting too hot, this is normal. The temperature limiter may cycle the elements off more frequently if: Ŷ Ŷ Ŷ Ŷ 7KH SDQ ERLOV GU\ 7KH SDQ ERWWRP LV QRW IODW 7KH SDQ LV RII FHQWHU 7KHUH LV QR SDQ RQ WKH HOHPHQW Oper
Touch On/Off pad for an individual burner or touch the All Off pad. Selecting Cooktop Settings &KRRVH WKH HOHPHQW EXUQHU WKDW LV EHVW ILW WR WKH FRRNZDUH VL]H (DFK HOHPHQW EXUQHU RQ \RXU QHZ cooktop has its own power levels ranging from low to KLJK 3RZHU OHYHO VHWWLQJV QHFHVVDU\ IRU FRRNLQJ ZLOO YDU\ depending on the cookware being used, the type and quantity of food, and the desired outcome.
USING THE COOKTOP: &RRNWRS /RFNRXW 6LQJOH .LWFKHQ 7LPHU 10 Cooktop Lockout Lock Touch Control Lock pad for 3 seconds. Control Lock ,QGLFDWRU 6\PERO Unlock Touch Control Lock pad again for 3 seconds. Cooktop Lockout: locks operation of the controls See Custom Settings section to activate Auto Lock feature. Single Kitchen Timer To Turn On To Turn Off Touch the Timer Select pad. Touch the or V arrows to choose the desired number of minutes. Timer automatically starts 3 seconds after pad is touched.
Timer Mode For more information see Custom Settings, Timer Mode section for Multi-Timer feature. Each burner can be OLQNHG WR D WLPHU %XUQHU PXVW EH RQ WR VHW WKH WLPHU When more than one burner is on, the order of the timer is from left to right. To Turn ON Multiple Timers 1. Touch the Timer Select pad. The corresponding burner power level and the display will blink. Touch the or V arrows to adjust time. Timer automatically starts after 3 seconds if there is no further action.
USING THE COOKTOP: Custom Settings Custom Settings 3 UHVV DQG KROG All Off pad for 3 seconds, then immediately press and hold the Timer Select pad for 3 seconds to enter custom settings. Those two pads must be pressed within 30 seconds. Any other pad will cancel mode. 2. “C - -” appears on display. To navigate through the Custom Settings, use the XS or V GRZQ SDGV ,I XS LV VHOHFWHG WKH GLVSOD\ F\FOH VWDUWV DW ³& ´ ,I V GRZQ LV VHOHFWHG WKH GLVSOD\ F\FOH VWDUWV DW ³& ´ 3.
Using the Griddle CAUTION Burn Hazard Ŷ * ULGGOH VXUIDFHV PD\ EH KRW HQRXJK WR FDXVH EXUQV GXULQJ DQG DIWHU XVH 3ODFH DQG UHPRYH WKH griddle when it is cool and all surface units are off. Use oven mitts if you will touch the griddle while KRW )DLOXUH WR GR VR FDQ UHVXOW LQ EXUQV Ŷ 3ODFH DQG UHPRYH WKH JULGGOH RQO\ ZKHQ JULGGOH LV FRRO DQG DOO VXUIDFH EXUQHUV DUH WXUQHG 2II %HIRUH XVLQJ WKLV FRRNZDUH IRU WKH ILUVW WLPH ZDVK LW WR PDNH VXUH LW LV FOHDQ 7KHQ VHDVRQ LW OLJKWO\ UXEELQJ FRRNLQJ oil
CARE AND CLEANING: Cleaning the Glass Cooktop Cleaning the Glass Cooktop To maintain and protect the surface of your glass cooktop, follow these steps: %HIRUH XVLQJ WKH FRRNWRS IRU WKH ILUVW WLPH FOHDQ LW with a ceramic cooktop cleaner. This helps protect the top and makes cleanup easier. 2. Regular use of a ceramic cooktop cleaner will help keep the cooktop looking new. 3. Shake the cleaning cream well. Apply a few drops of a ceramic cooktop cleaner directly to the cooktop.
Metal Marks and Scratches %H FDUHIXO QRW WR VOLGH SRWV DQG SDQV DFURVV \RXU cooktop. It will leave metal markings on the cooktop surface. These marks are removable using a ceramic cooktop cleaner with a non-scratch cleaning pad for ceramic cooktops. 2. If pots with a thin overlay of aluminum or copper are allowed to boil dry, the overlay may leave black discoloration on the cooktop. This should be removed immediately before heating again or the discoloration may be permanent.
TROUBLESHOOTING TIPS 16 7URXEOHVKRRWLQJ 7LSV ... %HIRUH \RX FDOO IRU VHUYLFH Save time and money! Review the charts on the following pages first and you may not need to call for service. If an error occurs in the control operation, a fault code will flash in the display. Record the error code and call for service. 3UREOHP 3RVVLEOH &DXVH What To Do Surface elements will not PDLQWDLQ D UROOLQJ ERLO RU cooking is slow ,PSURSHU FRRNZDUH EHLQJ XVHG 8VH SDQV WKDW DUH DEVROXWHO\ IODW DQG PDWFK the diamet
Notes 49-80747 Rev.
WARRANTY GE Appliances Electric Cooktop Warranty GEAppliances.com All warranty service is provided by our Factory Service Centers, or an authorized Customer Care® technician. To schedule service online, visit us at www.geappliances.com/service_and_support/, or call GE Appliances at 800.GE.CARES 3OHDVH KDYH \RXU VHULDO QXPEHU DQG \RXU PRGHO QXPEHU DYDLODEOH ZKHQ FDOOLQJ IRU VHUYLFH Servicing your appliance may require the use of the onboard data port for diagnostics.
Looking For Something More? GE Appliances offers a variety of accessories to LPSURYH \RXU FRRNLQJ DQG PDLQWHQDQFH H[SHULHQFHV Refer to the Consumer Support page for phone numbers and website information. The following products and more are available: Parts Griddle ACCESSORIES Accessories 6WDLQOHVV 6WHHO &OHDQHU DQG 3ROLVKHU 49-80747 Rev.
CONSUMER SUPPORT Consumer Support *( $SSOLDQFHV :HEVLWH Have a question or need assistance with your appliance? Try the GE Appliances Website 24 hours a day, any day of the year! You can also shop for more great GE Appliances products and take advantage of all our on-line support VHUYLFHV GHVLJQHG IRU \RXU FRQYHQLHQFH ,Q WKH 86 GEAppliances.com In Canada: GEAppliances.
TABLE DE CUISSON Radiante CONSIGNES DE SÉCURITÉ . . . . . . . 3 UTILISATION DE LA TABLE DE CUISSON Fonctions de la table de cuisson . . . . . . . . . . 5 Table de cuisson en verre à éléments radiants . . . . . . . . . . . . . . . . . . . . . 6 Conseils pour la mise en conserve . . . . . . . . 6 Batterie de cuisine pour table de cuisson en verre radiant . . . . . . . . . . . . . . . 7 Cycle de l’élément . . . . . . . . . . . . . . . . . . . . . . 8 Fonctionnement des éléments de cuisson . .
NOUS VOUS REMERCIONS D’ACCUEILLIR GE APPLIANCES CHEZ VOUS Que vous ayez grandi avec GE Appliances ou qu’il s’agisse de votre première acquisition, nous sommes heureux de vous accueillir dans notre famille. Nous sommes fiers du savoir-faire, de l’innovation et de l’esthétique qui composent chaque appareil GE Appliances, et nous pensons que vous le serez aussi.
VEUILLEZ LIRE TOUTES LES CONSIGNES AVANT D’UTILISER L’APPAREIL Veuillez lire toutes les consignes avant d’utiliser ce produit. Le non-respect de ces instructions pourrait AVERTISSEMENT entraîner un incendie, un choc électrique, une blessure grave voire la mort. AVERTISSEMENT CONSIGNES GÉNÉRALES DE SÉCURITÉ Ŷ 8WLOLVH] FHWWH WDEOH GH FXLVVRQ XQLTXHPHQW DX[ ILQV auxquelles elle a été destinée et de la façon décrite dans le présent manuel d’utilisation.
CONSIGNES DE SÉCURITÉ CONSIGNES DE SÉCURITÉ IMPORTANTES VEUILLEZ LIRE TOUTES LES CONSIGNES AVANT D’UTILISER L’APPAREIL AVERTISSEMENT CONSIGNES DE SÉCURITÉ — TABLE DE CUISSON Ŷ 'DQV O¶pYHQWXDOLWp G¶XQ LQFHQGLH Q¶XWLOLVH] SDV G¶HDX pour tenter d’éteindre un feu causé par de la graisse. N’empoignez jamais une poêle en feu. Éteignez les commandes (Off).
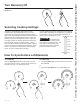
'DQV OH SUpVHQW PDQXHO OHV FDUDFWpULVWLTXHV HW OHXU DSSDUHQFH SHXYHQW rWUH GLႇpUHQWHV de celles de votre modèle. 1 2 5 Table de cuisson de 30 po 3 4 6 7 Commandes de l’interface utilisateur 1 2 5 Table de cuisson de 36 po 3 4 6 7 Commandes de l’interface utilisateur 1. Cooking Element(s) (élément(s) de cuisson) : Voir la Figure 9. 2. Power Level Arc (arc du niveau de puissance) : Voir la Figure 9. 3. Sync Burners (synchronisation des brûleurs) : Voir la Figure 10. 4.
UTILISATION DE LA TABLE DE CUISSON : Table de cuisson en verre à éléments radiants / Conseils pour la mise en conserve 6 Table de cuisson en verre à éléments radiants La surface de cuisson radiante est dotée d’éléments chauffants situés sous la surface de cuisson en verre. REMARQUE : Il est normal de sentir une légère odeur lorsque la surface de cuisson neuve est utilisée pour la première fois.
Les renseignements qui suivent vous aideront à choisir un ustensile de cuisson offrant un bon rendement sur une surface de cuisson en verre. REMARQUE : Observez toutes les recommandations du fabricant de l’ustensile de cuisson lorsque vous utilisez un type quelconque d’ustensiles sur la surface de cuisson en vitrocéramique. Recommandé Éviter / non recommandé Acier inoxydable Émail (peint) sur acier : Aluminum : Épais – recommandé Bonne conductivité.
UTILISATION DE LA TABLE DE CUISSON: Cycle de l’élément / Fonctionnement des éléments de cuisson / Réglage du brûleur 8 Cycle de l’élément Les éléments de surface chaufferont et s’éteindront afin de maintenir la température choisie. Tous les éléments radiants de surface sont équipés d’un limiteur de température afin d’éviter une température trop élevée de la table de cuisson. Ce cycle est normal.
Appuyez sur la touche 2Q 2ႇ pour éteindre un seul brûleur ou sur la touche $OO 2ႇ pour les éteindre tous. Sélection des réglages de la table de cuisson Choisissez l’élément/brûleur qui est le plus adéquat pour la taille de l’ustensile de cuisine. Chaque élément/brûleur de votre nouvelle table de cuisson possède son propre niveau de puissance variant d’une chaleur basse à élevée.
UTILISATION DE LA TABLE DE CUISSON: 9HUURXLOODJH GH OD WDEOH GH FXLVVRQ 0LQXWHULH GH FXLVLQH VLPSOH 10 Verrouillage de la table de cuisson Verrouillage Appuyez sur la touche de verrouillage pendant 3 secondes. Déverrouillage Appuyez de nouveau sur la touche de verrouillage pendant 3 secondes. Symbole/témoin de verrouillage des commandes Verrouillage de la table de cuisson verrouillage des commandes Pour activer la fonction de verrouillage automatique, consultez la section Réglages personnalisés.
Mode de minuterie Pour en savoir plus, consultez les fonctions Réglages SHUVRQQDOLVpV 0RGH GH PLQXWHULH HW 0LQXWHULHV PXOWLSOHV ,O HVW possible de lier chaque brûleur à une minuterie. Pour pouvoir définir la minuterie, le brûleur doit être en marche. Lorsque plus d’un brûleur est en marche, l’ordre de la minuterie s’établit de gauche à droite. Pour activer des minuteries multiples 1. Appuyez sur la touche Timer Select. Le niveau de puissance du brûleur correspondant et l’affichage clignotent.
UTILISATION DE LA TABLE DE CUISSON: Réglages personnalisés Réglages personnalisés 1. Appuyez sur la touche All Off et maintenez-la enfoncée pendant 3 secondes, puis appuyez immédiatement sur la touche Timer Select et maintenez-la enfoncée pendant 3 secondes pour entrer les réglages personnalisés. On doit appuyer sur ces touches dans un intervalle de 30 secondes. Si l’on appuie sur toute autre touche, le mode sera annulé.
Utilisation de la plaque chauffante ATTENTION Risque de brûlure Ŷ , O HVW SRVVLEOH TXH OD VXUIDFH GH OD SODTXH FKDXIIDQWH VRLW VXIILVDPPHQW FKDXGH SRXU YRXV FDXVHU GHV EUOXUHV pendant et après son utilisation. Mettez en place et retirez la plaque chauffante lorsqu’elle est froide et que tous les éléments de la surface sont désactivés. Utilisez des gants de cuisine si vous devez toucher la plaque chauffante lorsqu’elle est chaude. Dans le cas contraire, vous pourriez vous brûler.
ENTRETIEN ET NETTOYAGE: Nettoyage de la vitre de la table de cuisson 14 Nettoyage de la vitre de la table de cuisson Afin d'entretenir et protéger la surface de votre table de cuisson, suivez les étapes suivantes : 1. Avant d’utiliser la table de cuisson pour la première fois, nettoyez-la avec un nettoyant pour table de cuisson en vitrocéramique. Cela contribue à protéger le dessus et facilite le nettoyage. 2.
Traces De Métal Et Rayures 1. Veillez à ne pas glisser de marmites ni de casseroles en travers de la table de cuisson. Cela laisserait des marques métalliques sur la surface de la table de cuisson. Il est possible de faire disparaître ces marques à l’aide d’un nettoyant pour table de cuisson en vitrocéramique et une éponge nettoyante antirayures pour tables de cuisson en vitrocéramique. 2.
TRUCS DE DÉPANNAGE Trucs de dépannage ... Avant d’appeler le service à la clientèle Économisez du temps et de l’argent! Consultez les tableaux des pages suivantes, et vous n’aurez peut-être pas à appeler le service à la clientèle. Si une erreur se produit dans l’utilisation des commandes, un code de défaillance s’affichera. Notez le code d’erreur et contactez le service.
Remarques 49-80747 Rev.
GARANTIE Garantie couvrant la table de cuisson électrique GE Appliances GEAppliances.com Tout entretien ou réparation en vertu de la garantie est fourni par nos Centres d’entretien et de réparation de l’usine ou par un technicien autorisé de Customer Care®. Pour fixer un rendez-vous en ligne, consultez notre site www.geappliances.com/service_and_support/, ou téléphonez GE Appliances à 800.GE.CARES (800.432.2737). Veuillez avoir vos numéros de série et de modèle à portée de main lors de l’appel.
Vous êtes à la recherche d’autres articles? GE Appliances propose une variété d’accessoires afin d’améliorer votre expérience de cuisson et d’entretien! Reportez-vous à la page du Soutien au consommateur pour des renseignements sur l’accessibilité téléphonique et en ligne. Les produits suivants et d’autres encore sont offerts : Pièces ACCESSOIRES Accessoires 3ODTXH FKDXႇDQWH Nettoyant et polisseur pour acier inoxydable 49-80747 Rev.
SOUTIEN AU CONSOMMATEUR Soutien au consommateur Site Web de GE Appliances Vous avez une question ou vous avez besoin d’aide pour votre appareil électroménager? Visitez le site Web de GE Appliances 24 heures par jour, tous les jours de l’année! Vous pouvez aussi y trouver d’autres formidables produits *( $SSOLDQFHV HW WLUHU DYDQWDJH GH WRXV QRV VHUYLFHV G¶DVVLVWDQFH HQ OLJQH $X[ eWDWV 8QLV GEAppliances.com Au Canada : GEAppliances.
ESTUFA Radiante INFORMACIÓN DE SEGURIDAD . . . . . 3 USO DE LA PLACA DE COCCIÓN Funciones de la Placa de Cocción . . . . . . . . . . . . . . 5 Estufa de Vidrio Radiante . . . . . . . . . . . . . . . . . . . . . 6 Consejos para Productos Enlatados en el Hogar . . . . . . . . . . . . . . . . . . . . . . . . . . . . . . . 6 Utensilio para Placa de Cocción para Vidrio Radiante . . . . . . . . . . . . . . . . . . . . . . . 7 Ciclos de los Elementos . . . . . . . . . . . . . . . . . . . . . .
GRACIAS POR HACER QUE GE APPLIANCES SEA PARTE DE SU HOGAR. Ya sea que haya crecido usando GE Appliances, o que ésta es su primera vez, nos complace tenerlo en la familia. Sentimos orgullo por el nivel de arte, innovación y diseño de cada uno de los electrodomésticos de GE Appliances, y creemos que usted también. Entre otras cosas, el registro de su electrodoméstico asegura que podamos entregarle información importante del producto y detalles de la garantía cuando los necesite.
LEA TODAS LAS INSTRUCCIONES ANTES DE USAR ESTE ELECTRODOMÉSTICO ADVERTENCIA Lea todas las instrucciones de seguridad antes de utilizar este producto. No seguir estas instrucciones puede generar un incendio, una descarga eléctrica, lesiones corporales o la muerte. ADVERTENCIA INSTRUCCIONES GENERALES DE SEGURIDAD Ŷ 8VH HVWD SODFD GH FRFFLyQ VyOR FRQ HO REMHWLYR SDUD HO que fue creado, como se describe en este Manual del Propietario.
INFORMACIÓN DE SEGURIDAD INFORMACIÓN IMPORTANTE DE SEGURIDAD LEA TODAS LAS INSTRUCCIONES ANTES DE USAR ESTE ELECTRODOMÉSTICO ADVERTENCIA INSTRUCCIONES DE SEGURIDAD DE LA ESTUFA Ŷ (Q FDVR GH LQFHQGLR QR XWLOLFH DJXD HQ LQFHQGLRV GH grasa. Nunca levante una sartén en llamas. Apague los controles.
Es posible que las funciones y apariencias varíen con relación a su modelo a lo largo del manual. 1 2 5 Placa de cocción de 30” 3 4 6 7 &RQWUROHV GH OD ,QWHUIDVH GHO 8VXDULR 1 2 5 Placa de cocción de 36” 3 4 6 7 &RQWUROHV GH OD ,QWHUIDVH GHO 8VXDULR 1. Cooking Element(s) (Elemento(s) de Cocción): Consulte la página 9. 2. Power Level Arc (Arco Eléctrico): Consulte la página 9. 3. Sync Burners (Quemadores Sincronizados): Consulte la página 10. 4.
USO DE LA PLACA DE COCCIÓN: (VWXID GH 9LGULR 5DGLDQWH &RQVHMRV SDUD 3URGXFWRV (QODWDGRV HQ HO +RJDU 6 Estufa de Vidrio Radiante La estufa radiante cuenta con unidades calentadoras debajo de una superficie lisa de vidrio. NOTA: 8Q OLJHUR RORU HV QRUPDO FXDQGR XQD HVWXID QXHYD VH utiliza por primera vez. Es provocado por el calentamiento de piezas nuevas y materiales aislantes y desaparecerá en poco tiempo. NOTA: Esta placa de cocción cuenta con unidades de superficie de Rapid Response (Respuesta Rápida).
La siguiente información lo ayudará a elegir los recipientes de cocción que brindan un buen desempeño en estufas de vidrio. Ver el folleto sobre recipientes para usar con estufas de inducción. NOTA: Siga todas las recomendaciones del fabricante de recipientes cuando utilice cualquier clase de recipiente de cocción sobre la estufa cerámica. Recomendado Evitar/No se recomienda Acero inoxidable Esmalte (pintado) sobre acero: Aluminio: Se recomienda de capa gruesa Buena conductividad.
USO DE LA PLACA DE COCCIÓN: &LFORV GH ORV (OHPHQWRV 8VR GH ORV (OHPHQWRV GH &RFFLyQ $MXVWH GHO 7DPDxR GHO 4XHPDGRU 8 Ciclos de los Elementos Los elementos de la superficie realizarán ciclos de encendido y apagado para mantener la temperatura que seleccionó. Todos los elementos de la superficie radiante cuentan con un limitador de temperatura que evita que la placa de cocción de vidrio se caliente demasiado, lo cual es normal.
Presione la tecla 2Q 2ႇ (QFHQGHU $SDJDU para usar un quemador individual o presione la tecla $OO 2ႇ 7RGR $SDJDGR . Selección de las Configuraciones de la Placa de Cocción (OLMD HO HOHPHQWR TXHPDGRU TXH PHMRU VH DGHFXH DO WDPDxR GHO XWHQVLOLR &DGD HOHPHQWR TXHPDGRU GH VX QXHYD SODFD de cocción cuenta con sus propios niveles de potencia, desde bajo hasta alto.
USO DE LA PLACA DE COCCIÓN: %ORTXHR GH OD 3ODFD GH &RFFLyQ 7HPSRUL]DGRU ÒQLFR GH OD &RFLQD 10 Bloqueo de la Placa de Cocción Bloquear 3UHVLRQH OD WHFOD &RQWURO /RFN %ORTXHR GHO &RQWURO SRU segundos. Desbloquear ,QGLFDGRU Símbolo del Bloqueo del Control Presione la tecla Control Lock (Bloqueo del Control) nuevamente por 3 segundos.
Modo de Temporizador Para más información, consulte Configuraciones Especiales, en la sección del Modo de Temporizador para acceder a la función de Temporizador Múltiple. Cada quemador puede ser conectado con un temporizador. El quemador debe estar encendido para configurar el temporizador. Cuando más de un quemador esté encendido, el orden del temporizador será de izquierda a derecha. Para Encender Múltiples Quemadores 1. Presione la tecla Timer Select (Seleccionar Temporizador).
UTILISATION DE LA TABLE DE CUISSON: Configuraciones Especiales Configuraciones Especiales 1. Mantenga presionada la tecla All Off (Apagar Todo) durante 3 segundos. Luego de forma inmediata mantenga presionada la tecla Timer Select (Selección de Tiempo) durante 3 segundos para ingresar las Configuraciones Especiales. Esas dos teclas deben ser presionadas dentro de los 30 segundos. Cualquier otra tecla cancelará el modo. 2. “C - -” aparece en la pantalla.
Uso de la Plancha PRECAUCIÓN Peligro De Quemaduras Ŷ DV VXSHUILFLHV GH OD SODQFKD SXHGHQ HVWDU OR VXILFLHQWHPHQWH FDOLHQWHV FRPR SDUD SURYRFDU TXHPDGXUDV / durante y después del uso. Coloque y quite la plancha cuando esté fría y todas las unidades de superficie estén apagadas. Utilice agarraderas si toca la plancha cuando está caliente. No hacerlo puede provocar quemaduras. Ŷ &RORTXH \ UHWLUH OD SODQFKD VyOR FXDQGR WRGDV ODV SDUULOODV \ OD SODQFKD HVWpQ IUtDV \ WRGDV ODV XQLGDGHV superficiales es
CUIDADO Y LIMPIEZA: Limpieza de la Placa de Cocción de Vidrio Limpieza de la Placa de Cocción de Vidrio A fin de mantener y proteger la parte superior de su superficie de cocción de vidrio, siga estos pasos: 1. Antes de usar la superficie de cocción por primera vez, limpie la misma con un limpiador para superficies de cocción de cerámica. Esto ayudará a proteger la parte superior y facilitar la limpieza. 2.
Marcas de metal y rayones 1. Tenga cuidado al deslizar ollas y cacerolas por la superficie de cocción. Las mismas dejarán marcas sobre la superficie de cocción. Estas marcas se podrán retirar usando un limpiador para superficies de cocción de cerámica y una almohadilla de limpieza que no produzca rayones para superficies de cocción de cerámica. 2.
CONSEJOS PARA LA SOLUCIÓN DE PROBLEMAS 16 Consejos para la Solución de Problemas... Antes de solicitar el servicio técnico ¡Ahorre tiempo y dinero! Primero revise los cuadros que aparecen en las siguientes páginas y es posible que no necesite solicitar reparaciones. Si se produce un error en el funcionamiento del control, un código de falla titilará en la pantalla. Registre el código de error y llame al servicio técnico.
Notas 49-80747 Rev.
GARANTÍA Garantía de la Placa de Cocción Eléctrica de GE Appliances GEAppliances.com Todo el servicio de garantía es provisto por nuestros Centros de Servicio de Fabricación, o un técnico autorizado de Customer Care®. Para programar una visita del servicio técnico a través de Internet, visítenos en www.geappliances.com/service_and_support/, o llame a GE Appliances al 800.GE.CARES. Cuando llame para solicitar el servicio, tenga los números de serie y modelo disponibles.
¿Busca Algo Más? ¡GE Appliances ofrece una variedad de accesorios para mejorar sus experiencias de cocción y mantenimiento! Para acceder a números telefónicos e información de sitios Web, consulte la página de Soporte para el Consumidor. Estos y otros productos están disponibles: Piezas Plancha ACCESORIOS Accesorios Limpiador y Pulidor de Acero Inoxidable 49-80747 Rev.
SOPORTE PARA EL CONSUMIDOR Soporte para el Consumidor Sitio Web de GE Appliances ¿Desea realizar una consulta o necesita ayuda con su electrodoméstico? ¡Intente a través del Sitio Web de GE Appliances las KRUDV GHO GtD FXDOTXLHU GtD GHO DxR 8VWHG WDPELpQ SXHGH FRPSUDU PiV HOHFWURGRPpVWLFRV PDUDYLOORVRV GH *( $SSOLDQFHV \ aprovechar todos nuestros servicios de soporte a través de Internet, diseñados para su conveniencia. (Q (( 88 GEAppliances.com En Canadá: GEAppliances.