
Owners Manual

49-7000118 Rev. 0
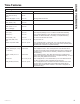
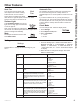
Microwave terms
Arcing Arcing is the microwave term for sparks in the
oven. Arcing is caused by:
• the metal shelf being installed incorrectly and
touching the microwave walls.
• metal or foil touching the side of the oven.
• foil that is not molded to food (upturned edges
act like antennas).
• metal such as twist-ties, poultry pins, gold-
rimmed dishes.
• recycled paper towels containing small metal
pieces.
• the turntable ring support being installed
incorrectly.
Covering Covers hold in moisture, allow for more even
heating and reduce cooking time. Venting plastic wrap or
covering with wax paper allows excess steam to escape.
Shielding In a regular oven, you shield chicken breasts
or baked foods to prevent over-browning. When
microwaving, use small strips of foil to shield thin parts,
such as the tips of wings and legs on poultry, which
would cook before larger parts.
Standing Time When you cook with regular ovens,
foods such as roasts or cakes are allowed to stand
to finish cooking or to set. Standing time is especially
important in microwave cooking. Note that a microwaved
cake is not placed on a cooling rack.
Venting After covering a dish with plastic wrap, you vent
the plastic wrap by turning back one corner so excess
steam can escape.
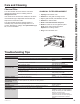
USING YOUR OVEN
Other Features
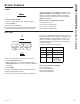
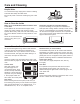
Chef Connect
Chef Connect
On/Off
To Pair Hold 3 Sec
Use the Chef Connect feature for connecting your microwave to a
GE range to sync your vent fan, cooktop surface lights and clock
via
Bluetooth technology.
1. You must have a Chef Connect enabled range. To pair your
microwave for the first time, initiate the Chef Connect process
on the GE range. Refer to the range owner’s manual for
instructions
2. On the microwave, hold Chef Connect button for 3 seconds.
The Bluetooth icon
on the display will start flashing as the
microwave starts to search and pair with your GE Range. The
icon
will remain ON after pairing successfully.
If a GE Range is not found within 2 minutes during search
mode the microwave will stop searching and the Bluetooth
icon
ZLOOWXUQ2))
On initial setup, the setup protocol will start.
If the Chef Connect feature is enabled the default settings are
as follows:
- Display clock sync: ON
- Auto cooktop light: ON (HIGH setting)
$XWRYHQWIDQ2))
- Auto off: 15 minutes
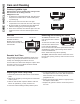
3. Select 1 to sync the surface lights to your GE range. It allows
the microwave surface lights to turn on at HIGH level
automatically when the paired range’s cooktop burner turns
on.
4. Select 1 to sync the vent fan to your GE range. This allows the
microwave vent fan to turn on at LOW speed automatically
when the paired range’s cooktop burner turns on.
Pairing is now complete, the Chef Connect feature is now on.
Note: If there is no sync option selected during set up, 5
minutes after icon
turns on, the units will return to stand-by
mode.
After completing the setting per above steps, your microwaves
vent fan and cooktop light will be set to turn on automatically
when the cooktop burner is turned on. The cooktop and
range clock display will be syncd to display the same time.
The vent fan and cooktop light will be set to automatically turn
off 15 minutes after the cooktop burner is turned off.
If desired, the light, fan, and auto off settings can now be
FKDQJHGXVLQJVHWWLQJVRSWLRQVDQGUHVSHFWLYHO\
Press Chef Connect once to turn off and twice to re-connect.
The icon
will illuminate when on.
In the case of an unintended disconnect such as lost power to
the microwave or range the connection will remain after power
UHVXPHG)RUYHU\VKRUWSRZHULQWHUUXSWLRQVWKHSRZHUPD\
need to be reset in order to reconnect