ICE MACHINE SAFETY INFORMATION . . . . . . . . .3 USING THE ICE MACHINE Packaging . . . . . . . . . . . . . . . . . . . . . . . . . . . .6 Controls . . . . . . . . . . . . . . . . . . . . . . . . . . . . . .6 Features . . . . . . . . . . . . . . . . . . . . . . . . . . . . . .8 Starting the Ice Machine . . . . . . . . . . . . . . . .8 OWNER’S MANUAL AND INSTALLATION INSTRUCTIONS UNC15 INSTALLATION INSTRUCTIONS Grounding the Ice Machine . . . . . . . . . . . . . .9 Before You Begin . . . . . . . . . .
THANK YOU FOR MAKING GE APPLIANCES A PART OF YOUR HOME. Whether you grew up with GE Appliances, or this is your first, we’re happy to have you in the family. We take pride in the craftsmanship, innovation and design that goes into every GE Appliances product, and we think you will too. Among other things, registration of your appliance ensures that we can deliver important product information and warranty details when you need them. Register your GE appliance now online.
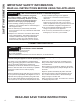
READ ALL INSTRUCTIONS BEFORE USING THE APPLIANCE WARNING To reduce the risk of fire, explosion, electric shock, or injury when using your ice machine, follow these basic safety precautions: Ŷ 7 KLV ,FH PDFKLQH PXVW EH SURSHUO\ LQVWDOOHG DQG ORFDWHG LQ DFFRUGDQFH ZLWK WKH ,QVWDOODWLRQ ,QVWUXFWLRQV EHIRUH LW LV XVHG Ŷ 8QSOXJ WKH ,FH PDFKLQH EHIRUH PDNLQJ UHSDLUV replacing a light bulb, or cleaning. NOTE: 3RZHU WR WKH ,FH PDFKLQH FDQQRW EH disconnected by any setting on the cont rol panel.
SAFETY INFORMATION IMPORTANT SAFETY INFORMATION READ ALL INSTRUCTIONS BEFORE USING THE APPLIANCE WARNING FIRE OR EXPLOSION HAZARD Flammable Refrigerant This appliance contains isobutane refrigerant, also known as R600a, a natural gas with high environmental compatibility. However, it is also combustible. Adhere to the warnings below to reduce the risk of injury or property damage. 1. When handling, installing and operating the appliance, care should be taken to avoid damage to the refrigerant tubing. 2.
READ ALL INSTRUCTIONS BEFORE USING THE APPLIANCE PROPER DISPOSAL OF YOUR OLD APPLIANCE WARNING SUFFOCATION AND CHILD ENTRAPMENT HAZARD Remove the door from the appliance prior to disposal. Failure to do so can result in child entrapment which can lead to death or brain damage. IMPORTANT: Child entrapment and suffocation are not problems of the past. Junked or abandoned appliances DUH VWLOO GDQJHURXV HYHQ LI WKH\ ZLOO VLW IRU ³MXVW D IHZ GD\V ´ ,I \RX DUH JHWWLQJ ULG RI \RXU ROG DSSOLDQFH please follow th
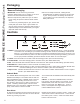
USING THE ICE MACHINE: Packaging/ Controls Packaging Remove Packaging Ŷ 'R QRW XVH VKDUS LQVWUXPHQWV UXEELQJ DOFRKRO flammable fluids or abrasive cleaners to remove tape or glue. These products can damage the surface of \RXU LFH PDNHU )RU PRUH LQIRUPDWLRQ VHH ,PSRUWDQW 6DIHW\ ,QVWUXFWLRQV IMPORTANT: 'R QRW UHPRYH DQ\ SHUPDQHQW instruction labels inside your ice machine or the Tech Sheet that is fastened behind the kickplate. Ŷ 5HPRYH WDSH DQG DQ\ ODEHOV IURP \RXU LFH PDNHU before using (except
Appliance Communication WiFi (for customers in the United States, its territories, and Canada) Clean and Filter buttons at the same time The WiFi symbol will start flashing on the display. 'RZQORDG WKH 6PDUW+4 DSS • Select Next in the app. • Available for iPhone from the Apple Store or from link at GEAppliances.com. • Available for Android from Google Play or from link at GEAppliances.com. Select Create Account on app. • Enter information, and select Register. An e-mail will be generated.
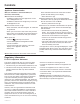
USING THE ICE MACHINE: Features/ Starting the ice machine Features ,FH VFRRS Control panel Cleaner fill hole Light Water filter access door Water filter Kick Plate &RQQHFWHG $SSOLDQFH ,QIRUPDWLRQ /DEHO Starting the ice machine This machine takes in room temperature air at the lower right front and forces warm air out the lower left front. Restricting the airflow or operating the machine in a hot or cold environment will adversely affect the ability of the ice machine to make ice.
ICE MACHINE Questions? Call 800.GE.CARES (800.432.2737) or visit our Website at: GEAppliances.com In Canada, call 1.800.561.3344 or visit our Website at: GEAppliances.ca GROUNDING THE ICE MACHINE WARNING Electrical Shock Hazard. Failure to follow these instructions can result in death, fire, or electrical shock. The power cord of this appliance is equipped with a 3-prong (grounding) plug which mates with a standard SURQJ JURXQGLQJ ZDOO RXWOHW WR PLQLPL]H WKH SRVVLELOLW\ RI HOHFWULF VKRFN KD]DUG IUR
INSTALLATION INSTRUCTIONS Installation Instructions ICE MACHINE LOCATION AND PREPARATION (Cont.) Utility and Operational Requirements • This ice machine must be connected to a potable water supply. The water to this ice machine must be potable, or ILW IRU KXPDQ FRQVXPSWLRQ 'XULQJ LFH PDNLQJ VRPH minerals will stick to the ice making components. The higher the mineral content, the more mineral build up will occur.
ADVANCE PLANNING CAUTION Due to excessive weight, TWO PEOPLE ARE REQUIRED TO MOVE AND INSTALL THIS Ice maker. Failure to do so can result in back or other injury. Cutout & Product Dimensions *Reference dimension. Assumes front of door without exterior panel aligns with front of cabinet as shown. 34-1/2" min. to 35" 15" (38.1 cm) 3-7/8" *3-5/8" 24" cabinet depth Floor drain access hole 34-1/8" min.
INSTALLATION INSTRUCTIONS Installation Instructions DIMENSIONS 3 7/8" FLOOR DRAIN ACCESS HOLE 20 3/8" Water inlet:1/4" 12 49-1000610 Rev.
DOOR SWING Moving the hinges allows the door to open from either the left or the right side. Change the swing BEFORE attaching the door panel. 1. Remove the top and bottom hinge screw covers to gain access to the screws. 6. Remove the upper decorative cover in the same way. 7. Remove the top hinge and hinge cover. Remove the hinge cover from the hinge. Push to Release 8. Remove the lower hinge and hinge cover. Remove the hinge cover from the hinge. 9.
INSTALLATION INSTRUCTIONS Installation Instructions DOOR SWING (Cont.) 11. Remove any plastic protective covering from the stainless door panel 8VLQJ D 3KLOOLSV VFUHZGULYHU LQVWDOO WKH VL[ VFUHZV (supplied with door panel kit) as shown in the figure to attach the inner panel to the exterior panel. Make sure the handle is located on the desired side. 15. Remove the upper hinge plate by pushing in and sliding to the outside and lower hinge plate by firmly pushing in and down as shown in the figure.
INSTALLING THE DOOR PANEL The ice machine is supplied without a conventional door covering, allowing the attachment of a door panel or a custom panel. NOTE: ,I WKH GRRU VZLQJ LV WR EH FKDQJHG LW QHHGV WR be done BEFORE attaching the door panel. Door Panel Finished door panels with handles are available from GE Appliances for attachment to the ice machine. See Accessories on page 27.
INSTALLATION INSTRUCTIONS Installation Instructions INSTALLING THE DOOR PANEL (Cont) ,I WKH GRRU VZLQJ LV JRLQJ WR EH FKDQJHG SOHDVH FRPSOHWH SULRU WR LQVWDOOLQJ WKH GRRU SDQHO 6HH SDJH 'HSHQGLQJ RQ WKH GRRU NLW EHLQJ LQVWDOOHG WKH GRRU KDQGOH PD\ QHHG WR EH IOLSSHG LI WKH GRRU VZLQJ LV EHLQJ changed. Please see instructions on page 18 on how to flip the door handle. Attaching the Door Panel 1. Remove the gasket from the inside of the door and retain for later use. 4.
INSTALLING THE DOOR PANEL (Cont) WARNING Door Hinge Pinch Point Hazard ,PSURSHU LQVWDOODWLRQ FDQ OHDG WR D ILQJHU SLQFK SRLQW KD]DUG QHDU WKH KLQJH ZKHQ RSHUDWLQJ WKH GRRU For installations that are not under a counter, follow the installation instructions. A protective guard is provided for limiting access to the door hinge. 8.
INSTALLATION INSTRUCTIONS Installation Instructions HANDLE REVERSING INSTRUCTIONS PLUMBING - DRAIN PUMP 1. Remove the allen wrench from the panel installation screw kit envelope Drain Installation 2. Loosen the set screw using the allen wrench. Remove the handle and flip it around so the logo is facing the other way. A drain pump is available for this ice machine. The GUDLQ SXPS NLW QXPEHU LV 83. DQG LV DYDLODEOH DW GEApplianceparts.
PLUMBING - GRAVITY DRAIN (cont) 4. Remove the clamp and rotate the barbed elbow so that it is pointing down toward the hole (see figure a below). Re-secure the barbed elbow with the clamp. Take off the plastic cover in the base pan below the drain hose. &XW DQ SLHFH RI 2' [ 2' W\JRQ (clear plastic) tubing. Slide one end of the tube onto the clamp, Leave the other end of the tube lying on the floor of the base pan until the unit is positioned over the floor drain. 6. Route the drain tube.
CARE AND CLEANING GSWF Water Filter Water Filter Cartridge The water filter cartridge is located at the bottom of the icemaker behind the water filter access door. When to Replace the Filter Cartridge ³5HSODFH )LOWHU´ ,QGLFDWRU ZLOO FRPH RQ ZKHQ LW LV WLPH WR RUGHU D ILOWHU 7KLV ZLOO RFFXU DIWHU DSSUR[LPDWHO\ PRQWKV or earlier after periods of heavy icemaking. To order additional filter cartridges, visit our website at gewaterfilters. com or call GE Appliances Parts and Accessories, 877.959.
Cleaning the Outside The stainless steel door and door handle can be cleaned with a commercially available stainless steel cleaner. Cleaners with oxalic acid such as Bar Keepers Friend Soft Cleanser™ will remove surface rust, tarnish and small blemishes. 8VH RQO\ D OLTXLG FOHDQVHU IUHH RI JULW DQG UXE LQ WKH GLUHFWLRQ RI WKH EUXVK OLQHV ZLWK D GDPS VRIW VSRQJH 'R not use appliance wax or polish on the stainless steel.
CARE AND CLEANING Care And Cleaning Removing Scale from the Ice Making System Cleaning the ice machine involves adding a cleaner to the ice machine. You should use rubber gloves when using the scale remover. To order cleaner, go to GEApplianceParts.com or call 877-959-8688. Order part number WX01X40745. , I XQLW LV RQ SUHVV DQG KROG WKH 3RZHU EXWWRQ IRU seconds. The icemaking light will flash until icemaker has pushed out remaining ice in icemaking chamber. 2.
6DYH WLPH DQG PRQH\ 5HYLHZ WKH FKDUWV RQ WKH IROORZLQJ SDJHV ILUVW DQG \RX PD\ QRW QHHG WR FDOO IRU VHUYLFH Problem Possible Causes What to Do Low ice rate Restricted drain or standing water in Clean the air cooled condenser fins. the bin Clean the ice making system. Check the drain line for kinks No ice Room temperature may be high ,FHPDNHU RSHUDWHV EHVW LQ WHPSHUDtures between 60 and 90 degrees F.
Notes 24 49-1000610 Rev.
Notes 49-1000610 Rev.
LIMITED WARRANTY GE Appliances Ice Machine Limited Warranty GEAppliances.com $OO ZDUUDQW\ VHUYLFH LV SURYLGHG E\ RXU )DFWRU\ 6HUYLFH &HQWHUV RU DQ DXWKRUL]HG &XVWRPHU &DUH® technician. To schedule service online, visit us at geappliances.com/service, or call GE Appliances at 800.GE.CARES (800.432.2737). Please KDYH \RXU VHULDO QXPEHU DQG \RXU PRGHO QXPEHU DYDLODEOH ZKHQ FDOOLQJ IRU VHUYLFH ,Q &DQDGD YLVLW GEAppliances.ca/en/support/service-request or call 800.561.
Looking For Something More? Finished stainless steel door panels with handles are available from GE Appliances for attachment to the ice machine.The panel kits are: =. 81 566 6WDLQOHVV VWHHO GRRU ZLWKRXW KDQGOH The following Monogram handles are available for purchase separately: • ZXGP1H1CPSS – Brushed stainless Minimalist handle • ZXGP1H1PPSS – Brushed stainless Statement handle Drain Conversion: A gravity drain model can be converted to a drain pump model by installing a drain pump kit.
CONSUMER SUPPORT Consumer Support GE Appliances Website Have a question or need assistance with your appliance? Try the GE Appliances Website 24 hours a day, any day RI WKH \HDU
MACHINE À GLAÇONS INFORMATION DE SÉCURITÉ . . .3 UTILISANT LA MACHINE À GLAÇONS Déballage . . . . . . . . . . . . . . . . . . . . . . . . . . . . .6 Commandes . . . . . . . . . . . . . . . . . . . . . . . . . .6 Fonctions . . . . . . . . . . . . . . . . . . . . . . . . . . . . .8 Démarrage de la machine à glaçons . . . . . .8 MANUEL D’UTILISATION ET INSTRUCTIONS D’INSTALLATION UNC15 INSTALLATION INSTRUCTIONS Mise à la terre de la machine à glaçons . . .9 Avant de commencer . . . . . . . . . . . . . . .
NOUS VOUS REMERCIONS D’ACCUEILLIR GE APPLIANCES CHEZ VOUS Que vous ayez grandi avec GE Appliances ou qu’il s’agisse de votre première acquisition, nous sommes heureux de vous accueillir dans notre famille. Nous sommes fiers du savoir-faire, de l’innovation et de l’esthétique qui composent chaque appareil GE Appliances, et nous pensons que vous le serez aussi.
LISEZ TOUTES LES INSTRUCTIONS AVANT UTILISANT LA MACHINE À GLAÇONS AVERTISSEMENT Pour réduire le risque d’incendie, d’explosion, de choc électrique ou de blessures lorsque vous utilisez votre machine à glaçons, veuillez suivre ces consignes de sécurité : Ŷ & H UpIULJpUDWHXU GRLW rWUH FRUUHFWHPHQW LQVWDOOp conformément aux Consignes d’Installation avant toute utilisation. Ŷ ' pEUDQFKH] OH UpIULJpUDWHXU DYDQW G¶HIIHFWXHU XQH réparation ou de le nettoyer.
INFORMATION DE SÉCURITÉ INSTRUCTIONS IMPORTANTES DE SÉCURITÉ LISEZ TOUTES LES INSTRUCTIONS AVANT UTILISANT LA MACHINE À GLAÇONS WARNING RISQUE D’INCENDIE OU D’EXPLOSION Fluide frigorigène inflammable Cet électroménager contient le réfrigérant isobutane, aussi connu comme R600a, un gaz naturel à compatibilité élevée avec l’environnement. Il s’agit cependant d’un combustible. Observez les consignes de sécurité ci-dessous afin de réduire le risque de blessure ou de dommage à la propriété. 1.
LISEZ TOUTES LES INSTRUCTIONS AVANT UTILISANT LA MACHINE À GLAÇONS MISE AU REBUT APPROPRIÉE DE VOTRE ANCIEN APPAREIL WARNING RISQUE DE SUFFOCATION ET DE PIÉGEAGE DES ENFANTS 5HWLUH] OD SRUWH GH O¶pOHFWURPpQDJHU DYDQW OD PLVH DX UHEXW /¶RPLVVLRQ GH SURFpGHU DLQVL SRVH XQ ULVTXH GH SLpJHU un enfant dont l’issue pourrait se traduire par des lésions cérébrales ou la mort par asphyxie. IMPORTANT: Les enfants pris au piège ou morts d’asphyxie sont toujours d’actualité.
UTILISANT LA MACHINE À GLAÇONS: Déballage/ Commandes Déballage Retirer l'emballage IMPORTANT: N’enlevez aucune étiquette d’instructions permanente à l’intérieur de la machine à glaçons ni fiche technique fixée derrière le panneau d’accès inférieur. en frottant avec les doigts et une petite quantité de savon à vaisselle liquide. Essuyez à l’eau chaude et séchez.
Communication avec les électroménagers Wi-Fi (pour les clients aux États-Unis, ses territoires et au Canada) 7pOpFKDUJH] O¶DSSOLFDWLRQ 6PDUW+4 • Disponible pour iPhone chez Apple Store ou en cliquant un lien sur GEAppliances.com. • Disponible pour Android chez Google Play ou en cliquant un lien sur GEAppliances.com. Sélectionnez Create Account (créer un compte) dans l’application. (QWUH] OHV LQIRUPDWLRQV SXLV VpOHFWLRQQH] 5HJLVWHU (s’enregistrer). Un courriel vous sera envoyé.
UTILISANT LA MACHINE À GLAÇONS: Fonctions/ Démarrage de la machine à glaçons 8 Fonctions Pelle à glaçons Panneau de commande Orifice de remplissage du nettoyant Éclairage Porte d’accès du filtre à eau Filtre à eau Coup-de-pied Étiquette d’informations sur la connectivité de l’appareil Démarrage de la machine à glaçons Cette machine aspire l’air à température ambiante depuis sa face frontale inférieure droite et expulse l’air chaud depuis sa face frontale inférieure gauche.
MACHINE À GLAÇONS Si vous avez des questions, appelez le 1.800.561.3344 ou visitez notre site Web à l’adresse : electromenagersge.ca MISE À LA TERRE DE LA MACHINE À GLAÇONS AVERTISSEMENT Risque de choc électrique. Le non-respect de ces instructions peut entraîner des risques d’incendies, des chocs électriques ou la mort.
INSTRUCTIONS D’INSTALLATION Instructions d’installation EMPLACEMENT ET PRÉPARATION DE LA MACHINE À GLAÇONS (SUITE) Spécifications relatives à l’alimentation d’eau et aux conditions ambiantes &HWWH PDFKLQH j JODoRQV GRLW rWUH UDFFRUGpH j XQH alimentation d’eau potable. • L’alimentation d’eau doit présenter une conductivité d’au moins 10 microSiemens/cm. /¶HDX DOLPHQWDQW FHWWH PDFKLQH j JODoRQV GRLW rWUH SRWDEOH et convenir à la consommation humaine.
PLANIFICATION PRÉALABLE ATTENTION En raison du poids important, DEUX PERSONNES SONT NÉCESSAIRES POUR DÉPLACER ET INSTALLER cette machine à glaçons. L’omission d’agir ainsi peut causer des blessures, notamment au dos. Dimensions du produits et des découpes Notes d’installation Une pompe de vidange est offerte pour cette machine à glaçons. On peut se procurer l’ensemble de pompe de vidange numéro UPK4 sur le site GEApplianceparts.com ou en composant le 877-959-8688.
INSTRUCTIONS D’INSTALLATION Instructions d’installation DIMENSIONS 3 7/8" FLOOR DRAIN ACCESS HOLE 20 3/8" Water inlet:1/4" 12 49-1000610 Rev.
SENS D’OUVERTURE DE LA PORTE Le déplacement des charnières permet d’ouvrir la porte depuis le côté gauche ou droit. Changez le sens d’ouverture $9$17 GH IL[HU OH SDQQHDX GH SRUWH 5HWLUH] OHV FRXYHUFOHV GHV YLV GHV FKDUQLqUHV VXSpULHXUH et inférieure pour accéder aux vis. 6. Utilisez un tournevis pour écarter les 4 boutonspressions. 5HWLUH] OD FKDUQLqUH VXSpULHXUH HW VRQ FRXYHUFOH 5HWLUH] le couvercle de charnière de la charnière.
INSTRUCTIONS D’INSTALLATION Instructions d’installation SENS D’OUVERTURE DE LA PORTE (suite) 5HWLUH] WRXWH SHOOLFXOH GH SURWHFWLRQ HQ SODVWLTXH GX panneau de porte en acier inoxydable. 12. À l’aide d’un tournevis à pointe cruciforme, installez les six vis (fournis dans la trousse du panneau de porte) comme illustré sur l’illustration afin de fixer le panneau intérieur sur le panneau extérieur. Assurez-vous que la poignée est située du côté désiré.
INSTALLER LE PANNEAU DE PORTE La machine à glaçons est livrée sans recouvrement de porte conventionnel pour permettre la fixation d’un panneau de porte ou d’un panneau personnalisé. REMARQUE: S’il faut changer le sens d’ouverture de la porte, cela doit se faire avant de fixer le panneau de porte. Panneau de porte Des panneaux de porte finis avec poignées sont offerts par GE Appliances pour fixation sur la machine à glaçons. Voir la section Accessoires à la page 21.
INSTRUCTIONS D’INSTALLATION Instructions d’installation INSTALLER LE PANNEAU DE PORTE (suite) S’il faut changer le sens d’ouverture de la porte, veuillez compléter cette étape avant d’installer le panneau de porte. Voyez la SDJH 6HORQ OD WURXVVH GH SRUWH TXL HVW LQVWDOOpH LO YRXV IDXGUD SHXW rWUH GpSODFHU OD SRLJQpH GH SRUWH VL OH VHQV G¶RXYHUWXUH est changé. Voyez les instructions de la page 18 sur la façon de déplacer la poignée.
INSTALLER LE PANNEAU DE PORTE (suite) Risque de pincement AVERTISSEMENT de doigts Une installation incorrecte peut présenter un risque de coincement de doigts près de la charnière en manipulant la porte. Si l’installation ne s’effectue pas sous le comptoir, suivre les instructions d’installation. Un dispositif de protection est fourni pour limiter l’accès à la charnière de porte. 8.
INSTRUCTIONS D’INSTALLATION Instructions d’installation INSTRUCTIONS RELATIVES À L’INVERSION DE LA POIGNÉE PLOMBERIE – POMPE DE VIDANGE 1. 5HWLUHU OD FOp KH[DJRQDOH GH O¶HQYHORSSH GH OD WURXVVH GH visserie pour installation du panneau. Une pompe de vidange est offerte pour cette machine à glaçons. On peut se procurer l’ensemble de pompe de vidange numéro UPK4 sur le site GEApplianceparts. com ou en composant le 877-959-8688. Au Canada, visitez le site ElectromenagersGE.ca ou composez le 800.561.3344.
PLOMBERIE - VIDANGE PAR GRAVITÉ (cont) 5HWLUH] OD EULGH HW IDLWHV SLYRWHU OH FRXGH FDQQHOp GH IDoRQ TX¶LO SRLQWH HQ EDV YHUV OH WURX 5pLQVWDOOH] OD EULGH SRXU IL[HU OH FRXGH FDQQHOp 5HWLUH] OD SHOOLFXOH plastique dans le plateau de base sous le tuyau de vidange. &RXSH] XQH ORQJXHXU GH SR GH WX\DX 7\JRQ (plastique transparent) de 5/8 (D.I.) x 7/8 (D.E.).
ENTRETIEN ET NETTOYAGE GSWF filtre à eau Cartouche de filtre à eau Le filtre à eau à cartouche est située dans le bas de la machine à glaçons, derrière la porte d’accès du filtre à eau. Quand remplacer le filtre à eau à cartouche /H YR\DQW 5HSODFH )LOWHU UHPSODFHU OH ILOWUH YD V DOOXPHU ORUVTX¶LO VHUD WHPSV GH FRPPDQGHU XQ ILOWUH &HOD VXUYLHQGUD au bout d’environ 5 mois, ou plus tôt si la consommation de glace a été élevée.
Nettoyage de l’extérieur Vous pouvez nettoyer la porte et la poignée en acier inoxydable à l’aide d’un nettoyant pour inox commercial. Les nettoyants qui contiennent de l’acide oxalique tels que Bar Keepers Friend Soft Cleanser™ vont éliminer la rouille, le ternissement et les petites taches. Utilisez uniquement un nettoyant liquide exempt d'abrasif et frottez dans la direction des lignes de brosse à l'aide d'une éponge douce humide.
ENTRETIEN ET NETTOYAGE Entretien et nettoyage Nettoyage du tartre dans le système de la machine à glaçons Le nettoyage de la machine nécessite de lui ajouter un nettoyant. Vous devez utiliser des gants en caoutchouc pour manipuler le produit antitartre. Pour commander le nettoyant, allez sur GEApplianceParts.com ou composez le 877-959-8688. Commandez la pièce numéro WX01X40745. 1. 6. va s’allumer et le processus de nettoyage débutera. Le nettoyage durera environ 40 minutes. Une fois le cycle de QHWWR\DJH
Économisez temps et argent! Consultez d’abord les tableaux des pages suivantes et vous pourriez vous éviter un appel de service. Problème Causes possibles Causes possibles Faible débit de glaçons 7X\DX GH YLGDQJH UHVWUHLQW RX HDX stagnante dans le bac Nettoyez les ailettes du condensateur refroidi à l’air. Nettoyez le système de production de glace. Vérifiez que le tuyau de vidange ne comporte pas de plis.
Notes 24 49-1000610 Rev.
Notes 49-1000610 Rev.
GARANTIE LIMITÉE GE Appliances garantie limitée de la machine à glaçons electromenagersGE.ca 7RXWHV OHV UpSDUDWLRQV HQ YHUWX GH OD JDUDQWLH VRQW IRXUQLV SDU QRV &HQWUH GH 6HUYLFH G¶8VLQH RX SDU XQ WHFKQLFLHQ DXWRULVp &XVWRPHU Care®. Pour prévoir une réparation, consultez notre site electromenagersge.ca/fr/soutien/demande-de-service ou appelez le 800.661.1616. Veuillez avoir votre numéro de série et votre numéro de modèle à portée de main lorsque vous appelez pour obtenir un service.
À la Recherche de Quelque Chose de Plus? Des panneaux de finition en acier inoxydable avec poignées sont offerts par GE Appliances pour fixation à la machine à glaçons.
SOUTIEN AU CONSOMMATEUR Soutien au consommateur Site Web de GE Appliances Vous avez une question ou vous avez besoin d’aide pour votre appareil électroménager? Visitez le site Web de GE Appliances 24 heures par jour, tous les jours de l’année! Vous pouvez aussi y trouver d’autres formidables produits GE Appliances et tirer avantage de tous nos services d’assistance en ligne. Aux États-Unis : GEAppliances.com Au Canada : ElectromenagersGE.
MÁQUINA DE HIELO INSTRUCIONES DE SEGURIDAD . . . . . . . . . . . . . . . . . . .3 USO DE LA MÁQUINA DE HIELO MANUAL DEL PROPIETARIO E INSTRUCCIONES DE INSTALACIÓN Embalaje . . . . . . . . . . . . . . . . . . . . . . . . . . . . .6 Controles . . . . . . . . . . . . . . . . . . . . . . . . . . . . .6 Funciones . . . . . . . . . . . . . . . . . . . . . . . . . . . .8 Activación de la Máquina de Hielo . . . . . . .8 UNC15 INSTRUCCIONES DE INSTALACIÓN Conexión a Tierra de la Máquina de Hielo . . . . . . .
GRACIAS POR HACER QUE GE APPLIANCES SEA PARTE DE SU HOGAR. Ya sea que haya crecido usando GE Appliances, o que ésta es su primera vez, nos complace tenerlo en la familia. Sentimos orgullo por el nivel de arte, innovación y diseño de cada uno de los electrodomésticos de GE Appliances, y creemos que usted también. Entre otras cosas, el registro de su electrodoméstico asegura que podamos entregarle información importante del producto y detalles de la garantía cuando los necesite.
ADVERTENCIA A fin de reducir el riesgo de incendio, explosión, descargas eléctricas o lesiones al usar su máquina de hielo siga estas precauciones básicas de seguridad: Ŷ ( VWH UHIULJHUDGRU VH GHEHUi LQVWDODU \ XELFDU adecuadamente de acuerdo con las Instrucciones de Instalación antes de ser usado. Ŷ ' HVHQFKXIH HO UHIULJHUDGRU DQWHV GH KDFHU UHSDUDFLRQHV R hacer una limpieza. Nota: La corriente que va al refrigerador no puede ser desconectada por ninguna configuración del panel de control.
INFORMACIÓN DE SEGURIDAD INFORMACIÓN IMPORTANTE DE SEGURIDAD LEA TODAS LAS INSTRUCCIONES ANTES DE USAR ADVERTENCIA RIESGO DE INCENDIO O EXPLOSIÓN Refrigerantes Inflamables Este electrodoméstico cuenta con refrigerante isobutano, también conocido como R600a, un gas natural con alto nivel de compatibilidad medioambiental. Sin embargo, también es combustible. Siga las advertencias que figuran a continuación, a fin de reducir el riesgo de lesiones o daños sobre la propiedad. 1.
FORMA ADECUADA DE DESCARTAR SU ANTIGUO ELECTRODOMÉSTICO WARNING RIESGO DE SOFOCACIÓN O DE QUE LOS NIÑOS QUEDEN ATRAPADOS Retire la puerta del electrodoméstico antes de descartar el mismo. Si esto no se realiza, los niños podrán quedar atrapados y esto podrá producir la muerte o daño cerebral. IMPORTANTE: Que un niño quede atrapado o que sufra una asfixia no son problemas del pasado.
EL USO DE LA MÁQUINA DE HIELO: Embalaje/ Controles Embalaje Retire el embalaje IMPORTANTE: 1R UHWLUH QLQJXQD HWLTXHWD GH LQVWUXFFLRQHV permanente dentro de la máquina de hielos ni la Ficha Técnica colocada detrás del panel de acceso inferior. o pegamento se pueden retirar fácilmente frotando con los dedos una cantidad pequeña de jabón líquido para lavar platos sobre el adhesivo. Limpie con agua caliente y seque. Ŷ 5HWLUH OD FLQWD \ FXDOTXLHU HWLTXHWD GH VX PiTXLQD GH KLHOR DQWHV del uso (excepto la et
Comunicación con el Electrodoméstico WiFi (para Clientes de Estados Unidos, sus territorios, y Canadá) 'HVFDUJXH OD DSOLFDFLyQ 6PDUW+4 'LVSRQLEOH SDUD L3KRQH GHVGH $SSOH 6WRUH R GHVGH HO enlace GEAppliances.com. 'LVSRQLEOH SDUD $QGURLG GHVGH *RRJOH 3OD\ R GHVGH HO enlace GEAppliances.com. Seleccione Create Account (Crear Cuenta) en la aplicación.
EL USO DE LA MÁQUINA DE HIELO: Funciones/ Activación de la máquina de hielo 8 Funciones Cuchara de hielo Panel de control Agujero de Llenado para el Limpiador Luz Puerta de acceso al filtro de agua Filtro de agua Panel Protector Etiqueta de Información del Electrodoméstico Conectado Activación de la máquina de hielo Esta máquina hace entrar el aire de la temperatura ambiente por la parte inferior derecha frontal y hace salir el aire caliente por la parte inferior izquierda frontal.
MÁQUINA DE HIELO Si tiene preguntas, llame al 1.800.GE.CARES o bien visite nuestra página Web: GEAppliances.com CONEXIÓN A TIERRA DE LA MÁQUINA DE HIELO ADVERTENCIA Riesgo de Descarga Eléctrica. Si no se siguen estas instrucciones se podrá producir a muerte, incendios o descargas eléctricas.
INSTRUCCIONES DE INSTALACIÓN Instrucciones de instalación UBICACIÓN Y PREPARACIÓN DE LA MÁQUINA DE HIELO (Cont.) Requisitos y Servicios Públicos y Funcionamiento • Esta máquina de hielo debe estar conectada a un suministro de agua potable. • El suministro de agua potable debe contar con una conductividad de por lo menos 10 microSiemens/cm.
PLANIFICACIÓN AVANZADA PRECAUCIÓN Debido a un peso excesivo, SE REQUIERE QUE DOS PERSONAS MUEVAN E INSTALEN ESTA máquina de hielo. Si esto no se cumple, se podrán producir lesiones en la espalda u otras heridas. DIMENSIONES DEL PRODUCTO Y ESPACIO 24" 34" a 35" 15" Mín. de 33-7/8" ajustable a 34-7/8" 22-3/4" hasta el Frente de la Puerta de Acero Inoxidable 49-1000610 Rev. 0 14-7/8" Notas de Instalación Una bomba de desagüe está disponible para esta máquina de hielo.
INSTRUCCIONES DE INSTALACIÓN Instrucciones de instalación DIMENSIONES 3 7/8" FLOOR DRAIN ACCESS HOLE 20 3/8" Water inlet:1/4" 12 49-1000610 Rev.
BALANCEO DE LA PUERTA Mover las bisagras permitirá que la puerta se abra tanto desde el lado izquierdo como del derecho. Cambie el EDODQFHR $17(6 GH DGKHULU HO SDQHO GH OD SXHUWD 1. Retire las tapas de los tornillos de las bisagras superior e inferior para poder acceder a los tornillos. 6. Retire la tapa superior decorativa del mismo modo. 7. Retire la bisagra superior y la tapa de la bisagra. Retire la tapa de la bisagra de esta última. Presione para Liberar 8.
INSTRUCCIONES DE INSTALACIÓN Instrucciones de instalación BALANCEO DE LA PUERTA (Cont.) 11. Retire cualquier cobertura protectora de plástico del panel de la puerta de acero inoxidable. 12. Usando un destornillador Phillips, instale los seis tornillos (suministrados con el kit del panel de la puerta), como se muestra en la figura, para adherir el panel interior al panel exterior. Asegúrese de que la manija se encuentre ubicada del lado deseado. 15.
INSTALACIÓN DEL PANEL DE LA PUERTA La máquina de hielo se suministra sin una cobertura de puerta convencional, permitiendo la adhesión de un panel de puerta o un panel a medida. NOTA: Si es necesario modificar el balanceo de la SXHUWD HVWR VH GHEHUi UHDOL]DU $17(6 GH OD DGKHVLyQ del panel de la puerta. Panel de la Puerta 5. Apoye el panel sobre una superficie y alinee la puerta sobre el panel de modo que quede ubicada de acuerdo con lo medido en el paso 2.
INSTRUCCIONES DE INSTALACIÓN Instrucciones de instalación INSTALACIÓN DEL PANEL DE LA PUERTA (Cont.) Si el balanceo de la puerta será modificado, por favor complete esto antes de realizar la instalación del panel de la puerta. &RQVXOWH OD SiJLQD 'HSHQGLHQGR GHO NLW GH SXHUWD TXH VH LQVWDODUi HV SRVLEOH TXH VHD QHFHVDULR GDU YXHOWD OD PDQLMD de la puerta si se cambiará el balanceo de la puerta. Por favor, consulte las instrucciones de la página 18 sobre cómo dar vuelta la manija de la puerta.
INSTALACIÓN DEL PANEL DE LA PUERTA (Cont.) ADVERTENCIA Riesgo de Lastimadura con la Bisagra de la Puerta Mientras cierra la bisagra, mantenga los dedos alejados de las partes móviles interiores de la bisagra. 8.
INSTRUCCIONES DE INSTALACIÓN Instrucciones de instalación INSTRUCCIONES PARA INVERTIR LA POSICIÓN DE LA MANIJA 1. Retire la llave Allen del sobre del kit de tornillos del panel de instalación. 2. Afloje el tornillo de ajuste utilizando la llave Allen. Retire la manija y de vuelta la misma, de modo que el logo mire hacia el lado contrario. PLOMERÍA – BOMBA DE DESAGÜE Instalación del Desagüe Una bomba de desagüe está disponible para esta máquina de hielo.
PLOMERÍA – DRENAJE POR GRAVEDAD (Cont.) 4. Retire la abrazadera y gire el codo dentado, de modo que apunte hacia abajo en dirección al agujero. Vuelva a asegurar el codo dentado con la abrazadera. Retire la tapa de plástico sobre la base de la bandeja, debajo de la manguera de drenaje. 5. Corte un trozo de tubería de tygon (plástico transparente) de 8" con 5/8" de diám. ext.
CUIDADO Y LIMPIEZA GSWF Filtro de Agua Cartucho del Filtro de Agua El cartucho del filtro de agua se encuentra ubicado en la parte inferior de la máquina de hielo, detrás de la puerta del acceso al filtro de agua. Cuándo Reemplazar el Cartucho del Filtro (O LQGLFDGRU GH ³5HHPSOD]R GHO )LOWUR´ VH LOXPLQDUi FXDQGR VHD WLHPSR GH RUGHQDU XQ ILOWUR (VWR RFXUULUi DSUR[LPDGDPHQWH luego de 5 meses o antes, luego de períodos de mucha producción de hielo.
Limpieza de la Parte Exterior La puerta y la manija de la puerta de acero inoxidable se pueden limpiar con un limpiador de acero inoxidable disponible comercialmente. Los limpiadores con ácido oxálico tales como Bar Keepers Friend Soft Cleanser™ eliminarán el óxido, deslustres y pequeñas manchas. Use sólo un limpiador líquido libre de material abrasivo y frote en la dirección de las líneas del cepillo con una esponja suave \ K~PHGD 1R XVH FHUD SDUD HOHFWURGRPpVWLFRV QL SXOD VREUH el acero inoxidable.
CUIDADO Y LIMPIEZA Cuidado y limpieza Retiro de Sarro del Sistema para Producción de Hielo La limpieza de la máquina de hielo involucra la adhesión de un limpiador a la máquina de hielo. Usted deberá usar guantes de goma al manipular el removedor de sarro. Para ordenar un limpiador, visite GEApplianceParts. com o comuníquese al 877-959-8688. Ordene el número de pieza WX01X40745. 1. Si la unidad se encuentra encendida, mantenga SUHVLRQDGR HO ERWyQ ³3RZHU´ (QFHQGLGR GXUDQWH segundos.
£$KRUUH WLHPSR \ GLQHUR 3ULPHUR UHYLVH ORV FXDGURV TXH DSDUHFHQ HQ ODV VLJXLHQWHV SiJLQDV \ HV SRVLEOH TXH QR necesite solicitar reparaciones. Problema Causas Posibles Qué hacer Promedio bajo de hielo 'HVDJH UHVWULQJLGR R DJXD UHVWDQWH HQ Limpie los alerones del condensador enel cesto friados por el aire. Limpie el sistema de la máquina de hielo. Controle que no haya torceduras en la tubería de desagüe.
Notas 24 49-1000610 Rev.
Notas 49-1000610 Rev.
GARANTÍA LIMITADA GE Appliances Garantía Limitada de la Máquina de Hielo GEAppliances.com Todo el servicio de garantía es provisto por nuestros Centros de Servicio de Fabricación, o un técnico autorizado de Servicio al Cliente (800.462.2737). Para programar una visita del servicio técnico, visítenos en GEAppliances.com, o comuníquese al 800.GE.CARES (800.432.2737). Cuando llame para solicitar el servicio, tenga los números de serie y modelo disponibles.
¿Busca Algo Más? Están disponibles paneles acabados para puertas de acero inoxidable con manijas a través de GE Appliances, los cuales se pueden adherir a la máquina de hielo.
SOPORTE PARA EL CONSUMIDOR Soporte para el Consumidor Sitio Web de GE Appliances ¢'HVHD UHDOL]DU XQD FRQVXOWD R QHFHVLWD D\XGD FRQ VX HOHFWURGRPpVWLFR" £,QWHQWH D WUDYpV GHO 6LWLR :HE GH *( $SSOLDQFHV ODV KRUDV GHO GtD FXDOTXLHU GtD GHO DxR 8VWHG WDPELpQ SXHGH FRPSUDU PiV HOHFWURGRPpVWLFRV PDUDYLOORVRV GH *( $SSOLDQFHV \ aprovechar todos nuestros servicios de soporte a través de Internet, diseñados para su conveniencia. En EE.UU.: GEAppliances.