2-9191 12-Number Memory Call Waiting Caller ID Telephone User's Guide 1 We bring good things to life.
FCC REGISTRATION INFORMATION Your telephone equipment is registered with the Federal Communications Commission and is in compliance with parts 15 and 68, FCC Rules and Regulations. 1 Notification to the Local Telephone Company On the bottom of this equipment is a label indicating, among other information, the FCC Registration number and Ringer Equivalence Number (REN) for the equipment. You must, upon request, provide this information to your telephone company.
INTERFERENCE INFORMATION This device complies with Part 15 of the FCC Rules. Operation is subject to the following two conditions: (1) This device may not cause harmful interference; and (2) This device must accept any interference received, including interference that may cause undesired operation. This equipment has been tested and found to comply with the limits for a Class B digital device, pursuant to Part 15 of the FCC Rules.
TABLE OF CONTENTS FCC REGISTRATION INFORMATION ................................................ 2 INTERFERENCE INFORMATION ........................................................ 3 HEARING AID COMPATIBILITY ....................................................... 3 INTRODUCTION .......................................................................... 5 CALLER ID WITH CALL WAITING ................................................. 5 BEFORE YOU BEGIN ...........................................................
INTRODUCTION Your Caller ID phone stores and displays specific information, provided by your local telephone company, to subscribers of Caller ID or similar caller identification services. You must subscribe to one of these services in order to use this unit. Your Caller ID phone enables you to: • Identify callers before you answer the phone. • View the time and date of each incoming call. • Record up to 60 Caller ID messages sequentially. • Know who called while you were away.
BEFORE YOU BEGIN PARTS CHECKLIST Make sure your package includes the following items: Store Quick Dial A Short cord DEF GHI JKL MNO PQRS TUV WXYZ * OPER # 4 7 RINGER VOLUME OFF LO 2 5 8 0 Base Coiled cord MODULAR JACK REQUIREMENTS You need an RJ11 type modular jack, which is the most common type of phone jack and might look like the one pictured here. If you don’t have a modular jack, call your local phone company to find out how to get one installed.
INSTALLATION & SETUP IMPORTANT INSTALLATION INFORMATION • Never install telephone wiring during a lightning storm. • Never touch uninsulated telephone wires or terminals, unless the telephone line has been disconnected at the network interface. • Use caution when installing or modifying telephone lines. INSTALLING THE BATTERIES Your Caller ID phone uses 4 AA-size alkaline batteries for receiving and storing Caller ID records and for the numbers you use for memory dialing.
NOTE: If the low battery icon LOW appears in the display, you need to replace the batteries. It is important that you replace the batteries as soon as possible in order to maintain Caller ID operation. During the replacing of batteries, a backup circuit in the unit will retain your stored information for up to 60 seconds. Write down any stored information you do not want erased.
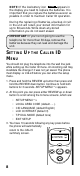
TO SET YOUR LOCAL AREA CODE The telephone uses the programmed area code to determine the number format to display when a valid Caller ID signal is received and is also used for the Dialback feature. 1. Press and hold the REVIEW up button then press and hold the REVIEW down button. Continue to hold both buttons for 3 seconds. SETUP MENU ^ v appears. 2. Press the REVIEW up button until LOCAL AREA CODE appears. 3. To enter or change the area code, press the DELETE button.
TO SET THE LCD CONTRAST This adjustment allows optimization of the contrast and viewing angle of the display. 1. Press and hold the REVIEW up button then press and hold the REVIEW down button. Continue to hold both buttons for 3 seconds. SETUP MENU ^ v appears. 2. Press the REVIEW up button until LCD CONTRAST appears. 3. Press the DELETE button to show the current contrast setting. There are 5 levels of contrast, with the default set to 3. 4. To decrease the contrast, press REVIEW down.
INSTALLING THE PHONE TO INSTALL ON A DESKTOP 1. Plug the coiled cord into the handset. Plug the other end into the jack on the bottom end of the base. 2. Plug the long straight line cord into jack on the bottom of the base. Plug the other end into a wall jack. 3. Set the RINGER switch on the base to HI. • LO = Sound will be lower. • OFF = Telephone will not ring.
TO MOUNT ON A WALL 1. Plug the short line cord into the jack on the bottom of the base and connect the other end to a wall phone jack. 2. Feed the short line cord through the grooves provided so that the base area is flat and ready to mount on the wall. 3. Slip the mounting holes of the base (on bottom of unit) over the wall plate posts and slide the base down until the phone is firmly in place. 4. Plug the coiled cord into the handset. Plug the other end into the jack on the lower end of the base. 5.
CALLER ID FEATURES SUMMARY SCREEN The Summary Screen shows the current time, current date and number of new calls to be reviewed. It is displayed until any button is pressed. Within 10 seconds of receiving a new call, the Summary Screen will be displayed and the New Call LED will flash. AM PM NOTE: The number of new calls is displayed until any new calls have been reviewed. RECEIVING AND STORING CALLS This unit receives and displays information transmitted by your local phone company.
REVIEWING CALL RECORDS • Press either the REVIEW up or REVIEW down button to view the newest call record. • Press the REVIEW down button to scroll through the call records from the most recent to the oldest. • Press the REVIEW up button to scroll through the call records from the oldest to the newest. • When all of the messages have been viewed, START/ END appears in the display. DELETING CALL RECORDS • To delete the record shown in the display, press the DELETE button once.
3. To adjust the phone number, press the DIAL button. For instance, a 7-digit local number sometimes cannot be dialed because it requires a 10-digit or 11-digit format. Press the DIAL button repeatedly to scroll through the 7, 10, and 11-digit numbers. 7-digits: 7-digit telephone number (i.e. 555-5555) 10-digits: 3-digit area code + 7-digit telephone number (i.e. 425-555-5555) 11-digits: long distance code 1 + 3-digit area code + 7-digit telephone number (i.e. 1-425-555-5555) 4.
CALLER ID WITH CALL WAITING Provided your telephone company is able to integrate Caller ID and Call Waiting services, you will see who is calling you when you hear the call waiting beep. The caller identification information appears in the display after you hear the tone. CALLER ID PHONE 12:30 10/19 1 - 315 - 555 - 1324 SMITH JOHN delete dial review • Press the FLASH button to put the person to whom you're talking on hold and answer the incoming call.
MESSAGE INDICATORS The following special messages indicate the status of a message or the unit: NO CALLS The caller memory is empty. UNKNOWN CALL LOW The incoming call does not have Caller ID service or their service area is not linked to yours. If UNKNOWN CALL appears along with a calling number, the name information for that number was not available. Battery power level is low. BLOCKED CALL The caller of the incoming call is registered as “Private Number” and their Caller ID information is withheld.
TELEPHONE BASICS CHANGING THE VOLUME You are able to control the listening level with the VOLUME button, which has 3 levels. At the lowest level, the phone beeps once. It remains at the last level set until you change it. REDIALING A NUMBER If you want to call the last number you dialed again (up to 32 digits), use REDIAL. 1. Pick up the handset. 2. Press REDIAL. 3. The last number called is automatically redialed.
USING MEMORY FEATURES Before you store any telephone number into memory, make sure the dial mode is correct for the type of telephone you’re using. The default dial mode is tone (touch-tone), so if you have pulse (rotary) service, you must first change the dial mode. See “To Set the Dial Mode.” TO STORE EMERGENCY/QUICK DIAL NUMBERS 1. Pick up the handset. 2. Push STORE. 3. Enter the telephone number (up to 20 digits). If you make a mistake, hang up and repeat the procedure for storing from the beginning.
TO CHANGE A STORED NUMBER Repeat the storage sequence. The new number replaces the old number at the memory location. TO ERASE A STORED NUMBER 1. Pick up the handset. 2. Press STORE. 3. Press STORE again. 4. Press the location (A, B, 0-9) to be erased. TO DIAL A QUICK DIAL NUMBER 1. Pickup the handset. 2. Press the Quick Dial location A or B. The number dials automatically. TO DIAL FREQUENTLY CALLED NUMBERS 1. Pick up the handset. 2. Press DIAL. 3. Press 0-9 for the memory location.
FLASH This feature is used to activate customer calling services available through your local phone company, such as Call Waiting. These services generally require an extra monthly fee. If you subscribe to any of these services, please refer to the phone company’s instructions on how to use FLASH. To answer an incoming call while having a conversation: • After you hear the Call Waiting tone, press and release the FLASH button. The first call is placed on hold while the second call can be answered.
TROUBLESHOOTING TIPS NO DIAL TONE • Check all cabling to make sure that all connections are secure and not damaged. • Check hook switch: Does it fully extend when handset is lifted from cradle? NO DISPLAY • Replace batteries. • Check for proper battery installation. NO INFORMATION IS SHOWN AFTER THE PHONE RINGS • Did you order Caller ID service from your local telephone company? This unit requires that you subscribe to Caller ID service in order to work.
PHONE DOES NOT DIAL OUT • Check the dial mode in the setup menu. Is it set to tone, which may not be compatible with your local dialing service? PHONE DOES NOT RING • Is the ringer switch in the OFF position? • Are you using too many phones on one line? (The total REN of all phones on the same line should not be greater than the maximum REN for your calling area. See FCC Registration Information) • Perform the checks under the first problem (Number 1).
SERVICE FCC requires this product be serviced only by the manufacturer or its authorized service agents. In accordance with FCC requirements, changes or modifications not expressly approved by Thomson Consumer Electronics could void the user’s authority to operate this product. For instructions on how to obtain service, refer to the warranty included in this guide. Attach your sales receipt to the booklet for future reference or jot down the date this product was purchased or received as a gift.
INDEX A Adjusting Pause 20 C Call Waiting answering 21 Call Waiting with Caller ID 16 Caller ID Button 13 Caller ID Features 13 Caller ID Setup Menu 8 Caller ID with Call Waiting 5 Changing a Stored Number 20 Changing the Volume 18 CID Display Language 9 D Deleting Call Records 14 Desktop Installation 11 Dial Mode 10 Dialing Back 14 E Emergency/Quick Dial Numbers 19 Erasing a Stored Number 20 Exiting Setup 10 F FCC Registration Information 2 Flash 21 Frequently Called Numbers 19 Frequently called number
L LCD Contrast 10 Limited Warranty 27 Local Area Code, Setting 9 Low Battery Icon 8 M Memory Features 19 Message Indicators 17 Modular Jack Requirements 6 Mounting on a Wall 12 O One Touch Redial 18 P Parts Checklist 6 Pause (Redial) 20 Q Quick dial numbers dialing 20 R Receiving and Storing Calls 13 Redialing a Number 18 Reviewing Call Records 14 S Service 24 Setting Up the Caller ID Menu 8 Stored numbers dialing 20 Summary Setup 13 T Telephone Basics 18 Temporary Tone Dialing 21 Troubleshooting Tip
LIMITED WARRANTY What your warranty covers: • Any defect in materials or workmanship. For how long after your purchase: • One year. (The warranty period for rental units begins with the first rental or 45 days from date of shipment to the rental firm, whichever comes first.) What we will do: • Provide you with a new or, at our option, a refurbished unit. • The exchange unit is under warranty for the remainder of the original product’s warranty period. How to make a warranty claim: • Properly pack your unit.
P.O. Box 1976, Indianapolis, IN 46206 © 1999 Thomson Consumer Electronics, Inc. Trademark(s) ® Registered Marca(s) Registrada(s) Model 2-9191 15394130 (Rev.
2-9191 Teléfono con 12-Números de Memoria e Identificación de Llamadas Con Llamada en Espera Guía del Usuario 1 Creamos cosas buenas para la vida.
INFORMACIÓN DE LA REGISTRACIÓN DE LA FCC Su equipo telefónico de la GE ha sido registrado con la Comisión Federal de Comunicaciones (FCC) y está en acuerdo con las Partes 15 y 68 de las Regulaciones y Reglas de la FCC. 1 Notificación a la Compañía Telefónica Local Al fondo de este equipo Ud. hallará un rótulo indicando, entre otra información, el número de la Registración con la FCC y el Número del Equivalente Timbre (REN) para este equipo. Ud.
INFORMACIÓN DE INTERFERENCIAS Este artefacto cumple con la Parte 15 de las Reglas de la FCC. Su funcionamiento es sujeto a las dos condiciones siguientes: (l) Este artefacto no puede causar interferencia dañosa, y (2) Este artefacto debe aceptar cualquier interferencia recibida, incluyendo interferencia que puede causar un funcionamiento no deseado. Este equipo ha sido probado y cumple con los límites para un artefacto digital de la Clase B, de conformidad con la Parte 15 de las Reglas de la FCC.
TABLA DE CONTENIDO INFORMACIÓN DE LA REGISTRACIÓN DE LA FCC ...................................... 2 INFORMACIÓN DE INTERFERENCIAS ........................................................ 3 COMPATIBILIDAD CON AUDÍFONOS ........................................................ 3 INTRODUCCIÓN .................................................................................. 5 IDENTIFICACIÓN DE LLAMADAS CON LLAMADA EN ESPERA ................. 5 ANTES DE COMENZAR .................................................
INTRODUCCIÓN Su teléfono con Identificador de Llamadas almacena y muestra información específica, siempre y cuando su compañía telefónica local ofrezca el servicio de Identificador de Llamadas o algún servicio similar de identificación a sus suscriptores. Usted debe suscribirse a alguno de estos servicios para poder aprovechar este aparato. Su Identificador de Llamadas le permite: • Identificar a la persona que llama antes de contestar el teléfono. • Ver la hora y fecha de cada llamada que entra.
ANTES DE COMENZAR LISTA DE PARTES Asegúrese de que su paquete incluye los siguientes artículos: Cable corto Store Quick Dial A DEF GHI JKL MNO PQRS TUV WXYZ * OPER # 4 7 RINGER VOLUME OFF LO Caller ID B ABC 1 2 5 8 0 3 6 9 HI Volume Memory Cable espiral Cable de la línea telefónica Base Redial Flash Auricular REQUERIMIENTOS DE CONTACTO MODULAR Usted necesita un contacto modular tipo RJ11, que es el tipo de contacto telefónico más común y se parece al contacto dibujado aquí.
INSTALACIÓN DE LAS BATERÍAS Su teléfono con Identificador de Llamadas usa 4 baterías alkalinas tamaño “AA” para almacenar datos del Identificador de Llamadas y para los números que usted usa para re-discado de memoria. IMPORTANTE: Usted tendrá aproximadamente 60 segundos para cambiar las baterías antes de que los datos almacenados en la memoria del auricular se pierdan. Por favor lea las instrucciones antes de cambiar las baterías y tenga las baterías listas para ser cambiadas de antemano. 1.
PARA PROGRAMAR EL MENÚ DEL IDENTIFICADOR DE LLAMADAS Usted no debería conectar el teléfono en el contacto de la pared mientras está programando el menú del Indicador de Llamadas. Si entrara una llamada, el cambio se invalidaría si aún no había sido salvado. El teléfono debe indicar xx CALLS antes de que usted pueda inscribir el menú para programar. CALLER ID PHONE SETUP MENU delete dial review 1.
PARA PROGRAMAR SU CÓDIGO DE ÁREA LOCAL El teléfono usa el área local programada para determinar el formato de números que se muestra cuando se recibe una señal válida del Identificador de Llamadas y también se usa para la función de re-discado para contestar la llamada. 1. Oprima y sostenga la ecla de revisar (“REVIEW”) y flecha hacia arriba y después oprima y sostenga la tecla de revisar. (“REVISAR”) y flecha hacia abajo. Continue sosteniendo ambas teclas durante 3 segundos.
PARA PROGRAMAR EL IDIOMA DE LA PANTALLA DEL IDENTIFICADOR DE LLAMADAS (CID) Este ajuste cambia los mensajes del Identificador de Llamadas a ser mostrados en Inglés, Francés o Español. 1. Oprima y sostenga la ecla de revisar (“REVIEW”) y flecha hacia arriba y después oprima y sostenga la tecla de revisar. (“REVISAR”) y flecha hacia abajo. Continue sosteniendo ambas teclas durante 3 segundos. La indicación para programar el menú (SETUP MENU ^ v ) aparecerá en el visor. 2.
PARA PROGRAMAR LA MODALIDAD PARA MARCAR Este ajuste le permite seleccionar la modalidad para discar en tono (tone) o rotatorio (pulse). 1. Oprima y sostenga la ecla de revisar (“REVIEW”) y flecha hacia arriba y después oprima y sostenga la tecla de revisar. (“REVISAR”) y flecha hacia abajo. Continue sosteniendo ambas teclas durante 3 segundos. La indicación para programar el menú (SETUP MENU ^ v ) aparecerá en el visor. 2.
PARA INSTALAR EL TELÉFONO PARA INSTALAR SOBRE SUPERFICIE PLANA 1. Conecte el cable espiral al auricular. Conecte el otro extremo al contacto en el extremo inferior de la base. 2. Conecte el cable liso largo al contacto en la parte inferior de la base. Conecte el otro extremo en el contacto de la pared 3. Ponga el selector del timbre (“RINGER”) en la base en la posición “HI”. • LO = El sonido será más bajo • OFF = El teléfono no timbrará.
PARA MONTAR SOBRE PARED 1. Conecte el cable liso corto al contacto en la parte inferior de la base y conecte el otro extremo a un contacto telefónico de pared. 2. Pase el cable corto a través de las ranuras para que el área de la superficie de la base esté plana y lista para montar en la pared. 3.
FUNCIONES DEL IDENTIFICADOR DE LLAMADAS PROGRAMACIÓN DEL RESUMEN DE LLAMADAS La Pantalla Resumen AM PM muestra la hora actual, la fecha actual y el número de nuevas llamadas listas para ser revisadas. Esto se muestra hasta que cualquier botón sea oprimido. A los 10 segundos de recibir una llamada nueva, la Pantalla Resumen será mostrada y el indicador de llamada nueva parpadeará. NOTA: El número de llamadas nuevas se muestra hasta que alguna de las llamadas nuevas haya sido revisada.
NOTA: Si ningún botón del Identificador de Llamadas es oprimido durante 5 segundos después de haber oprimido el botón “CALLER ID”, el teléfono volverá a ser asegurado. PARA REVISAR DATOS DE LLAMADAS • Oprima el botón “REVIEW” flecha arriba o “REVIEW” flecha abajo para ver el dato de la llamada más nueva. • Oprima el botón “REVIEW” flecha abajo para deslizarse por los datos de llamadas, desde la más reciente hacia la más antigua.
SI USTED PROGRAMÓ SU CÓDIGO DE ÁREA LOCAL EN SU MENÚ DE PROGRAMACIÓN. 1. Use los botones “REVIEW” hacia arriba o abajo para que la pantalla muestre el número que usted desea discar. • Si usted ve un número con 7 dígitos (por ejemplo 5551234), entonces esa llamada fué recibida desde su misma área de larga distancia. Sin embargo, esto no garantiza que la llamada es “local”.
2. Vea los pasos 2 a 4 en la sección anterior para completar la secuencia de re-discado. NOTA: Si sólo aparece en la pantalla PICKUP PHONE, no puede hacerse ningún otro cambio. La información enviada desde la compañía telefónica se sabe que es válida y el número puede ser discado para contestar la llamada (disponible únicamente en ciertas áreas). Una vez que usted levanta el auricular, el número será automáticamente discado.
MENSAJES INDICADORES A continuación se da la lista de los mensajes que aparecen en el aparato: NO LLAMADA LLAMADA DESCONOCIDA REMPLACE LA PILA LOW LLAMADA BLOQUEADA ERROR NO HAY INFORMACIÓN PRINCIPIO/FIN 18 La memoria está vacía. La llamada que está entrando no tiene servicio de Identificador de Llamadas o el área de servicio de la persona que llama no está asociado con el suyo.
INFORMACIÓN BÁSICA DEL TELÉFONO PARA CAMBIAR EL VOLUMEN Usted puede controlar el nivel de volumen a escuchar con el botón de volumen, que tiene por lo menos 3 niveles. Permanece en el último nivel programado hasta que usted lo cambie. En el nivel más bajo, el teléfono pita una vez. PARA RE-DISCAR UN NÚMERO Si un número que usted marca está ocupado o si usted quiere llamar al último número que usted marcó (hasta 32 dígitos), use el botón “REDIAL”. 1. Levante el auricular. 2. Oprima REDIAL. 3.
PARA USAR FUNCIONES DE LA MEMORIA Antes de que usted almacene un número en la memoria, asegúrese de que la modalidad de marcar es correcta para el tipo de teléfono que está usted usando. La modalidad programada de fábrica (“default”) es de tono (“touch-tone”), así que si usted tiene servicio rotatorio o de pulso (“rotary”), usted debe primero cambiar la modalidad. Vea “Para Programar la Modalidad para Marcar.” NÚMEROS DE EMERGENCIA/DISCADO RÁPIDO 1. Levante el auricular. 2.
CÓMO CAMBIAR UN NÚMERO ALMACENADO Repita la secuencia de discado. El número nuevo reemplazará al número antiguo en la localización de la memoria. PARA BORRAR UN NÚMERO ALMACENADO 1. Levante el auricular. 2. Oprima el botón de almacenar (“STORE”) 3. Oprima “STORE” nuevamente. 4. Oprima la localización de la memoria (A, B, 0-9) que va a ser borrada. PARA DISCAR UN NÚMERO DE DISCADO RÁPIDO 1. Levante el auricular. 2. Oprima el botón de Discado Rápido (“Quick Dial”) en la localización A o B.
Usted puede necesitar ajustar la duración de una pausa . Puede ser ajustada de 1 a 9 segundos. El tiempo programado de fábrica (“default”) es 4 segundos. 1. Levante el auricular. 2. Oprima el botón de almacenar (“STORE”) 3. Oprima 1-9 (1=1 segundo, 2=2 segundos, etc.) 4. Oprima “STORE” nuevamente 5. Oprima el botón “PAUSE (REDIAL)” para salvar. CENTELLEO (“FLASH”) Esta función se utiliza para para activar los servicios especiales para llamar que son disponibles a través de su compañía telefónica local.
DETECCIÓN DE AVERÍAS NO HAY TONO DE MARCAR • Cheque todo el cableado para asegurarse de que todas las conexiones están firmemente aseguradas y no dañadas. • Cheque el gancho de colgar (Hookswitch): ¿Regresa a su lugar completamente cuando el auricular es descolgado? LA PANTALLA EN BLANCO • Cambie las baterías • Cheque que las baterías están adecuadamente instaladas.
deberá no ser mayor que el número “REN” –Número de Equivalencia de Timbrado para su área. Vea las especificaciones en la sección de la Comisión Federal de Comunicaciones -FCC-.) • Lleve a cabo el chequeo del primer problema de esta sección.
INDICE A Antes de Comenzar 6 C Centelleo (“FLASH”) 22 Cómo cambiar un número almacenado 21 Cómo obtener servicios de mantenimiento 24 D Detección de Averías 23 F Funciones del Identificador de Llamadas 14 G Garantía limitada 27 I Identificación de llamadas con llamada en espera 5 Información Básica del Teléfono 19 Información de Interferencias 3 Información de la Registración de la FCC 2 Información Importante para la Instalación 6 Instalación de las Baterías 7 Instalación yProgramación 6 Introducción
P Para Borrar Datos de Llamadas 15 Para Borrar un Número Almacenado 21 Para Cambiar el Volumen 19 Para discar (contestar) 15 Para Discar Números Llamados Frecuentemente 21 Para Discar un Número de Discado Rápido 21 Para Instalar el Teléfono 12 Para Instalar sobre Superficie Plana 12 Para Montar sobre Pared 13 Para programar el Contraste en la pantalla de CID 10 Para programar el Idioma de la Pantalla del Identi 10 Para Programar el Menú del Identificador de Llamad 8 Para programar la modalidad para marcar 1
GARANTÍA LIMITADA Su garantía cubre: • Todo defecto de materiales o mano de obra Vigencia de la garantía: • Dos años a partir de la fecha de compra (El período de la garantía para los aparatos de alquiler comienza el primer día de alquiler 0 45 días a partir de la fecha de envío a la empresa de alquiler, cualquiera sea la fecha que cae primero.) Responsabilidad de la compañía: • Brindarle un aparato nuevo o, si lo consideramos necesario, un aparato reacondicionado.
P.O. Box 1976, Indianapolis, IN 46206 © 1999 Thomson Consumer Electronics, Inc. Trademark(s) ® Registered Model 2-9191 Marca(s) Registrada(s) 15394130 (Rev.