
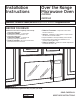
Installation Instructions


8
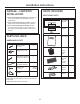
Find the studs, using one of the following
methods:
A. Stud finder – a magnetic device which
locates nails.
OR
B. Use a hammer to tap lightly across the
mounting surface to find a solid sound.
This will indicate a stud location.
After locating the stud(s), find the center by
probing the wall with a small nail to find the
edges of the stud. Then place a mark halfway between
the edges. The center of any adjacent
studs should be 16” or 24” from this mark.
Draw a line down the center of the studs.
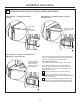
THE OVEN MUST BE CONNECTED TO AT LEAST ONE
WALL STUD.
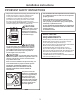
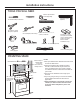
1
Remove the turntable, installation instructions,
filters, exhaust adaptor, damper, shelf and the small
hardware bag. Do not remove the foam packing
protecting the front of the oven.
Fold back all 4 carton flaps fully against carton sides.
Then carefully roll the oven and carton over onto
the top side. The oven should be resting in the foam
packing.
REMOVING THE OVEN FROM
7+(&$57215(029,1*7+(
MOUNTING PLATE
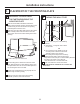
FINDING THE WALL STUDS
B
.
A
.
2
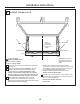
PLACEMENT OF THE MOUNTING PLATE
1
Wall
Studs
Center
3
Carton
Pull the carton up and off the oven.
Open the oven door and remove any packing
material, if present, from inside the oven.
Foam packing
Installation Instructions
2
3
6
Set the oven upright. Remove and properly discard
plastic bags and foam packing.
5
1
The mounting plate is attached to the back of the
oven. Remove the two screws holding it to the oven.
The plate will be used as the rear wall template and
for mounting the oven to the wall.
4