Write the model ami serial numbers here: Model # Serial # York can find thee on a label on the front of the range behind the Kick panel or broiler drawer www. AmericanaAppliances.com Non-Self-Cleaning Gas Ranges Safety Instructions Operating Instructions Aluminum Foil Clock and Timer O Baking and Roasting .. Broiling Broiling Guide .. Oven Control... Power Outage Preheating 12 Surface Cooking . BQ Thermostat Adjustment... 15 Care and Cleaning Air Vents an and Grid limbless |. .
Operating Instructions IMPORTANT SAFETY INFORMATION. READ ALL INSTRUCTIONS BEFORE USING. Installation Instructions Troubleshooting Tips Consumer Support A WARNING! For your safety, the information in this manual must be followed to minimize the risk of fire or explosion, electric shock, root prevent property damage, personal injury, or loss of life.
www.AmericanaAppliances.com A WARNING! IMPORTANT SAFETY NOTICE The California Safe Drinking Water and Toxic Enforcement Act requires the Governor of California to publish a list of substances known to the state to cause birth defects or other reproductive harm, and requires businesses to wan customers of potential exposure to such substances.
IMPORTANT SAFETY INFORMATION. READ ALL INSTRUCTIONS BEFORE USING. Installation Instructions | Operating Instructions troubleshooting Tips Consumer Support i.
www.AmericanaAppliances.com COOK MEAT AND POULTRY THOROUGHLY... Cook meat and poultry thoroughly—meat to at least an INTERNAL temperature of 160°F and poultry to at least an INTERNAL temperature of 180°F. Cooking to these temperatures usually protects against forborne illness. OVEN Stand away from the range when opening the door of a hot oven, The hot air and steam that escape can cause burns to hands, face and eyes.
Installation Instructions | Operating Instructions Troubleshooting Tips Consumer Support IMPORTANT SAFETY INFORMATION. READ ALL INSTRUCTIONS BEFORE USING. A WARNING! SURFACE BURNERS Use proper pan pans that are unstable or easily tipped. Select cookware having fiat bottoms large enough to cover burner grates. To avoid spillovers, make sure cookware is large enough to contain the food properly.
www.AmericanaAppliances.com fess SURFACE BURNERS (cont) not lift the cook top on sealed burner models. Lifting the cook top can lead to damage and improper operation of the range. © removing cookware. i When a pilot goes out (on standing pilot models), you will detect a faint odor of gas as your signal to relight the pilot. When relighting the pilot, make sure burner controls are in the off position, and follow instructions in this book ro relight.
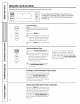
Using the gas surface burners. Before Lighting a Gas Burner they should be used at all des. Make save all boomers are in place. i Make sure all grates on the age are properly placed before using any burner. Throughout this manual, features and appearance may vary from your model. If drip pans are supplied with your ranges After Lighting a Gas Burner 2 Do not operate the burner for an extended period of time without cookware on the grate, The finish on the grate may chip without cookware to absorb the heat.
www.AmericanaAppliances.com How to Select Flame Size For safe handling of cookware, never let the flames extend up the sides of the cookware. Watch the flame, not the kola, as you educe heat. When Fast beating is devised, the flare size on a gas boomer should watch the cookware you are using.
Using the clock and timer. Throughout this manual, features and appearance may vary from your model. [LECHER, | TIMER You have the choice of having the timer show the time counting down or the time of day. In either case, the timer will signal at the end of the timer period to alert you that the time is up. DNIESTER CLOCK To Set the Clock NOTE: When you first plug in the range or after a power failure, the entire Clock/Timer display will fight up. [7] Press the CLOCK pad.
Using the oven. www.AmericanaAppliances.com To avoid possible burns, place the racks in the desired position before you turn the oven on. The vane has 5 rack positions. It also bas a special low rack position (R) for extra large rems. Shah as a large turkey. Before You Begin...
Using the oven. The oven has a special low rack (B) position just above the oven bottom Use jt when extra cooking space is needed, for example, when cooking 2 large turkey, The rack is not designed to slide out at this position. How to Set the Oven for Baking or Roasting Your oven is not designed for open-door cooking. [71 Close the oven door. Tarn the OVEN CONTROL knob 10 the desired temperate, 2 Check goad for oneness at minimum time on recipe. Cook longer if necessary.
www.AmericanaAppliances.com How to Set the Oven for Broiling Broiling is cooking food by direct heat from above the food. Most fish and render cuts of meat can be railed. Fallow these directions t keep spattering ane smoking (© a murmuring, Your range has a compartment below the oven for broiling Both the oven and broiler compartment doors must he closed during broiling.
Safety Instructions Installation Instructions Troubleshooting Tips Consumer Support Using the oven. The size, weight, thickness, starting temperature and sour preference of oneness will affect broiling times. This guide js based on meats a refrigerator temperature. The 1.8, Department of Agriculture says “Rare beef is popular, but you should know that cooking i to only 140°F means some food poisoning organisms may survive.” (Source: food ur Kitchen Gul SDA Bev.
Adjust the oven it yourself! www.AmericanaAppliances.com You may find that your new oven cooks differently than the one it replaced. Use your new oven for a few weeks to become more familiar with it. If you still think your new oven is too hot or too cold, you can adjust the thermostat yourself. Do not use thermometers, such as those found in grocery stores, to check the temperature setting of your oven. These thermometers may vary 20-40 degrees.
Care and cleaning of the range. Safety Instructions Be sure electrical power is off and all surfaces are cool before cleaning any part of the range. A WARNING G: If your range is removed for cleaning, servicing or any reason, be sure the anti-tip device is re-engaged properly when the range is replaced. Failure to take this precaution could result in tipping of the range and cause injury.
laird Gothic Sealed Burner Assemblies {on some models) Ton all controls OFF before vesting the burner parts and drip pans (if so equipped). The burner grates, caps, burner beads and Arp pans (if so equipped) can be lifted off, waking thew easy to dean. The electrodes ate not removable. NOTE: Do not use steel wool or scouring powders to clean the boomers. A CAU Tl ON: Do not operate the cookie without all burner parts, drip pans {if so equipped) and grates in place. NOTE: Do not lift the cook top.
Care and cleaning of the range. Safety Instructions ties a sewing needle or twist-fie to unclog the small hole in the burner head Installation Instructions Troubleshooting Tips Consumer Support 18 Burner Caps and Heads (on sealed burners only} NOTE: Before removing the boomer taps and heads, remember their size and location. Replace them in the same location after cleaning. Buber caps Lift off when cool. Wash bummer caps in hot. soa er and rinse with clean water.
www.AmericanaAppliances.com Cook top Surface To void damaging the peekaboo enamel ce of the cook top and ww prevent it from becoming dull, clean ap spills right away. Foods with a lot of acid (tomatoes, sauerkraut, fruit juices, tee) or foods with high sugar content could cause a dull spot if alleviated to set. When the surface has cooled. wash and rinse. For the s such as fat spattering, ete, wash with soap and water once th surface has cooled. Then rinse and polish with a dry doth.
Care and cleaning of the range. Safety Instructions Lit the door straight up and aff the hinges. The gasket is designed with a gap ai the bottom to allow foc proper sir circulation. Du nut rb ar teal tre door gasket has an extremely low resistance to abrasion, Jf you native the gasket beaming war, frayed or damaged iv any way arf it has became displaced on the road, you should have it replaced Installation Instructions Lift-Off Oven Door The ven door is removable, bit 1 is heavy.
www.AmericanaAppliances.com Broiler Pan and Grid After broiling, remove the broiler pan from the oven. Remove the grid from the pao. Carefully pour out grease from the pan inch a proper container, Wash and rinse the broiler pan and grid in hot water with a fulfilled or plastic scouting pad. if food has burned on, sprinkle the grid with detergent while hot and cover with wet paper towels or a dishcloth, Soaking the pan will remove burned-on foods.
Care and cleaning of the range. List Ir Oven Racks Clean the racks with an abrasive denser or scouring pad. After cleaning, rinse the racks with clean water and dry with a clean cloth, Installation Instructions troubleshooting Tips Consumer Support Porcelain Oven Interior {on all models except continuous-cleaning models) With prop care, the porcelain enamel interior will retain its attractive finish for many yeas. Sap and water will normally do the job.
www.AmericanaAppliances.com Special Care of Continuous-Cleaning Oven Interior (on some models) The special coating is a porous ceramic material, which is dark in color and feels slightly rough to the touch. The Continuous-Cleaning Oven cleans itself while cooking, The over walls are finished with a special coating that cannot be deaden the nasal caner with soap. detergents, steel wool pads, commercial oven cleanses, coarse abrasive pads or coarse brushes.
Installation Instructions Range If you have questions, call 1.800.432.2737 IN THE COMMONWEALTH OF MASSACHUSETTS * This product must be installed by a licensed plumber or gas fitter, * When using ball-type gas shut-off valves, they shall be the handle type. + A flexible gas connector, when used, must not exceed 3 feet. 24 BEFORE YOU BEGIN Read these instructions completely and carefully.
Installation Instructions FOR YOUR SAFETY Do not store or use combustible materials, gasoline or other flammable vapors and liquids in the vicinity of this or any other appliance. If you smell gas: [1] Open windows. [2] Don touch electrical switches, Extinguish any open flame. [4] immediately call your gas supplier.
Installation Instructions A WARNING! INSTALLATION SAFETY INSTRUCTIONS Read these instructions completely and carefully. Improper installation, adjustment, alteration, service or maintenance can cause injury or property damage. Refer to this manual. For assistance or additional information, consult a qualified installer, service agency, manufacturer {dealer} or the gas supplier. Never reuse old flexible connectors. The use of old flexible connectors can cause gas leaks and personal injury.
Installation Instructions DIMENSIONS AND CLEARANCES Provide adequate clearances between the range and adjacent combustible surfaces. These dimensions must be met for safe use of your range. The location of the electrical outlet and pipe opening (see Gas Pipe and Electric Outlet Locations) may be adjusted to meet specific requirements. The range may be placed with 0” clearance (flush) at the back wall.
Installation Instructions A WARNING! ANTI-TIP DEVICE WARNING « Ali ranges can tip. « BURNS or other SERIOUS INJURIES can result. + INSTALL and CHECK the ANTE-TIP bracket following the instructions supplied with the bracket. To reduce the risk of tipping the range, the range must be secured by a properly installed anti-tip bracket. See installation instructions shipped with the bracket for complete details before attempting to install.
Installation Instructions [11 PROVIDE ADEQUATE GAS SUPPLY Your range is designed to operate at a pressure of 4” of water column on natural gas or, if designed for LP gas (propane or butane), 10” of water column. Make sure you are supplying your range with the type of gas for which it is designed. This range is convertible for use on natural or propane gas.
Installation Instructions GAS PIPE AND ELECTRICAL OUTLET LOCATIONS (for models with Sealed Burners) This area allows for flush ar | range installation with 2% through-the-wall connection i of pipe valve and rear wall 120V outlet, Shortest connection from hard pipe stub location to range hookup.
Installation Instructions FLEXIBLE CONNECTOR HOOKUP (for models equipped with Sealed Burners} a> Pressure regulator. [ee AL a Adapter 3 "| «——Flex connector {6 feet maximum} Installer: Inform the consumer of the location of the gas shut-off valve.
Installation Instructions FLEXIBLE CONNECTOR HOOKUP {for models equipped with Standard Twin Burners) Pressure regulator Adapter | EEE hr Manifold =» | pipe i Flex connector —m i {8 feat maximum) N Adapter wd Installer: Inform the consumer of i the location of the Gas shut-off gas shut-off valve.
Installation Instructions ELECTRICAL CONNECTIONS Electrical Requirements 120-volt, 60 Hertz, properly grounded branch circuit protected by a 15-amp or 20-amp circuit breaker or time-delay fuse. Extension Cord Cautions Because of potential safety hazards associated with certain conditions, we strongly recommend against the use of an extension cord.
Installation Instructions ELECTRICAL CONNECTIONS {cont.} When disconnecting the power cord from the adapter, always hold the adapter with one hand. If this is not done, the adapter ground terminal is very likely to break with repeated use. Should this happen, DO NOT USE the appliance until a proper ground has again been established. Usage Situations where Appliance Power Cord will be Disconnected Frequently.
Installation Instructions [5] LIGHT THE PILOTS {cont.) Adjust the Surface Burner Pilots if Necessary CAUTION — Make sure the surface burner control knobs are in the OFF position before attempting to adjust the pilots. 1. Raise the cook top. 2. Locate the pilot adjustment screw. It can be accessed through the small hole near the center of the manifold panel. 3. To adjust, use a blade-type screwdriver with a shaft diameter of less than or equal to 3/16”.
Installation Instructions [5] LIGHT THE PILOTS (cont.) [E] Adjust Broil Buber Air Adjustment Shutter on Models with a Broiler Drawer, [D] Check Ignition of Oven Burner if Necessary {cont.} The oven is designed to operate quietly and To Remove the Broiler Drawer: automatically. To operate the oven, turn the OVEN CONTROL knob to a setting above 260°F. After 30-90 seconds, the oven burner will ignite and burn until the set temperature 2. Grasp handle, lift and pull broiler is reached.
Installation Instructions [5] LIGHT THE PILOTS {cont.) [F] Check Ignition of Surface Burners Operation of all cook top and oven burners should be checked after pilots have been lighted {on some models} and the range and gas supply lines have been carefully checked for leaks. Standing Pilot Models Select a top burner knob and simultaneously push in and turn to HI position. The burner should light within a few seconds. Try each burner in succession until all burners have been checked.
Installation Instructions [6] LEVEL THE RANGE Install the oven racks in the oven and position the range where it will be installed. Raise range leg leveler Raise range {on some models) {on some models) Check for levelness by placing a spirit level or a cup, partially filled with water, on one of the oven racks. If using a spirit level, take two readings— with the level placed diagonally first in one direction and then the other. Remove the broiler drawer or kick panel.
Installation Instructions INSTALL THE ANTI-TIP DEVICE {cont} 12] For wood construction, drill a pilot hole at an angle of 20° from the horizontal. A nail or awl may be used if a drill is not available. Mount the Anti-Tip device with the screw provided. For cement or concrete construction, you will need a 1/4” x 1¥%” lag bolt and a 1/2” 0.D. sleeve anchor, which are not provided. Drill the recommended size hole for the hardware.
Before you call for service... 8 5 Troubleshooting Tips g Save time and money! Review the charts on the following = pages first and you may not need to call for service. Problem | Possible Causes What To Do Top burners do not light Plug on range snot completely * Make sure electrical plug is plugged into a live, or do nat burn evenly inserted in the electrical outlet, properly grounded outer.
www.AmericanaAppliances.com Problem. Possible Causes What To Do S$ Lack does pot work Plug on range is not completely * Make sure electrical plug is plugged tut a live, inserted in the electrical outlet. proper grounded outlet, A fuse in your home may be * Replace the fuse or reset the circuit breaker. o blown or the circuit breaker 2 tripped. 2 Oven controls improperly set. * See the Using the clock and timer section. Eg @ Food does not bake Oven controls improperly set. * See the Using the oven section.
Safety Instructions Before you call for service... “Crackling "or Troubleshooting Tips Possible Causes What To Do Installation Instructions | Operating Instructions This is the sound of the * This is normal. “popping” sound. metal heating and cooling during cooking. Rainbow effecting This is caused by the heat * This is normal the oven window treatment applied to the {on some models) oven window. Power outage, Rawer outage or surge. Reset the clock.
Accessories. Looking For Something More? 158! You can find these accessories and many more by calling 800.626.2002 (during normal business * hours). Have your model number ready.
Safety Instructions Installation Instructions | Operating Instructions Troubleshooting Tips Gas Range Warranty. 7 All warranty services for Americana™ are provided by GF Factory Staple your receipt here. (48 Service Centers, or an authorized Customer Care” technician. Proof of the original purchase To schedule service, call 800.432.2737. Please have serial number date is needed to obtain service and model number available when calling for service. under the warranty.
Consumer Support. Schedule Service Expert GE repair ser only one step away front your door. Schedule service: 800.432.2737 during normal business hours, In Canada, call 1.806.561.3344 (sour convenience by calling Extended Warranties Purchase a GE extended warranty and learn about special di in effect. You can purchase it by calling 800.626.2224 during normal busing will still be there after our warranty expires. In Canada, call 1.888.261.2133 nts that ave available while your warranty is still s hours.