Dryers GEAppliances.com Safety Instructions . . . . . . . . 2–4 Operating Instructions Control Panels . . . . . . . . . . . . . . .5 Control Settings . . . . . . . . . . . . . .6 Dryer Features . . . . . . . . . . . . .7, 8 Loading and Using the Dryer . . .9 Reversing the Door . . . . . . . . . . .8 Venting the Dryer . . . . . . . . . . .10 Troubleshooting Tips . . . . 11, 12 Owner’s Manual DBB5000 DHDSR48 DTSR495 DWSR405 DWXR485 EED6500 EGD6500 Consumer Support Consumer Support . . .
Safety Instructions IMPORTANT SAFETY INFORMATION. READ ALL INSTRUCTIONS BEFORE USING. WARNING! For your safety, the information in this manual must be followed to minimize the risk of fire or explosion, electric shock, or to prevent property damage, personal injury, or death. ■ Do not store or use gasoline or other flammable vapors and liquids in the vicinity of this or any other appliance. ■ Installation and service must be performed by a qualified installer, service agency or the gas supplier.
GEAppliances.com Safety Instructions YOUR LAUNDRY AREA ■ Keep the area underneath and around your appliances free of combustible materials (lint, paper, rags, etc.), gasoline, chemicals and other flammable vapors and liquids. ■ Keep all laundry aids (such as detergents, bleaches, etc.) out of the reach of children, preferably in a locked cabinet. Observe all warnings on container labels to avoid injury. ■ Keep the floor around your appliances clean and dry to reduce the possibility of slipping.
Safety Instructions IMPORTANT SAFETY INFORMATION. READ ALL INSTRUCTIONS BEFORE USING. WARNING! WHEN USING YOUR DRYER (cont.) ■ Never attempt to operate this appliance if it is damaged, malfunctioning, partially disassembled, or has missing or broken parts, including a damaged cord or plug. Operating Instructions ■ The interior of the machine and the exhaust duct connection inside the dryer should be cleaned at least once a year by a qualified technician. See the Loading and Using the Dryer section.
About the dryer control panel. GEAppliances.com You can locate your model number on the label on the front of the dryer behind the door. Throughout this manual, features and appearance may vary from your model.
Safety Instructions About the control settings. IMPORTANT: Clean the lint filter each time you use the dryer. 1 Fabric Care COTTONS For regular to heavy cottons. REG. HEAT EASY CARE or For synthetics, blends, delicates and items labeled permanent press. PERMA PRESS MED. HEAT FLUFF For fluffing items without heat. Use the TIMED DRY cycle. NO HEAT Operating Instructions DELICATES For delicates, synthetics and items labeled tumble dry low.
About the dryer features. GEAppliances.com Safety Instructions Wrinkle Care Use this option to minimize the wrinkles in clothes. It provides approximately 15 minutes of no-heat tumbling after the clothes are dry. If WRINKLE CARE is not ON, the dryer will stop once the timer reaches the WRINKLE CARE mark on the cycle dial. This option can only be used with the COTTONS, EASY CARE and DELICATES cycles.
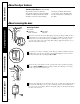
Safety Instructions About the dryer features. Stainless Steel Drum (on some models) The stainless steel used to make the dryer drum provides the highest reliability available in a GE dryer. If the dryer drum should be scratched or dented during normal use, the drum will not rust or corrode. These surface blemishes will not affect the function or durability of the drum. About reversing the door.
About loading and using the dryer. GEAppliances.com Safety Instructions Always follow the fabric manufacturer’s care label when laundering. Sorting and Loading Hints As a general rule, if clothes are sorted properly for the washer, they are sorted properly for the dryer. Do not add fabric softener sheets once the load has become warm. They may cause fabric softener stains.
Safety Instructions About venting the dryer. For the best drying performance the dryer needs to be properly vented. The dryer will use more energy and run longer if it is not vented to the below specifications. Carefully follow the details on Exhausting in the Installation Instructions. ■ Use only rigid metal 4 ″ diameter ductwork inside the dryer cabinet. Use only rigid metal or flexible metal 4″ diameter ductwork for exhausting to the outside. ■ Do not use plastic or other combustible ductwork.
Before you call for service… GEAppliances.com Safety Instructions Troubleshooting Tips Save time and money! Review the charts on the following pages, or visit GEAppliances.com. You may not need to call for service. What To Do Dryer doesn’t start Dryer is unplugged • Make sure the dryer plug is pushed completely into the outlet. Fuse is blown/circuit breaker is tripped • Check the house fuse/circuit breaker box and replace fuse or reset breaker. NOTE: Most electric dryers use two fuses/breakers.
Problem Possible Causes What To Do Clothes take too long to dry Improper sorting • Separate heavy items from lightweight items (generally, a well-sorted washer load is a well-sorted dryer load). Large loads of heavy fabrics (like beach towels) • Large, heavy fabrics contain more moisture and take longer to dry. Separate large, heavy fabrics into smaller loads to speed drying time. Controls improperly set • Match control settings to the load you are drying.
GE Service Protection Plus™ GE, a name recognized worldwide for quality and dependability, offers you Service Protection Plus ™—comprehensive protection on all your appliances— No Matter What Brand! Benefits Include: • Backed by GE • All brands covered • Unlimited service calls • All parts and labor costs included • No out-of-pocket expenses • No hidden deductibles • One 800 number to call We’ll Cover Any Appliance. Anywhere. Anytime.
Consumer Product Ownership Registration Dear Customer: Thank you for purchasing our product and thank you for placing your confidence in us. We are proud to have you as a customer! Follow these three steps to protect your new appliance investment: 1 2 3 Complete and mail your Consumer Product Ownership Registration today. Have the peace of mind of knowing we can contact you in the unlikely event of a safety modification. Read your Owner’s Manual carefully.
GE Dryer Warranty. Staple your receipt here. Proof of the original purchase date is needed to obtain service under the warranty. For The Period Of: We Will Replace: One Year From the date of the original purchase Any part of the dryer which fails due to a defect in materials or workmanship. During this full one-year warranty, GE will also provide, free of charge, all labor and related service costs to replace the defective part.
Consumer Support. GE Appliances Website GEAppliances.com Have a question or need assistance with your appliance? Try the GE Appliances Website 24 hours a day, any day of the year! For greater convenience and faster service, you can now download Owner’s Manuals, order parts, catalogs, or even schedule service on-line. You can also “Ask Our Team of Experts™” your questions, and so much more... Schedule Service GEAppliances.com Expert GE repair service is only one step away from your door.