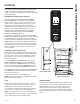
REFRIGERATORS Bottom-Freezer SAFETY INFORMATION . . . . . . . . .3 USING THE REFRIGERATOR Controls . . . . . . . . . . . . . . . . . . . . . . . . . . . . . .5 Shelves and Racks and Pans . . . . . . . . . . . .6 Door Bins . . . . . . . . . . . . . . . . . . . . . . . . . . . . .7 Freezer Drawers . . . . . . . . . . . . . . . . . . . . . . .7 OWNER’S MANUAL & INSTALLATION INSTRUCTIONS GLE12HSLSS GLE12HSPSS CARE AND CLEANING . . . . . . . . . . .
THANK YOU FOR MAKING GE APPLIANCES A PART OF YOUR HOME. Whether you grew up with GE Appliances, or this is your first, we’re happy to have you in the family. We take pride in the craftsmanship, innovation and design that goes into every GE Appliances product, and we think you will too. Among other things, registration of your appliance ensures that we can deliver important product information and warranty details when you need them. Register your GE appliance now online.
READ ALL INSTRUCTIONS BEFORE USING THE APPLIANCE To reduce the risk of fire, explosion, electric shock, or injury when using your refrigerator, follow WARNING these basic safety precautions: Ŷ 7 KLV UHIULJHUDWRU PXVW EH SURSHUO\ LQVWDOOHG DQG ORFDWHG LQ DFFRUGDQFH ZLWK WKH ,QVWDOODWLRQ ,QVWUXFWLRQV EHIRUH LW LV XVHG Ŷ 8QSOXJ WKH UHIULJHUDWRU EHIRUH PDNLQJ UHSDLUV replacing a light bulb, or cleaning. NOTE: Power to the refrigerator cannot be disconnected by any setting on the control panel.
SAFETY INFORMATION IMPORTANT SAFETY INFORMATION READ ALL INSTRUCTIONS BEFORE USING THE APPLIANCE INSTALLATION WARNING EXPLOSION HAZARD .HHS IODPPDEOH PDWHULDOV DQG YDSRUV VXFK DV JDVROLQH DZD\ IURP UHIULJHUDWRU )DLOXUH WR GR VR FDQ UHVXOW LQ ILUH explosion, or death.
The control location for GLE12HSLSS model is on the RXWVLGH RI WKH )UHVK )RRG GRRU )RU */( +6366 PRGHO LW LV RQ WKH OHIW VLGH ZDOO RI WKH LQVLGH RI WKH )UHVK )RRG FRPSDUWPHQW Fridge Freezer TempZone Zone Select Refrigerator Temperature Control 7KLV UHIULJHUDWRU KDV WHPSHUDWXUH ]RQHV Fridge, Freezer, TempZone.
USING THE REFRIGERATOR: Shelves, Racks and Pans Shelves and Racks and Pans CAUTION 'R QRW FOHDQ JODVV VKHOYHV RU FRYHUV Tuck Away Shelf Shelf with Racks with warm water when they are cold. Glass shelves and covers may break if exposed to sudden temperature changes or impact such as bumping or dropping. Tempered glass is designed to shatter into many small pieces if it breaks. NOTE: 'R QRW EORFN DLU RXWOHW E\ SODFLQJ IRRG LWHPV directly against it. Erratic temperatures may result.
Fridge Door Bins To remove door bins, slide bin up over the rib in the door and pull out. To install door bins, slide the bin over the rib in the door. The small bin goes at the top on either set of ribs. Large bins go at the bottom and in the middle. NOTE: Placing the door bins in the wrong locations will FDXVH WKH )UHVK )RRG GRRU QRW WR FORVH Freezer Drawers Upper Drawer Lower Drawer The divider can be placed in 2 positions for better RUJDQL]DWLRQ RI WKH GUDZHU /LIW WKH GLYLGHU RXW WR UHPRYH it.
CARE AND CLEANING Care and Cleaning Cleaning the Outside Directions for Cleaning Outside Surfaces, Door Handles, and Trim DO USE Soft, clean cloth or sponge DO NOT USE Abrasive cloths, scrubbing sponges, scouring or steel wool pads Mild detergent mixed with warm water $SSURYHG VWDLQOHVV VWHHO FOHDQHUV 9LVLW WKH &DIp Appliances parts store for approved stainless steel cleaners: geapplianceparts.
Preparing for Vacation )RU ORQJ YDFDWLRQV RU DEVHQFHV UHPRYH IRRG DQG XQSOXJ WKH UHIULJHUDWRU 8QSOXJ WKH UHIULJHUDWRU 7KLV refrigerator will remember the current setting when you plug it in again. Clean the interior with a baking soda solution of one tablespoon (15 ml) of baking soda to one quart (1 liter) of water. Leave the doors open. ,I DQ LFHPDNHU KDV EHHQ LQVWDOOHG LW PXVW EH WXUQHG RII PRYH WKH VZLWFK WR WKH 2)) SRVLWLRQ RQ WKH SRZHU VZLWFK model.
INSTALLATION INSTRUCTIONS Installation Instructions GLE12HSLSS If you have questions, call 1.800.GE.CARES or visit our Website at: GEAppliances.com. ,Q &DQDGD FDOO or Visit our Website at: geappliances.ca BEFORE YOU BEGIN CLEARANCES Read these instructions completely and carefully. Allow the following clearances for ease of installation, proper air circulation and plumbing and electrical connections.
REVERSING THE DOOR SWING WARNING )ROORZ DOO VWHSV ZKHQ UHYHUVLQJ WKH GRRU VZLQJ )DLOXUH WR IROORZ WKHVH LQVWUXFWLRQV leaving off parts, or overtightening screws, can lead to the door falling off and result in injury and property damage. 1. 8QVFUHZ VFUHZV RQ WRS RI IURQW FDVH 2. Remove top front case cover and cover insert. The cover insert slides out toward the bottom of the cover.
INSTALLATION INSTRUCTIONS Installation Instructions REVERSING THE DOOR SWING (CONT.) WARNING )ROORZ DOO VWHSV ZKHQ UHYHUVLQJ WKH GRRU VZLQJ )DLOXUH WR IROORZ WKHVH LQVWUXFWLRQV leaving off parts, or overtightening screws, can lead to the door falling off and result in injury and property damage. 8. Remove the screw hole covers on the left side of the middle mullion where the new hinge will be installed. Place the screw hole covers over the holes where you removed the old hinge. 12.
Newer refrigerators sound different from older refrigerators. Modern refrigerators have more features and use newer technology. Do you hear what I hear? These sounds are normal. Ŷ The new high HUMMM... WHOOSH... efficiency compressor may run faster and longer than your old refrigerator and you may hear a high-pitched hum or pulsating sound while it is operating. Ŷ You may hear a whooshing sound when the doors FORVH 7KLV LV GXH WR SUHVVXUH HTXDOL]LQJ ZLWKLQ WKH refrigerator. &/,&.6 3236 &5$&.
TROUBLESHOOTING TIPS Troubleshooting Tips... Before you call for service 6DYH WLPH DQG PRQH\ 5HYLHZ WKH FKDUWV RQ WKH IROORZLQJ SDJHV ILUVW DQG \RX PD\ QRW QHHG WR FDOO IRU VHUYLFH ,I needed, service can be scheduled by visiting us online GEAppliances.com RU FDOOLQJ *(&$5(6 ,Q &DQDGD YLVLW GEAppliances.ca RU FDOO Problem Possible Causes What to Do Refrigerator does not operate Refrigerator in defrost cycle. Wait about 30 minutes for defrost cycle to end.
Problem Possible Causes What to Do )UHTXHQW EX]]LQJ VRXQG IURP WKH LFH ,FH PDNHU SRZHU VZLWFK LV LQ WKH 21 6HW WKH SRZHU VZLWFK WR WKH 2)) maker (if installed). position but the water supply to the SRVLWLRQ .HHSLQJ LW LQ WKH 21 SRVLWLRQ refrigerator has not been connected. will damage the water valve. No ice cube production (if ice maker Supply line or shutoff valve is Call a plumber. is installed). clogged. Refrigerator has odor.
LIMITED WARRANTY Refrigerator Limited Warranty For US Customers, DOO ZDUUDQW\ VHUYLFH SURYLGHG E\ RXU )DFWRU\ 6HUYLFH &HQWHUV RU DQ DXWKRUL]HG &XVWRPHU &DUH® technician. To schedule service, on-line, 24 hours a day, visit us at GEAppliances.
Icemaker Accessory Kit IM4D: ,FH PDNHU $Q ,0 ' LFHPDNHU DFFHVVRU\ NLW LV DYDLODEOH DW H[WUD cost. 7R RUGHU FDOO *( $SSOLDQFHV DW *(&$5(6 RU YLVLW GEAppliances.com ,Q &DQDGD visit GEAppliances.ca RU FDOO ON )ROORZ WKH LQVWDOODWLRQ LQVWUXFWLRQV RQ WKH IROORZLQJ pages. You will use these instead of the instructions that come with your icemaker.
ACCESSORY INSTALLATION INSTRUCTIONS Accessory Installation Instructions ,I \RX KDYH TXHVWLRQV FDOO *( $SSOLDQFHV DW 1.800.GE.CARES or visit our Website at: GEAppliances.com. ,Q &DQDGD FDOO 1.800.561.3344 or visit our Website at: geappliances.ca BEFORE YOU BEGIN ITEMS NEEDED FROM IM4D KIT Read these instructions completely and carefully. • IMPORTANT – Save these instructions for local inspector’s use. • IMPORTANT – Observe all governing codes and ordinances.
INSTALLING IM4D ICEMAKER KIT BEFORE YOU BEGIN PLUG IN THE ICEMAKER Read these instructions completely and carefully. Plug the icemaker power cord into the socket making sure the prongs and holes are matched. Press the plug firmly into the socket. Lock the plug in place by clipping the restraints into each side of the plug. Make Hook sure the restraints click into place. Make sure the power cord is still in the hook on back of the icemaker.
ACCESSORY INSTALLATION INSTRUCTIONS Accessory Installation Instructions INSTALLING ICEMAKER IM4D (CONT.) INSTALL THE ICE BUCKET ATTACH WARRANTY LABEL Ɣ 5HPRYH WKH PLGGOH GLYLGHU IURP WKH WRS IUHH]HU drawer. A label is provided with this kit to record the date of installation for warranty purposes. Apply it to the back of the refrigerator. Middle 'LYLGHU KEEP THE MANUAL Ɣ 5HPRYH WKH / VKDSHG LQVHUW E\ XQVFUHZLQJ WKH VFUHZV RQ HDFK HQG ,QVHUW WKH EXWWRQV SURYLGHG into the holes in the ice buc
WATER VALVE ASSEMBLY WARNING To reduce the risk of death or electric shock, you must follow these instructions: Ŷ Unplug the refrigerator before removing any panels. Ŷ Do not contact or damage any wiring while the panel is removed. Ŷ Replace all parts and panels before plugging the refrigerator back in. REMOVE THE COVER Remove the compressor compartment access cover. This requires removing Phillips head screws which attach the cover to the back of the refrigerator case.
ACCESSORY INSTALLATION INSTRUCTIONS Accessory Installation Instructions INSTALLING THE WATER LINE BEFORE YOU BEGIN WHAT YOU WILL NEED 5HFRPPHQGHG FRSSHU ZDWHU VXSSO\ NLWV DUH :; ; :; ; RU :; ; GHSHQGLQJ RQ WKH DPRXQW RI tubing you need.
INSTALLING THE WATER LINE (Continued) WHAT YOU WILL NEED (Continued) 2 Choose a location for the valve that is easily DFFHVVLEOH ,W LV EHVW WR FRQQHFW LQWR WKH VLGH RI a vertical water pipe. When it is necessary to FRQQHFW LQWR D KRUL]RQWDO ZDWHU SLSH PDNH WKH connection to the top or side, rather than at the bottom, to avoid drawing off any sediment from the water pipe.
ACCESSORY INSTALLATION INSTRUCTIONS Accessory Installation Instructions INSTALLING THE WATER LINE (Continued) 5 TIGHTEN THE PIPE CLAMP 7 Tighten the clamp screws until the sealing washer begins to swell. NOTE: 'R QRW RYHUWLJKWHQ RU \RX PD\ FUXVK the tubing. Washer )RU SODVWLF WXELQJ IURP D 6PDUW&RQQHFW Refrigerator Tubing kit, insert the molded end of the tubing into the shutoff valve and tighten compression nut until it is hand tight, then tighten one additional turn with a wrench.
INSTALLING THE WATER LINE (Continued) CONNECT THE TUBING TO THE REFRIGERATOR (Continued) Place the compression nut and ferrule (sleeve) onto the end of the tubing as shown. On SmartConnect™ Refrigerator Tubing kit, the nuts are already assembled to the tubing. ,QVHUW WKH HQG RI WKH WXELQJ LQWR WKH ZDWHU YDOYH connection as far as possible. While holding the tubing, tighten the fitting.
ACCESSORY INSTALLATION INSTRUCTIONS Accessory Installation Instructions Troubleshooting Tips... Before you call for service 6DYH WLPH DQG PRQH\ 5HYLHZ WKH FKDUWV RQ WKH IROORZLQJ SDJHV ILUVW DQG \RX PD\ QRW QHHG WR FDOO IRU VHUYLFH ,I needed, service can be scheduled by visiting us online GEAppliances.com RU FDOOLQJ *(&$5(6 ,Q &DQDGD YLVLW GEAppliances.ca RU FDOO Problem Possible Causes What to Do Automatic icemaker does not work Freezer compartment too warm.
Troubleshooting Tips... Before you call for service Problem Possible Causes What to Do Leaking water around the fill cup Foam in the fill cup from installing the fill tube. ,I WKH ¿OO WXEH ZDV LQVWDOOHG E\ VOLGLQJ it through the back of the refrigerator, it may have picked up pieces of foam as it was pushed through. This foam can interfere ZLWK WKH ZDWHU ÀRZ LQ WKH ¿OO FXS Check the cup and make sure there are no foam pieces. &KHFN WKDW WKH ¿OO WXEH LV FRUUHFWO\ LQVHUWHG LQ WKH ¿OO FXS RSHQLQJ 6H
CONSUMER SUPPORT Consumer Support GE Appliances Website Have a question or need assistance with your appliance? Try the GE Appliances Website 24 hours a day, any day of the year! You can also shop for more great GE Appliances products and take advantage of all our on-line support VHUYLFHV GHVLJQHG IRU \RXU FRQYHQLHQFH ,Q WKH 86 GEAppliances.com ,Q &DQDGD GEAppliances.
RÉFRIGÉRATEUR avec congélateur en bas MESURES DE SÉCURITÉ . . . . . . . . .3 UTILISATION DU RÉFRIGÉRATEUR Commandes . . . . . . . . . . . . . . . . . . . . . . . . . .5 Tablettes, supports et bacs . . . . . . . . . . . . .6 Balconnets . . . . . . . . . . . . . . . . . . . . . . . . . . . .7 Tiroirs de congélateur . . . . . . . . . . . . . . . . . .7 MANUEL D’UTILISATION ET INSTRUCTIONS D’INSTALLATION GLE12HSLSS GLE12HSPSS ENTRETIEN ET NETTOYAGE . . . .
NOUS VOUS REMERCIONS D’ACCUEILLIR GE APPLIANCES CHEZ VOUS Que vous ayez grandi avec GE Appliances ou qu’il s’agisse de votre première acquisition, nous sommes heureux de vous accueillir dans notre famille. Nous sommes fiers du savoir-faire, de l’innovation et de l’esthétique qui composent chaque appareil GE Appliances, et nous pensons que vous le serez aussi.
LISEZ TOUTES LES DIRECTIVES AVANT D'UTILISER L'APPAREIL AVERTISSEMENT Pour réduire le risque d’incendie, d’explosion, de choc électrique ou de blessures lorsque vous utilisez votre réfrigérateur, veuillez suivre ces consignes de sécurité : Ŷ & H UpIULJpUDWHXU GRLW rWUH FRUUHFWHPHQW LQVWDOOp conformément aux instructions d'installation avant toute utilisation. Ŷ ' pEUDQFKH] OH UpIULJpUDWHXU DYDQW G¶HIIHFWXHU XQH réparation, de remplacer une ampoule ou de le nettoyer.
INFORMATION DE SÉCURITÉ INFORMATION DE SÉCURITÉ IMPORTANTES LISEZ TOUTES LES DIRECTIVES AVANT D'UTILISER L'APPAREIL INSTALLATION AVERTISSEMENT RISQUE D’EXPLOSION &RQVHUYH] OHV PDWpULDX[ HW YDSHXUV LQIODPPDEOHV WHOV TXH O¶HVVHQFH j O¶pFDUW GH YRWUH UpIULJpUDWHXU 8QH H[SORVLRQ XQ incendie voire la mort pourrait en résulter. BRANCHEMENTS ÉLECTRIQUES AVERTISSEMENT RISQUE DE CHOC ÉLECTRIQUE Branchez l’appareil dans une prise triple avec terre. Ne retirez pas la broche de terre.
/ HPSODFHPHQW GH OD FRPPDQGH GX PRGqOH */( +6/66 VH trouve sur l'extérieur de la porte du compartiment réfrigérateur. 3RXU OH PRGqOH */( +6366 HOOH VH WURXYH VXU OD SDURL gauche à l'intérieur du compartiment réfrigérateur. Fridge Freezer TempZone Commandes de température du réfrigérateur Zone Select TempZone (réfrigérateur, congélateur, TempZone).
UTILISATION DU RÉFRIGÉRATEUR: Tablettes, supports et bacs Tablettes, supports et bacs ATTENTION Ne nettoyez pas les tablettes ou couvercles Tablette rétractable Tablette avec supports en verre avec de l’eau chaude lorsqu’ils sont froids. Les tablettes et couvercles en verre peuvent se briser s’ils sont exposés à une variation de température soudaine, ou soumis à un impact s’ils sont heurtés ou échappés. S’il se brise, le verre trempé est conçu pour se fracturer en un grand nombre de petits éclats.
Balconnets de réfrigérateur Pour retirer les balconnets, glissez-les vers le haut par-dessus la nervure dans la porte et tirez. Pour installer les balconnets, glissez-les par-dessus la nervure dans la porte. Le petit balconnet se place sur le dessus de n’importe quelle paire de nervures. Les gros balconnets vont dans les nervures du bas ou du centre. REMARQUE : Placer les balconnets aux mauvaises positions empêchera la fermeture de la porte du réfrigérateur.
ENTRETIEN ET NETTOYAGE Entretien et nettoyage Nettoyage de l'extérieur Directives pour nettoyer les surfaces extérieures, les poignées de porte et les garnitures UTILISER NE PAS UTILISER Linge ou éponge doux et propres Linges abrasifs, éponges à récurer, tampons à récurer ou en laine d’acier. Détergent doux dans eau chaude. Nettoyants pour acier inoxydable approuvés; visitez la ERXWLTXH GH SLqFHV &DIp $SSOLDQFHV SRXU GHV QHWWR\DQWV pour acier inoxydable approuvés : Electromenagersge.
Préparation de départ en vacances Pour de longues vacances ou absences, enlevez tous vos aliments et débranchez votre réfrigérateur. Mettez le bouton GH FRPPDQGH GH OD WHPSpUDWXUH HQ SRVLWLRQ 2)) HW QHWWR\H] l’intérieur avec une solution de bicarbonate de soude, de 15 ml (une cuillère à soupe) de bicarbonate de soude pour 1 litre (une pinte) d’eau. Laissez les portes ouvertes.
INSTRUCTIONS D’INSTALLATION Instructions d’installation GLE12HSLSS Des Questions ? Appelez 800.GE.CARES (800.432.2737) ou consultez notre site internet : GEAppliances.com Au Canada, appelez le 1.800.561.3344 ou consultez notre site internet : electromenagersge.ca AVANT DE COMMENCER Lisez ces instructions entièrement et attentivement. • IMPORTANT – &RQVHUYH] FHV LQVWUXFWLRQV pour l’inspecteur local. • IMPORTANT – 5HVSHFWH] WRXWHV OHV ordonnances et les codes locaux.
INVERSION DE L’OUVERTURE DES PORTES 1. Dévissez 4 vis dans le haut de la carrosserie frontale. AVERTISSEMENT Suivez toutes les étapes pour inverser le sens d’ouverture de porte. L’omission de suivre ces instructions, de ne pas utiliser toutes les pièces, ou le serrage excessif des vis, peuvent causer la chute de la porte et occasionner des blessures ou des dommages à la propriété. 2. 5HWLUH] OH FRXYHUFOH GDQV OH KDXW GH OD FDUURVVHULH frontale. La pièce rapportée glisse vers le bas du couvercle.
INSTRUCTIONS D’INSTALLATION Instructions d’installation INVERSION DE L’OUVERTURE DES PORTES (SUITE) AVERTISSEMENT Suivez toutes les étapes pour inverser le sens d’ouverture de porte. L’omission de suivre ces instructions, de ne pas utiliser toutes les pièces, ou le serrage excessif des vis, peuvent causer la chute de la porte et occasionner des blessures ou des dommages à la propriété. 8.
Les nouveaux réfrigérateurs n’émettent pas les mêmes sons que les anciens. Les réfrigérateurs modernes comportent davantage de fonctions et utilisent une technologie plus récente. Entendez-vous ce que j’entends? Ces bruits sont normaux. Ŷ / H QRXYHDX FRPSUHVVHXU à rendement élevé peut fonctionner plus longtemps et plus vite que votre ancien réfrigérateur et vous pouvez entendre un son modulé ou un ronflement aigu pendant son fonctionnement. HUMMM... WOUUCH...
CONSEILS DE DÉPANNAGE Conseils de dépannage... Avant de faire un appel de service eFRQRPLVH] WHPSV HW DUJHQW &RQVXOWH] G¶DERUG OHV WDEOHDX[ GHV SDJHV VXLYDQWHV HW YRXV SRXUULH] YRXV pYLWHU XQ DSSHO GH VHUYLFH Au besoin, vous pouvez programmer un appel de service en nous visitant sur GEAppliances.com RX HQ FRPSRVDQW OH *(&$5(6 $X &DQDGD YLVLWH] Electromenagersge.
Problème Causes possibles Bourdonnement fréquent de la machine Le commutateur de marche de la à glaçons (si elle est installée). machine à glaçons est dans la position 21 PDUFKH PDLV O¶DUULYpH G¶HDX DX réfrigérateur n’a pas été raccordée. La conduite d’eau ou le robinet d’arrêt Pas de production de glace (si la machine à glaçons est installée). est bouché. 2GHXU GDQV OH UpIULJpUDWHXU Des aliments ont transmis leur odeur au réfrigérateur.
GARANTIE Garantie limitée du réfrigérateur Pour les clients des États-Unis, WRXWHV OHV UpSDUDWLRQV HQ YHUWX GH OD JDUDQWLH VRQW IRXUQLV SDU QRV &HQWUH GH 6HUYLFH G¶8VLQH RX SDU XQ WHFKQLFLHQ DXWRULVp &XVWRPHU &DUH 3RXU SUpYRLU XQH UpSDUDWLRQ FRQVXOWH] QRWUH VLWH electromenagersge.ca ou appelez OH *( &$5( 9HXLOOH] DYRLU YRWUH QXPpUR GH VpULH HW YRWUH QXPpUR GH PRGqOH j SRUWpH GH PDLQ ORUVTXH vous appelez pour obtenir un service.
Trousse de machine à glaçons : Machine à glaçons La trousse de machine à glaçons IM4D est offerte en supplément. 3RXU FRPPDQGHU DSSHOH] *( $SSOLDQFHV DX *(&$5(6 RX YLVLWH] GEAppliances.com $X &DQDGD visitez Electromenagersge.ca RX FRPSRVH] OH ON Suivez les instructions d’installation sur les pages suivantes. Vous utiliserez celles-ci plutôt que les instructions qui accompagnent votre machine à glaçons.
INSTRUCTIONS D’INSTALLATION DE L’ACCESSOIRE 18 Instructions d’installation de l’accessoire 9RXV DYH] GHV TXHVWLRQV" $X &DQDGD DSSHOH] DX QXPpUR 1.800.561.3344 ou visitez notre site Web à l’adresse electromenagersge.ca AVANT DE COMMENCER CONTENU DE LA TROUSSE IM-4D Lisez ces instructions complètement et attentivement. Ɣ IMPORTANT – &RQVHUYH] FHV LQVWUXFWLRQV pour votre inspecteur local. Ɣ IMPORTANT – 2EVHUYH] WRXV OHV FRGHV HW les ordonnances en vigueur.
INSTALLATION DE LA TROUSSE DE MACHINE À GLAÇONS IM4D AVANT DE COMMENCER BRANCHEZ LA MACHINE À GLAÇONS Lisez soigneusement chaque étape avant de commencer. AVERTISSEMENT RISQUE DE CHOC ÉLECTRIQUE Pour éliminer le risque de choc électrique ou de blessure durant l’installation, vous devez d’abord débrancher le réfrigérateur avant de procéder. L’omission de suivre ces instructions pose un risque de choc électrique.
INSTRUCTIONS D’INSTALLATION DE L’ACCESSOIRE Instructions d’installation de l’accessoire INSTALLATION DE LA TROUSSE DE MACHINE À GLAÇONS IM4D (Suite) INSTALLEZ LE BAC À GLAÇONS Ɣ 5HWLUH] OH GLYLVHXU FHQWUDO GX WLURLU VXSpULHXU GX congélateur.
INSTALLATION DU ROBINET D’EAU AVERTISSEMENT Afin de réduire le risque de mort ou de décharge électrique, vous devez suivre les instructions suivantes : Ŷ Débranchez le réfrigérateur avant de retirer quelque panneau que ce soit. Ŷ N’endommagez aucun fil lors du retrait du panneau. Ŷ Replacez toutes les pièces et tous les panneaux avant de rebrancher le réfrigérateur. ENLEVEZ LE COUVERCLE Enlevez le couvercle du compartiment du compresseur.
INSTRUCTIONS D’INSTALLATION DE L’ACCESSOIRE Instructions d’installation de l’accessoire INSTALLATION DE LA CONDUITE D’EAU AVANT DE COMMENCER CE DONT VOUS AUREZ BESOIN Nous recommandons les trousses d’alimentation d’eau en cuivre WX8X2, WX8X3, WX8X4, selon le montant de conduite dont vous avez besoin.
INSTALLATION DE LA CONDUITE D’EAU CE DONT VOUS AUREZ BESOIN (suite) 2 (SUITE) CHOISISSEZ L’EMPLACEMENT DU ROBINET Percez un trou de 1/4 po dans le tuyau d’eau, à l’aide d’un foret dur. Enlevez toute barbure due au perçage du trou dans le tuyau. Faites attention de ne pas laisser de l’eau couler dans votre perceuse électrique. Si vous ne percez pas un trou de 1/4 po, vous obtiendrez une alimentation d’eau réduite et des glaçons plus petits.
INSTRUCTIONS D’INSTALLATION DE L’ACCESSOIRE Instructions d’installation de l’accessoire INSTALLATION DE LA CONDUITE D’EAU (SUITE) 5 NOTE : 9RXV GHYH] YRXV FRQIRUPHU DX[ &RGHV GH SORPEHULH &05 GX &RPPRQZHDOWK RI Massachusetts. Les robinets d’arrêt à étrier sont illégaux et leur utilisation n’est pas autorisée au 0DVVDFKXVHWWV &RQVXOWH] YRWUH SORPELHU ORFDO SERREZ LE COLLIER DE SERRAGE Serrez les vis du collier jusqu’à ce que la rondelle d’étanchéité commence à enfler. NOTE : Ne serrez pas trop.
INSTALLATION DE LA CONDUITE D’EAU (SUITE) 9 BRANCHEZ LE TUYAU À VOTRE RÉFRIGÉRATEUR (Suite) Placez l’écrou de compression et la bague (manchon) à l’extrémité du tuyau comme l’indique l’illustration. Si YRXV XWLOLVH] XQH WURXVVH 6PDUW&RQQHFW 5HIULJHUDWRU Tubing, les écrous sont déjà assemblés au tuyau. Insérez l’extrémité du tuyau dans le branchement du robinet d’arrêt d’eau, le plus loin que possible. Tout en tenant le tuyau, serrez le raccord.
INSTRUCTIONS D’INSTALLATION DE L’ACCESSOIRE Instructions d’installation de l’accessoire Conseils de dépannage... Avant de faire un appel de service eFRQRPLVH] WHPSV HW DUJHQW &RQVXOWH] G¶DERUG OHV WDEOHDX[ GHV SDJHV VXLYDQWHV HW YRXV SRXUULH] YRXV pYLWHU XQ DSSHO GH service.Si nécessaire, une visite de service peut être programmée en nous visitant sur GEAppliances.com ou en composant *(&$5(6 $X &DQDGD YLVLWH] Electromenagersge.
Conseils de dépannage... Avant de faire un appel de service Problème Causes possibles L’eau fuit autour de la tasse Il y a de la mousse dans la tasse de remplissage de remplissage resultant de l’installation de la conduite de remplissage. La conduite de remplissage ne repose pas bien dans la tasse de remplissage.
SOUTIEN AU CONSOMMATEUR Soutien au consommateur Site Web de GE Appliances Vous avez une question ou vous avez besoin d’aide pour votre appareil électroménager? Visitez le site Web des électroménagers *( KHXUHV SDU MRXU j WRXW PRPHQW GH O¶DQQpH 9RXV SRXYH] DXVVL \ PDJDVLQHU G¶DXWUHV pOHFWURPpQDJHUV GH TXDOLWp *( HW bénéficier de tous nos services de soutien en ligne conçus pour mieux vous servir. $X eWDWV 8QLV GEAppliances.com Au &DQDGD Electromenagersge.
REFRIGERADORES Freezer Inferior INFORMACIÓN DE SEGURIDAD ..3 OPERACIÓN DEL REFRIGERADORE Controles . . . . . . . . . . . . . . . . . . . . . . . . . . . . . . . 5 Estantes y Repisas y Bandejas . . . . . . . . . . . . . 6 Cestos de la puerta . . . . . . . . . . . . . . . . . . . . . . 7 Cajones del Freezer . . . . . . . . . . . . . . . . . . . . . . 7 CUIDADO Y LIMPIEZA . . . . . . . . . . . . .
GRACIAS POR HACER QUE GE APPLIANCES SEA PARTE DE SU HOGAR. Ya sea que haya crecido usando GE Appliances, o que ésta es su primera vez, nos complace tenerlo en la familia. Sentimos orgullo por el nivel de arte, innovación y diseño de cada uno de los electrodomésticos de GE Appliances, y creemos que usted también. Entre otras cosas, el registro de su electrodoméstico asegura que podamos entregarle información importante del producto y detalles de la garantía cuando los necesite.
ADVERTENCIA A fin de reducir el riesgo de incendio, explosión, descargas eléctricas o lesiones al usar su refrigerador, siga estas precauciones básicas de seguridad: Ŷ ( VWH UHIULJHUDGRU VH GHEHUi LQVWDODU \ XELFDU adecuadamente de acuerdo con las Instrucciones de Instalación antes de ser usado. Ŷ ' HVHQFKXIH HO UHIULJHUDGRU DQWHV GH KDFHU UHSDUDFLRQHV reemplazar una lámpara de luz o hacer una limpieza.
INFORMACIÓN DE SEGURIDAD INFORMACIÓN IMPORTANTE DE SEGURIDAD LEA TODAS LAS INSTRUCCIONES ANTES DE USAR INSTALACIÓN ADVERTENCIA RIESGO DE EXPLOSIÓN Mantenga cualquier material y vapores inflamables, tales como gasolina, alejados del refrigerador. Si no se cumple con esto se podrá producir una explosión, incendio o la muerte. CONEXIÓN DE LA ELECTRICIDAD ADVERTENCIA RIESGO DE DESCARGA ELÉCTRICA Enchufe en un tomacorriente con conexión a tierra de 3 cables.
La ubicación del control en el modelo GLE12HSLSS se encuentra en la parte exterior de la puerta de Comidas Frescas. En el modelo GLE12HSPSS, se encuentra en la pared izquierda de la parte interior del compartimiento de Comidas Frescas. Fridge Freezer TempZone Control de Temperatura del Refrigerador Zone Select Este refrigerador cuenta con 3 zonas de temperatura: Heladera, Freezer, TempZone. Sus rangos de temperatura son: Heladera 33°F (0.6°C) a 41°F (5°C), Freezer -6°F (-21°) a 6°F (-14.
OPERACIÓN DEL REFRIGERADORE: Estantes y Repisas y Bandejas 6 Estantes y Repisas y Bandejas PRECAUCIÓN Cajón Plegable Estante con Repisas 1R OLPSLH HVWDQWHV GH YLGULR ni tapas con agua caliente cuando estén fríos. Los estantes de vidrio y las tapas se pueden romper si son expuestos a cambios de temperatura repentinos o impactos tales como sacudones o caídas. El vidrio templado está diseñado para destruirse en pequeñas piezas en caso de rotura.
Cestos de la Puerta del Freezer A fin de retirar los cestos de la puerta, deslice el cesto hacia arriba sobre la base de apoyo de la puerta y empuje hacia afuera. A fin de instalar los cestos de la puerta, deslice el cesto sobre la base de apoyo de la puerta. El cesto pequeño se ubica en la parte superior, en cualquiera de los grupos de bases de apoyo. Los cestos grandes se ubican en la parte inferior y en el medio.
CUIDADO Y LIMPIEZA Care and Cuidado y limpieza Limpieza exterior ,QVWUXFFLRQHV SDUD OD /LPSLH]D GH 6XSHU¿FLHV ([WHULRUHV 0DQLMDV GH 3XHUWDV \ %RUGHV USE NO USE Telas suaves y limpias o esponjas Telas abrasivas, esponjas de fregar, almohadillas de estropajo o de lana de acero 'HWHUJHQWH VXDYH PH]FODGR FRQ DJXD FDOLHQWH Limpiadores de acero inoxidable aprobados. Visite la tienda de piezas de Café Appliances para acceder a limpiares de acero inoxidable aprobados: GEApplianceparts.
Cómo prepararse para las vacaciones Para una largas vacaciones o ausencias, retire los alimentos y desconecte el refrigerador. Gire el dial de control de la WHPSHUDWXUD KDFLD OD SRVLFLyQ 2)) DSDJDGR \ OLPSLH HO interior con una solución de una cucharada de bicarbonato (15 PO \ XQ FXDUWR OLWUR GH DJXD 'HMH ODV SXHUWDV DELHUWDV Si una máquina de hielos fue instalada, deberá ser apagada; PXHYD HO LQWHUUXSWRU KDVWD OD SRVLFLyQ 2)) DSDJDGR HQ HO modelo con interruptor de encendido.
INSTRUCCIONES DE INSTALACIÓN Instrucciones de instalación GLE12HSLSS ¿Preguntas? Llame a 800.GE.CARES (800.432.2737) o visite nuestro sitio web en: GEAppliances.com En Canadá, llame al 1.800.561.3344 o visite nuestro Sitio Web en: GEAppliances.ca ANTES DE EMPEZAR ÁREA Lea estas instrucciones completa y cuidadosamente. 'HMH ORV VLJXLHQWHV HVSDFLRV SDUD IDFLOLWDU OD instalación, una adecuada circulación de aire y plomería y conexiones eléctricas.
CÓMO INVERTIR EL VAIVÉN DE LA PUERTA ADVERTENCIA Siga todos los pasos al invertir la dirección de la apertura de la puerta. Si no se siguen estas instrucciones, dejando piezas sin uso o ajustando tornillos en exceso, esto podrá hacer que la puerta se caiga y producir lesiones y daños sobre la propiedad. NOTAS IMPORTANTES 1. 'HVHQURVTXH ORV WRUQLOORV HQ OD SDUWH VXSHULRU GH OD carcasa frontal. 2. Retire la tapa de la carcasa frontal superior y la inserción de la tapa.
INSTRUCCIONES DE INSTALACIÓN Instrucciones de instalación CÓMO INVERTIR EL VAIVÉN DE LA PUERTA (CONT.) 8. Retire las tapas de los agujeros de los tornillos del lado izquierdo del parteluz intermedio, donde la nueva bisagra será instalada. Coloque las tapas de los agujeros para tornillos sobre los agujeros donde retiró la bisagra anterior. 13. Usando los tornillos provistos, adhiera la bisagra superior izquierda a la parte superior de la carcasa. 14.
El sonido de los refrigeradores nuevos es diferente al de aquellos más antiguos. Los refrigeradores modernos cuentan con más funciones y utilizan una tecnología más nueva. ¿Escuchas lo que yo escucho? Estos sonidos son normales. HUMMM... WHOOSH... Ŷ Es posible que el nuevo compresor de alta efectividad funcione más rápido y por más tiempo que aquel de su refrigerador antiguo, y es posible que escuche un zumbido o sonido de pulsación en un tono alto mientras está funcionando.
SOLUCIÓN DE PROBLEMAS Solución de problemas.. Antes de Solicitar el Servicio Técnico ¡Ahorre tiempo y dinero! Primero revise los cuadros que aparecen en las siguientes páginas y es posible que no necesite solicitar UHSDUDFLRQHV 'H VHU QHFHVDULR SRGUi SURJUDPDU HO VHUYLFLR WpFQLFR YLVLWiQGRQRV HQ GEAppliances.com o llamando al 800.GECARES 800.432.2737. En Canadá, visite GEAppliances.ca o llame al 800.561.3344.
Problema Causas Posibles Qué Hacer Congelamiento lento de los cubos de hielo Sonido de zumbido frecuente de la máquina de hielos (si la máquina de hielos fue instalada) La puerta se deja abierta. Revise si un paquete está reteniendo la puerta abierta. &RQ¿JXUH HO LQWHUUXSWRU HQ OD SRVLFLyQ 2)) $SDJDGR 0DQWHQHUOR HQ OD SRVLFLyQ 21 (Encendido) dañará la válvula de agua.
GARANTÍA Garantía limitada del refrigerador Todo el servicio de garantía es provisto por nuestros Centros de Servicio de Fabricación, o un técnico autorizado de Servicio al Cliente (Customer Care®). Para programar una visita del servicio técnico, visítenos en GEAppliances.com, o comuníquese al 800.GE.CARES (800.432.2737). Cuando llame para solicitar el servicio, tenga los números de serie y modelo disponibles.
Kit de Accesorios de la Máquina de Hielos IM4D: (O DFFHVRULR GH OD PiTXLQD GH KLHORV ,0 ' HVWi GLVSRQLEOH SRU un costo adicional. Para realizar una orden, llame a GE Appliances al 800.GECARES (800.432.2737) o visite GEAppliances.com. En Canadá, visite GEAppliances.ca o llame al 800.561.3344. Siga las instrucciones de instalación en las siguientes páginas. 'HEHUi XVDU HVWDV LQVWUXFFLRQHV HQ OXJDU GH DTXHOODV LQFOXLGDV con su máquina de hielos.
INSTRUCCIONES DE INSTALACIÓN DE ACCESORIOS Instrucciones de Instalación de Accesorios ¿Preguntas? Llame 800.GE.CARES (800.432.2737) o Visite nuestra página en la red en: GEAppliances.com. En Canadá, llame al 1.800.561.3344 o visite nuestro sitio Web en: geappliances.ca ANTES DE EMPEZAR CONTENIDO DEL KIT IM4D Lea estas instrucciones completa y cuidadosamente. • IMPORTANTE – Guarde estas instrucciones para el uso del inspector local.
INSTALACIÓN DEL KIT DE LA MÁQUINA DE HIELOS IM4D ANTES DE EMPEZAR CONECTE LA MÁQUINA DE HIELOS Lea cada paso completamente antes de proceder. ADVERTENCIA RIESGO DE DESCARGA ELÉCTRICA A fin de eliminar el riesgo de descarga eléctrica o lesión durante la instalación, primero deberá desenchufar el refrigerador antes de proceder.
INSTRUCCIONES DE INSTALACIÓN DE ACCESORIOS Instrucciones de Instalación de Accesorios INSTALACIÓN DEL KIT DE LA MÁQUINA DE HIELOS IM4D (CONT.) INSTALE LA CUBETA DE HIELOS Ɣ 5HWLUH HO GLYLVRU LQWHUPHGLR GHO FDMyQ VXSHULRU GHO IUHH]HU 'LYLVRU Intermedio PEGUE LA ETIQUETA DE GARANTÍA Se suministra una etiqueta con este kit para registrar la fecha de instalación para propósitos de la garantía. Colóquela en la parte posterior del refrigerador.
ENSAMBLE DE LA VÁLVULA DE AGUA ADVERTENCIA A fin de reducir el riesgo de muerte o de descargas eléctricas, se deberán seguir estas instrucciones: Ŷ Desenchufe el refrigerador antes de retirar cualquier panel. Ŷ No dañe ningún cable mientras el panel es retirado. Ŷ Reemplace todas las piezas y paneles antes de volver a enchufar el refrigerador. RETIRE LA CUBIERTA Retire la cubierta de acceso del compartimiento del compresor.
INSTRUCCIONES DE INSTALACIÓN DE ACCESORIOS Instrucciones de Instalación de Accesorios INSTALACIÓN DE LA TUBERÍA DEL AGUA ANTES DE INICIAR QUÉ NECESITA Los kits de cobre recomendados para el suministro de agua son WX8X2, WX8X3 o WX8X4, dependiendo de la cantidad de tubería necesaria. Las tuberías plásticas aprobadas para el suministro de agua son las tuberías para el refrigerador SmartConnect™ (WX08X10002, WX08X10006, WX08X10015 y WX08X10025).
INSTALACIÓN DE LA TUBERÍA DEL AGUA (Continued) QUÉ NECESITA (Continued) 2 SELECCIONE LA UBICACIÓN DE LA VÁLVULA Ɣ Dos tuercas de compresión de 1/4" de diámetro exterior y 2 férulas (mangas)—para conectar la tubería de cobre a la válvula de cierre y la válvula del agua del refrigerador. O BIEN Ɣ Si está usando un kit de tubería para el refrigerador SmartConnect™, los accesorios necesarios ya vienen preinstalados en la tubería. Seleccione una ubicación para la válvula que sea fácilmente accesible.
INSTRUCCIONES DE INSTALACIÓN DE ACCESORIOS Instrucciones de Instalación de Accesorios INSTALACIÓN DE LA TUBERÍA DEL AGUA (Continued) 5 APRIETE LA ABRAZADERA DEL TUBO Apriete los tornillos de la abrazadera hasta que la arandela sellante empiece a hincharse. NOTA: 1R DSULHWH GHPDVLDGR OD WXEHUtD \D TXH SRGUtD romperse. Arandela Abrazadera del tubo Extremo de entrada Tornillo de la abrazadera NOTA: Se deberán seguir los Códigos 248CMR de Plomería para el Estado de Massachusetts.
INSTALACIÓN DE LA TUBERÍA DEL AGUA (Continued) 9 CONECTE LA TUBERÍA 11 VUELVA A INSTALAR LA TAPA AL REFRIGERADOR (Continued) Coloque la tuerca de compresión y la férula (manga) en el extremo de la tubería como se muestra. En el kit de tubería para el refrigerador SmartConnectTM, las tuercas ya vienen armadas con la tubería. Inserte el extremo de la tubería en la conexión de la válvula del agua lo más que se pueda. Mientras sostiene la tubería, apriete el accesorio.
INSTRUCCIONES DE INSTALACIÓN DE ACCESORIOS Instrucciones de Instalación de Accesorios Consejos para la Solución de Problemas... Antes de solicitar el servicio técnico Problema Posibles causas Qué hacer La máquina automática de hielos no funciona/ no hace hielos El compartimento del congelador está muy cálido. 'HVSXpV GH LQVWDODU HO NLW SHUPLWD TXH HO UHIULJHUDGRU se enfríe completamente por 24 horas. Una vez el compartimento esté frío, la máquina de hielos comenzará la producción de hielo.
Consejos para la Solución de Problemas... Antes de solicitar el servicio técnico Problema Posibles causas Qué hacer Fuga de agua alrededor de la copa de llenado Espuma adquirida durante la instalación del tubo de llenado. Si el tubo de llenado fue instalado deslizándolo a través de la parte posterior del refrigerador, es posible que haya agarrado pedazos de espuma cuando fue Tubo de llenado empujado a través de la espuma.
SOPORTE PARA EL CONSUMIDOR Soporte para el Consumidor Sitio Web de GE Appliances ¢'HVHD UHDOL]DU XQD FRQVXOWD R QHFHVLWD D\XGD FRQ VX HOHFWURGRPpVWLFR" £,QWHQWH D WUDYpV GHO 6LWLR :HE GH (OHFWURGRPpVWLFRV de GE las 24 horas del día, cualquier día del año! Usted también puede comprar más GE Appliances maravillosos y aprovechar todos nuestros servicios de soporte a través de Internet, diseñados para su conveniencia. En EE.UU.: GEAppliances.