
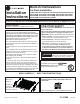
Installation Guide


2
Installation Instructions
1
REMOVE UPPER RACK
• Pull the upper rack out to full extension.
• Lift the rack so the front wheels clear the front end
hooks on each side rail.
• Pull the rack out until the rear wheels contact the
front end hooks on each side rail.
• Lift the rack off the rails.
• The upper rack spray arm should be drained of water
by tilting the rack backwards while holding it over the
sink or over towels.
2
REMOVE UPPER RACK RAILS
(OPTIONAL)
• Pull one upper rack rail out most of the way.
• Remove the rear end cap from the rail by lifting its
center tab and pulling the cap back and off.
• Pull the rail off the roller mounts.
• Repeat on the opposite side.
4
INSTALL 3RD RACK RAILS
• Install the rail by sliding it onto both rack mount
rollers.
• 3rd Rack rails are right and left side specific. To
ensure proper assembly, all front end hooks must
point upwards.
• Attach the rear end cap by snapping it onto the back
of the rail.
• Ensure rear end cap is properly assembled by
listening for a definite “click” sound and giving a
gentle outward pull on the rail to verify retention.
• Repeat on the opposite side.
Pull out,
lift up, and
remove
Pull out
rail
Remove rear
end cap
Tab
3
INSTALL 3RD RACK MOUNTS
• Insert the locating tab of the 3rd Rack mount into the
tub slot and fully seat against the ceiling of the tub.
• Be sure the tub mount is flush with the side wall of
the tub.
• Part will temporarily retain itself in the tub until screws
are installed.
• Align the screw holes and use a Phillips screwdriver
to drive one of the provided screws into each screw
hole.
DO NOT USE POWER TOOLS OR OVERTIGHTEN.
• Repeat on the opposite side.
Slide rail onto
rollers
Replace rear
end cap