GEAppliances Safety hlformation ....... 4-7 Opera ting lnstructions Connecting Elecuici/y ..... Control Panels ............ GSC3200 GSC3230 GSC3400 GSC3430 ll 12 Control Settings ........... 13 Dial Cycles ............ 14, 15 I,oading the Dishwasher Racks ...... 18, 19 Optional Accessories ...... 21 Unicouple .............. 8-10 Using the Dishwasher . .16, 17 Care and Cleaning ........ Troubleshooting Tips Before You Call for Service ............. 20 22-27 Customer Service Product Registration .
GE& You,A ServicePartnership. Important! Two easy ways to register your appliance /. 5_' Throtl¢_h Complete tile ....interrlet at x_ o°eatl:-) -)liances.... (onl and mail tile enclosed Product Registratior_ Card Write the model and serial numbers here. # # You can find them on the tub wailjust insido the door. Staple sales slip or cancelled check here. Proof of the origina/ purchaso date is needed to obtain service under the warrant.
i_iiiiiiiiiliii You'll tind man} chart answers ot Troubleshooting atall. to common problems Tips tirst, you ma) here. not need [tyou review our to call for sea-vice If YouNeedService lfyou do need service, away, A list of toll-ii'ee section. 94 hours you can reke_, knowing (alstomer help is only a phone service numbers Or you can always call the GE Answer is included Center call in the back <')at 800.626.2000, a day, 7 days a week. OR Visit our $\ebsite at: www.geappliances.
IMPORTANTSAFETYINFORMATION. READALLINSTRUCTIONSBEFOREUSING. A WARNING! For your safe_ the information in this manual must be foflowed to minimize the risk of fire, explosion, electric shock, or to prevent property damage, personal injury, or loss of life. WATER HEATER SAFETY Under certain conditions hydrogen gas may be produced a water heater thathas notbeen used for two weeks or in more.
Use your dishwasher only for its intended purpose as described in this Owner's Manual PROPER INSTALLATION ANDMAINTENANCE This dishwasher must be properly installed and located in accordance with the Installation Instructions before #is used. If you did not receive an Installation Instructions sheet with your dishwasher, you can receive one by calling us toll-free at the GEAnswer Cente_ 800.626.2000.
IMPORTANTSAFETYINFORMATION. READALLINSTRUCTIONSBEFOREUSING. A WARNING! DONOT... i¢ Do not tamperwith controls. i_ Do not _tbuse, sit on, or stand on the door or dish r_tck oi die dishw_tsher. s_i'I)o not discard a dishwasher without first removing the door of the washing compartment. i_ Do not store or rise combustible materials, i!iiiiiiHiiHiililH!iiiiiHi g_/soline or other tlammable vapors and liquids in the vicinity ot this or any other appliance.
WHENUSINGYOURDISHWASHER _ Use only powder, tabs or liquid detergents, agents recommended or wetting, for use in a dishwasher and keep them out of the reach of children. Automatic Cascade ') l)ishwashing I) ere r?ge l-_thas been approved ti)r use in all GE dishwashers. s_?'1Jocate sharp items so that they are not likely to damage the door seal. i_ I,oad sharp knives with the handles up to reduce the risk ot cut-t}T)e ir_juries.
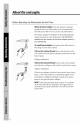
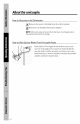
About the unicouple. Before Operating the Dishwasher the First -time Attachthe faucetadapter.The special faucet adapter supplied with your dishwasher must be assembled to the sink tim(el betbre you can use your dishwasher, The taucet adapter is designed to tit standard spouts having internal or external threads.
iiii i How to Connect the Unicouple !i ii iii ii Pull Unicouple and its hoses completely ()tit fl'orn storage cornpam-ner_t located at rear oI dishwasher and attach it to the timcet adapter, Attach tile Unicouple connector to tile taucet adapter b) depressing the collar at the top of the connector. When Unicouple is all the way up onto the adapter, release file collar. It will then snap into position to h)ck the Unicouple in place.
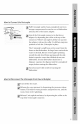
About the unicouple. How to Disconnect the Dishwasher Remove ..... the power (ord plug, fl'om the.... wall re(eptacle. i)isconnect Unicouple fl'om taucet adapter. NOTE:Whenmotorstopsat theendof thefinal dnse,the Unicouplecanbe disconnected andreturnedtostorage, How to Drain Excess Water From Unicouple Hoses 11the sink is 34" or higher ti'om the floor, the excess water in Unicouple hoses cannot be drained directly into the sink.
About connecting electricity. A iiii i CAUTION,forpersonalsafety: !i ii iii ii DO NOTUSEAN EXTENSIONCORDORAN ADAPTERPLUGWITH THIS APPLIANCE. DO NOT UNDERANY CIRCUMSTANCES, CUTORREMOVETHETHIRD GROUNDINGPRONGFROMTHEPOWERCORD. GROUNDINGINSTRUCTIONS--Thisappliance must be grounded. In the event oI a malflmction or breakdown, grounding will reduce the risk of electric shock by providing a path ot least resistance tbr electric current.
About the dishwasher control panel You can locate your model number on the tub wall just inside the door. Throughout this manual, features and appearance may vary from your model. Models GSC3200 and GSC3230 ;;;;;;;;;;;;;;;;;;;;;;;;;;;;;;;;;;;;; CYCLES E_ER_Y OPTIOn, S POTS _ORMAL &PAN_ WASH H_TE_PWASH _N _FP ON HEATED DRY _ _FF RINSEONLYr.
ControlSettings O iiii i !i ii ,iii i Cycles POTS & PANS 9.5gal.,63 rain. Rinse-Rinse-Rinse-Main Wad_-Rinse-Rinse-Rinse NORMAL WASH 8.0gal.,63 min. Rinse Rinse_MainWashq:_inse-RinseRinse Forloadsof everydaydishes, glassesandcookware witl= mediumsoils. NOTE."Many disl_esI_avelighter soil than normal.Choosinga cycle other than NORMAL WASHwiii saveenergyandwater. LIGHT WASH 6.7gal.,63 min. Rinse Rinse-MainWash-Rinse-Rinse Fordisheswith light soils. SHORT WASH 6.6gal.,55 rain.
About the dial cycles. Short Wash ROT START OPTION START DELAy (HRS) % '_ STAR T '_ SHORT For quicklywashing loads ot eve)3(la_,dishes with medium soils that have not dried on. ¢, OFF _ pLATEWARMER mt_leDDRy_ _lie m Select the NORMALWASH(ycleand any options. sure the door is unlatched. _N_TmDRYOm _ _I Slowlyturn the Dial to SHORTWASH, atch the door to start the c?vle. Rinse Only HDT START OPTION START DELAy g '_ For rinsing START partial loads that will be washed later.
Hot Start iiii i HOT START OPTION START DELAy (fiRS) _ '_ Preheats STAR T % wash water to correct !i ii ,iii i temperature. SHORT ,_- WASH OFF Select the HOT STARTcvcle _{ Be sure the door and am other option. is unlatched. P_TEWARMER Slowl} turn the l)ial to HOTSTART _N_TmD m_O ORYOFF} I_atch the door to start the ode.
Using the dishwasher. Checkthe Water Temperature The entering water must be at least 120°F. and not nlore than 150° F., tbr ettective cleaning and to prevent dish damage. Check tile water temperature with a candy or meat thermometer. Turn oil tile hot water taucet nearest the dishwasher, place tile thernlometer in a glass and let tile water run continuousl} into tile glass until tile temperature stops rising.
ProperUseof Detergent iiii i !i ii ,iii i Use only detergent specithally made tot use in dishwashers. ( ascade '_ Automatic Dislm_ashing [)ete_\gent has been approved ior use in all GE dishwashers. Keep your detergent tt'esh and d[)-. Don't put powder detergent into the dispenser until ?xm're tea@ to _ash dishes. The amount of detergent to use depends on whether your water is hard or soft. With hard water, you need extra detergent. With soil water, you need less detergent.
Loading the dishwasher racks. For best dishwashing results, follow these loading guidelines. Features and appearance of racks and silverware baskets may vary from your model Upper Rack Tile upper rack is tor glasses, tups and saucers. CtlpS al-ld glasses fit best alol-l_ tile sides. This is also a secure place tor dishwasher-sate plastics. The upper rack is good tot all kinds of oddshaped utensils. Saucepans, nlixing bowls and other items should be placed l_lce down.
Lower Rack Whenioadingthelower rack,donot loadlargepiattersor traysb the frontrightcornerTheymaypreventdetergent fromcirculatingduringthewashcycle. The lower rack is best used tor plates, saucers and cookware, IJaNe items such as broiler pans and racks should go along the sides, 1Joad platters, pots and bowls along the sides, in corners, or in the back, The soiled side ot items should t_lce the center of the rack.
Caring for the dishwasher. To clean the control panel use a lightly dampened cloth then dry thoroughly. To clean the exterior use a good appliance polish wax. Never use sharp objects, scouring pads or harsh cleaners on any part of the dishwasher. Protect Against Freezing II your dishwasher s leti in an unheated tile winter, ask a service technician to: pla_e during _{ Cut off electrical power to the dishwasher. r ftlses or trip c rcut )reaker.
_iiii_liii_,iii ¸ Aboutoptional accessories. Vou canchange thedoor andlower access panel appearance ofyour 1_ dishwasher by ordering one of these optional accessories: Color Panels 1/4" Wood Panel Trim Kit ;_:3/4" Trimless Panel Kit These accessories are available at extra cost (VISA, MasterCard or Discover cards accepted) by calling 800-626-2002. Specify accessory number when ordering.
Before you call for service... Troubleshooting -tips Review the charts on the following pages first and you may not need to call for service. Possible Causes Dishwasherwon'trun iiiiiiiii!{iiiii!iiiiiiiiiiiiiiiii!7 Noise What ToDo Fuseis blown, or the circuit breaker lripped Replace fl_se or reset cir(_fit breaker. Remove any other appliances ti'om the circuit. Some Soft _()od disposal shredding action. of the sounds you'll hear are normal Drain valve opening to pump _ater out.
Possible Water standing in the bottom of the tub Causes This is normal What ToDo A small amount of clean water around tile outlet on tile ufl) bottom at file back ot tile tub keeps seal lubricated. Water won'tpmnp out of the tub Drain is clogged tile water i_iiiii/iu J,!,i]{ii{ iiiiiiiii lfy)u have an air gap, clean it. Check 1osee ifymr kilchen sink is draining well. II not, you may need a plumber. Ifthe dishwasher drains into a disposer, run disposer clear.
Before you call for service... Troubleshooting -tips Possible Causes Stained tub interior iiilg!{iiiii!iiiiiiiiiiiiiiiii!7 Detergent with colorant was used What ToDo Sorne (tetergents contairi colorant (pigment or dyes) that will discolor the mb interior with extended use. Check the detergent cup tor signs oI an) discoloration. Itcup is discolored, charNe to detergerit without an} colorant. Cascade '> Automatic I)ish_ ashino Detergent has been approved tor use in all GE dishwashers.
Possible Causes Spotsandfihning onglassesand flatware Exlremely hard water Low inlet water temperature Overloading dishwasher Improper the loading Old or damp powder detergent Rinse agent dispenser empff Too little detergent What ToDo Use det-Dt_ rinse agent to renlove spots and prevent new fihn build-up. i_iiLJ,!,ii{ii{ To renlove Stllbborll spots and pre-existing tilm fl'om glassware: I Remove all metal utensils fl'om the dishwasher. iiiiiiiii 2 I)o not add detergent.
Before you call for service... Troubleshooting -tips Possible Causes Yellowor brown fihn on insidesurfaces iiiiiiiii!iiiiii!iiiiiiiiiiiiiiiii!7 Tea or coffee stains What ToDo Remove the stain by hand, using a solntiorl of i/2 cup bleach and 3 cups warm water. A WARNING Betore deanir_g interior wait at least 20 minutes alter a cT,_lefi)r the heafir N elernerlt to cool dowrL l_ailure to do so can resuh in bl3ri1s.
iii:lli Possible Causes What To Do Detergent cup lid Dial is not in the OFF Turn tlle Dial (o OFF won't latch position and slide tile door the lelL Oetergent left in dispenser cups Dishes are blocking detergent cups Steam This is normal Black or gray Almninmn marks on dishes rubbed Reposidon i_iiiiiL J,!,ii{ii{ tlle dishes, iiiiiiiii Steam comes through tile vent by the door latch during (IDing and when water is being-lmmped o111, utensils against the latch to have dishes Remove
i!iiiiiiHiiHii/ilH!iiiiiHi i_i!ii_iiiiiiii!i ilii_i_iiii!i:ii_!_iliii!iiiii_ .....................................
GE Service Protection Plus TM (;E, a name recognized worldwide for qualit) and dependabilit}, offers )ou Servke Protection PlusTM--con]prehensive protection all )our appliam es--No Matter What Brand! Benefits Include: We'll CoverAny Appliance. Anywhere. Anytime.
Consumer Product Ownership Registration I)ear Customer: Thank )ou for purchasing our product and thank you for placing your contidence We are proud to have )(Ill as a customer! Follow these three steps to protect your new appliance • your Consmner Product Ownership Complete andtoday, mail Registration Have the peace of mind (ff knowin_ we Call contact _,-()11 ill the unlikely'event of a satety moditication.
GE Dishwasher Warranty All warranty service provided by our Factory Service Centers, or an authorized Customer Care® technician. For service, carl 800-GE-CARES. g GE Will Replace: One Year Fromthe date of the original purchase Anypart ot the dishwasher which iidls due 1o a detect in materials or workmanship. I)urir_g this full one-year warranty, (;E will also provide, free of charge,all labor and in-home service to replace tl_e detective part.
Service TelephoneNumbers. GEAnswer Center_ 800.626.2000 The ( _FAnswer (_enter'" is open 24 hours a day. t days a ,,reek. OR Visit our _,_ebsite at: ww_geappliances, com In-HomeRepairService800-GE-CaRES (soo-432-27aa Expert (;E repair service is only a phone call awa}. Special Needs Service800.626.2000 TDD 800-TDD-GEAC (800-833-4322) (;E otters, t_'ee of dmrge, a broclmre ..... to assist in l)lannin°_ a 1)arriert_'ee k tchen for persons with lint ted mobil tv.