REFRIGERATORS Top-Freezer SAFETY INFORMATION . . . . . . . . .3 USING THE REFRIGERATOR Temperature Control . . . . . . . . . . . . . . . . . . .5 Sabbath Mode . . . . . . . . . . . . . . . . . . . . . . . . .5 Fresh Food Compartment Shelves . . . . . . .5 Freezer Compartment Shelves . . . . . . . . . .6 Storage Drawers . . . . . . . . . . . . . . . . . . . . . . .6 Automatic Ice Maker . . . . . . . . . . . . . . . . . . .7 CARE AND CLEANING . . . . . . . . . . .
THANK YOU FOR MAKING GE APPLIANCES A PART OF YOUR HOME. Whether you grew up with GE Appliances, or this is your first, we’re happy to have you in the family. We take pride in the craftsmanship, innovation and design that goes into every GE Appliances product, and we think you will too. Among other things, registration of your appliance ensures that we can deliver important product information and warranty details when you need them. Register your GE appliance now online.
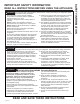
READ ALL INSTRUCTIONS BEFORE USING THE APPLIANCE reduce the risk of fire, explosion, electric shock, or injury when using your refrigerator, follow WARNING To these basic safety precautions: Ŷ 7 KLV UHIULJHUDWRU PXVW EH SURSHUO\ LQVWDOOHG DQG ORFDWHG LQ DFFRUGDQFH ZLWK WKH ,QVWDOODWLRQ ,QVWUXFWLRQV EHIRUH LW LV XVHG Ŷ 8QSOXJ WKH UHIULJHUDWRU EHIRUH PDNLQJ UHSDLUV RU cleaning. NOTE: Power to the refrigerator cannot be disconnected by any setting on the control panel.
SAFETY INFORMATION IMPORTANT SAFETY INFORMATION READ ALL INSTRUCTIONS BEFORE USING THE APPLIANCE INSTALLATION WARNING FIRE OR EXPLOSION HAZARD .HHS IODPPDEOH PDWHULDOV DQG YDSRUV DZD\ IURP UHIULJHUDWRU )DLOXUH WR GR VR FDQ UHVXOW LQ ILUH H[SORVLRQ RU GHDWK CONNECTING ELECTRICITY WARNING ELECTRICAL SHOCK HAZARD Plug into a grounded 3-prong outlet 'R QRW UHPRYH WKH JURXQG SURQJ 'R QRW XVH DQ DGDSWHU 'R QRW XVH DQ H[WHQVLRQ FRUG Failure to follow these instructions can result in death, fire, or ele
The temperature control adjusts the refrigerator from its warmest to coldest settings. Your refrigerator will come with the recommended IDFWRU\ VHWWLQJ RQ ³ ´ )RU FROGHU WHPSHUDWXUH WXUQ WKH NQRE FORFNZLVH WR HLWKHU VHWWLQJ ³ ´ RU ³ ´ )RU warmer temperature, turn the dial counter-clockwise WR HLWKHU VHWWLQJ ³ ´ RU ³ ´ 7R WXUQ RII WKH FRROLQJ LQ both compartments, turn the knob counter-clockwise to VHWWLQJ ³2II´ 1RWH WKDW WKLV GRHV QRW VKXW RII SRZHU WR WKH refrigerator.
USING THE REFRIGERATOR: )UHH]HU &RPSDUWPHQW 6KHOYHV 'UDZHUV 6 Freezer Compartment Shelves When placed correctly on the shelf supports, the steel wire stationary shelves will stop before coming FRPSOHWHO\ RXW RI WKH IUHH]HU DQG ZLOO QRW WLOW ZKHQ \RX place food on it or remove food from it. Some models have glass shelves. CAUTION 'R QRW FOHDQ JODVV VKHOYHV RU FRYHUV with warm water when they are cold.
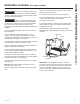
Not all features are on all models. WARNING Connect to potable water supply only. A cold water supply is required for automatic icemaker operation. The water pressure must be between 40 and 120 psi (275-827 kilopascals). CAUTION Avoid contact with the moving parts of the ejector mechanism, or with the heating element (located on the bottom of the ice maker) that releases WKH FXEHV 'R QRW SODFH ILQJHUV RU KDQGV RQ WKH automatic ice making mechanism while the refrigerator is plugged in.
CARE AND CLEANING Care And Cleaning Cleaning the Outside Directions for Cleaning Outside Surfaces, Door Handles, and Trim DO USE Soft, clean cloth or sponge Abrasive cloths, scrubbing sponges, scouring or steel wool pads Mild detergent mixed with warm water $SSURYHG VWDLQOHVV VWHHO FOHDQHUV 9LVLW WKH *( Appliances parts store for approved stainless steel cleaners: GEAppliancesparts.com or call 877.959.
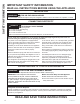
Models 16, 17, 18, 19, & 22 If you have questions, call 1.800.GE.CARES or visit our Website at: GEAppliances.com. In Canada, call 1.800.561.3344 or Visit our Website at: geappliances.ca BEFORE YOU BEGIN Read these instructions completely and carefully. • IMPORTANT – Save these instructions for local inspector’s use. • IMPORTANT – Observe all governing codes and ordinances. • Note to Installer – Be sure to leave these • Note to Consumer – .HHS WKHVH LQVWUXFWLRQV instructions with the Consumer.
INSTALLATION INSTRUCTIONS Installation Instructions INSTALLING THE WATER LINE (on some models) BEFORE YOU BEGIN WHAT YOU WILL NEED (Cont.) 5HFRPPHQGHG FRSSHU ZDWHU VXSSO\ NLWV DUH :; ; :; ; RU :; ; GHSHQGLQJ RQ WKH DPRXQW RI tubing you need. Approved plastic water supply lines are SmartConnect™ Refrigerator Tubing :; ; :; ; DQG :; ; When connecting your refrigerator to a GE Appliances Reverse Osmosis Water System, the only DSSURYHG LQVWDOODWLRQ LV ZLWK D *( $SSOLDQFHV 59.
INSTALLING THE WATER LINE (Cont.) 4 FASTEN THE SHUTOFF VALVE BEFORE YOU BEGIN Read these instructions completely and carefully. WARNING To reduce the risk of electric shock or injury during installation, you must first unplug the refrigerator before proceeding. (Cont.) NOTE: Commonwealth of Massachusetts Plumbing Codes 248CMR shall be adhered to. Saddle valves are illegal and use is not permitted in Massachusetts. Consult with your licensed plumber.
INSTALLATION INSTRUCTIONS Installation Instructions INSTALLING THE WATER LINE (Cont.) 8 CONNECT THE TUBING TO THE REFRIGERATOR NOTES: • Before making the connection to the refrigerator, be sure the refrigerator power cord is not plugged into the wall outlet. • We recommend installing a water filter *;5/4 DYDLODEOH RQ Jewaterfilters.com or 877.959.
INSTALLING THE DOOR HANDLE 1A PLASTIC HANDLE 2 HANDLE INSTALLATION ,QVWDOO WKH KDQGOH IDVWHQHU LQWR WKH KROH RQ WKH IUHH]HU DQG IUHVK IRRG GRRUV 7KH IDVWHQHUV correspond with the handle side (the side opposite the hinge). Handle Fastener 1B STAINLESS STEEL HANDLE Attach plastic bushing to the door with the screw on both freezer and fresh food doors. The fasteners correspond with the handle side (the side opposite the hinge). $WWDFK KDQGOH WR IUHH]HU GRRU E\ VOLGLQJ KDQGOH up onto plastic bushin
INSTALLATION INSTRUCTIONS Installation Instructions REVERSING THE DOOR SWING WARNING Follow all steps when reversing the door swing. Failure to follow these instructions, leaving off parts, or overtightening screws, can lead to the door falling off and result in injury and property damage. 1 BEFORE YOU START 8QSOXJ WKH UHIULJHUDWRU IURP LWV HOHFWULFDO outlet. 1.2 Empty all door shelves, including the dairy compartment. CAUTION 'R QRW OHW HLWKHU GRRU GURS WR WKH IMPORTANT NOTES: floor.
REVERSING THE DOOR SWING (Cont.) WARNING Follow all steps when reversing the door swing. Failure to follow these instructions, leaving off parts, or overtightening screws, can lead to the door falling off and result in injury and property damage. 3 REMOVE THE FRESH FOOD DOOR 3.1 Tape the door shut with masking tape. 8QVFUHZ WKH FHQWHU hinge pin and remove it from its socket. Be careful not to lose the center hinge and washer.
INSTALLATION INSTRUCTIONS 16 Installation Instructions REVERSING THE DOOR SWING (Cont.) 5 REVERSING THE DOOR HANDLES 5.1. Remove handle screws from the top of fresh food door. Remove handle screws from the ERWWRP RI IUHH]HU GRRU 5.2.
REVERSING THE DOOR SWING (Cont.) 6 RE-HANGING THE DOORS 6.1 Re-hang the fresh food door 6.1.1 Lower the fresh food door onto the bottom hinge pin. Be sure the washer is in place on the pin. 6 RE-HANGING THE DOORS (CO 6.1 Re-hang the fresh food door /RZHU WKH IUHH]HU GRRU RQWR WKH FHQWHU hinge pin. Be sure the washer is in place on the pin. Plastic Washer Hinge Pin Plastic Washer Hinge Pin 6.1.2 Tilt the door towards the cabinet.
TROUBLESHOOTING TIPS: Normal Operating Sounds 18 Normal Operating Sounds Newer refrigerators sound different from older refrigerators. Modern refrigerators have more features and use newer technology. Do you hear what I hear? These sounds are normal. Ŷ The new high HUMMM... WHOOSH... efficiency compressor may run faster and longer than your old refrigerator and you may hear a high-pitched hum or pulsating sound while it is operating.
6DYH WLPH DQG PRQH\ 5HYLHZ WKH FKDUWV RQ WKH IROORZLQJ SDJHV ILUVW DQG \RX PD\ QRW QHHG WR FDOO IRU VHUYLFH ,I needed, service can be scheduled by visiting us online GEAppliances.com or calling 800.GECARES 800.432.2737. ,Q &DQDGD YLVLW GEAppliances.ca or call 800.561.3344. Truth or Myth Truth or Myth? The automatic ice maker in my refrigerator will produce ice when the refrigerator is plugged in to a power receptacle.
Notes 20 49-1000394 Rev.
For US Customers, DOO ZDUUDQW\ VHUYLFH SURYLGHG E\ RXU )DFWRU\ 6HUYLFH &HQWHUV RU DQ DXWKRUL]HG &XVWRPHU &DUH® technician. To schedule service, on-line, 24 hours a day, visit us at GEAppliances.com, or call 800.GE.CARES (800.432.2737). Please have serial number and model number available when calling for service. In Canada, call 800.561.3344. Servicing your appliance may require the use of the onboard data port for diagnostics.
CONSUMER SUPPORT Consumer Support GE Appliances Website Have a question or need assistance with your appliance? Try the GE Appliances Website 24 hours a day, any day of the year! You can also shop for more great GE Appliances products and take advantage of all our on-line support VHUYLFHV GHVLJQHG IRU \RXU FRQYHQLHQFH ,Q WKH 86 GEAppliances.com ,Q &DQDGD GEAppliances.
RÉFRIGÉRATEUR Congélateur au sommet MESURES DE SÉCURITÉ . . . . . . . . .3 Instructions de fonctionnement Bouton de commande de la température .5 Mode Sabbat . . . . . . . . . . . . . . . . . . . . . . . . . .5 Clayettes du compartiment réfrigérateur . .5 Clayettes du compartiment congélateur . .6 Bacs de rangement . . . . . . . . . . . . . . . . . . . .6 Machine à glaçons automatique . . . . . . . . .7 ENTRETIEN ET NETTOYAGE . . . .
NOUS VOUS REMERCIONS D’ACCUEILLIR GE APPLIANCES CHEZ VOUS Que vous ayez grandi avec GE Appliances ou qu’il s’agisse de votre première acquisition, nous sommes heureux de vous accueillir dans notre famille. Nous sommes fiers du savoir-faire, de l’innovation et de l’esthétique qui composent chaque appareil GE Appliances, et nous pensons que vous le serez aussi.
LISEZ TOUTES LES DIRECTIVES AVANT D'UTILISER L'APPAREIL Pour réduire le risque d’incendie, d’explosion, de choc électrique ou de blessures lorsque vous utilisez votre réfrigérateurde , veuillez suivre ces consignes de sécurité : l’électroménager. Ŷ &H UpIULJpUDWHXU GRLW rWUH FRUUHFWHPHQW LQVWDOOp FRQIRUPpPHQW DX[ &RQVLJQHV G¶,QVWDOODWLRQ DYDQW WRXWH Ŷ /HV HQIDQWV HW OHV SHUVRQQHV GRQW OHV FDSDFLWpV VRQW utilisation.
INFORMATION DE SÉCURITÉ INFORMATION DE SÉCURITÉ IMPORTANTES LISEZ TOUTES LES DIRECTIVES AVANT D'UTILISER L'APPAREIL INSTALLATION AVERTISSEMENT RISQUE D’INCENDIE OU D’EXPLOSION &RQVHUYH] OHV PDWpULDX[ HW YDSHXUV LQIODPPDEOHV j O¶pFDUW GH YRWUH UpIULJpUDWHXU 8QH H[SORVLRQ XQ LQFHQGLH YRLUH OD PRUW pourrait en résulter. BRANCHEMENTS ÉLECTRIQUES AVERTISSEMENT RISQUE DE CHOC ÉLECTRIQUE Branchez l’appareil dans une prise triple avec terre. Ne retirez pas la broche de terre. N’utilisez pas d’adaptateur.
a commande de température règle le réfrigérateur depuis le plus chaud jusqu’au plus froid. À la livraison, votre réfrigérateur est réglé à la valeur d’usine « 3 ». Pour une température plus froide, tournez le bouton dans le sens des aiguilles jusqu’à la valeur « 4 » ou « 5 ». Pour une température plus chaude, tournez le bouton dans le sens contraire des aiguilles jusqu’à « 1 » ou « 2 ».
UTILISATION DU RÉFRIGÉRATEUR: Bacs de rangement Clayettes du compartiment congélateur Lorsqu’elles sont placées correctement sur leurs supports, les clayettes fixes se bloqueront avant de sortir complètement du congélateur et elles ne pencheront pas si vous y placez ou retirez des aliments. &HUWDLQV PRGqOHV VRQW GRWpV GH WDEOHWWHV HQ YHUUH ATTENTION Ne nettoyez pas les tablettes ou couvercles en verre avec de l’eau chaude lorsqu’ils sont froids.
(sur certains modèles) Toutes les caractéristiques ne sont pas disponibles sur tous les modèles. AVERTISSEMENT 5DFFRUGH] O¶DSSDUHLO j XQH alimentation d’eau potable seulement. Une alimentation d’eau froide est requise pour faire fonctionner la machine à glaçons et le pichet à remplissage automatique. La pression d’eau doit se situer entre 40 et 120 psi. (275 à 827 kPa).
ENTRETIEN ET NETTOYAGE Entretien et nettoyage Nettoyage de l’extérieur Directives pour nettoyer les surfaces extérieures, les poignées de porte et les garnitures UTILISER Linge ou éponge doux et propres Linges abrasifs, éponges à récurer, tampons à récurer ou en laine d’acier. Détergent doux dans eau chaude. Nettoyants pour acier inoxydable approuvés; visitez la boutique de pièces GE Appliances pour des nettoyants pour acier inoxydable approuvés : Electromenagersge.
Si vous avez des questions, appelez le 1.800.561.3344 ou visitez notre site Web à l’adresse: electromenagersge.ca AVANT DE COMMENCER DÉGAGEMENTS Veuillez lire toutes les directives attentivement. Prévoyez les dégagements suivants pour faciliter l’installation, la bonne circulation d’air et les raccordements de plomberie et d’électricité. • IMPORTANT – &RQVHUYH] FHV LQVWUXFWLRQV SRXU l’inspecteur local.
INSTRUCTIONS D’INSTALLATION Instructions d’installation INSTALLATION DE LA CONDUITE D’EAU (sur certains modèles) AVANT DE COMMENCER Nous recommandons les trousses d’alimentation d’eau en cuivre WX8X2, WX8X3, WX8X4, selon le montant de conduite dont vous avez besoin. Nous approuvons les FRQGXLWHV G¶HDX HQ PDWLqUH SODVWLTXH 6PDUW&RQQHFW 5HIULJHUDWRU 7XELQJ :; ; :; ; HW WX08X10025). 6L YRXV LQVWDOOH] XQ V\VWqPH G¶HDX *( $SSOLDQFHV 5HYHUVH Osmosis dans votre réfrigérateur, la seule installat
INSTALLATION DE LA CONDUITE D’EAU (SUITE) 5 ACHEMINEZ LE TUYAU AVANT DE COMMENCER Lisez soigneusement chaque étape avant de commencer. AVERTISSEMENT Pour réduire le risque de choc électrique ou de blessure durant l’installation, vous devez d’abord débrancher le réfrigérateur avant de procéder. L’omission de suivre ces instructions pose un risque de choc électrique.
INSTRUCTIONS D’INSTALLATION Instructions d’installation INSTALLATION DE LA CONDUITE D’EAU (SUITE) 8 BRANCHEZ LE TUYAU À VOTRE RÉFRIGÉRATEUR NOTES: • Avant de brancher le tuyau à votre réfrigérateur, assurez-vous que le cordon d’alimentation électrique du réfrigérateur ne soit pas branché à la prise murale. • Nous vous recommandons de poser un filtre à eau *;5/4 GLVSRQLEOH VXU gewaterfilters.
INSTALLATION DE LA POIGNÉE 1A POIGNÉE EN PLASTIQUE Poser la fixation de poignée dans le trou sur les portes congélateur et réfrigérateur. Les fixations correspondent au côté poignée (le côté opposé à la charnière). 2 INSTALLATION DE LA POIGNÉE 1. Fixez la poignée sur la porte congélateur en la glissant vers le haut sur le manchon en plastique ou à l'aide des vis dans le bas de la poignée. 2.
INSTRUCTIONS D’INSTALLATION Instructions d’installation INVERSION DE L’OUVERTURE DES PORTES AVERTISSEMENT Suivez toutes les étapes pour inverser le sens d’ouverture de porte. L’omission de suivre ces instructions, de ne pas utiliser toutes les pièces, ou le serrage excessif des vis, peuvent causer la chute de la porte et occasionner des blessures ou des dommages à la propriété. NOTES IMPORTANTES Pour inverser le sens d’ouverture des portes : • Lisez toutes les directives avant de commencer.
INVERSION DE L’OUVERTURE DES PORTES (SUITE) AVERTISSEMENT Suivez toutes les étapes pour inverser le sens d’ouverture de porte. L’omission de suivre ces instructions, de ne pas utiliser toutes les pièces, ou le serrage excessif des vis, peuvent causer la chute de la porte et occasionner des blessures ou des dommages à la propriété.
INSTRUCTIONS D’INSTALLATION Instructions d’installation INVERSION DE L’OUVERTURE DES PORTES (SUITE) 5 INVERSION DES POIGNÉES DE PORTE 5.1. Enlevez les vis de la poignée dans le haut de la porte réfrigérateur. Enlevez les vis de la poignée dans le bas de la porte congélateur. 5.2. Enlevez la poignée de la porte réfrigérateur en la glissant vers le haut pour la dégager de la fixation (poignée en plastique) ou du manchon en plastique (poignée en acier inoxydable).
INVERSION DE L’OUVERTURE DES PORTES (SUITE) REMISE EN PLACE DES PORTES 5HPLVH HQ SODFH GH OD SRUWH GX UpIULJpUDWHXU $EDLVVH] OD SRUWH GX FRPSDUWLPHQW réfrigérateur sur l’axe de charnière inférieur. Assurez-vous que la rondelle est en place sur l’axe. REMISE EN PLACE DES PORTES (suite) 5HPLVH HQ SODFH GH OD SRUWH GX FRQJpODWHXU 3ODFH] OD SRUWH GX FRQJpODWHXU VXU O¶D[H GH charnière centrale. Assurez-vous que la rondelle est en place sur l’axe.
CONSEILS DE DÉPANNAGE: Bruits normaux de fonctionnement 18 Bruits normaux de fonctionnement Les nouveaux réfrigérateurs n’émettent pas les mêmes sons que les anciens. Les réfrigérateurs modernes comportent davantage de fonctions et utilisent une technologie plus récente. Entendez-vous ce que j’entends? Ces bruits sont normaux. HUMMM... WOUUCH...
eFRQRPLVH] WHPSV HW DUJHQW &RQVXOWH] G¶DERUG OHV WDEOHDX[ GHV SDJHV VXLYDQWHV HW YRXV SRXUULH] YRXV pYLWHU XQ DSSHO GH service.Au besoin, vous pouvez programmer un appel de service en nous visitant sur GEAppliances.com ou en composant le *(&$5(6 $X &DQDGD YLVLWH] Electromenagersge.ca RX FRPSRVH] OH Vérité ou mythe Vérité ou mythe? La machine à glaçons automatique produit de la glace lorsque le réfrigérateur est branché dans une prise électrique.
Notes 20 49-1000394 Rev.
Pour les clients des États-Unis, WRXWHV OHV UpSDUDWLRQV HQ YHUWX GH OD JDUDQWLH VRQW IRXUQLV SDU QRV &HQWUH GH 6HUYLFH G¶8VLQH RX SDU XQ WHFKQLFLHQ DXWRULVp &XVWRPHU &DUH 3RXU SUpYRLU XQH UpSDUDWLRQ FRQVXOWH] QRWUH VLWH electromenagersge.ca ou appelez le *( &$5( 9HXLOOH] DYRLU YRWUH QXPpUR GH VpULH HW YRWUH QXPpUR GH PRGqOH j SRUWpH GH PDLQ ORUVTXH YRXV appelez pour obtenir un service.
SOUTIEN AU CONSOMMATEUR Soutien au consommateur Site Web de GE Appliances Vous avez une question ou vous avez besoin d’aide pour votre appareil électroménager? Visitez le site Web de GE $SSOLDQFHV KHXUHV SDU MRXU WRXV OHV MRXUV GH O¶DQQpH 9RXV SRXYH] DXVVL \ WURXYHU G¶DXWUHV IRUPLGDEOHV SURGXLWV *( $SSOLDQFHV HW WLUHU DYDQWDJH GH WRXV QRV VHUYLFHV G¶DVVLVWDQFH HQ OLJQH $X[ eWDWV 8QLV GEAppliances.com $X &DQDGD Electromenagersge.