ICEMAKER ACCESSORY KIT IM4D and IM4LED SAFETY INFORMATION . . . . . . . . .3 USING THE ICEMAKER Automatic Icemaker. . . . . . . . . . . . . . . . . . . .4 Preparing for Vacation . . . . . . . . . . . . . . . . .4 Setting the icemaker to OFF . . . . . . . . . . . .4 Normal sounds you may hear. . . . . . . . . . . .4 OWNER’S MANUAL & INSTALLATION INSTRUCTIONS INSTALLATION INSTRUCTIONS . . . . . . . . . . . . . . . . .5 Icemaker Installation U, V, W or X . . . . . . .
THANK YOU FOR MAKING GE APPLIANCES A PART OF YOUR HOME. Whether you grew up with GE Appliances, or this is your first, we’re happy to have you in the family. We take pride in the craftsmanship, innovation and design that goes into every GE Appliances product, and we think you will too. 2 49-60698 Rev.
READ ALL INSTRUCTIONS BEFORE INSTALLING THE ICEMAKER OR ACCESSORIES WARNING To reduce the risk of fire, explosion, electric shock, or injury when using your refrigerator, follow these basic safety precautions: Ŷ 5HDG WKH IXOO 6DIHW\ ,QIRUPDWLRQ DQG ,QVWUXFWLRQV of your refrigerator before installing or operating the icemaker. Ŷ :KHQ PRYLQJ WKH UHIULJHUDWRU DZD\ IURP WKH wall, be careful not to roll over or damage the power cord.
USING THE ICEMAKER Automatic Icemaker A newly-installed refrigerator may take 12 to 24 hours to begin making ice. The icemaker will produce seven cubes per cycleapproximately 100-130 cubes in a 24-hour period, depending on freezer compartment temperature, room temperature, number of door openings and other use conditions. ,FHPDNHU When the refrigerator has been connected to the water supply, set the power switch to ON. The icemaker will fill with water when it cools to freezing.
IM4D and IM4LED Icemaker Kit ,I \RX KDYH TXHVWLRQV FDOO *( $SSOLDQFHV DW 1.800.GE.CARES or visit our Website at: GEAppliances.com. ,Q &DQDGD FDOO 1.800.561.3344 or visit our Website at: geappliances.ca BEFORE YOU BEGIN Read these instructions completely and carefully. • IMPORTANT – 6DYH WKHVH LQVWUXFWLRQV IRU local inspector’s use. • IMPORTANT – 2EVHUYH DOO JRYHUQLQJ FRGHV and ordinances.
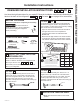
INSTALLATION INSTRUCTIONS Installation Instructions CONTENTS OF KIT IM4D and IM4LED 5 +H[ +HDG 6FUHZ IRU :DWHU /LQH &ODPS ´ 11 6KRUW ~ ´ )LOO WXEH $VVHPEO\ ,FHPDNHU ,0 ' 1 ,FHPDNHU ,0 ' RU 12 /RQJ ~ ´ )LOO WXEH $VVHPEO\ 6 :DWHU /LQH &ODPS VWUDLQ UHOLHI IRU house water line 13 ,FHPDNHU )LOO &XS VLGH PRXQWHG 14 +RVH &ODPS 15 +H[ +HDG 6FUHZV IRU attaching water tube LQOHW FRYHU ´ ICEMAKER WARRANTY VERIFICATION ,FHPDNHU ,0 /(' Date Installed Dealer :DUUDQW\ /DEHO Q OODWLR ,
ICEMAKER INSTALLATION INSTRUCTIONS U V W OR X $UH WKHVH WKH ULJKW LQVWUXFWLRQV IRU \RXU PRGHO" )ROORZ WKH ,QVWDOODWLRQ ,QVWUXFWLRQV LQGLFDWHG E\ WKH label on the back of the refrigerator - 8 V W or X . For letter T , go to page 10 for instructions. BEFORE YOU BEGIN Read these instructions completely and carefully. WARNING To reduce the risk of electric shock or injury during installation, you must first unplug the refrigerator before proceeding.
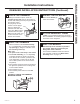
INSTALLATION INSTRUCTIONS Installation Instructions ICEMAKER INSTALLATION INSTRUCTIONS (Continued) 3 REMOVE THE OUTLET COVER 5 Peel off the outlet cover. INSTALL FILL TUBE *R WR WKH EDFN RI WKH UHIULJHUDWRU 2Q WKH refrigerator side of the fill tube assembly RU 12 depending on model), there is an adhesive EDFNLQJ 5HPRYH WKH DGKHVLYH EDFNLQJ DQG VOLGH the tube into the hole near the top at the back of the refrigerator. Firmly press on the fill tube assembly to secure it to the refrigerator.
ICEMAKER INSTALLATION INSTRUCTIONS (Continued) 8 PLUG IN THE ICEMAKER Holding the icemaker in place, insert the icemaker power cord plug into the socket on the side wall, making sure the prongs and holes are matched. Press the plug firmly into the VRFNHW /RFN WKH SOXJ LQ Hook place by clipping the restraints onto each side RI WKH SOXJ 0DNH VXUH WKH restraints click into place. 0DNH VXUH WKH SRZHU FRUG is still in the hook on the back of the icemaker.
INSTALLATION INSTRUCTIONS Installation Instructions ICEMAKER INSTALLATION INSTRUCTIONS T - IM4D ONLY BEFORE YOU BEGIN 2 Read these instructions completely and carefully. 6HW WKH LFHPDNHU SRZHU VZLWFK WR OFF /HDYH the power switch in the OFF position until the refrigerator is connected to the water supply to prevent premature operation. WARNING To reduce the risk of electric shock or injury during installation, you must first unplug the refrigerator before proceeding.
ICEMAKER INSTALLATION INSTRUCTIONS (Continued) 5 PLUG IN THE ICEMAKER Holding the icemaker in place, insert the icemaker power cord plug into the socket on the side wall, making sure the prongs and holes are matched. Press the plug firmly into the socket. /RFN WKH SOXJ LQ SODFH E\ FOLSSLQJ WKH UHVWUDLQWV RQWR HDFK VLGH RI WKH SOXJ 0DNH VXUH WKH restraints click into place and the power cord is still in the hook on the back of the icemaker.
INSTALLATION INSTRUCTIONS Installation Instructions WATER VALVE INSTALLATION INSTRUCTIONS U V W OR X $UH WKHVH WKH ULJKW LQVWUXFWLRQV IRU \RXU PRGHO" )ROORZ WKH ,QVWDOODWLRQ ,QVWUXFWLRQV LQGLFDWHG E\ WKH label on the back of the refrigerator - 8 V W or X . For letter T , go to page 14 for instructions. BEFORE YOU BEGIN Read these instructions completely and carefully. 2 Ɣ /RFDWH WKH IHPDOH connector plug.
WATER VALVE ASSEMBLY INSTALLATION INSTRUCTIONS (Continued) 3 CONNECT WATER TUBE TO INLET (cont.) 5 Ɣ 8VLQJ RQH RI WKH adhesive-backed fasteners VHFXUH WKH ZDWHU WXEH WR WKH EDFN RI WKH UHIULJHUDWRU DERXW EHORZ WKH LQOHW Ɣ ,I WKH ZDWHU WXEH LV QRW SXVKHG LQ DV IDU DV LW can go and the hose clamp is not in place over the fill tube assembly, then leaks are possible.
INSTALLATION INSTRUCTIONS Installation Instructions WATER VALVE INSTALLATION INSTRUCTIONS T - IM4D ONLY BEFORE YOU BEGIN 2 Read these instructions completely and carefully. Ɣ 5HPRYH ZDWHU OLQH IURP WKH YDOYH DVVHPEO\ LQFOXGHG LQ WKLV NLW E\ UHPRYLQJ WKH WXEH from the clip and pushing on the bottom of the YDOYH TXLFN FRQQHFW GLVHQJDJLQJ WKH WXEH DQG pulling it from the valve.
WATER VALVE ASSEMBLY INSTALLATION INSTRUCTIONS (Continued) 4 ATTACH THE WATER VALVE TO THE MACHINE COMPARTMENT 6 Ɣ /RFDWH WKH IHPDOH connector plug. Plug the female connector onto the male terminals on the water valve. Either wire can go on either terminal. Ɣ )DVWHQ WKH ZDWHU valve to the cabinet by driving the hex-head VFUHZ IURP the kit through the hole in the bracket extension and into the hole in the cabinet.
INSTALLATION INSTRUCTIONS Installation Instructions INSTALLING THE WATER LINE BEFORE YOU BEGIN WHAT YOU WILL NEED 5HFRPPHQGHG FRSSHU ZDWHU VXSSO\ NLWV DUH :; ; WX8X3 or WX8X4, depending on the amount of tubing you need. Approved plastic water supply OLQHV DUH 6PDUW&RQQHFW 5HIULJHUDWRU 7XELQJ :; ; :; ; :; ; DQG WX08X10025). When connecting your refrigerator to a GE $SSOLDQFHV 5HYHUVH 2VPRVLV :DWHU 6\VWHP WKH RQO\ DSSURYHG LQVWDOODWLRQ LV ZLWK D *( $SSOLDQFHV 59.
INSTALLING THE WATER LINE (Continued) WHAT YOU WILL NEED &RQWLQXHG 2 &KRRVH D ORFDWLRQ IRU WKH YDOYH WKDW LV HDVLO\ DFFHVVLEOH ,W LV EHVW WR FRQQHFW LQWR WKH VLGH RI a vertical water pipe. When it is necessary to connect into a horizontal water pipe, make the connection to the top or side, rather than at the bottom, to avoid drawing off any sediment from the water pipe.
INSTALLATION INSTRUCTIONS Installation Instructions INSTALLING THE WATER LINE (Continued) 5 TIGHTEN THE PIPE CLAMP Tighten the clamp screws until the sealing washer begins to swell. NOTE: Do not overtighten or you may crush the tubing. Washer )RU SODVWLF WXELQJ IURP D 6PDUW&RQQHFW 5HIULJHUDWRU 7XELQJ NLW LQVHUW WKH PROGHG HQG of the tubing into the shutoff valve and tighten compression nut until it is hand tight, then tighten RQH DGGLWLRQDO WXUQ ZLWK D ZUHQFK 2YHUWLJKWHQLQJ may cause leaks.
INSTALLING THE WATER LINE (Continued) 9 CONNECT THE TUBING TO THE REFRIGERATOR &RQWLQXHG 11 3ODFH WKH FRPSUHVVLRQ QXW DQG IHUUXOH VOHHYH RQWR WKH HQG RI WKH WXELQJ DV VKRZQ 2Q 6PDUW&RQQHFW 5HIULJHUDWRU 7XELQJ NLW WKH QXWV are already assembled to the tubing. ,QVHUW WKH HQG RI WKH WXELQJ LQWR WKH ZDWHU YDOYH connection as far as possible. While holding the tubing, tighten the fitting.
TROUBLESHOOTING TIPS Troubleshooting Tips... Before you call for service 6DYH WLPH DQG PRQH\ 5HYLHZ WKH FKDUWV RQ WKH IROORZLQJ SDJHV ILUVW DQG \RX PD\ QRW QHHG WR FDOO IRU VHUYLFH ,I needed, service can be scheduled by visiting us online GEAppliances.com RU FDOOLQJ *(&$5(6 ,Q &DQDGD YLVLW *($SSOLDQFHV FD RU FDOO Problem Possible Causes What to Do Automatic icemaker does not work Freezer compartment too warm.
Problem Possible Causes Leaking water around the fill cup Foam in the fill cup from installing the fill tube. What to Do ,I WKH ¿OO WXEH ZDV LQVWDOOHG E\ VOLGLQJ it through the back of the refrigerator, it may have picked up pieces of foam as it was pushed through. This foam can LQWHUIHUH ZLWK WKH ZDWHU ÀRZ LQ WKH ¿OO FXS &KHFN WKH FXS DQG make sure there are no foam pieces. Fill tube not correctly seated &KHFN WKDW WKH ¿OO WXEH LV FRUUHFWO\ in the fill cup.
TROUBLESHOOTING TIPS Troubleshooting Tips... Before you call for service Problem Possible Causes What to Do Ice cubes have odor/ taste Ice storage bin needs cleaning. Food transmitting odor/taste to ice cubes. Interior of refrigerator needs cleaning. Normal operation. Empty and wash bin. Discard old cubes. Frequent “buzzing” sound Icemaker LED lights WXUQLQJ Rႇ ,0 /(' only) Icemaker LED lights not turning on (IM4LED only) Normal operation. Blocked sensor Wrap foods well.
GEAppliances.com $OO ZDUUDQW\ VHUYLFH LV SURYLGHG E\ RXU )DFWRU\ 6HUYLFH &HQWHUV RU DQ DXWKRUL]HG &XVWRPHU &DUH® technician. To schedule service online, visit us at geappliances.com/service RU FDOO *( $SSOLDQFHV DW *( &$5(6 3OHDVH have your serial number and your model number available when calling for service. In Canada, call 800.561.3344.
CONSUMER SUPPORT Consumer Support GE Appliances Website +DYH D TXHVWLRQ RU QHHG DVVLVWDQFH ZLWK \RXU DSSOLDQFH" 7U\ WKH *( $SSOLDQFHV :HEVLWH KRXUV D GD\ DQ\ GD\ RI WKH \HDU
TROUSSE DE MACHINE À GLAÇONS IM4D et IM4LED INFORMATION DE SÉCURITÉ . . .3 UTILISATION DE LA MACHINE À GLAÇONS Machine à glaçons automatique . . . . . . . . .4 Préparation à un départ de longue durée . . . . . . . . . . . . . . . . . . . . . .4 Mise à l’arrêt de la machine à glaçons . . . .4 Bruits normaux que vous pouvez entendre . . . . . . . . . . . . . . . . . . . . .4 MANUEL D’UTILISATION ET INSTRUCTIONS D’INSTALLATION INSTRUCTIONS D’INSTALLATION . . . . . . . . . . . . . . .
NOUS VOUS REMERCIONS D’ACCUEILLIR GE APPLIANCES CHEZ VOUS Que vous ayez grandi avec GE Appliances ou qu’il s’agisse de votre première acquisition, nous sommes heureux de vous accueillir dans notre famille. Nous sommes fiers du savoir-faire, de l’innovation et de l’esthétique qui composent chaque appareil GE Appliances, et nous pensons que vous le serez aussi. 2 49-60698 Rev.
LISEZ TOUTES LES DIRECTIVES AVANT D'INSTALLER LA MACHINE À GLAÇONS OU DES ACCESSOIRES AVERTISSEMENT Afin de réduire le risque d’incendie, d’explosion, de décharge électrique ou de blessure lors de l’utilisation de votre réfrigérateur, observez ces consignes de sécurité fondamentales : Ŷ /LVH] WRXWH O¶LQIRUPDWLRQ GH VpFXULWp HW OHV LQVWUXFWLRQV de votre réfrigérateur avant d’installer ou d’utiliser la machine à glaçons.
UTILISATION DE LA MACHINE À GLAÇONS Machine à glaçons automatique Un réfrigérateur nouvellement installé peut prendre de 12 à 24 heures pour commencer à produire des glaçons. /D PDFKLQH j JODoRQV SURGXLW VHSW JODoRQV SDU F\FOH VRLW environ 100 à 130 glaçons par 24 heures, selon la température du compartiment congélation, la température de la pièce, le nombre de fois que la porte est ouverte et les autres conditions d’utilisation.
IM4D et IM4LED Trousse de machine à glaçons Vous avez des questions? Au Canada, appelez au numéro 1.800.561.3344 ou visitez notre site Web à l’adresse electromenagersge.ca AVANT DE COMMENCER Lisez ces instructions complètement et attentivement. Ɣ IMPORTANT – Conservez ces instructions pour votre inspecteur local. Ɣ IMPORTANT – Observez tous les codes et les ordonnances en vigueur. Ɣ Note à l’installateur – Assurez-vous de laisser ces instructions au consommateur.
INSTRUCTIONS D’INSTALLATION Instructions d’installation Contenu de la trousse im-4D et IM4LED 5 Vis à tête hexagonale pour collier de serrage de conduite d’eau (3/4 po)* 1 0DFKLQH j JODoRQV /¶DVSHFW SHXW varier) ou 11 Tube de remplissage court (~8 po) 12 Tube de remplissage long (~9 po) 6 Collier de serrage de conduite d’eau (collier de serrage), pour la conduite d’alimentation d’eau de la maison ICEMAKER WARRANTY VERIFICATION Date Installed 0DFKLQH j JODoRQV ,0 /(' 13 5pFLSLHQW GH remplissage
INSTRUCTIONS D’INSTALLATION DE LA MACHINE À GLAÇONS U V W OU X &HV LQVWUXFWLRQV VRQW HOOHV DSSURSULpHV SRXU YRWUH PRGqOH" 6XLYH] OHV LQVWUXFWLRQV G¶LQVWDOODWLRQ ¿JXUDQW sur l’étiquette à l’arrière de votre réfrigérateur - - U V W ou X . Pour la lettre T , allez à la page 10 et suivez les instructions qui y sont énumérées.. AVANT DE COMMENCER Pour la lettre V et X Lisez soigneusement chaque étape avant de commencer.
INSTRUCTIONS D’INSTALLATION Instructions d’installation INSTRUCTIONS D’INSTALLATION DE LA MACHINE À GLAÇONS (Suite) 3 ENLEVEZ LE RECOUVREMENT DE LA SORTIE D’EAU 5 'pFROOH] OH UHFRXYUHPHQW de la sortie d’eau. $OOH] j O¶DUULqUH GX UpIULJpUDWHXU 'X F{Wp UpIULJpUDWHXU du tube de remplissage (11 ou 12 selon le modèle) se WURXYH XQ GRV DGKpVLI 5HWLUH] FH GRV HW JOLVVH] OH WXEH dans le trou près du haut de l’arrière du réfrigérateur. Pressez fermement sur le tube pour le fixer au réfrigérateur.
INSTRUCTIONS D’INSTALLATION DE LA MACHINE À GLAÇONS (Suite) 8 BRANCHEZ LA MACHINE À GLAÇONS En tenant la machine à glaçons en place, insérez la fiche de cordon d’alimentation électrique de la machine à glaçons dans la prise située sur la paroi de côté, en vous assurant de mettre les bonnes broches dans les bons trous. Pressez fort la fiche dans la prise. Fixez la fiche en place en agrafant les dispositifs de retenue Crochet des deux côtés de la fiche.
INSTRUCTIONS D’INSTALLATION Instructions d’installation INSTRUCTIONS D’INSTALLATION DE LA MACHINE À GLAÇONS T - IM4D SEULEMENT AVANT DE COMMENCER 2 Lisez soigneusement chaque étape avant de commencer. AVERTISSEMENT Pour réduire le risque de choc électrique ou de blessure durant l’installation, vous devez d’abord débrancher le UpIULJpUDWHXU DYDQW GH SURFpGHU /¶RPLVVLRQ GH suivre ces instructions peut poser un risque de choc électrique.
INSTRUCTIONS D’INSTALLATION DE LA MACHINE À GLAÇONS (Suite) 5 BRANCHEZ LA MACHINE À GLAÇONS En tenant la machine en place, insérez la fiche de son cordon d’alimentation dans la prise sur la paroi latérale, en vous assurant que les broches s’insèrent dans les bons orifices. Poussez fermement la fiche dans la prise. Verrouillez la fiche en place en encliquetant les languettes de retenue de chaque côté de la fiche.
INSTRUCTIONS D’INSTALLATION Instructions d’installation INSTRUCTIONS D’INSTALLATION DE L’ENSEMBLE DE ROBINET D’EAU U V W OU X &HV LQVWUXFWLRQV VRQW HOOHV DSSURSULpHV SRXU YRWUH PRGqOH" 6XLYH] OHV LQVWUXFWLRQV G¶LQVWDOODWLRQ ¿JXUDQW VXU l’étiquette à l’arrière de votre réfrigérateur - U V W ou X . Pour la lettre T , allez à la page 14 pour des instructions. AVANT DE COMMENCER 2 Lisez soigneusement chaque étape avant de commencer. Ɣ 7URXYH] OD SULVH GX C connecteur femelle.
INSTRUCTIONS D’INSTALLATION DE L’ENSEMBLE DE ROBINET D’EAU (Suite) 3 BRANCHEZ LA CONDUITE D’EAU À L’ENTRÉE DE CONDUITE (suite) 5 Ɣ ¬ O¶DLGH GH O¶XQ GHV GLVSRVLWLIV GH IL[DWLRQ DYHF envers adhésif (4), fixez la conduite d’eau à l’arrière du réfrigérateur à environ 12 mm (1/2 po) en dessous de l’entrée. Ɣ 6L OD FRQGXLWH G¶HDX Q¶HVW SDV SRXVVpH DXVVL ORLQ que possible ou si le coller de serrage n’est pas en place sur le tube de remplissage, des fuites peuvent se produire.
INSTRUCTIONS D’INSTALLATION Instructions d’installation INSTRUCTIONS D’INSTALLATION DE L’ENSEMBLE DE ROBINET D’EAU T - IM4D SEULEMENT AVANT DE COMMENCER 2 Lisez soigneusement chaque étape avant de commencer. TUBULURE D’EAU EN PLASTIQUE Ɣ 3RXU HQOHYHU OD FRQGXLWH G¶HDX GX URELQHW GH FHW ensemble, retirez le tube de l’attache, poussez sur le bas du raccord à connexion rapide du robinet, dégagez le tube puis tirez-le pour le sortir du robinet.
INSTRUCTIONS D’INSTALLATION DE L’ENSEMBLE DE ROBINET D’EAU (Suite) 4 FIXEZ LE ROBINET D’EAU AU COMPARTIMENT MACHINE Ɣ 5HSpUH] OD ILFKH GX connecteur femelle. Branchez le connecteur femelle dans les bornes mâles du robinet d’eau. N’importe quel fil peut se brancher sur n’importe quelle borne. Ɣ )L[H] OH URELQHW G¶HDX dans la carrosserie en vissant la vis à tête hexagonale (9) (fournie avec l’ensemble) dans le trou de la rallonge de support puis 9 dans le trou de la carrosserie.
INSTRUCTIONS D’INSTALLATION Instructions d’installation INSTALLATION DE LA CONDUITE D’EAU AVANT DE COMMENCER CE DONT VOUS AUREZ BESOIN Nous recommandons les trousses d’alimentation d’eau en cuivre WX8X2, WX8X3, WX8X4, selon le montant de conduite dont vous avez besoin. Nous approuvons les conduites d’eau en matière plastique SmartConnect™ 5HIULJHUDWRU 7XELQJ :; ; :; ; WX08X10015 et WX08X10025).
INSTALLATION DE LA CONDUITE D’EAU CE DONT VOUS AUREZ BESOIN (suite) 2 (SUITE) CHOISISSEZ L’EMPLACEMENT DU ROBINET Percez un trou de 1/4 po dans le tuyau d’eau, à l’aide d’un foret dur. Enlevez toute barbure due au perçage du trou dans le tuyau. Faites attention de ne pas laisser de l’eau couler dans votre perceuse électrique. Si vous ne percez pas un trou de 1/4 po, vous obtiendrez une alimentation d’eau réduite et des glaçons plus petits.
INSTALLATION INSTRUCTIONS Instructions d’installation INSTALLATION DE LA CONDUITE D’EAU (SUITE) 5 Serrez les vis du collier jusqu’à ce que la rondelle d’étanchéité commence à enfler. NOTE : Ne serrez pas trop. Vous risquez d’écraser le tuyau de cuivre. 5RQGHOOH Collier de serrage Vis du collier 6 NOTE : Vous devez vous conformer aux Codes GH SORPEHULH &05 GX &RPPRQZHDOWK RI 0DVVDFKXVHWWV /HV URELQHWV G¶DUUrW j pWULHU VRQW illégaux et leur utilisation n’est pas autorisée au Massachusetts.
INSTALLATION DE LA CONDUITE D’EAU (SUITE) 9 BRANCHEZ LE TUYAU À VOTRE RÉFRIGÉRATEUR (Suite) 11 Placez l’écrou de compression et la bague (manchon) à l’extrémité du tuyau comme l’indique l’illustration. Si YRXV XWLOLVH] XQH WURXVVH 6PDUW&RQQHFW 5HIULJHUDWRU Tubing, les écrous sont déjà assemblés au tuyau. Insérez l’extrémité du tuyau dans le branchement du robinet d’arrêt d’eau, le plus loin que possible. Tout en tenant le tuyau, serrez le raccord.
CONSEILS DE DÉPANNAGE Conseils de dépannage... Avant de faire un appel de service Économisez temps et argent! Consultez d’abord les tableaux des pages suivantes et vous pourriez vous éviter un appel de service.Si nécessaire, une visite de service peut être programmée en nous visitant sur GEAppliances.com ou en composant 800.
Problème Causes possibles Solutions L’eau fuit autour de la tasse de remplissage Il y a de la mousse dans la tasse de remplissage resultant de l’installation de la conduite de remplissage. Si vous avez installé la conduite de remplissage en la faisant glisser par l’arrière du réfrigérateur, Conduite de vous pouvez avoir entraîné des remplissage morceaux de mousse en le poussant.
CONSEILS DE DÉPANNAGE 22 Conseils de dépannage... Avant de faire un appel de service Problème Causes possibles Les glaçons ont une odeur Le bac à glaçons doit être ou un goû nettoyé. Les aliments donnent de l’odeur ou du goût aux glaçons. L’intérieur du réfrigérateur a besoin d’être nettoyé. Il y a un bourdonnement C’est normal. fréquent Les lampes DEL s’éteignent (IM4D seulement) Les lampes DEL ne s’allument pas (IM4D seulement) C’est normal. Solutions Videz et lavez le bac à glaçons.
electromenagersGE.ca Toutes les réparations en vertu de la garantie sont fournis par nos Centre de Service d’Usine ou par un technicien autorisé Customer Care®. Pour prévoir une réparation, consultez notre site electromenagersge.ca/fr/soutien/demande-de-service ou appelez le 800.661.1616. Veuillez avoir votre numéro de série et votre numéro de modèle à portée de main lorsque vous appelez pour obtenir un service.
SOUTIEN AU CONSOMMATEUR Soutien au consommateur Site Web de GE Appliances Vous avez une question ou vous avez besoin d’aide pour votre appareil électroménager? Visitez le site Web de GE Appliances 24 heures par jour, tous les jours de l’année! Vous pouvez aussi y trouver d’autres formidables produits GE Appliances et tirer avantage de tous nos services d’assistance en ligne. Aux États-Unis : GEAppliances.com Au Canada : electromenagersGE.
KIT DE ACCESORIOS DE LAS MÁQUINAS DE HIELOS IM4D e IM4LED INFORMACIÓN DE SEGURIDAD . . . .3 USO DE LA MÁQUINA DE HIELOS Máquina automática de hielos . . . . . . . . . . . . . . Cómo prepararse para las vacaciones . . . . . . . Configuración de la máquina de hielos en OFF (Apagado) . . . . . . . . . . . . . . . . . . . . . Sonidos normales que puede escuchar . . . . . . 4 4 MANUAL DEL PROPIETARIO E INSTALACIÓN 4 4 INSTRUCCIONES DE INSTALACIÓN . . . . . . . . . . . . . . . . . . .
GRACIAS POR HACER QUE GE APPLIANCES SEA PARTE DE SU HOGAR. Ya sea que haya crecido usando GE Appliances, o que ésta es su primera vez, nos complace tenerlo en la familia. Sentimos orgullo por el nivel de arte, innovación y diseño de cada uno de los electrodomésticos de GE Appliances, y creemos que usted también. 2 49-60698 Rev.
LEA TODAS LAS INSTRUCCIONES ANTES DE INSTALAR LA MÁQUINA DE HIELOS O LOS ACCESORIOS ADVERTENCIA A fin de reducir el riesgo de incendio, explosión, descargas eléctricas o lesiones al usar su refrigerador, siga estas precauciones básicas de seguridad: Ŷ /HD FRPSOHWDPHQWH OD ,QIRUPDFLyQ GH 6HJXULGDG H ,QVWUXFFLRQHV GH VX UHIULJHUDGRU DQWHV GH LQVWDODU R usar la máquina de hielos. Ŷ $O DOHMDU HO UHIULJHUDGRU GH OD SDUHG VH GHEHUi WHQHU cuidado de que no ruede sobre ni dañe el cable de corriente.
USO DE LA MÁQUINA DE HIELOS Máquina automática de hielos Un refrigerador recién instalado puede tomar desde 12 hasta 24 horas para empezar a hacer hielo. /D PiTXLQD GH KLHORV SURGXFLUi VLHWH FXERV SRU FLFOR aproximadamente entre 100–130 cubos en un período de 24 horas, dependiendo de la temperatura en el compartimiento del congelador, la temperatura del sitio, las veces que se abra la puerta y otras condiciones.
IM4D y IM4LED Kit para hielos ¿Preguntas? Llame 800.GE.CARES (800.432.2737) o Visite nuestra página en la red en: GEAppliances.com ANTES DE EMPEZAR Lea estas instrucciones completa y cuidadosamente. • IMPORTANTE – Guarde estas instrucciones para el uso del inspector local. • IMPORTANTE – Cumpla con todos los códigos y ordenanzas gubernamentales. • Nota para el instalador Asegúrese de dejar estas instrucciones con el consumidor.
INSTRUCCIONES PARA INSTALACIÓN Instrucciones para instalación CONTENIDO DEL KIT IM4D y IM4LED 5 Tornillo de cabeza hexagonal, para la abrazadera para la tubería del agua (3/4”)* 11 Ensamble corto del tubo de llenado (~8”) 1 Máquina de hielos /D DSDULHQFLD SRGUtD YDULDU R 12 Ensamble largo del tubo de llenado (~9”) 6 Abrazadera para la tubería del agua (alivio de presión), para la tubería del agua de la casa ICEMAKER WARRANTY VERIFICATION 13 Date Installed Dealer 0iTXLQD GH KLHORV ,0 /(' 7 Etiqueta
INSTRUCCIONES PARA LA INSTALACIÓN DE LA MÁQUINA DE HIELOS U V W O X ¢6RQ pVWDV ODV LQVWUXFFLRQHV FRUUHFWDV SDUD VX PRGHOR" 6LJD ODV ,QVWUXFFLRQHV GH ,QVWDODFLyQ LQGLFDGDV HQ la etiqueta en la parte trasera del refrigerador - U V W o X . Para la letra T , consulte las instrucciones que aparecen en la página 10. ANTES DE EMPEZAR Para la letra V o X Lea cada paso completamente antes de proceder.
INSTRUCCIONES PARA INSTALACIÓN Instrucciones para instalación INSTRUCCIONES PARA LA INSTALACIÓN DE LA MÁQUINA DE HIELOS (Cont.) 3 RETIRE LA TAPA DE LA FICHA 5 Quite la tapa de la ficha. INSTALE EL TUBO DE LLENADO Vaya a la parte trasera del refrigerador.
INSTRUCCIONES PARA LA INSTALACIÓN DE LA MÁQUINA DE HIELOS (Cont.) 8 CONECTE LA MÁQUINA DE HIELOS Sosteniendo la máquina de hielos en su lugar, inserte el enchufe del cable de corriente de la máquina de hielos en el orificio de la pared lateral, asegurándose de que las patas y los orificios se ajusten. Presione el enchufe firmemente en el Gancho orificio. Asegure el enchufe en su lugar fijando los sujetadores en cada costado del enchufe. Asegúrese de que los sujetadores encajen en su lugar.
INSTRUCCIONES PARA INSTALACIÓN Instrucciones para instalación INSTRUCCIONES PARA LA INSTALACIÓN DE LA MÁQUINA DE HIELOS T - IM4D ÚNICAMENTE ANTES DE EMPEZAR 2 FIJE EL INTERRUPTOR EN LA Lea cada paso completamente antes de proceder. ADVERTENCIA POSICIÓN DE OFF (apagado) Fije el interruptor de corriente de la máquina de hielos en la posición de OFF (apagado) hasta que el refrigerador se conecte al suministro de agua para evitar la operación prematura de la misma.
INSTRUCCIONES PARA LA INSTALACIÓN DE LA MÁQUINA DE HIELOS (Continued) 5 ENCHUFE LA MÁQUINA DE HIELOS Sosteniendo la máquina de hielos en su posición, inserte el enchufe del cable de corriente en la ficha sobre la pared lateral, asegurándose de que las clavijas y los agujeros coincidan. Presione el cable de manera firme en la ficha. Ajuste el enchufe en su posición, sujetando los encastres a cada lado del enchufe.
INSTRUCCIONES PARA INSTALACIÓN Instrucciones para instalación INSTRUCCIONES PARA LA INSTALACIÓN DEL ENSAMBLE DE LA VÁLVULA DEL AGUA U V W O X ¢6RQ pVWDV ODV LQVWUXFFLRQHV FRUUHFWDV SDUD VX PRGHOR" 6LJD ODV ,QVWUXFFLRQHV GH ,QVWDODFLyQ LQGLFDGDV HQ la etiqueta en la parte trasera del refrigerador- U V W o X . Para la letra T , consulte las instrucciones que aparecen en la página 14. ANTES DE EMPEZAR 2 INSTALE LA VÁLVULA DEL AGUA Lea cada paso completamente antes de proceder.
INSTRUCCIONES PARA LA INSTALACIÓN DEL ENSAMBLE DE LA VÁLVULA DEL AGUA (Continued) 3 CONECTE EL TUBO DEL AGUA 5 DIRIJA E INSTALE EL TUBO DEL A LA ENTRADA (cont.) AGUA Ɣ &RQ XQR GH ORV VXMHWDGRUHV FRQ DGKHVLYR SRVWHULRU (4), fije el tubo del agua en la parte posterior del refrigerador, aproximadamente a 1/2" por debajo de la entrada.
INSTRUCCIONES PARA INSTALACIÓN Instrucciones para instalación INSTRUCCIONES PARA LA INSTALACIÓN DEL ENSAMBLE DE LA VÁLVULA DEL AGUA T - IM4D ÚNICAMENTE ANTES DE EMPEZAR 2 TUBERÍA PLÁSTICA DE AGUA Lea cada paso completamente antes de proceder. ADVERTENCIA A fin de reducir el riesgo de descarga eléctrica o lesión durante la instalación, primero deberá desenchufar el refrigerador antes de proceder. Si no se siguen estas instrucciones, se podrá producir descarga eléctrica.
INSTRUCCIONES PARA LA INSTALACIÓN DEL ENSAMBLE DE LA VÁLVULA DEL AGUA (Continued) 4 ADHIERA LA VÁLVULA DE AGUA AL COMPARTIMIENTO DE LA MÁQUINA Ɣ 8ELTXH HO HQFKXIH de conexión hembra. Enchufe el conector hembra en las terminales macho de la válvula de agua. Se puede usar cualquiera de los cables en cualquiera de las terminales.
INSTRUCCIONES PARA INSTALACIÓN Instrucciones para instalación INSTALACIÓN DE LA TUBERÍA DEL AGUA ANTES DE INICIAR QUÉ NECESITA /RV NLWV GH FREUH UHFRPHQGDGRV SDUD HO VXPLQLVWUR GH agua son WX8X2, WX8X3 o WX8X4, dependiendo de OD FDQWLGDG GH WXEHUtD QHFHVDULD /DV WXEHUtDV SOiVWLFDV aprobadas para el suministro de agua son las tuberías para el refrigerador SmartConnect™ (WX08X10002, WX08X10006, WX08X10015 y WX08X10025).
INSTALACIÓN DE LA TUBERÍA DEL AGUA (Cont.) QUÉ NECESITA (Cont.) 2 SELECCIONE LA UBICACIÓN DE LA VÁLVULA Ɣ Dos tuercas de compresión de 1/4" de diámetro exterior y 2 férulas (mangas)—para conectar la tubería de cobre a la válvula de cierre y la válvula del agua del refrigerador. O BIEN Ɣ Si está usando un kit de tubería para el refrigerador SmartConnect™, los accesorios necesarios ya vienen preinstalados en la tubería. Seleccione una ubicación para la válvula que sea fácilmente accesible.
INSTRUCCIONES PARA INSTALACIÓN Instrucciones para instalación INSTALACIÓN DE LA TUBERÍA DEL AGUA (Continued) 5 APRIETE LA ABRAZADERA DEL TUBO Apriete los tornillos de la abrazadera hasta que la arandela sellante empiece a hincharse. NOTA: No apriete demasiado la tubería ya que podría romperse. Arandela Abrazadera del tubo Extremo de entrada Tornillo de la abrazadera NOTA: 6H GHEHUiQ VHJXLU ORV &yGLJRV &05 de Plomería para el Estado de Massachusetts.
INSTALACIÓN DE LA TUBERÍA DEL AGUA (Continued) 9 CONECTE LA TUBERÍA 11 CONECTE EL REFRIGERADOR AL REFRIGERADOR (Continued) Coloque la tuerca de compresión y la férula (manga) en el extremo de la tubería como se muestra. En el kit de tubería para el refrigerador SmartConnectTM, las tuercas ya vienen armadas con la tubería. ,QVHUWH HO H[WUHPR GH OD WXEHUtD HQ OD FRQH[LyQ GH la válvula del agua lo más que se pueda. Mientras sostiene la tubería, apriete el accesorio.
SOLUCIONAR PROBLEMAS Consejos para la Solución de Problemas... Antes de solicitar el servicio técnico ¡Ahorre tiempo y dinero! Primero revise los cuadros que aparecen en las siguientes páginas y es posible que no necesite solicitar reparaciones. Problema Posibles causas Qué hacer La máquina automática de hielos no funciona/ no hace hielos El compartimento del congelador está muy cálido. 'HVSXpV GH LQVWDODU HO NLW SHUPLWD TXH HO UHIULJHUDGRU se enfríe completamente por 24 horas.
Problema Posibles causas Qué hacer Fuga de agua alrededor de la copa de llenado Espuma adquirida durante la instalación del tubo de llenado. Si el tubo de llenado fue instalado deslizándolo a través de la parte posterior del refrigerador, es posible que haya agarrado pedazos de espuma cuando fue Tubo de llenado empujado a través de la espuma. Esta espuma puede interferir con el ÀXMR GHO DJXD HQ OD FRSD GH OOHQDGR Cerciórese de que no exista espuma en la copa.
SOLUCIONAR PROBLEMAS 22 Consejos para la Solución de Problemas... Antes de solicitar el servicio técnico Problema Posibles causas Qué hacer Los cubos de hielo tienen olor / sabor El recipiente de almacenamiento necesita limpieza. La comida está transmitiendo olor / sabor a los cubos de hielo. El interior del refrigerador necesita limpieza. Operación normal. 'HVRFXSH \ ODYH HO UHFLSLHQWH 'HVHFKH ORV FXERV YLHMRV Zumbido frecuente Las luces LED de la máquina Operación normal.
GEAppliances.com Todo el servicio de garantía es provisto por nuestros Centros de Servicio de Fabricación, o un técnico autorizado de Customer &DUH 3DUD SURJUDPDU XQD YLVLWD GHO VHUYLFLR WpFQLFR D WUDYpV GH ,QWHUQHW YLVtWHQRV HQ GEAppliances.com/service, o llame al 800. *( &$5(6 &XDQGR OODPH SDUD VROLFLWDU HO VHUYLFLR WHQJD ORV Q~PHURV GH VHULH \ PRGHOR GLVSRQLEOHV En Canadá, llame al 800.561.3344.
SOPORTE PARA EL CONSUMIDOR Soporte para el Consumidor Sitio Web de GE Appliances ¢'HVHD UHDOL]DU XQD FRQVXOWD R QHFHVLWD D\XGD FRQ VX HOHFWURGRPpVWLFR" £,QWHQWH D WUDYpV GHO 6LWLR :HE GH *( $SSOLDQFHV ODV 24 horas del día, cualquier día del año! Usted también puede comprar más electrodomésticos maravillosos de GE Appliances y DSURYHFKDU WRGRV QXHVWURV VHUYLFLRV GH VRSRUWH D WUDYpV GH ,QWHUQHW GLVHxDGRV SDUD VX FRQYHQLHQFLD En EE.UU.: GEAppliances.