RANGES Compact Electric SAFETY INFORMATION . . . . . . . . . . . 3 USING THE RANGE Surface Units. . . . . . . . . . . . . . . . . . . . . . . . . . . . 8 Oven Controls. . . . . . . . . . . . . . . . . . . . . . . . . . 12 Sabbath Mode. . . . . . . . . . . . . . . . . . . . . . . . . . 12 Oven Racks. . . . . . . . . . . . . . . . . . . . . . . . . . . . 13 Aluminum Foil and Oven Liners. . . . . . . . . . . 13 Cookware Guidelines. . . . . . . . . . . . . . . . . . . . 14 Cooking Modes. . . . . . . . .
THANK YOU FOR MAKING GE APPLIANCES A PART OF YOUR HOME. Whether you grew up with GE Appliances, or this is your first, we’re happy to have you in the family. We take pride in the craftsmanship, innovation and design that goes into every GE Appliances product, and we think you will too. Among other things, registration of your appliance ensures that we can deliver important product information and warranty details when you need them. Register your GE appliance now online.
READ ALL INSTRUCTIONS BEFORE USING THE APPLIANCE WARNING Read all safety instructions before using the product. Failure to follow these instructions may result in fire, electrical shock, serious injury or death. ANTI-TIP DEVICE WARNING Tip-Over Hazard • A child or adult can tip the range and be killed. • Verify the anti-tip bracket has been properly installed and engaged. • Ensure the anti-tip bracket is re-engaged when the range is moved.
SAFETY INFORMATION IMPORTANT SAFETY INFORMATION READ ALL INSTRUCTIONS BEFORE USING THE APPLIANCE WARNING GENERAL SAFETY INSTRUCTIONS (Cont.) ■ Do not touch the surface units, the heating elements or the interior surface of the oven. These surfaces may be hot enough to burn even though they are dark in color.
READ ALL INSTRUCTIONS BEFORE USING THE APPLIANCE WARNING COOKTOP SAFETY INSTRUCTIONS ■ Never leave the surface units unattended with the cooktop ON above a Lo setting. Boilovers cause smoking and greasy spillovers that may catch on fire. ■ Always be present at the range when cooking with oil or grease. Surface cooking is an "attended" activity. ■ Never leave oil unattended while frying. If allowed to heat beyond its smoking point, oil may ignite resulting in fire that may spread to surrounding cabinets.
SAFETY INFORMATION IMPORTANT SAFETY INFORMATION READ ALL INSTRUCTIONS BEFORE USING THE APPLIANCE WARNING RADIANT COOKTOP SAFETY INSTRUCTIONS ■ Use care when touching the cooktop. The glass surface of the cooktop will retain heat after the controls have been turned off. ■ Do not cook on a broken cooktop. If glass cooktop should break, cleaning solutions and spillovers may penetrate the broken cooktop and create a risk of electric shock. Contact a qualified technician immediately.
READ ALL INSTRUCTIONS BEFORE USING THE APPLIANCE PROPER DISPOSAL OF YOUR APPLIANCE Dispose of or recycle your appliance in accordance with Federal and Local Regulations. Contact your local authorities for the environmentally safe disposal or recycling of your appliance. How to Remove Protective Shipping Film and Packaging Tape Carefully grasp a corner of the protective shipping film with your fingers and slowly peel it from the appliance surface. Do not use any sharp items to remove the film.
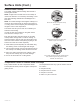
USING THE RANGE: Surface Units Surface Units WARNING FIRE HAZARD: Never leave the range unattended with the cooktop ON above a Lo setting. Keep flammable items away from the cooktop. Turn off all controls when done cooking. Failure to follow these instructions can result in fire, serious injury or death. Throughout this manual, features and appearance may vary from your model. How to Set Push the knob in and turn in either direction to the setting you want.
Radiant Glass Cooktop The radiant cooktop features heating units beneath a smooth glass surface. NOTE: A slight odor is normal when a new cooktop is used for the first time. It is caused by the heating of new parts and insulating materials and will disappear in a short time. NOTE: On models with light-colored glass cooktops, it is normal for the cooking zones to change color when hot or cooling down. This is temporary and will disappear as the glass cools to room temperature.
USING THE RANGE: Surface Units Surface Units (Cont.) Cookware for Radiant Glass Cooktops The following information will help you choose cookware which will give good performance on glass cooktops. NOTE: Follow all cookware manufacturer’s recommendations when using any type of cookware on the ceramic cooktop. Recommended Avoid/Not Recommended Stainless Steel Enamel (painted) on Steel Aluminum Heavy weight recommended. Good conductivity.
More about Cookware ■ Place only dry pans on the surface elements. Do not place lids on the surface elements, particularly wet lids. Wet pans and lids may stick to smooth surface when cool. ■ Do not use woks that have support rings. This type of wok will not heat on the cooktop. ■ We recommend that you use only a flat-bottomed wok. They are available at your local retail store. The bottom of the wok should have the same diameter as the surface element to ensure proper contact.
Oven Temperature Knob Turn the OVEN TEMP knob to the setting you want. The Oven/Cycle light comes on when the burner is on. It will cycle on and off during cooking. Front of OVEN TEMP knob (knob appearance may vary) To Adjust the Thermostat To decrease the oven temperature, move the top screw toward the left. KE ER T 4. Replace the knob, matching the flat area of the knob to the shaft, and Back of OVEN TEMP knob (knob appearance may vary) check performance.
Rack Positions Your oven has four rack positions in the main oven. Recommended rack positions for various types of foods are provided in the Cooking Guide. Adjusting the rack position is one way to impact cooking results. For example, if you would prefer darker tops on cakes, muffins or cookies, try moving food one rack position higher. If you find foods are too brown on top, try moving them down next time.
USING THE OVEN: Cookware Guidelines / Cooking Modes Cookware Guidelines The material, finish, and size of cookware affect baking performance. ■ Shiny pans can produce more evenly cooked baked goods such as cakes and cookies. Dark, coated and dull pans absorb heat more readily than light, shiny pans. Pans that absorb heat more readily can result in a browner, crisper and thicker crust. If using dark and coated cookware check food earlier than the minimum cook time.
RECOMMENDED MODE(S) RECOMMENDED RACK POSITION(S) ADDITIONAL SUGGESTIONS Layer Cakes, sheet cakes, bundt cakes, muffins, quick breads on a Single Rack Bake 2 Use shiny cookware. Layer cakes* on Multiple Racks Bake 1 and 3 Ensure adequate airflow (see illustration below). Chiffon cakes (angel food) Bake 1 Use shiny cookware. Cookies, biscuits, scones on a Single Rack Bake 3 Use shiny cookware. Cookies, biscuits, scones on Multiple Racks Bake 2 and 4 Ensure adequate airflow.
CARE AND CLEANING: Cleaning the Range – Exterior Cleaning the Range – Exterior WARNING Be sure all controls are off and all surfaces are cool before cleaning any part of the range. Tip-Over Hazard If your range is removed for cleaning, servicing or any reason, be sure the antiAWARNING child or adulttipcan tip the range and be killed. device is reengaged properly when the range is replaced.
Porcelain Enamel Cooktop The porcelain enamel finish is sturdy but breakable if misused. This finish is acid-resistant. However, any acidic foods spilled (such as fruit juices, tomato or vinegar) should not be permitted to remain on the finish. For other spills such as fat spatterings, wash with soap and water or cleansing powders after the surface has cooled. Rinse well. Polish with a dry cloth. If acids spill on the cooktop while it is hot, use a dry paper towel or cloth to wipe it up right away.
CARE AND CLEANING: Cleaning the Range – Exterior / Oven Cleaning the Range – Exterior (Cont.) Drip Pans Remove the surface units. Then lift out the drip pans. For best results, clean the drip pans by hand. Place them in a covered container (or a plastic bag) with 1⁄4 cup ammonia to loosen the soil. Rinse with clean water and polish with a clean soft cloth. The drip pans may also be cleaned in a dishwasher. Clean the area under the drip pans often. Built-up soil, especially grease, may catch fire.
Oven Heating Elements Do not clean the bake element or the broil element. Any soil will burn off when the elements are heated. To clean the oven floor, gently lift the bake element. Clean the oven floor with warm, soapy water. Gently lift the bake element Cleaning the Glass Cooktop Normal Daily Use Cleaning To maintain and protect the surface of your glass cooktop, follow these steps: NOTE: It is very important that you DO NOT heat the cooktop until it has been cleaned thoroughly. 1.
CARE AND CLEANING: Cleaning the Glass Cooktop Cleaning the Glass Cooktop (Cont.) Heavy, Burned-On Residue 1. Allow the cooktop to cool. 2. Use a single-edge razor blade scraper at approximately a 45° angle against the glass surface and scrape the soil. It will be necessary to apply pressure to the razor scraper in order to remove the residue. 3. After scraping with the razor scraper, spread a few drops of ceramic cooktop cleaner on the entire burned residue area.
Cleaning the Oven Door Cleaning the Door Interior Cleaning the Door Exterior Do not allow excess water to run into any holes or slots in the door. If a stain on the door vent trim is persistent, use a mild abrasive cleaner and a sponge-scrubber for best results. Do not use this method on any other surface. Wipe dish soap over any baked-on spatters on the glass. Use a single sided safety razor blade to clean it off. Then wipe over the glass with a soapy cloth to remove any residue and dry off.
CARE AND CLEANING: Oven Door Oven Door The door is very heavy. Be careful when removing and lifting the door. Do not lift door by the handle. To Remove the Door: 1. Fully open the door. 2. Pull the hinge locks up and away from the range frame to the unlocked position. 3. Firmly grasp both sides of the door near the top. 4. Close door until the top of the door is approximately 6” from the range frame. 5. Lift door up and away from the range until both hinge arms are clear of the slots in the range frame.
Save time and money! Review the charts on the following pages first and you may not need to call for service. Problem Possible Cause What To Do Surface units will not maintain a rolling boil or cooking is not fast enough Improper cookware being used. Use pans which are flat and match the diameter of the surface unit selected. In some areas, the power (voltage) may be low. Cover pan with a lid until desired heat is obtained.
TROUBLESHOOTING TIPS Troubleshooting Tips ... Before you call for service Problem Possible Cause What To Do Food does not bake properly Oven controls improperly set. See the Cooking Modes section. Rack position is incorrect or rack is not level. See the Cooking Modes section and Cooking Guide. Incorrect cookware or cookware of improper size being used. See the Cookware section. Oven temperature needs adjustment. See the Oven Controls section.
Problem Possible Cause What To Do Sometimes the oven takes longer to preheat to the same temperature Cookware or food in oven. The cookware or food in the oven will cause the oven to take longer to preheat. Remove items to reduce preheat time. Number of racks in oven. Adding more racks to the oven will cause the oven to take longer to preheat. Remove some racks. Oven racks are difficult to slide The shiny, silver-colored racks were cleaned in a self-clean cycle.
LIMITED WARRANTY GE Appliances Electric Range Limited Warranty GEAppliances.com All warranty service is provided by our Factory Service Centers, or an authorized Customer Care® technician. To schedule service online, visit us at GEAppliances.com/service_and_support/, or call GE Appliances at 800.GE.CARES (800.432.2737). Please have your serial number and your model number available when calling for service. Servicing your appliance may require the use of the onboard data port for diagnostics.
Looking For Something More? GE Appliances offers a variety of accessories to improve your cooking and maintenance experiences! Refer to the Consumer Support page for phone numbers and website information.
CONSUMER SUPPORT Consumer Support GE Appliances Website Have a question or need assistance with your appliance? Try the GE Appliances Website 24 hours a day, any day of the year! You can also shop for more great GE Appliances products and take advantage of all our on-line support services designed for your convenience. In the US: GEAppliances.