Radiant Self-Cleaning Convection Ranges www.GEAppliances.com Safety Instructions . . . . . . . . . . . . .2–5 Operating Instructions Owner’s Manual JB910 Clock, Timer and Control Lockout . . . . . . . . . . . . . . . . .15 Convection Oven . . . . . . . . . . . . .19–23 Roasting Guide . . . . . . . . . . . . . . . .23 Timed Features . . . . . . . . . . . . .21, 22 Cookware . . . . . . . . . . . . . . . . . . . . . . .7 Oven . . . . . . . . . . . . . . . . . . . . . . .11, 12 Broiling Guide . . . . . . .
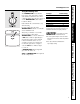
WARNING! For your safety, the information in this manual must be followed to minimize the risk of fire, electric shock, or to prevent property damage, personal injury, or loss of life. WARNING ANTI-TIP DEVICE All ranges can tip and injury could result. Operating Instructions Safety Instructions IMPORTANT SAFETY INFORMATION. READ ALL INSTRUCTIONS BEFORE USING. To prevent accidental tipping of the range, attach it to the wall and floor by installing the Anti-Tip device supplied.
WARNING! SAFETY PRECAUTIONS Do not operate the oven or cooktop controls if the glass is broken. Food splatter or cleaning solution may penetrate a broken control panel or cooktop and create a risk of electrical shock. Contact a qualified technician immediately should your glass control panel or cooktop become broken. ■ CAUTION: Items of interest to children should not be stored in cabinets above a range or on the back of a range—children climbing on the range to reach items could be seriously injured.
RADIANT SURFACE UNITS Use proper pan size—select cookware having flat bottoms large enough to cover the surface unit heating element. The use of undersized cookware will expose a portion of the surface unit to direct contact and may result in ignition of clothing. Proper relationship of cookware to surface unit will also improve efficiency. ■ Never leave the surface units unattended at high heat settings. Boilovers cause smoking and greasy spillovers that may catch on fire.
WARNING! OVEN Stand away from the range when opening the oven door. Hot air or steam which escapes can cause burns to hands, face and/or eyes. ■ Pulling out the rack to the stop-lock is a convenience in lifting heavy foods. It is also a precaution against burns from touching hot surfaces of the door or oven walls. ■ Do not use the oven to dry newspapers. If overheated, they can catch on fire. ■ Do not use the oven for a storage area. Items stored in an oven can ignite.
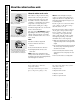
Safety Instructions Operating Instructions About the radiant surface units. NOTE: Throughout this manual, features and appearance may vary from your model. About the radiant surface units SURFACE COOKING ;;;;;;;;;;;;; ;;;;;;;;;;;; ; ;;;; ;;; ;; ;;;;;;;; Never cook directly on the glass. Always use cookware. OFF CENTER ;;;;;;;;;;; ;;;;;;;;;;; ; ;; ; ; ;; ;;;;;;;;;;;; ; ;;;; ;;; Always place the pan ; in the center of the surface unit you are cooking on.
The following information will help you choose cookware which will give good performance on glass cooktops. Porcelain Enamel Covered Cast Iron: recommended recommended As long as the cookware is covered completely with porcelain enamel, this cookware is recommended. Caution is recommended for cast iron cookware that is not completely covered with smooth porcelain enamel, as it may scratch the glass ceramic cooktop. Aluminum: Check pans for flat bottoms by using a straight edge.
Safety Instructions How to Set Push the knob in and turn in either direction to the setting you want. At both OFF and HI the control clicks into position. You may hear slight clicking sounds during cooking, indicating the control is keeping the power level you set. Be sure you turn the control knob to OFF when you finish cooking. A HOT SURFACE indicator light, on the cooktop, will glow when any radiant element is turned on. It will remain on until the surface is cooled to approximately 150°F.
Using the Warming Zone The WARMING ZONE is located in the back center of the glass surface. Always start with hot food. Do not use to heat cold food. Placing uncooked or cold food on the WARMING ZONE could result in foodborne illness. Sauces Soups (cream) Stews Vegetables Hot Beverages Soups (other than cream) Breads/Pastries Control Setting LO Medium Medium Medium HI HI LO For best results, all foods on the WARMING ZONE should be covered with a lid or aluminum foil.
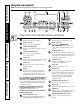
NOTE: Throughout this manual, features and appearance may vary from your model. Operating Instructions Safety Instructions Using the oven controls. Care and Cleaning Oven Control, Clock and Timer Features and Settings BAKE Pad OVEN LIGHT ON/OFF Pad Touch to select the bake function. Touch to turn the oven light on or off. BROIL HI/LO Pad DELAY START Pad Touch to select the broil function.
www.GEAppliances.com To avoid possible burns, place the racks in the desired position before you turn the oven on. Before you begin… The racks have stops, so that when placed correctly on the supports, they will stop before coming completely out, and will not tilt. On some models, the bake heating element is under the oven floor. Do not place foods on the oven bottom for cooking. The oven has 6 rack positions. To remove a rack, pull it toward you, tilt the front end up and pull it out.
Safety Instructions Operating Instructions How to Set the Oven for Broiling Leave the door open to the broil stop position. The door stays open by itself, yet the proper temperature is maintained in the oven. Use LO Broil to cook foods such as poultry or thick cuts of meat thoroughly without over-browning them. Place the meat or fish on the broiler grid in the broiler pan. Follow suggested rack positions in the Broiling Guide.
www.GEAppliances.com NOTE: Foods that spoil easily—such as milk, eggs, fish, stuffings, poultry and pork—should not be allowed to sit for more than 1 hour before or after cooking. Room temperature promotes the growth of harmful bacteria. Be sure that the oven light is off because heat from the bulb will speed harmful bacteria growth. How to Set an Immediate Start and Automatic Stop Touch the number pads to set the desired oven temperature. Touch the COOKING TIME pad.
Safety Instructions For many foods, especially roasts and poultry, internal food temperature is the best test for doneness. The temperature probe takes the guesswork out of roasting by cooking foods to the exact doneness you want. Use of probes other than the one provided with this product may result in damage to the probe or oven control. Plug Use the handles of the probe and plug when inserting and removing them from the food and outlet.
www.GEAppliances.com To Set the Clock Make sure the clock is set to the correct time of day. The clock must be set to the correct time of day for the automatic oven timing functions to work properly. The time of day cannot be changed during a timed baking or self-cleaning cycle. Touch the CLOCK pad. Touch the number pads. Touch the START pad. Touch the KITCHEN TIMER ON/OFF pad. The Kitchen Timer is a minute timer only. The Kitchen Timer does not control oven operations.
You may find that your new oven cooks differently than the one it replaced. Use your new oven for a few weeks to become more familiar with it. If you still think your new oven is too hot or too cold, you can adjust the thermostat yourself. Do not use thermometers, such as those found in grocery stores, to check the temperature setting of your oven. These thermometers may vary 20–40 degrees.
www.GEAppliances.com The warming drawer will keep hot, cooked foods at serving temperature. Always start with hot food. Do not use to heat cold food other than crisping crackers, chips or dry cereal. To Use the Warming Drawer Touch the WARMING DRAWER pad. “WARMER ON” and “1” are lit on the display and “Set” begins to blink. The warming drawer starts automatically after touching 1 , 2 or 3. “WARMER ON” and the number remain lit. “Set” stops blinking. To cancel, touch the WARMING DRAWER pad.
Temperature Selection Chart To keep several different foods hot, set the control to the food needing the highest setting. ■ The temperature, type and amount of food, and the time held will affect the quality of the food. Operating Instructions Safety Instructions Using the warming drawer. ■ Repeated opening of the drawer allows the hot air to escape and the food to cool. ■ With large loads it may be necessary to use a higher warming drawer setting and cover some of the cooked food items.
www.GEAppliances.com Convection Fan Operation In a convection oven, a fan circulates hot air over, under and around the food. This circulating hot air is evenly distributed throughout the oven cavity. As a result, foods are evenly cooked and browned—often in less time with convection heat. NOTE: To maximize cooking evenness, the fan is designed to rotate in both directions, with a pause in between. This is normal.
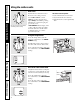
Roasting rack Post Grid Operating Instructions Safety Instructions Using the convection oven. Broiler pan ■ Good for large tender cuts of meat, uncovered. The convection fan circulates the heated air evenly over and around the food. Meat and poultry are browned on all sides as if they were cooked on a rotisserie. Using the roasting rack provided, heated air will be circulated over, under and around the food being roasted.
www.GEAppliances.com You will hear a fan while cooking with these features. The fan will stop when the door is opened, but the heat will not turn off. NOTE: Foods that spoil easily—such as milk, eggs, fish, stuffings, poultry and pork—should not be allowed to sit for more than 1 hour before or after cooking. Room temperature promotes the growth of harmful bacteria. Be sure that the oven light is off because heat from the bulb will speed harmful bacteria growth.
How to Set a Delayed Start and Automatic Stop The oven will turn on at the time of day you set, cook for a specific length of time and then turn off automatically. Make sure the clock shows the correct time of day. Touch the CONVECTION BAKE MULTI/1 RACK pad once for multirack convection baking. This mode is used for cooking food items on more than one rack (i.e., 2, 3 or more racks) at the same time in convection bake. See Multi-Rack Baking section for more information.
www.GEAppliances.com How to Set the Oven for Convection Roasting when Using the Probe Place the oven rack in the position that centers the food between the top and bottom of the oven. Insert the probe into the meat. Make sure it is pushed all the way in. For best results when roasting large turkeys and roasts, we recommend using the probe included in the convection oven. Touch the PROBE pad. Touch the number pads to set the desired internal meat temperature.
The proofing feature maintains a warm environment useful for rising yeast-leavened products. How to Set the Oven For Proofing Place the covered dough in a dish in the oven on shelf B or C. NOTE: For best results, cover the dough with a cloth or with greased plastic wrap (the plastic may need to be anchored underneath the container so the oven fan will not blow it off). Operating Instructions Safety Instructions Using the proofing and warming features. Touch the PROOF pad and then the START pad.
www.GEAppliances.com The oven door must be closed and all controls set correctly for the cycle to work properly. Before a Clean Cycle We recommend venting your kitchen with an open window or using a ventilation fan or hood during the first self-clean cycle. NOTE: ■ If your oven is equipped with shiny, silver-colored oven racks, remove them before you begin the self-clean cycle. ■ If your oven is equipped with gray porcelain-coated oven racks, they may be left in the oven during the self-clean cycle.
The oven door must be closed and all controls set correctly for the cycle to work properly. How to Delay the Start of Cleaning Touch the SELF CLEAN STD/LO pad once for a 4-hour clean time or twice for a 3-hour clean time. A 3-hour self-clean time is recommended for use when cleaning small, contained spills. A self-clean time of 4 hours or longer is recommended for a dirtier oven. Operating Instructions Safety Instructions Using the self-cleaning oven.
www.GEAppliances.com Your new touch pad control has additional features that you may choose to use. The following are the features and how you may activate them. The special feature modes can only be activated while the display is showing the time of day. They remain in the control’s memory until the steps are repeated. When the display shows your choice, touch the START pad. The special features will remain in memory after a power failure, except for the Sabbath feature, which will have to be reset.
Tone Volume + Operating Instructions Safety Instructions Special features of your oven control. This feature allows you to adjust the tone volumes to a more acceptable volume. There are three possible volume levels. Touch the OVEN LIGHT ON/OFF pad again. The display will show 1 BEEP. This is the quietest volume level. Touch the BROIL HI/LO and BAKE pads at the same time until the display shows SF. For each time the level is changed, a tone will sound to provide an indication of the volume level.
Auto Recipe™ Conversion When using convection bake, the Auto Recipe™ Conversion feature will automatically convert entered regular baking temperatures to convection baking temperatures. Press the BAKE and BROIL HI/LO pads at the same time until the display shows SF. Press the CONVECTION BAKE MULTI/1 RACK pad. The display will show CON ON. Press the CONVECTION BAKE MULTI/1 RACK pad again. The display will show CON OFF. Press the START pad.
Safety Instructions (Designed for use on the Jewish Sabbath and Holidays) The Sabbath feature can be used for baking/roasting only. It cannot be used for convection, broiling, self-cleaning or Delay Start cooking. NOTE: The oven light comes on automatically (on some models) when the door is opened and goes off when the door is closed. The bulb may be removed. See the Oven Light Replacement section. On models with a light switch on the control panel, the oven light may be turned on and left on.
www.GEAppliances.com Be sure all controls are off and all surfaces are cool before cleaning any part of the range. If your range is removed for cleaning, servicing or any reason, be sure the anti-tip device is re-engaged properly when the range is replaced. Failure to take this precaution could result in tipping of the range and cause injury. Carefully grasp a corner of the protective shipping film with your fingers and slowly peel it from the appliance surface.
Safety Instructions Cleaning the Oven Door The gasket is designed with a gap at the bottom to allow for proper air circulation. Do not rub or clean the door gasket— it has an extremely low resistance to abrasion. If you notice the gasket becoming worn, frayed or damaged in any way or if it has become displaced on the door, you should have it replaced.
Removable Warming Drawer Pan NOTE: For models with an electric warming drawer or lower oven drawer, before performing any adjustments, cleaning or service, disconnect the range electrical power supply at the household distribution panel by removing the fuse or switching off the circuit breaker. Make sure the drawer heating element is cool. ■ Never place, use or self-clean the warming drawer pan in the upper oven. NOTE: Allow warming drawer to cool before removing pan.
Safety Instructions Operating Instructions Care and Cleaning Care and cleaning of the range. Oven Light Replacement CAUTION: Before replacing your oven light bulb, disconnect the electrical power to the range at the main fuse or circuit breaker panel. Be sure to let the light cover and bulb cool completely. To remove the cover: Wire cover holder. Hold a hand under the cover so it doesn’t fall when released. With fingers of the same hand, firmly push back the wire cover holder. Lift off the cover.
Roasting rack Flat rack Offset racks Oven Racks and Convection Roasting Rack NOTE: The shiny, silver-colored oven racks (on some models) and the convection roasting rack may be cleaned in the self-cleaning oven. However, the racks will darken in color, lose their luster and become hard to slide if cleaned during the self-cleaning cycle. If your oven is equipped with shiny, silver-colored oven racks, they should be removed from the oven before beginning the self-clean cycle.
Safety Instructions Operating Instructions Care and Cleaning Troubleshooting Tips Consumer Support Cleaning the glass cooktop. Normal Daily Use Cleaning ONLY use CERAMA BRYTE® Ceramic Cooktop Cleaner on the glass cooktop. Other creams may not be as effective. To maintain and protect the surface of your glass cooktop, follow these steps: Clean your cooktop after each spill. Use CERAMA BRYTE® Ceramic Cooktop Cleaner.
Metal Marks and Scratches If pots with a thin overlay of aluminum or copper are allowed to boil dry, the overlay may leave black discoloration on the cooktop. These marks are removable using the CERAMA BRYTE® Ceramic Cooktop Cleaner with the CERAMA BRYTE® Cleaning Pad for Ceramic Cooktops. This should be removed immediately before heating again or the discoloration may be permanent. WARNING: Carefully check the bottom of pans for roughness that would scratch the cooktop.
Safety Instructions Operating Instructions Care and Cleaning Troubleshooting Tips Consumer Support Before you call for service… Troubleshooting Tips Save time and money! Review the charts on the following pages first and you may not need to call for service. Problem Possible Causes What To Do Surface units will not maintain a rolling boil or cooking is not fast enough Improper cookware being used. • Use pans which are flat and match the diameter of the surface unit selected.
Possible Causes What To Do Food does not bake or roast properly Oven controls improperly set. • See the Using the oven section. Rack position is incorrect or the rack is not level. • See the Using the oven section. Incorrect cookware or cookware of improper size being used. • See the Using the oven section. Oven thermostat needs adjustment. • See the Adjust the oven thermostat—Do it yourself! section. Oven controls improperly set. • Make sure you touch the BROIL HI/LO pad.
Safety Instructions Operating Instructions Care and Cleaning Troubleshooting Tips Consumer Support Before you call for service… Troubleshooting Tips Problem Possible Causes Clock and timer do not work Plug on range is not completely • Make sure electrical plug is plugged into a live, properly inserted in the electrical outlet. grounded outlet. A fuse in your home may be blown or the circuit breaker tripped. What To Do • Replace the fuse or reset the circuit breaker. Oven controls improperly set.
Loc On appears in the oven display or LC in the surface display The controls have been locked. • See the Control lockout section to unlock. Control signals after entering cooking time or start time You forgot to enter a bake temperature or cleaning time. • Touch the BAKE pad and desired temperature or the SELF CLEAN STD/LO pad and desired clean time. Display goes blank A fuse in your home may be blown or the circuit breaker tripped. • Replace the fuse or reset the circuit breaker.
Safety Instructions Operating Instructions Before you call for service… Troubleshooting Tips Problem Possible Causes What To Do Drawer does not slide smoothly or drags The drawer is out of alignment. • Fully extend the drawer and push it all the way in. See the Care and cleaning of the range section. Drawer is over-loaded or load is unbalanced. • Reduce weight. Redistribute drawer contents. A fuse in your home may be blown or the circuit breaker tripped.
GE Service Protection Plus™ GE, a name recognized worldwide for quality and dependability, offers you Service Protection Plus ™—comprehensive protection on all your appliances— No Matter What Brand! Benefits Include: • Backed by GE • All brands covered • Unlimited service calls • All parts and labor costs included • No out-of-pocket expenses • No hidden deductibles • One 800 number to call We’ll Cover Any Appliance. Anywhere. Anytime.
Consumer Product Ownership Registration Dear Customer: Thank you for purchasing our product and thank you for placing your confidence in us. We are proud to have you as a customer! Follow these three steps to protect your new appliance investment: 1 2 3 Complete and mail your Consumer Product Ownership Registration today. Have the peace of mind of knowing we can contact you in the unlikely event of a safety modification. After mailing the registration below, store this document in a safe place.
Safety Instructions Notes.
Looking For Something More? You can find these accessories and many more at www.GEAppliances.com, or call 800.626.2002 (during normal business hours). Have your model number ready. Troubleshooting Tips Care and Cleaning Operating Instructions Safety Instructions Accessories.
All warranty service provided by our Factory Service Centers, or an authorized Customer Care® technician. To schedule service, on-line, 24 hours a day, visit us at www.GEAppliances.com, or call 800.GE.CARES (800.432.2737). Staple your receipt here. Proof of the original purchase date is needed to obtain service under the warranty. GE Will Provide: One Year From the date of the original purchase Any part of the range which fails due to a defect in materials or workmanship.
Consumer Support GE Appliances Website www.GEAppliances.com Have a question or need assistance with your appliance? Try the GE Appliances Website 24 hours a day, any day of the year! For greater convenience and faster service, you can now download Owner’s Manuals, order parts, catalogs, or even schedule service on-line. You can also “Ask Our Team of Experts™” your questions, and so much more... Schedule Service www.GEAppliances.com Expert GE repair service is only one step away from your door.