www.GEAppliances.com J .----..
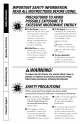
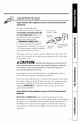
IMPORTANTSAFETYINFORMATION. READALL INSTRUCTIONSBEFOREUSING. PRECAUTIONSTOAVOID POSSIBLEEXPOSURETO EXCESSIVEMICROWAVEENERGY • Do Not Operate the oxvn if it Do NotAttempt to operate this ()x_n with the door ()pen is dmnaged. important close properly and that there exI)osnFe is no damage m the: to microwave energ T. It is important to deicat or tamper Do Not Place any object 1)etween the o_n fl'ont lace and the door soil or cleaner accumulate that the oven door not with the saictv interlocks.
Use this appfiance only for its intended purpose as described in this Owner's Manual • Tllis microwmv o_vn is not appro_vd or tested lot marine use. • • • To reduce tile risk of fire in tile Do not mount a sink. • Do not tllis appliance coM llang over edg_ of tal)le or countei: oven cavity: tile II/Otlllt II/icrow_P,'U over or near any portion or cooking over Do not let power oven of a lleating appliance. -- Do not overtook tbod.
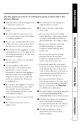
IMPORTANTSAFETYINFORMATION. READALL INSTRUCTIONSBEFOREUSING. WARNING! ARCING If you see arcing, press the CLEAR/OFFpad and correct the problem. Arcing is the microwave term t_)r sparks in the oven. Arcing is caused by: • • Metal or t_)il touching side of the oven. • Foil not molded to t_)od • Rec?vled paper towels containing small metal pieces being used in the microwave. (upturned act like edges the Metal, such as twist-ties, pouhry dishes, pins, or gold-rimmed in the microwave. antennits).
• SUPERHEATEDWATER Liquids,such as water, coffee or tea, are able to be overheated beyond the boiling point without appearing to be boiling. Visible bubbling or boiling when the container is removed from the microwave ovenis not always present. THISCOULDRESULT IN VERYHOTLIQUIDS SUDDENLYBOILING0VER WHENTHECONTAINERIS DISTURBEDORA SPOONOR OTHERUTENSILIS INSERTED INTO THELIQUID. To reduce the risk of injm T to persollS: • Avoid heating not oxvd-Jeat --Stir the liquid the liquid. evenly.
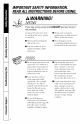
IMPORTANTSAFETYINFORMATION. READALL INSTRUCTIONSBEFOREUSING. WARNING! MICROWA VE-SAFE COOKWARE Make sure all cookware your microwave used in oven is suitable R)r microwaving. Most glass casseroles, cooking measuring cups, Do not use recycled products. towels, dislles, custard • paper cups, potm W or cllina dinnerware wlfich does not have metallic trim or glaze witll a metallic slleen can be used.
• "Boilable" cooking pouches andtightly closed plastic bags should beslit,pierced orvented asdirected by package. If theyarenot, plastic couldburstduringor immediately aftercooking, possibly resulting iniqjnry. Ms(), plastic stol_age containers should beatleast partially uncovered because theyt_wm afightseal. When cooking withcontainers tightly covered withplastic Wl;lp_ relllove carefiflly coxvring and direct aw, W ti'om hands • and time.
IMPORTANTSAFETYINFORMATION. READALL INSTRUCTIONSBEFOREUSING. WARNING! Improper use of the grounding plug can result in a risk of electric shock. GROUNDING INSTRUCTIONS This appliance must be grounded. In the ment of an electrical short circuit, grounding reduces the risk of electric shock b) providing an escape wire t_)r the electric This appliance wire with outlet Consuh a qualitied whether are the outlet responsibilit_ grounded with plug.
ADAPTER PLUGS Usage situations where appliance's power cord will be disconnected infrequently Because of potential sate W hazaMs under certain conditions, (Adapter plugs not we strongly recommend against the perrrlitted b Canada) use of an adapter plug.
IMPORTANTSAFETYINFORMATION. READALL INSTRUCTIONSBEFOREUSING. WARNING! EXTENSION CORDS A short power supply cord is provided fl'om becoming ent,mg_ed Extension may be used if)_m cords If an extension _] to reduce in or tripping the risks resulting over a longer are careflll cord. in using them.
READANDFOLLOW THISSAFETY INFORMATION CAREFULLY.
Congratulations! YouAre Now Part of the GEFamily. _lcome to the GE tinnily. _'re committed Mamlal to pr(Mding and you'll Best of all, you'll That's important, experience because thank continue you t_)r buying of our quality serxice. hear it in the friendly many years. And we hope _ proud dependable xoices these xalues )our _m'll each products of our customer GE. _ appreciate serxice time you use your new microwaxe your you need quality purchase, appliances Owner's del)artment.
Safety Information PrecautionstoAvoid PossibleExposureto ExcessiveMicrowave Energy ...2 GE& You, A Service Partnership. Ask any GE appliance owner and they will tell you we stand behind our products with unmatched quality service. However, did you know that most questions result from simple problems that you can easily fix yourself in just a few minutes? This Owner's Manual can tell you how Safety Precautions ......... 2, 3 Arcing ..................... 4 Foods ....................
About the features of your microwave oven. Throughout this manual, features and appearance may vary from your model. 0 1100Watts I i m E2 k. 0 m 0 Featuresof the Oven 0 0 @ 0 0 DoorLatches. Window with MetalShield. xiewed while keeping Screen microwmes alloxvs cooking confined to be in the oven. ConvenienceGuide. TouchControlPanelandDisplay. DoorLatchRelease.Presslatch release to open doox; RemovableTurntable. and support in place when using Turntable the oxen.
You can microwave by time, with the sensor features or with the auto feature. AUTO/TIME DEE TIME COOK POPCORN BEVERAGE REHEAT I ] I 666 AUTO/TIME DEE POWER LEVEL € i i 0 I CookingControls Check the Convenience Guide before you begin. time Features Press AUTO/TIMEDEF.
About changing the power level. The power level may be entered immediately POWER after entering" or changed the tkmture time tOT TIME COOK, Time Defrost or EXPRESS COOK. The power LEVEL level may also be changed [_ TIME COOKor select Press ] Enter 1_] during cooking time countdown. time Defrost. or deti'osting time. Press POWERLEVEL _ elect desired power level 1-10. Press START © START PAUSE k;hriable power cooking.
About the time features. a) 77meCook TIME COOK TimeCookI Allo_vs }ou to microwme and 99 seconds. t))t an) time up to 99 minutes Power level 10 (High) is automatically change set, but you may tlexibilitv. I [_ Press TIMECOOK. _ Enter cooking _] hange power lmel if'}ou don't want full power: (Press POWER LEVEL Select a desired power 0 START PAUSE it t_)r more time. lexel 1-10.) [_ Press START ?rim may open the door the t))od.
About the time features. Cooking Guide for Time Cook NOTE: Use power level High (10) unless otherwise noted. Vegetable Amount Time Comments Asparagus (freshspears) 1 lb. 5 to 8 rnin., Med-High (7) In 1½-qt. ohlong glass haking dish, place 1/4 cup _ater. (frozenspears) 10-oz. package 4 to 7 rain. In 1-qt. casserole. Beaus (freshgreen) 1 lb. cut in half 10 to 15 min. In 1½-qt. casserole, 1/2 cup water: (frozengreen) lO-oz, package 4 to 8 min. In 1-qt. casserole, place 2 tablespoons water.
Vegetable Amount Time Comments (frozenkernel) lO-oz, package 2 to 6 _rfin. In l-qt. casserole,place 2 tablespoons watea: Corn on the cob (fresh) 1 to 5 eaxs 1¼ to 4 ruin. In 2-qt. gJass corn. If corn water; if corn add 1/4 cup after laalf of Corn per ear (frozen) baking dish, place is in lausk, use no laas been husked, wamn Rearrange time. 1 ear 3 to 6 ruin. 2 to 6 eaxs 2 to 3 ruin. per ear 1O-oz. package 2 to 6 rain. In 1-qt.
About the time features. time Defrost AUTO/TIMEDEF. Alloxvs you to defrost for a selected length of time. See the Defrosting Guide for suggested times. (Auto Defrost in the About the auto feature section.) explained Press AUTO/TIMEDEEtwice. [] []Enter [_] defl'osfing time. Press START _--] Turn tb()d over when the oven signals. [] 0 START PAUSE Press START Power level is automatic_dly set at 3, 1)ut can be changed.
Defrosting Guide Food Time Breads,Cakes Bread,bunsorrolls (I piece) 1/4 mb_. Sweet rolls (approx.12oz.) 2 to & _rdn. FishandSeafood Fillets,frozen(I lb.) 6 to 9 _rdn. Shellfish,smaflpieces (I lb.) 3 to 7 _rfin. Fruit Plasticpouch--1 or2 (10-oz.package) Comments Reammg_ atter half the dine. 1 to 5 _rdn. Meat Bacon(I lb.) 2 to 5 rain. Place unopened package in oxen. I,et stand 5 minutes alter deii'osfing. Franks (I lb.) 2 to 5 rain. Groundmeat (I lb.) Roast"beef,lamb,veal pork 4 to 6 rain.
About the time features. Express Cook Thisis a quick way to set cooking time for I-6 minutes. Press one of the Express Cook pads (fi'om 1 to 6) tbr 1 to 6 minutes of (()()king at power level 10. For example, press the 2 pad for 2 minutes of cooking time. The power lexel can be changed as time is counting down. Press POWERLEVEL and enter 1-10.
About the auto feature. €# Auto Defrost AUTO/TIME DEF. The Auto/time Defrost tcature gives )_m two wav_ to defi'ost frozen foods. Press AUTO/TIMEDEE once for Auto Defrost or twice tbr lime Defrost. Auto Defrost for meat, poult 0 and fish. Use lime Defrost for most other fiozen foods. Use Auto Defrost power poultr_ © automatically sets the deflosting levels to g'i_e even defl'osting and fish weighing results up to 6 pounds. _] Press AUTOITIMEDEEonce.
About the sensorfeatures. Humidity Sensor The Sensor Features detect released during the cooking cooking. the increasing time to various Do not use the Sensor humidity The oven automatically adjusts t),pes and amounts Features of tood. twice in succession on the same tood portion--it may resuh in severely overcooked or burnt tood. If tood is undercooked after the countdown, cooking use 77meCook tot additional time.
C# Popcorn POPCORN To use the Popcorn feature: [] (lesstimel (moretime) Useonly_ziff7prepackagedmicrowave popcornweighing1.75to 3.5 ounces. NOTE."Do not use this feature twice in succession on the same food portion-it may result in severely overcooked or burnt food. ollow package instrnctions, using lime Cook if the package is less than 1.75 ounces or larger than 3.5 ounces. Place the package center of the microwm e. [] Press POPCORN.
About the sensorfeatures. Reheat The REHEAT Reheat teature cooked (lesstime} single serxings of prexiously of leftoxers. REHEAT Place covered tood in the oven. Press The oxen starts immediately. _] The oxen signals when steam is sensed and the time remaining begins counting down. Automatic Settings Toreduce time by 10%." Press I after the feature pad. reheats or a plate [_] (more time} How to Change the toods Do not ()pen the oxen door down.
Sensor Cooking Vegetables, Potatoes BAKEDPOTATO [] lace covered t_)od in the oven. Press the t_)od pad. For xegetables, press the VEGETABLEpad once VEGETABLE J_)r fl'esh vegetables, three twice J_)r fl'ozen times J_)r canned vegetables. vegetables The or oven starts immediately. (lesstime) I (more time) Sensorcookinggives you easy, automatic results with a varietyof foods (seethe Cookbg Guidebelow). NOTE.
About the other features. [ I HELP He/p The HELP pad displays teature l-tints. Press HELP,then select int_)rmation a teature and helptul pad. Cooking Complete Reminder To remind you that you have t_3od in the oxen, the oxen will display FOOD IS READYand until you either open beep once a minute or press CLEAR/OFE the oven door Clock Press to enter CLOCK the time of day or to check the time of da) wl-file microwming. Press CLOCK _] Enter time of da): _] Select AM or PM.
Reminder REMINDER The Reminder feature can be used like an alarm and can be used at any time, exen when is operating. The 24 hours later. Reminder clock, tim oxen time can be set up to [7] Press REMINDER. _] nter the time )ou want the o_en to remind )ou. (Be sure the microwme clock sho_vs the correct I tim e of day.) a. [_ Select AM or PM. [_] Press REMINDER. When Reminder signal occurs, press REMINDER to turn it off. The Reminder time ma)be displa)ed by pressing REMINDER.
About the other features. © CLEAR OFF ChildLock-Out "rbu may lock the control microwme flom heing panel to prexent accidentally the started or used h) cl-fildren. To lock or unlock the controls, press and hold CLEAR/OFF%r ahout three seconds. _'hen the control panel is locked, to the extreme an L will he displayvd right.
Microwave terms. Term Definition Arcing Arcing is the microwave caused by: • metal term or foil toucl-fing lot sparks in the oven. Arcing is the side of the oven. • toil that is not molded to tood (upturned edges pouhry pins, g_)ld-rimmed act like antennas). • metal such as twist-ties, • recycled _ve_g Covers paper hold cooking towels containing in moisture, time.
Care and cleaning of the microwave oven. Helpful Hints An occasional baking soda thorough wiping and water keeps with a solution the inside of ti'esh. Unplug the cord before cleaning any part of this oven. How to Clean the Inside Walls,Floor,Inside Window,Metal andPlasticParts on the Door Some spatters can be removed with a paper towel, others may require a damp cloth. Remove greasy spatters with a sudsy cloth, then rinse with a damp cloth.
I How to Clean the Outside Do not use cleaners containing ammonia or alcohol on the microwave oven. Ammonia or alcohol can damage the appearance of the microwave. Case Clean the outside P.inse and then damp of the microwaxe dry. Wipe with a sudsy cloth. the window I clean with a cloth. Control Panel and Door Wipe with cleaning abl_asivcs damage control a damp cloth. spFa)_s, lacg_ or sharp it. Some Dry thoroughly.
Troubleshootingtips. Problem Possible Causes What ToDo Ovenwill notstart A fuse in your home • P.eI)lace thse or reset circuit breaken may be blown or the circuit breaker Power tripped. surge. • Unplug oven, Controlpanellighted, yet ovenwill notstart Plug not fully inserted into wall outlet. • Make Door not securely • Open dosed. the then microwave plug it 1)ack in. sure the 3-prong plug on the oven is flflly inserted into wall outlet. the door and close securely.
Problem Possible Causes What ToDo "SENSORERROR" appearson display During Popcorn, Reheat Beverage, Baked Potato, or Vegetable program, the door was opened before stemn could be detected. • Close Stemn • Use ]Tree Cook to heat tor was not in maximum detected mnount the door, press CLEAR/OFFand l_gJn Ill orc aK, dn. time. of time. "LOCKED"appearsin display The control locked.
Troubleshootingtips. Things ThatAre Normal With YourMicrowave Oven • Steam • I,ight or xapor reflection • Dimming around door sound the door: or outer case. in the blower interJcrence might Similar appliances, it does not indicam Plug the microwave be noticed to the interJcrence while at power a problem into a different and signal using the caused electrical of the TV/mdio by other small with the microwave.
Notesl q_ _D €_ _m r_ €_ 37
-j Q) 38
GE Microwave Oven Warranty. Proof the originalhere. purchase date is Stapleofyourreceipt needed to make a warranty claim. For The Period Of." What GE Will Provide: One Fear From the date of the originalpurchase Replacementunittot any product which fidls due to a defect in materials or workmmlship. The exchang_ unit is warmnmd tot the remainder of your product's original one-year warranty period. In Order to Make a Warranty Claim: • Properly pack your unit.
ConsumerSupport. GEAppliancesWebsite Haw a ¥\_bsite service, You can www.GEAppliances.com question or need assistance with your appliance? Try the GE Appliances 24 hours a da), any day of the year! For greater comvnience and fi_ster you can now download Owner's Manuals or oMer catalogs on4ine. also "Ask Our Team of Experts"*" your questions, and so m uc h m ore... RealLife DesignStudio www.GEAppliances.