
Installation guide
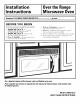


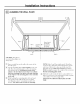

Installation Instructions
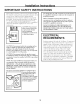
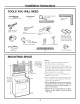
TOOLS YOU WILL NEED
# 1 and#2Phillipsscrewdriver
Pencil
Tinsnips(forcutting
damper,if required)
Scissors
(to cut template,if necessary)
Gloves
Safetygoggles
Rulerortape measureand
tedge
Electricdrill with ¾_",V/" and%"
drill bits
Saw(saber,holeor keyhole) Studfinder er
Hammer(optional)
Level
(optional)
Fillerblocksor scrap
woodpieces,if needed
for top cabinetspacing
(usedonrecessedbottom
cabinetinstallationsonly)
Ductandmaskingtape
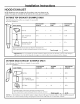
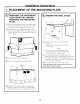
MOUNTING SPACE
66" or More
fromthe Floor
to the Topof
the Microwave
BottomEdgeof
CabinetNeedsto
be30" or More
from the Cooking
Surface
Backsplash
NOTES:
• The space betweei] the cabinets n]ust be
30" wide and fl'ee of obstructions.
• If the space between the cabinets is greater
than 30", a Filler Panel Kit may be used to fill
in the gap between the microwave oven and
the cabinets. Your Owner's Manual contains
the kit number fl>r w>ur model.
* This microwave oven is fl>r installation over
ranges up to 36" wide.
* If VOU aye going to vent your illicrowave oven
to tile outside, see Hood Exhaust Section fl)r
exhaust duct preparation.
* When installing the microwave oven beneath
smooth, flat cabinets, be careful to follow the
instructions on the top cabinet template for
power cord clearmlce.
* Models with top venting grilles: Do not allow
cabinetry or other objects to block the airflow
of the vent.
7