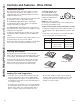
BEVERAGE CENTER & WINE CHILLER SAFETY INFORMATION . . . . . . . . .3 USING THE APPLIANCE Controls and Features: Beverage Center Glass Shelves . . . . . . . . . . . . . . . . . . . . . . .5 Loading . . . . . . . . . . . . . . . . . . . . . . . . . . . .5 Temperature Control. . . . . . . . . . . . . . . . .5 Controls and Features: Wine Chiller Wine Bottles . . . . . . . . . . . . . . . . . . . . . . . .6 Loading . . . . . . . . . . . . . . . . . . . . . . . . . . . .6 Temperature Control. . . . . . . . .
THANK YOU FOR MAKING GE APPLIANCES A PART OF YOUR HOME. Whether you grew up with GE Appliances, or this is your first, we’re happy to have you in the family. We take pride in the craftsmanship, innovation and design that goes into every GE Appliances product, and we think you will too. Among other things, registration of your appliance ensures that we can deliver important product information and warranty details when you need them. Register your GE appliance now online.
This is the safety alert symbol. This symbol alerts you to potential hazards that can kill or hurt you and others. All safety messages will follow the safety alert symbol and the word “DANGER”, “WARNING”, or “CAUTION”. These words are defined as: DANGER Indicates a hazardous situation which, if not avoided, will result in death or serious injury. WARNING Indicates a hazardous situation which, if not avoided, could result in death or serious injury.
SAFETY INFORMATION IMPORTANT SAFETY INFORMATION READ ALL INSTRUCTIONS BEFORE USING CONNECTING ELECTRICITY WARNING Electrical Shock Hazard. Plug into a grounded 3-prong outlet. Do not remove the ground prong. Do not use an adapter. Do not use an extension cord with this appliance. Failure to follow these instructions can result in death, fire, or electrical shock. Do not, under any circumstances, cut or remove the third (ground) prong from the power cord.
Temperature Control The operating temperatures of the beverage center range from the low forties to the mid fifties. This appliance is not a refrigerator and does not maintain temperatures like a refrigerator (below 41°F). Do not install the beverage center where the temperature will go below 55°F (13°C) or above 90°F (32°C). As with any refrigeration-type product, there is a slight temperature variance at different locations within the cabinet. The coolest area will be in the lower part of the cabinet.
USING THE APPLIANCE: Controls and Features -Wine Chiller Controls and Features - Wine Chiller Temperature Control Do not install the wine chiller where the temperature will go below 55°F (13°C) or above 90°F (32°C). To set the control, turn it to the RED WINE setting. Once the bottles are loaded, allow at least 24 hours before making any adjustments to the initial setting. The RED WINE setting will provide a temperature of approximately 55ºF (13ºC), which is the optimum storage temperature for red wine.
Full Extension Drawers All of the full extension drawers pull out so bottles can be conveniently added or removed. Any of the full extension drawers can be removed to store larger bottles. To remove: Tab (push tab down on right drawer guide, pull tab up on left drawer guide) 1. Pull the full extension drawer out to the STOP position. 2. Push the tab on right drawer guide down while pulling the tab on left guide up, and pull the drawer out. To replace: 1. Push the drawer slide arm back into the unit. 2.
CARE AND CLEANING Care and Cleaning Cleaning the Outside IMPORTANT: Unplug the beverage center or wine chiller before cleaning. Keep the outside clean. The cabinet can be washed with mild soap and water. Rinse thoroughly with clean water. Never use abrasive scouring powders. Use a glass cleaner or mild soap and water and a soft cloth to clean the glass door. Do not use any abrasive powders. Wipe the controls with a damp cloth. Dry thoroughly.
Beverage Center and Wine Chiller Questions? Call 800.GE.CARES (800.432.2737) or Visit our Website at: GEAppliances.com BEFORE YOU BEGIN Read these instructions completely and carefully. • • IMPORTANT – Save these PRODUCT CLEARANCES The beverage center and wine chiller is factory set for a 110° door swing. When installed in a corner: instructions for local inspector’s use. • Allow 4" min. clearance on the hinge side for the 90° door swing and to allow racks to slide out.
INSTALLATION INSTRUCTIONS Installation Instructions INSTALLATION SPACE SIDE-BY-SIDE INSTALLATIONS The beverage center and wine chiller can be a free-standing model or it can be built in using the cut-out dimensions below. Increase storage capacity by installing two beverage centers or wine chillers together. Or, for a complete refreshment center, install any two of these units together. Locate Outlet 10-1/2" 34-1/2"-35" • A side-by-side installation requires at least a 47-1/2” wide opening.
TOOLS REQUIRED • #2 Phillips screwdriver • Adjustable wrench PARTS SUPPLIED • Hardware for changing door swing • Left and right side hinge covers • Top screw hole cover GROUNDING THE BEVERAGE CENTER AND WINE CHILLER FOR PERSONAL SAFETY, THIS APPLIANCE MUST BE PROPERLY GROUNDED. The power cord of this appliance is equipped with a three-prong (grounding) plug which mates with a standard three-prong (grounding) wall receptacle to minimize the possibility of electric shock hazard from this appliance.
INSTALLATION INSTRUCTIONS Installation Instructions 2 REVERSE DOOR SWING SKIP THIS STEP IF DOOR SWING SUITS THE INSTALLATION 2. Remove the bottom fill plug on the bottom left side of the door. Parts Included: 3. Reinstall the original door stop and cam riser onto the bottom left side of the door. • Top left case hinge 4. Reinstall the bottom fill plug on the bottom right side of the door. • Bottom left case hinge • Left and right side decorative hinge cover • Decorative hinge screw hole cover 5.
3 LEVEL 4 CONNECT POWER • Use an adjustable wrench to turn the leveling legs and raise or lower the product. • Connect power cord plug to a properly grounded receptacle. • Adjust carefully; the product should be level and plumb with cabinetry, and should align with adjacent toekick height. • Make sure power is on by opening the door to see if interior light turns on. 5 SLIDE PRODUCT INTO THE CUTOUT • Carefully slide the unit into the opening. Be careful not to entangle power cord.
TROUBLESHOOTING TIPS Normal operating sounds Newer appliances sound different from older appliances. Modern appliances have more features and use newer technology. HUMMM... WHOOSH... Ŷ T he new high efficiency compressor may run faster and longer than your old appliance and you may hear a high-pitched hum or pulsating sound while it is operating. Ŷ 6 RPHWLPHV WKH appliance runs for an extended period, especially when the doors are opened frequently.
Problem Possible Causes What To Do Appliance does not operate Appliance may be in defrost cycle. This is normal. Compressor does not operate for about 30 minutes when in defrost cycle. Appliance is unplugged. Push the plug completely into the outlet. The circuit breaker is tripped/ he fuse is blown. Replace fuse or reset the breaker. GFI outlet is tripped. Reset outlet. GFI outlet is not recommended. Vibration or rattling (slight vibration is normal) Appliance is on an uneven surface.
TROUBLESHOOTING TIPS 16 Troubleshooting tips ... Before you call for service Problem Possible Causes What To Do Moisture forms on outside of appliance Not unusual during periods of high humidity. If bothersome, wipe surface dry; otherwise, moisture will evaporate in time. Door left open. Always make sure that the door is closed after opening. Check to see if a bottle is holding door open. Frost or moisture collects inside Interior light does not operate Too frequent or too long door openings.
GEAppliances.com For US Customers, all warranty service is provided by our Factory Service Centers, or an authorized Customer Care® technician. To schedule service online, visit us at www.geappliances.com/service_and_support/, or call GE Appliances at 800.GE.CARES (800.432.2737). Please have your serial number and your model number available when calling for service. In Canada, call 800.561.3344.
CONSUMER SUPPORT Consumer Support GE Appliances Website Have a question or need assistance with your appliance? Try the GE Appliances Website 24 hours a day, any day of the year! You can also shop for more great GE Appliances products and take advantage of all our on-line support services designed for your convenience. In the US: GEAppliances.com In Canada: GEAppliances.
REFROIDISSEUR À BOISSONS ET VIN CONSIGNES DE SÉCURITÉ . . . . .3 MODE D’EMPLOI Commandes et caractéristiques: Refroidisseur de boissons Clayettes en verre . . . . . . . . . . . . . . . . . . .5 Chargement . . . . . . . . . . . . . . . . . . . . . . . .5 Commande de la température . . . . . . . .5 Commandes et caractéristiques: Refroidisseur à vin Bouteilles de Vin . . . . . . . . . . . . . . . . . . . .6 Chargement . . . . . . . . . . . . . . . . . . . . . . . .6 Commande de la température . . . . . . .
NOUS VOUS REMERCIONS D’ACCUEILLIR CET ÉLECTROMÉNAGER GE CHEZ VOUS. Que vous ayez grandi avec des électroménagers GE ou qu’il s’agisse de votre première acquisition, nous sommes heureux de vous accueillir dans notre famille. Nous sommes fiers du savoir-faire, de l’innovation et de l’esthétique qui composent chaque électroménager GE, et nous pensons que vous le serez aussi.
&H V\PEROH UHSUpVHQWH XQH DOHUWH GH VpFXULWp &H V\PEROH YRXV DYLVH GH GDQJHUV SRVVLEOHV SRXYDQW FDXVHU la mort, des blessures ou autres. Tous les messages de sécurité seront précédés du symbole d’alerte de sécurité DLQVL TXH GHV PRWV © '$1*(5 ª © $9(57,66(0(17 ª RX © 0,6( (1 *$5'( ª &HV PHVVDJHV VRQW OHV VXLYDQWV DANGER Signale une situation qui présente un danger imminent et qui, si elle n’est pas évitée, entraînera des blessures graves, voire la mort.
CONSIGNES DE SÉCURITÉ IMPORTANTES CONSIGNES DE SÉCURITÉ VEUILLEZ LIRE TOUTES LES INSTRUCTIONS AVANT UTILISATION DU FOUR BRANCHEMENTS ÉLECTRIQUES AVERTISSEMENT Risque de choc électrique. Branchez l’appareil dans une prise triple N’utilisez pas de rallonge avec cet appareil. avec terre. Le non-respect de ces instructions peut Ne retirez pas la broche de terre. entraîner des risques d’incendies, des chocs N’utilisez pas d’adaptateur. électriques ou la mort.
Commande de la température Les températures de fonctionnement pour le refroidisseur de ERLVVRQV YDULHQW HQWUH HW & HW ) &HW DSSDUHLO n’est pas un réfrigérateur et il ne garde pas la température FRPPH XQ UpIULJpUDWHXU j PRLQV GH & ) N’installez pas le refroidisseur de boissons dans un endroit où les températures peuvent descendre en dessous de 13 & ) RX rWUH VXSpULHXUHV j & ) &RPPH GDQV WRXV OHV DSSDUHLOV UpIULJpUDQWV OHV températures varient légèrement dans
MODE D’EMPLOI : &RPPDQGHV HW FDUDFWpULVWLTXHV 5HIURLGLVVHXU j YLQ Commandes et caractéristiques - Refroidisseur à vin.
Retrait des tiroirs à extension totale 7RXV OHV WLURLUV SHXYHQW rWUH WLUpV FRPSOqWHPHQW DILQ d’ajouter ou de retirer facilement des bouteilles. 1¶LPSRUWH TXHO WLURLU j H[WHQVLRQ WRWDOH SHXW rWUH UHWLUp afin d’entreposer des produits plus imposants. Pour retirer : REMARQUE : assurez-vous que les onglets des tiroirs à extension totale sont complètement bloqués en place avant d’y charger des bouteilles.
ENTRETIEN ET NETTOYAGE. Entretien et nettoyage. Nettoyage de l’extérieur IMPORTANT : débranchez le refroidisseur à boissons et vin avant tout nettoyage. Gardez l’extérieur propre. La caisse de l’appareil SHXW rWUH QHWWR\pH DX VDYRQ GRX[ HW j O¶HDX 5LQFH] minutieusement à l’eau propre. N’utilisez jamais de produits à récurer abrasifs. Utilisez un nettoyant à verre ou un savon doux et de l’eau, et nettoyez la porte vitrée à l’aide d’un linge doux. N’utilisez jamais de produits à récurer abrasifs.
Questions ? Composez le : 800.361.3400 ou consultez le site : electromenagersge.ca AVANT DE COMMENCER Lisez attentivement et soigneusement ces instructions. • IMPORTANT – &RQVHUYH] FHV instructions pour l’utilisation de l’inspecteur local. • IMPORTANT – 5HVSHFWH] WRXV OHV codes et les ordonnances en vigueur.
INSTRUCTIONS D’INSTALLATION Instructions d’installation ESPACE POUR INSTALLATION INSTALLATION CÔTE À CÔTE /H UHIURLGLVVHXU j ERLVVRQV HW YLQ SHXW rWUH un modèle autonome ou encastré suivant les dimensions suivantes : $XJPHQWH] OD FDSDFLWp G¶HQWUHSRVDJH HQ LQVWDOODQW deux refroidisseurs à vin ou boissons, ensemble. 2X SRXU XQ FHQWUH FRPSOHW GH UHIURLGLVVHPHQW installez n’importe lequel de ces appareils ensemble.
OUTILS NÉCESSAIRES • Tournevis cruciforme n° 2 • Clé anglaise PIÈCES FOURNIES • Quincaillerie pour changer le battant de porte • Caches charnière gauche et droite • Capuchon de trou de vis supérieur METTRE À LA TERRE LE REFROIDISSEUR À BOISSONS ET VIN 3285 '(6 5$,6216 '( 6e&85,7e 3(56211(//( &(7 $33$5(,/ '2,7 Ç75( &255(&7(0(17 0,6 ¬ /$ 7(55( &HW DSSDUHLO HVW PXQL G¶XQ FRUGRQ G¶DOLPHQWDWLRQ doté d’une fiche à prise de terre qui se branche sur une prise triphasée murale standard correspondante afin de
INSTRUCTIONS D’INSTALLATION Instructions d’installation 2 INVERSION DU BATTANT DE PORTE SAUTER CE CHAPITRE SI L’INSTALLATION ACTUELLE DE LA PORTE VOUS CONVIENT Pièces incluses : &KDUQLqUH VXSpULHXUH JDXFKH &KDUQLqUH LQIpULHXUH JDXFKH &DFKH GH FKDUQLqUH JDXFKH HW GURLWH GpFRUDWLYH &DSXFKRQ GpFRUDWLI GH YLV GH FKDUQLqUH • Embout de tournevis Torx® Outils nécessaires : • Tournevis cruciforme • Perceuse électrique Pour retirer la porte : eFUDVH] OH FDUWRQ G¶HPEDOODJH DILQ GH O¶XWLOLVHU comme protec
3 MISE À NIVEAU 4 BRANCHEMENT DE L’APPAREIL • Utilisez une clé anglaise pour ajuster les pattes afin de monter ou abaisser le refroidisseur. • Branchez le cordon d’alimentation à une prise murale correctement mise à la terre. $MXVWH] OHV VRLJQHXVHPHQW O¶DSSDUHLO GRLW rWUH j QLYHDX HW G¶DSORPE DYHF OHV PHXEOHV HW GRLW rWUH aligné à la hauteur du protège-orteils adjacent. • Vérifiez que l’alimentation est branchée en ouvrant la porte et vérifiant que la lumière s’allume bien.
CONSEILS DE DÉPANNAGE Sons normaux de fonctionnement. Les appareils électroménagers neufs émettent des bruits différents des anciens. Les appareils modernes ont plus de caractéristiques et utilisent des technologies plus nouvelles. HUMMM... WHOOSH... Ŷ / H QRXYHDX FRPSUHVVHXU j KDXW UHQGHPHQW SHXW tourner plus vite et plus longtemps que celui de votre ancien appareil et peut émettre des sons et vibrations plus aigus lorsqu’il fonctionne.
Problèmes Causes possibles Ce qu’il faut faire L’appareil ne fonctionne pas L’appareil est en mode de dégivrage. &¶HVW QRUPDO /H FRPSUHVVHXU QH IRQFWLRQQH SDV SHQGDQW HQYLURQ PLQXWHV HQ PRGH GH GpJLYUDJH L’appareil est débranché. Poussez la fiche complètement dans la prise murale. Le disjoncteur s’est déclenché ou le fusible a grillé. 5HPSODFH] OH IXVLEOH RX UpDUPH] OH GLVMRQFWHXU Le disjoncteur de fuite à la terre s’est déclenché.
CONSEILS DE DÉPANNAGE Conseils de dépannage ... $YDQW G¶DSSHOHU OH VHUYLFH GH GpSDQQDJH Problèmes Causes possibles Ce qu’il faut faire De l’humidité se forme sur l’extérieur de l’appareil Ceci n’est pas inhabituel lors de temps humides. Si cela vous ennuie, essuyez la surface, autrement, l’humidité s’évaporera en temps voulu. La porte est laissée ouverte. Vérifiez toujours que la porte soit bien fermée après l’avoir ouverte. 9pULILH] VL XQH ERXWHLOOH HPSrFKH OD SRUWH GH IHUPHU orrectement.
GEAppliances.com Pour les clients des États-Unis : 7RXWHV OHV UpSDUDWLRQV HQ YHUWX GH OD JDUDQWLH VRQW IRXUQLV SDU QRV &HQWUH GH 6HUYLFH G¶8VLQH RX SDU XQ WHFKQLFLHQ DXWRULVp &XVWRPHU &DUH®. Pour programmer un appel de service en ligne, consultez notre site electromenegersge.ca/fr/soutien/demande-de-service/ RX DSSHOH] OH 9HXLOOH] avoir votre numéro de série et votre numéro de modèle à portée de main lorsque vous appelez pour obtenir un service.
SOUTIEN AU CONSOMMATEUR Soutien au consommateur Site Web GE Appliances Vous avez une question ou vous avez besoin d’aide pour votre appareil électroménager? Visitez le site Web des électroménagers GE 24 heures par jour, à tout moment de l’année! Vous pouvez aussi y magasiner d’autres électroménagers de qualité GE et EpQpILFLHU GH WRXV QRV VHUYLFHV GH VRXWLHQ HQ OLJQH FRQoXV SRXU PLHX[ YRXV VHUYLU $X eWDWV 8QLV GEAppliances.com $X &DQDGD GEAppliances.
CENTRO DE BEBIDAS Y REFRIGERADOR DE VINO INFORMACIÓN DE SEGURIDAD 3 Uso del Electrodoméstico Controles y funciones: Centro de bebidas Estantes de cristal . . . . . . . . . . . . . . . . . . .5 Carga . . . . . . . . . . . . . . . . . . . . . . . . . . . . . .5 Control de temperatura . . . . . . . . . . . . . .5 Controles y funciones: Refrigerador de vino Botellas de vin . . . . . . . . . . . . . . . . . . . . . .6 Carga . . . . . . . . . . . . . . . . . . . . . . . . . . . . . .6 Control de temperatura . .
GRACIAS POR HACER QUE LOS ELECTRODOMÉSTICOS GE SEAN PARTE DE SU HOGAR. Ya sea que haya crecido usando Electrodomésticos GE, o que ésta es su primera vez, nos complace tenerlo en la familia. Sentimos orgullo por el nivel de arte, innovación y diseño de cada uno de los Electrodomésticos GE, y creemos que usted también. Entre otras cosas, el registro de su electrodoméstico asegura que podamos entregarle información importante del producto y detalles de la garantía cuando los necesite.
Éste es el símbolo de alerta de seguridad. El mismo alerta sobre potenciales riesgos que le pueden producir la muerte o lesiones tanto a usted como a otras personas. Todos los mensajes de seguridad estarán a continuación del símbolo de alerta de VHJXULGDG \ FRQ OD SDODEUD ³3(/,*52´ ³$'9(57(1&,$´ R ³35(&$8&,Ï1´ (VWDV SDODEUDV VH GHILQHQ FRPR PELIGRO Indica una situación de riesgo que, si no se evita, producirá la muerte o lesiones graves.
INFORMACIÓN DE SEGURIDAD INFORMACIÓN IMPORTANTE DE SEGURIDAD LEA TODAS LAS INSTRUCCIONES ANTES DEL USO CONEXIÓN DE LA ELECTRICIDAD ADVERTENCIA Riesgo de Descarga Eléctrica. Enchufe en un tomacorriente con conexión a 1R XWLOLFH XQ H[WHQVRU GH FDEOH FRQ HVWH DSDUDWR tierra de 3 cables. Si no se siguen estas instrucciones se podrá producir a muerte, incendios o descargas 1R HOLPLQH HO FDEOH GH FRQH[LyQ D WLHUUD eléctricas.
Control de temperatura Las temperaturas de funcionamiento del centro de bebidas oscilan entre los 4 °C (40 °F) y hasta los 13 °C (55 °F), aproximadamente. Este electrodoméstico no es un refrigerador ni mantiene temperaturas como un refrigerador (inferiores a 5 °C [41 ºF]). 1R LQVWDOH HO FHQWUR GH EHELGDV HQ OXJDUHV HQ ORV TXH OD temperatura será inferior a los 13 ºC (55 ºF) o superará los 32 ºC (90 ºF).
USO DEL ELECTRODOMÉSTICO: Controles y funciones - Refrigerador de vino 6 Controles y funciones - Refrigerador de vino Control de temperatura 1R LQVWDOH HO UHIULJHUDGRU GH YLQR HQ OXJDUHV HQ ORV que la temperatura será inferior a los 13 ºC (55 ºF) o superará los 32 ºC (90 ºF). Para configurar el control, gire la perilla de control hasta HO DMXVWH 5(' :,1( YLQR tinto). Una vez cargadas las botellas, espere al menos 24 horas para realizar cualquier ajuste sobre la configuración inicial.
Quitar los cajones de extensión completa Todos los cajones de extensión completa pueden sacarse para poder agregar o quitar las botellas fácilmente. Es posible quitar cualquier cajón de extensión completa para poder almacenar botellas más grandes. Para quitar los cajones: NOTA: $VHJ~UHVH GH TXH ODV SHVWDxDV GH ODV JXtDV GHO cajón de extensión completa estén bien encajadas antes de cargar las botellas.
CUIDADO Y LIMPIEZA Cuidado y limpieza Limpieza del exterior IMPORTANTE: Desconecte el centro de bebidas o el refrigerador de vino antes de la limpieza. Mantenga el exterior limpio. Se puede lavar el gabinete con jabón suave y agua. Enjuague FRPSOHWDPHQWH FRQ DJXD OLPSLD 1XQFD XWLOLFH limpiadores abrasivos en polvo.
Centro de bebidas y Refrigerador de vino ¿Tiene preguntas? Llame al 800.GE.CARES (800.432.2737) o visite nuestra página web: GEAppliances.com ANTES DE EMPEZAR Lea estas instrucciones en su totalidad y con atención. • IMPORTANTE – guarde estas instrucciones para el uso del inspector local. • IMPORTANTE – tenga en cuenta todos los códigos y normas regentes. • TOLERANCIAS DEL PRODUCTO El centro de bebidas y el refrigerador de vino están configurados de fábrica para un recorrido de puerta de 110º.
INSTRUCCIONES DE INSTALACIÓN Instrucciones de instalación EL ESPACIO DE INSTALACIÓN INSTALACIONES CONJUNTAS El centro de bebidas y el refrigerador de vino puede situarse por sí mismo o encastrarse utilizando las dimensiones de sección siguientes. $XPHQWH OD FDSDFLGDG GH DOPDFHQDPLHQWR instalando dos centros de bebidas o refrigeradores de vino de forma conjunta. O, para un centro de refrigeración completo, instale cualquiera de estas unidades de forma conjunta.
HERRAMIENTAS NECESARIAS 'HVWRUQLOODGRU 3KLOLSV Q~PHUR • Llave inglesa PARTES SUMINISTRADAS • Material para cambiar el recorrido de la puerta • Cubrebisagras para la parte izquierda y la parte derecha • Cubierta para el orificio de tornillos superior CONEXIÓN A TIERRA DEL CENTRO DE BEBIDAS Y DEL REFRIGERADOR DE VINO 325 6(*85,'$' 3(5621$/ (67( $3$5$72 '(%( &21(&7$56( $ 7,(55$ &255(&7$0(17( El cable de alimentación de este aparato está equipado con un enchufe de tres bornes (de conexión a tierra) q
INSTRUCCIONES DE INSTALACIÓN Instrucciones de Instalación 2 INVERTIR EL SENTIDO DE APERTURA DE LA PUERTA OMITA ESTE PASO SI EL SENTIDO DE APERTURA DE LA PUERTA SE ADECUA A LA INSTALACIÓN Piezas incluidas: • Bisagra superior izquierda • Bisagra inferior izquierda • Cubrebisagras decorativos para la parte izquierda y la parte derecha • Cubierta decorativa para el orificio del tornillo de la bisagra • Punta Torx® Herramientas necesarias: 'HVWRUQLOODGRU 3KLOOLSV • Taladro eléctrico Para quitar la puerta:
3 NIVELAR 4 CONECTAR LA ALIMENTACIÓN • Utilice una llave inglesa para girar las patas de nivelado y elevar o bajar el producto. • Conecte el cable de alimentación a un receptáculo correctamente conectado a tierra. $MXVWH FRQ FXLGDGR HO SURGXFWR GHEH HVWDU nivelado y de acuerdo con los muebles, y debe alinearse con la altura de los huecos para pies adyacentes. $VHJ~UHVH GH TXH OD DOLPHQWDFLyQ HVWp DFWLYDGD abriendo la puerta para ver si la luz interior se enciende.
SUGERENCIAS PARA LA SOLUCIÓN DE PROBLEMAS 14 Sonidos de funcionamiento normales Los nuevos aparatos suenan de modo diferente a los aparatos antiguos. Los aparatos modernos tienen más funciones y utilizan una tecnología más moderna. HUMMM... WHOOSH... Ŷ ( O QXHYR FRPSUHVRU GH DOWD HILFDFLD SXHGH IXQFLRQDU a mayor velocidad y durante más tiempo que su antiguo aparato, y podría escuchar un zumbido de tono alto o un sonido de vibración mientras está en funcionamiento.
Problema Causas posibles Qué hacer El aparato no funciona Puede que el aparato esté en el ciclo de descongelado. Esto es normal. El motor no funciona durante unos 30 minutos cuando está en el ciclo de descongelado. El aparato está desconectado. Inserte el enchufe por completo en la toma de corriente. El interruptor de circuito está desconectado o el fusible está fundido. Cambie el fusible o restaure el interruptor. La toma de corriente GFI está desconectada. Restaure la toma de corriente.
SUGERENCIAS PARA LA SOLUCIÓN DE PROBLEMAS 16 Consejos para la Solución de Problemas... $QWHV GH VROLFLWDU HO VHUYLFLR WpFQLFR Problema Causas posibles What To Do Se crea humedad en el exterior del aparato No es extraño durante períodos de alta humedad. Si es molesto, seque la superficie; en caso contrario la humedad se evaporará al cabo de un tiempo. Se ha dejado la puerta abierta.
GARANTÍA Garantía GE Appliances GEAppliances.com Todos los servicios de garantía los proporcionan nuestros Centros de Reparación de Fábrica o nuestros técnicos Customer Care® autorizados. Para concertar una cita de reparación, en línea, 24 horas al día, visíte nos al *($SSOLDQFHV FRP R OODPH DO *( &$5(6 &XDQGR OODPH SDUD VROLFLWDU VHUYLFLR SRU IDYRU WHQJD D mano el número de serie y el número de modelo.
SOPORTE PARA EL CONSUMIDOR Soporte para el Consumidor Sitio Web de Electrodomésticos de GE ¢'HVHD UHDOL]DU XQD FRQVXOWD R QHFHVLWD D\XGD FRQ VX HOHFWURGRPpVWLFR" £,QWHQWH D WUDYpV GHO 6LWLR :HE GH (OHFWURGRPpVWLFRV de GE las 24 horas del día, cualquier día del año! Usted también puede comprar más Electrodomésticos GE maravillosos y aprovechar todos nuestros servicios de soporte a través de Internet, diseñados para su conveniencia. En EE.UU.: GEAppliances.