Profile Bottom Freezer Refrigerators GEAppliances.com Safety Instructions . . . . . . . . . . .2, 3 Operating Instructions Additional Features . . . . . . . . . . . . . . . . .9 Automatic Icemaker . . . . . . . . . . . . . . .12 Care and Cleaning . . . . . . . . . . . . .13–14 Controls . . . . . . . . . . . . . . . . . . . . . . . . . .4–5 Crispers and Pans . . . . . . . . . . . . . . . . .10 Freezer . . . . . . . . . . . . . . . . . . . . . . . . . . . .11 Replacing the Light Bulbs . . . . . . . . . .
Safety Instructions IMPORTANT SAFETY INFORMATION. READ ALL INSTRUCTIONS BEFORE USING. WARNING! Use this appliance only for its intended purpose as described in this Owner’s Manual. SAFETY PRECAUTIONS Operating Instructions When using electrical appliances, basic safety precautions should be followed, including the following: ■ This refrigerator must be properly installed and located in accordance with the Installation Instructions before it is used.
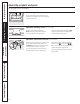
WARNING! HOW TO CONNECT ELECTRICITY Do not, under any circumstances, cut or remove the third (ground) prong from the power cord. For personal safety, this appliance must be properly grounded. Have the wall outlet and circuit checked by a qualified electrician to make sure the outlet is properly grounded. Where a standard 2-prong wall outlet is encountered, it is your personal responsibility and obligation to have it replaced with a properly grounded 3-prong wall outlet.
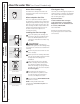
Safety Instructions About the controls with temperature settings. Operating Instructions (on some models) Installation Instructions (on some models) NOTE: The refrigerator is shipped with protective film covering the temperature controls. If this film was not removed during installation, remove it now. Troubleshooting Tips The temperature controls are preset in the factory at 37°F for the refrigerator compartment and 0°F for the freezer compartment.
GEAppliances.com How it Works (on some models) Once activated, the compressor will turn on immediately and the fans will cycle on and off at high speed as needed for eight hours. The compressor will continue to run until the refrigerator compartment cools to approximately 34°F (1°C), then it will cycle on and off to maintain this setting. After 8 hours, or if TurboCool is pressed again, the refrigerator compartment will return to the original setting. How to Use Press TurboCool.
Safety Instructions Operating Instructions About the water filter. (on 22 and 23 models only) Water Filter Cartridge Filter Bypass Plug The water filter cartridge is located in the back upper right corner of the refrigerator compartment. You must use the filter bypass plug when a replacement filter cartridge is not available. The icemaker will not operate without the filter or filter bypass plug.
GEAppliances.com Water Filter Cartridge Filter Bypass Plug The water filter cartridge is located in the back upper right corner of the refrigerator compartment. You must use the filter bypass plug when a replacement filter cartridge is not available. The icemaker will not operate without the filter or filter bypass plug. When to Replace the Filter Installing the Filter Cartridge If you are replacing the cartridge, first remove the old one.
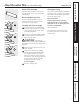
Safety Instructions About the shelves and bins. Not all features are on all models. Rearranging the Shelves Shelves in the refrigerator compartment are adjustable. Refrigerator Compartment Operating Instructions To remove: Remove all items from the shelf. Tilt the shelf up at the front. Lift the shelf up at the back and bring the shelf out. Some models have wire shelves that can be adjusted in the same manner.
Adjustable Bins on the Door Adjustable bins can easily be carried from refrigerator to work area. To remove: Lift bin straight up, then pull out. The snugger helps prevent tipping, spilling or sliding of small items stored on the door shelf. Grip the finger hold near the rear of the snugger and move it to fit your needs. Operating Instructions To replace or relocate: Slide in the bin just above the molded door supports, and push down. The bin will lock in place.
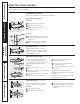
Safety Instructions Not all features are on all models. Fruit and Vegetable Crisper Excess water that may accumulate in the bottom of the drawers or under the drawers should be wiped dry. Adjustable Humidity Crisper (on some models) Slide the control all the way to the HIGH setting to provide high humidity recommended for most vegetables. Second slot from top Installation Instructions Operating Instructions About the crispers and pans.
GEAppliances.com Not all features are on all models. Freezer Shelves and Baskets A shelf above the ice storage bin A half-width basket NOTE: Do not fill baskets higher than the rim of the basket. This may cause baskets to stick or jam when opening or closing. A shallow full-width basket Safety Instructions About the freezer. A deep full-width basket Basket Removal To remove the deep full-width basket on freezer drawer models: Open the freezer drawer until it stops.
Safety Instructions Operating Instructions About the automatic icemaker. A newly installed refrigerator may take 12 to 24 hours to begin making ice. Automatic Icemaker (on some models) Power Switch Icemaker Green Power Light Feeler Arm You will hear a buzzing sound each time the icemaker fills with water. See below for how to access ice and reach the power switch. Be sure nothing interferes with the sweep of the feeler arm.
GEAppliances.com Cleaning the Outside The door handles and trim. Clean with a cloth dampened with soapy water. Dry with a soft cloth. Do not use wax on the door handles and trim. Do not wipe the refrigerator with a soiled dish cloth or wet towel. These may leave a residue that can erode the paint. Do not use scouring pads, powdered cleaners, bleach or cleaners containing bleach because these products can scratch and weaken the paint finish. Do not use appliance wax or polish on the stainless steel.
Behind the Refrigerator Be careful when moving the refrigerator away from the wall. All types of floor coverings can be damaged, particularly cushioned coverings and those with embossed surfaces. Raise the leveling legs located at the bottom front of the refrigerator. Operating Instructions Safety Instructions Care and cleaning of the refrigerator. (cont.) Pull the refrigerator straight out and return it to position by pushing it straight in.
GEAppliances.com Turning the control to the 0 (off) position does not remove power to the light circuit. Refrigerator Lights CAUTION: Light bulbs may be hot. Unplug the refrigerator. Plug the refrigerator back in. NOTE: Appliance bulbs may be ordered from GE Parts and Accessories, 800.626.2002. Rotate the shield down and then forward to release the tabs at the front of the shield. Freezer Light CAUTION: Light bulbs may be hot. Unplug the refrigerator.
Installation Instructions Refrigerator Models 20, 22 and 23 Questions? Call 800.GE.CARES (800.432.2737) or visit our Website at: GEAppliances.com In Canada, call 1.800.561.3344 or visit our Website at: www.GEAppliances.ca BEFORE YOU BEGIN TOOLS YOU MAY NEED Read these instructions completely and carefully. • • • • • • • • IMPORTANT — Save these instructions for local inspector’s use. Adjustable Wrench IMPORTANT — Observe all governing codes and ordinances.
Installation Instructions INSTALLING THE REFRIGERATOR REFRIGERATOR LOCATION REMOVE TOP CAP (cont.) (on some models) • Do not install the refrigerator where the temperature will go below 60°F (16°C) because it will not run often enough to maintain proper temperatures. • Do not install the refrigerator where the temperature will go above 100°F (37°C) because it will not perform properly. • Install it on a floor strong enough to support it fully loaded.
Installation Instructions INSTALLING THE REFRIGERATOR (cont.) 2 TURN ON THE WATER SUPPLY (icemaker and dispenser models) 1 CONNECTING THE REFRIGERATOR TO THE HOUSE WATER LINE (cont.) Turn the water on at the shutoff valve (house water supply) and check for any leaks. A If you are using copper tubing, place a compression nut and ferrule (sleeve) onto the end of the tubing coming from the house cold water supply. If you are using the GE SmartConnect™ tubing, the nuts are already assembled to the tubing.
Installation Instructions 7 REMOVE THE FREEZER DOOR HANDLE 6 REMOVE THE FRESH FOOD DOOR HANDLE Stainless steel and plastic handles: A Loosen the set screws located on the underside of the handle with the 1/8″ Allen wrench and remove the handle. NOTE: If the handle mounting fasteners need to be tightened or removed, use a 3/16″ Allen wrench.
Installation Instructions INSTALLING THE REFRIGERATOR (cont.) 9 ATTACH THE FREEZER DOOR HANDLE 8 ATTACH THE FRESH FOOD DOOR HANDLE Stainless steel handle: A Attach the handle to the handle mounting fasteners and tighten the set screws with a 3/32″ Allen wrench. NOTE: For Double Door models follow the same procedure on the opposite door. Stainless steel and plastic handles: A Attach the handle firmly to the mounting fasteners and tighten the set screws on the bottom of the handle with a 1/8″ Allen wrench.
Installation Instructions 10 LEVEL THE REFRIGERATOR 11 SET THE CONTROLS The leveling legs have 2 purposes: 1) Leveling legs adjust so the refrigerator is firmly positioned on the floor and does not wobble. 2) Leveling legs serve as a stabilizing brake to hold the refrigerator securely in position during operation and cleaning. The leveling legs also prevent the refrigerator from tipping. Set the controls to the recommended setting. A Remove the grille by removing the two Phillips head screws.
Installation Instructions REMOVING THE FREEZER DRAWER 2 REMOVE THE DRAWER FRONT FROM THE SLIDES (cont.) The freezer drawer can be removed, if needed, to fit through tight areas. Read these instructions completely and carefully. B Lift up on both sides of the freezer drawer handle to separate the drawer railings from the rail assemblies. C Set the drawer front on a non-scratching surface. D Push the rail assemblies back into locking position. 1 REMOVE THE BASKET A Open the freezer drawer until it stops.
Installation Instructions 1 ATTACH AND SECURE THE DRAWER FRONT TO THE SLIDES (cont.) Two people may be required to complete this procedure. E Replace the screws on both rail assemblies. 1 ATTACH AND SECURE THE DRAWER FRONT TO THE SLIDES A Pull out the rail assemblies to the full length on each side of the cabinet. Screw 2 REPLACE THE FREEZER BASKET B Locate the slots on the inside of the rail assemblies near the back. Replace the lower freezer basket by lowering it into the frame.
Installation Instructions REVERSING THE DOOR SWING (Single Door Refrigerator Models only) 1 REMOVE THE IMPORTANT NOTES REFRIGERATOR DOOR When reversing the door swing: NOTE: Door swing is not reversible on stainless steel models. • Read the instructions all the way through before starting. • Parts are included in the door hinge kit. • Handle parts carefully to avoid scratching paint. • Set screws down by their related parts to avoid using them in the wrong places.
Installation Instructions 2 REMOVE CENTER HINGE 4 TRANSFER REFRIGERATOR DOOR STOP A Remove the hinge pin from the hinge bracket. The hinge pin will be used again with the new hinge bracket for the other side. A B C B Using a 5/16″ socket ratchet/driver, remove the bolts securing the center hinge to the cabinet. Set the bolts aside. Remove the door stop on right side of the bottom of the refrigerator door by removing the two screws. Move the plastic hinge hole thimble to the opposite hole.
Installation Instructions REVERSING THE DOOR SWING (cont.) 6 REHANG REFRIGERATOR DOOR A Lower the refrigerator door onto the center hinge pin. Ensure that the plastic hinge pin thimble is on the center hinge pin or inside door hinge pin hole located in the bottom of the door. B Insert the door thimble into the hinge hole on top of the refrigerator door and then insert the top hinge pin. Make sure the door is aligned with the cabinet. Attach the hinge to the top of the cabinet loosely with the bolts.
Installation Instructions REMOVING THE DOORS (Double Door Refrigerator Models only) 1 REMOVE THE IMPORTANT NOTES REFRIGERATOR DOORS NOTE: Door swing is not reversible. • Read the instructions all the way through before starting. • Handle parts carefully to avoid scratching paint. • Set screws down by their related parts to avoid using them in the wrong places. • Provide a non-scratching work surface for the doors. IMPORTANT: Once you begin, do not move the cabinet.
Installation Instructions REMOVING THE DOORS (cont.) 1 REMOVE THE REFRIGERATOR DOORS 2 REMOVE CENTER HINGE (cont.) Using a 5/16″ socket ratchet/driver, remove the bolts securing the center hinge to the cabinet. Set the hinge and bolts aside. D Remove the hinge cover on top of the refrigerator door by removing the Phillips head screw and pulling it up. E Using a 5/16″ socket ratchet/driver, remove the bolts securing the top hinge to the cabinet.
Installation Instructions REPLACING THE DOORS (Double Door Refrigerator Models only) 2 REHANG REFRIGERATOR DOORS (CONT.) 1 INSTALL CENTER HINGE E Make sure the gasket on the door is flush against the cabinet and is not folded. Make sure the door is straight and the gap between the doors is even across the front. While holding the aligned door in place, tighten the top hinge bolts. Replace the hinge cover and screw. Install the center hinge on each side.
Installation Instructions INSTALLING THE WATER LINE (ICEMAKER MODELS) WHAT YOU WILL NEED BEFORE YOU BEGIN Recommended copper water supply kits are WX8X2, WX8X3 or WX8X4, depending on the amount of tubing you need. Approved plastic water supply lines are GE SmartConnect™ Refrigerator Tubing (WX08X10006, WX08X10015 and WX08X10025). When connecting your refrigerator to a GE Reverse Osmosis Water System, the only approved installation is with a GE RVKit.
Installation Instructions Install the shutoff valve on the nearest frequently used drinking water line. WHAT YOU WILL NEED (CONT.) NOTE: The only GE approved plastic tubing is that supplied in GE SmartConnect™ Refrigerator Tubing kits. Do not use any other plastic water supply line because the line is under pressure at all times. Certain types of plastic will crack or rupture with age and cause water damage to your home.
Installation Instructions INSTALLING THE WATER LINE (cont.) 4 FASTEN THE SHUTOFF VALVE 7 CONNECT THE TUBING TO THE VALVE Fasten the shutoff valve to the cold water pipe with the pipe clamp. Place the compression nut and ferrule (sleeve) for copper tubing onto the end of the tubing and connect it to the shutoff valve. Pipe Clamp Make sure the tubing is fully inserted into the valve. Tighten the compression nut securely.
GEAppliances.com Newer refrigerators sound different from older refrigerators. Modern refrigerators have more features and use newer technology. Do you hear what I hear? These sounds are normal. HUMMM... WHOOSH... and longer than your old refrigerator and you may hear a high-pitched hum or pulsating sound while it is operating. ■ You may hear a whooshing sound when the doors close. This is due to pressure equalizing within the refrigerator. ■ You may hear the fans spinning at high speeds.
Safety Instructions Operating Instructions Installation Instructions Troubleshooting Tips Problem Possible Causes What To Do Motor operates for long periods or cycles on and off frequently. (Modern refrigerators with more storage space and a larger freezer require more operating time. They start and stop often to maintain even temperatures.) Normal when refrigerator is first plugged in. • Wait 24 hours for the refrigerator to completely cool down.
Food transmitting odor/taste to ice cubes. • Wrap foods well. Interior of refrigerator needs cleaning. • See Care and cleaning. • Keep an open box of baking soda in the refrigerator; replace every three months. Door left open. • Check to see if package is holding door open. Freezer control not set cold enough. • See About the controls. Foods transmitting odor to refrigerator. • Foods with strong odors should be tightly wrapped.
Safety Instructions Operating Instructions Installation Instructions Troubleshooting Tips Problem Possible Causes What To Do Water has poor taste/odor Water dispenser has not been used for a long time. • Dispense water until all water in system is replenished. Water in first glass is warm Normal when refrigerator is first installed. • Wait 24 hours for the refrigerator to completely cool down. Water dispenser has not been used for a long time.
Possible Causes What To Do My display is showing TurboCool function is activated. • See About TurboCool for more information. Water filter indicator light changed color This is normal. • See About the water filter for more information. Water filter indicator light remains red even after replacing the water filter Water filter indicator must be reset. • Press and hold the RESET WATER FILTER pad for 3 seconds. See About the water filter for more information.
Consumer Support Troubleshooting Tips Installation Instructions Operating Instructions Safety Instructions Notes.
Please place in envelope and mail to: Veuillez mettre dans une enveloppe et envoyez à : OWNERSHIP REGISTRATION P.O.
All warranty service provided by our Factory Service Centers, or an authorized Customer Care® technician. To schedule service on-line, visit us at GEAppliances.com, or call 800.GE.CARES (800.432.2737). Please have serial number and model number available when calling for service. Staple your receipt here. Proof of the original purchase date is needed to obtain service under the warranty.
CUSTOMER WARRANTY (for customers in Canada) Your refrigerator is warranted to be free of defects in material and workmanship.
Performance Data Sheet SmartWater Filtration System MWF Cartridge This system has been tested according to NSF/ANSI 42/53 for reduction of the substances listed below. The concentration of the indicated substances in water entering the system was reduced to a concentration less than or equal to the permissible limit for water leaving the system, as specified in NSF/ANSI 42/53.
Performance Data Sheet SmartWater Filtration System GSWF Cartridge This system has been tested according to NSF/ANSI 42/53 for reduction of the substances listed below. The concentration of the indicated substances in water entering the system was reduced to a concentration less than or equal to the permissible limit for water leaving the system, as specified in NSF/ANSI 42/53.* (100% safety factors built in for unmetered usage) Standard No.
State of California Department of Health Services Water Treatment Device Certificate Number 05 - 1698 Date Issued: February 2, 2005 Trademark/Model Designation MWF Manufacturer: General Electric Company Replacement Elements MWF The water treatment device(s) listed on this certificate have met the testing requirements pursuant to Section 116830 of the Health and Safety Code for the following health related contaminants: Cysts Turbidity Microbiological Contaminants and Turbidity Organic Contaminants Al
State of California Department of Health Services Water Treatment Device Certificate Number 03 - 1559 Date Issued: April 28, 2003 Trademark/Model Designation GE GSWF Replacement Elements GSWF Manufacturer: General Electric Consumer Products The water treatment device(s) listed on this certificate have met the testing requirements pursuant to Section 116830 of the Health and Safety Code for the following health related contaminants: Microbiological Contaminants and Turbidity Cysts Turbidity Inorganic/Ra