RANGES Compact Electric SAFETY INFORMATION .......... 3 USING THE RANGE Surface Units . . . . . . . . . . . . . . . . . . . . . . . . . . . 8 Oven Controls . . . . . . . . . . . . . . . . . . . . . . . . . . 12 Sabbath Mode . . . . . . . . . . . . . . . . . . . . . . . . . . 12 Oven Racks . . . . . . . . . . . . . . . . . . . . . . . . . . . .13 Aluminum Foil and Oven Liners. . . . . . . . . . .13 Cookware Guidelines . . . . . . . . . . . . . . . . . . . .14 Cooking Modes . . . . . . . . . . . . . . .
THANK YOU FOR MAKING GE APPLIANCES A PART OF YOUR HOME. Whether you grew up with GE Appliances, or this is your first, we’re happy to have you in the family. We take pride in the craftsmanship, innovation and design that goes into every GE Appliances product, and we think you will too. Among other things, registration of your appliance ensures that we can deliver important product information and warranty details when you need them. Register your GE appliance now online.
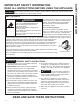
READ ALL INSTRUCTIONS BEFORE USING THE APPLIANCE WARNING Read all safety instructions before using the product. Failure to follow these instructions may result in fire, electrical shock, serious injury or death. ANTI-TIP DEVICE WARNING Tip-Over Hazard • A child or adult can tip the range and be killed. • Verify the anti-tip bracket has been properly installed and engaged. • Ensure the anti-tip bracket is re-engaged when the range is moved.
SAFETY INFORMATION IMPORTANT SAFETY INFORMATION READ ALL INSTRUCTIONS BEFORE USING THE APPLIANCE WARNING GENERAL SAFETY INSTRUCTIONS (Cont.) Ŷ 'R QRW WRXFK WKH VXUIDFH XQLWV WKH KHDWLQJ HOHPHQWV Ŷ 'R QRW XVH DQ\ W\SH RI IRLO RU OLQHU WR FRYHU WKH or the interior surface of the oven. These surfaces oven bottom or anywhere in the oven, except as may be hot enough to burn even though they are described in this manual.
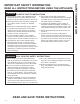
READ ALL INSTRUCTIONS BEFORE USING THE APPLIANCE WARNING COOKTOP SAFETY INSTRUCTIONS Ŷ 1HYHU OHDYH WKH VXUIDFH XQLWV XQDWWHQGHG ZLWK WKH FRRNWRS 21 DERYH D /R VHWWLQJ %RLORYHUV FDXVH smoking and greasy spillovers that may catch on fire. Ŷ $OZD\V EH SUHVHQW DW WKH UDQJH ZKHQ FRRNLQJ ZLWK oil or grease. Surface cooking is an "attended" activity.
SAFETY INFORMATION IMPORTANT SAFETY INFORMATION READ ALL INSTRUCTIONS BEFORE USING THE APPLIANCE WARNING RADIANT COOKTOP SAFETY INSTRUCTIONS Ŷ 8VH FDUH ZKHQ WRXFKLQJ WKH FRRNWRS 7KH JODVV surface of the cooktop will retain heat after the controls have been turned off. Ŷ 'R QRW FRRN RQ D EURNHQ FRRNWRS ,I JODVV FRRNWRS should break, cleaning solutions and spillovers may penetrate the broken cooktop and create a risk of electric shock. Contact a qualified technician immediately.
READ ALL INSTRUCTIONS BEFORE USING THE APPLIANCE How to Remove Protective Shipping Film and Packaging Tape Carefully grasp a corner of the protective shipping film with your fingers and slowly peel it from the appliance VXUIDFH 'R QRW XVH DQ\ VKDUS LWHPV WR UHPRYH WKH ILOP Remove all of the film before using the appliance for the first time.
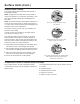
USING THE RANGE: 6XUIDFH 8QLWV Surface Units WARNING FIRE HAZARD: Never leave the range unattended with the cooktop ON above a Lo setting. Keep flammable items away from the cooktop. Turn off all controls when done cooking. Failure to follow these instructions can result in fire, serious injury or death. Throughout this manual, features and appearance may vary from your model. How to Set Push the knob in and turn in either direction to the setting you want.
Radiant Glass Cooktop The radiant cooktop features heating units beneath a smooth glass surface. NOTE: A slight odor is normal when a new cooktop is used for the first time. It is caused by the heating of new parts and insulating materials and will disappear in a short time. NOTE: On models with light-colored glass cooktops, it is normal for the cooking zones to change color when hot or cooling down. This is temporary and will disappear as the glass cools to room temperature.
USING THE RANGE: 6XUIDFH 8QLWV Surface Units (Cont.) Cookware for Radiant Glass Cooktops The following information will help you choose cookware which will give good performance on glass cooktops. NOTE: Follow all cookware manufacturer’s recommendations when using any type of cookware on the ceramic cooktop. Recommended Avoid/Not Recommended Stainless Steel Enamel (painted) on Steel Aluminum Heating empty pans can cause permanent damage to cooktop glass.
More about Cookware Ŷ 3ODFH RQO\ GU\ SDQV RQ WKH VXUIDFH HOHPHQWV 'R QRW place lids on the surface elements, particularly wet lids. Wet pans and lids may stick to smooth surface when cool. Ŷ 'R QRW XVH ZRNV WKDW KDYH VXSSRUW ULQJV 7KLV W\SH RI wok will not heat on the cooktop. Ŷ :H UHFRPPHQG WKDW \RX XVH RQO\ D IODW ERWWRPHG wok. They are available at your local retail store. The bottom of the wok should have the same diameter as the surface element to ensure proper contact.
Oven Temperature Knob Turn the OVEN TEMP knob to the setting you want. 7KH 2YHQ &\FOH OLJKW FRPHV RQ ZKHQ WKH EXUQHU LV RQ ,W will cycle on and off during cooking. Front of OVEN TEMP knob NQRE DSSHDUDQFH PD\ YDU\ To Adjust the Thermostat To decrease the oven temperature, move the top screw toward the left. KE ER T %DFN RI 29(1 7(03 NQRE NQRE DSSHDUDQFH PD\ YDU\ Sabbath Mode Certain models comply with the Star-K Jewish Sabbath requirements for use during the Sabbath and holidays.
Rack Positions Your oven has four rack positions in the main oven. Recommended rack positions for various types of foods are provided in the Cooking Guide. Adjusting the rack position is one way to impact cooking results. For example, if you would prefer darker tops on cakes, muffins or cookies, try moving food one rack position higher. If you find foods are too brown on top, try moving them down next time.
USING THE OVEN: &RRNZDUH *XLGHOLQHV &RRNLQJ 0RGHV 14 Cookware Guidelines The material, finish, and size of cookware affect baking performance. Ŷ 6KLQ\ SDQV FDQ SURGXFH PRUH HYHQO\ FRRNHG EDNHG goods such as cakes and cookies. 'DUN FRDWHG DQG GXOO SDQV DEVRUE KHDW PRUH UHDGLO\ than light, shiny pans. Pans that absorb heat more readily can result in a browner, crisper and thicker crust. If using dark and coated cookware check food earlier than the minimum cook time.
RECOMMENDED MODE(S) RECOMMENDED RACK POSITION(S) ADDITIONAL SUGGESTIONS Layer Cakes, sheet cakes, bundt cakes, muffins, quick breads on a Single Rack %DNH 2 8VH VKLQ\ FRRNZDUH Layer cakes* on Multiple Racks %DNH 1 and 3 Ensure adequate airflow VHH LOOXVWUDWLRQ EHORZ &KLIIRQ FDNHV DQJHO IRRG %DNH 1 8VH VKLQ\ FRRNZDUH Cookies, biscuits, scones on a Single Rack %DNH 3 8VH VKLQ\ FRRNZDUH Cookies, biscuits, scones on Multiple Racks %DNH 2 and 4 Ensure adequate airflow.
CARE AND CLEANING: Cleaning the Range – Exterior Cleaning the Range – Exterior %H VXUH DOO FRQWUROV DUH RII DQG DOO VXUIDFHV DUH FRRO EHIRUH FOHDQLQJ DQ\ SDUW RI WKH UDQJH WARNING If your range is removed for cleaning, servicing or any reason, be sure the anti- tip device is reengaged properly when the range is replaced. Failure to take this precaution could result in tipping of the range and can result in death or serious burns to children or adults.
Porcelain Enamel Cooktop The porcelain enamel finish is sturdy but breakable if misused. This finish is acid-resistant. However, any DFLGLF IRRGV VSLOOHG VXFK DV IUXLW MXLFHV WRPDWR RU YLQHJDU VKRXOG QRW EH SHUPLWWHG WR UHPDLQ RQ WKH ILQLVK For other spills such as fat spatterings, wash with soap and water or cleansing powders after the surface has cooled. Rinse well. Polish with a dry cloth. If acids spill on the cooktop while it is hot, use a dry paper towel or cloth to wipe it up right away.
CARE AND CLEANING: &OHDQLQJ WKH 5DQJH ± ([WHULRU 2YHQ Cleaning the Range – Exterior (Cont.) Drip Pans Remove the surface units. Then lift out the drip pans. For best results, clean the drip pans by hand. Place WKHP LQ D FRYHUHG FRQWDLQHU RU D SODVWLF EDJ ZLWK 1»4 cup ammonia to loosen the soil. Rinse with clean water and polish with a clean soft cloth. The drip pans may also be cleaned in a dishwasher. &OHDQ WKH DUHD XQGHU WKH GULS SDQV RIWHQ %XLOW XS VRLO especially grease, may catch fire.
Oven Heating Elements 'R QRW FOHDQ WKH EDNH HOHPHQW RU WKH EURLO HOHPHQW $Q\ soil will burn off when the elements are heated. To clean the oven floor, gently lift the bake element. Clean the oven floor with warm, soapy water. Gently lift the bake element Cleaning the Glass Cooktop Normal Daily Use Cleaning 21/< XVH &(5$0$ %5<7(® Ceramic Cooktop Cleaner on the glass cooktop. Other creams may not be as effective.
CARE AND CLEANING: Cleaning the Glass Cooktop Cleaning the Glass Cooktop (Cont.) Heavy, Burned-On Residue 1. Allow the cooktop to cool. 8VH D VLQJOH HGJH UD]RU EODGH VFUDSHU DW DSSUR[LPDWHO\ a 45° angle against the glass surface and scrape the soil. It will be necessary to apply pressure to the razor scraper in order to remove the residue. 3.
Cleaning the Oven Door Cleaning the Door Interior Cleaning the Door Exterior 'R QRW DOORZ H[FHVV ZDWHU WR UXQ LQWR DQ\ KROHV RU VORWV in the door. If a stain on the door vent trim is persistent, use a mild abrasive cleaner and a sponge-scrubber for best results. 'R QRW XVH WKLV PHWKRG RQ DQ\ RWKHU VXUIDFH Wipe dish soap over any baked-on spatters on the glass.
CARE AND CLEANING: 2YHQ 'RRU Oven Door 7KH GRRU LV YHU\ KHDY\ %H FDUHIXO ZKHQ UHPRYLQJ DQG OLIWLQJ WKH GRRU 'R QRW OLIW GRRU E\ WKH KDQGOH To Remove the Door: 1. Fully open the door. 2. Pull the hinge locks up and away from the range frame to the unlocked position. 3. Firmly grasp both sides of the door near the top. 4. Close door until the top of the door is approximately ´ IURP WKH UDQJH IUDPH 5. Lift door up and away from the range until both hinge arms are clear of the slots in the range frame.
Save time and money! Review the charts on the following pages first and you may not need to call for service. Problem Possible Cause What To Do Surface units will not maintain a rolling boil or cooking is not fast enough Improper cookware being used. 8VH SDQV ZKLFK DUH IODW DQG PDWFK WKH GLDPHWHU RI WKH surface unit selected. ,Q VRPH DUHDV WKH SRZHU YROWDJH PD\ EH low. Cover pan with a lid until desired heat is obtained.
TROUBLESHOOTING TIPS Troubleshooting Tips ... %HIRUH \RX FDOO IRU VHUYLFH Problem Possible Cause What To Do Food does not bake properly Oven controls improperly set. See the Cooking Modes section. Rack position is incorrect or rack is not level. See the Cooking Modes section and Cooking Guide. Incorrect cookware or cookware of improper size being used. See the Cookware section. Oven temperature needs adjustment. See the Oven Controls section.
Problem Possible Cause What To Do Sometimes the oven takes longer to preheat to the same temperature Cookware or food in oven. The cookware or food in the oven will cause the oven to take longer to preheat. Remove items to reduce preheat time. Number of racks in oven. Adding more racks to the oven will cause the oven to take longer to preheat. Remove some racks. Oven racks are difficult to slide The shiny, silver-colored racks were cleaned in a self-clean cycle.
LIMITED WARRANTY GE Appliances Electric Range Limited Warranty GEAppliances.com All warranty service is provided by our Factory Service Centers, or an authorized Customer Care® technician. To schedule service online, visit us at GEAppliances.com/service_and_support/, or call GE Appliances at 800.GE.CARES 3OHDVH KDYH \RXU VHULDO QXPEHU DQG \RXU PRGHO QXPEHU DYDLODEOH ZKHQ FDOOLQJ IRU VHUYLFH Servicing your appliance may require the use of the onboard data port for diagnostics.
Looking For Something More? GE Appliances offers a variety of accessories to improve your cooking and maintenance experiences! Refer to the Consumer Support page for phone numbers and website information.
CONSUMER SUPPORT Consumer Support GE Appliances Website Have a question or need assistance with your appliance? Try the GE Appliances Website 24 hours a day, any day of the year! You can also shop for more great GE Appliances products and take advantage of all our on-line support VHUYLFHV GHVLJQHG IRU \RXU FRQYHQLHQFH ,Q WKH 86 GEAppliances.
Eléctricas compactas COCINAS INFORMACIÓN DE SEGURIDAD . . . . .3 USO DE LA COCINA Unidades de superficie . . . . . . . . . . . . . . . . . . . . . . . 8 Controles del Horno . . . . . . . . . . . . . . . . . . . . . . . . . 12 Modo Sabático . . . . . . . . . . . . . . . . . . . . . . . . . . . . . 12 Estantes del Horno . . . . . . . . . . . . . . . . . . . . . . . . . . 13 Papel de Aluminio y Cobertores del Horno . . . . . 13 Pautas de Uso de Utensilios . . . . . . . . . . . . . . . . . .
GRACIAS POR HACER QUE GE APPLIANCES SEA PARTE DE SU HOGAR. Ya sea que haya crecido usando GE Appliances, o que ésta es su primera vez, nos complace tenerlo en la familia. Sentimos orgullo por el nivel de arte, innovación y diseño de cada uno de los electrodomésticos de GE Appliances, y creemos que usted también. Entre otras cosas, el registro de su electrodoméstico asegura que podamos entregarle información importante del producto y detalles de la garantía cuando los necesite.
LEA TODAS LAS INSTRUCCIONES ANTES DE USAR ESTE ELECTRODOMÉSTICO ADVERTENCIA Lea todas las instrucciones de seguridad antes de utilizar este producto. No seguir estas instrucciones puede generar un incendio, una descarga eléctrica, lesiones corporales o la muerte. DISPOSITIVO ANTI-VOLCADURAS Para reducir el riesgo de volcar la cocina, ésta debe sujetarse mediante un soporte anti-volcaduras con una adecuada instalación.
INFORMACIÓN DE SEGURIDAD INFORMACIÓN IMPORTANTE DE SEGURIDAD LEA TODAS LAS INSTRUCCIONES ANTES DE USAR ESTE ELECTRODOMÉSTICO ADVERTENCIA INSTRUCCIONES GENERALES DE SEGURIDAD (Cont.) Ŷ 1R WRTXH ODV XQLGDGHV GH VXSHUILFLH ORV HOHPHQWRV calentadores o la superficie interior del horno. Estas superficies pueden estar lo suficientemente calientes para quemar aún cuando tengan un color oscuro.
LEA TODAS LAS INSTRUCCIONES ANTES DE USAR ESTE ELECTRODOMÉSTICO ADVERTENCIA INSTRUCCIONES DE SEGURIDAD DE LA ESTUFA Ŷ 1XQFD SLHUGD GH YLVWD ODV XQLGDGHV GH OD VXSHUILFLH FXDQGR la superficie de cocción se encuentre en ON (Encendida) y en configuraciones superiores a Lo (Baja). Los alimentos que hierven y se derraman pueden provocar humo y derrames grasosos que pueden prenderse fuego. Ŷ 6LHPSUH HVWp SUHVHQWH IUHQWH D OD FRFLQD FXDQGR FRFLQH con aceite o grasa.
INFORMACIÓN DE SEGURIDAD INFORMACIÓN IMPORTANTE DE SEGURIDAD LEA TODAS LAS INSTRUCCIONES ANTES DE USAR ESTE ELECTRODOMÉSTICO ADVERTENCIA INSTRUCCIONES DE SEGURIDAD DE LA ESTUFA RADIANTE Ŷ 7HQJD FXLGDGR DO WRFDU OD HVWXID /D VXSHUILFLH GH YLGULR de la estufa retendrá calor después de que los controles se hayan apagado. Ŷ 1R FRFLQH VREUH XQD HVWXID URWD 6L OD HVWXID VH URPSH las soluciones de limpieza y los derrames pueden penetrar en la estufa rota y crear un riesgo de descarga eléctrica.
LEA TODAS LAS INSTRUCCIONES ANTES DE USAR ESTE ELECTRODOMÉSTICO Cómo Retirar la Película Protectora de Envío y la Cinta de Embalaje Con cuidado tome un extremo de la película protectora de envío con los dedos y lentamente retire la misma de la superficie del electrodoméstico. No utilice ningún producto filoso para retirar la película. Retire toda la película antes de usar el electrodoméstico por primera vez.
USO DE LA COCINA: 8QLGDGHV GH VXSHUILFLH Unidades de superficie ADVERTENCIA RIESGO DE INCENDIO: Nunca pierda de vista la cocina cuando la superficie de cocción se encuentre en ON (Encendida) y en configuraciones superiores a Lo (Baja). Mantenga los ítems inflamables alejados de la estufa. Apague todos los controles cuando finalice la cocción. Si no se siguen estas instrucciones se podrá producir incendios, lesiones graves o la muerte.
Estufa de Vidrio Radiante La estufa radiante cuenta con unidades calentadoras debajo de una superficie lisa de vidrio. NOTA: 8Q OLJHUR RORU HV QRUPDO FXDQGR XQD HVWXID QXHYD se utiliza por primera vez. Es provocado por el calentamiento de piezas nuevas y materiales aislantes y desaparecerá en poco tiempo. NOTA: En modelos con estufas de vidrio de color claro, es normal que las zonas de cocción cambien de color cuando están calientes o enfriándose.
USO DE LA COCINA: 8QLGDGHV GH VXSHUILFLH Unidades de superficie (Cont.) Utensilio para Placa de Cocción para Vidrio Radiante La siguiente información lo ayudará a elegir los recipientes de cocción que brindan un buen desempeño en estufas de vidrio. Ver el folleto sobre recipientes para usar con estufas de inducción. NOTA: Siga todas las recomendaciones del fabricante de recipientes cuando utilice cualquier clase de recipiente de cocción sobre la estufa cerámica.
Más sobre Utensilios Ŷ &RORTXH VyOR UHFLSLHQWHV VHFRV VREUH ORV HOHPHQWRV GH superficie. No coloque tapas sobre los elementos de superficie, en especial tapas mojadas. Es posible que las ollas y tapas mojadas se adhieran a la superficie plana cuando se enfríen. Ŷ 1R XVH ZRNV FRQ DQLOORV GH VRSRUWH 7VWH WLSR GH ZRN QR VH calentará sobre la superficie de cocción. Ŷ 5HFRPHQGDPRV HO XVR GH ZRNV GH EDVH SODQD VRODPHQWH Se encuentran disponibles en su negocio minorista local.
Perilla de la Temperatura del Horno Gire la perilla OVEN TEMP (Temperatura del Horno) hacia la configuración que desee. /D OX] GH 2YHQ &\FOH +RUQR &LFOR VH HQFLHQGH FXDQGR HO quemador está encendido. Ésta realizará ciclos de encendido y apagado durante la cocción.
Posiciones de los Estantes Su horno cuenta con cuatro posiciones de estantes en el horno principal. En la Guía de Cocción, se brindan recomendaciones de posiciones de los estantes para diferentes tipos de comidas. Se ajusta un estante en una dirección para afectar los resultados de cocción. Por ejemplo, si se prefieren partes superiores más oscuras en tartas, panecillos o galletas, pruebe moviendo la comida a un estante que se encuentre una posición más arriba.
USO DEL HORNO: 3DXWDV GH 8VR GH 8WHQVLOLRV 0RGRV GH &RFFLyQ Pautas de Uso de Utensilios El material, el acabado y el tamaño de los utensilios afectan el horneado. Ŷ /DV ROODV EULOODQWHV SXHGHQ SURGXFLU UHVXOWDGRV GH KRUQHDGR más parejos en tortas y galletas. Las ollas oscuras, revestidas y opacas absorben el calor más rápidamente que las ollas claras y brillantes. Al usar ollas que absorben el calor más rápidamente, las comidas podrán resultar más doradas, crocantes y con una capa más gruesa.
MODO(S) RECOMENDADO(S) POSICIÓN(ES) DE ESTANTES RECOMENDADA SUGERENCIAS ADICIONALES Tortas con capas, tortas rectangulares, roscas, panecillos, pan rápido en un Solo Estante Hornear 2 8VH XWHQVLOLRV EULOODQWHV Tortas con capas* en Múltiples Estantes Hornear \ Asegúrese de que haya un flujo de aire adecuado (Vea la ilustración).
CUIDADO Y LIMPIEZA: Limpieza de la Cocina - Exterior Limpieza de la Cocina - Exterior Asegúrese de que todos los controles estén apagados y que las superficies estén frías antes de limpiar cualquier parte de la cocina. ADVERTENCIA Si se quita la cocina para efectuar una limpieza, reparaciones o cualquier otra razón, verifique que el dispositivo anti-volcaduras se coloque de manera adecuada cuando vuelva a instalarse la cocina. Si no toma esta precaución, la cocina puede volcarse y provocar lesiones.
Estufa de esmalte de porcelana (en algunos modelos) El acabado de esmalte de porcelana es resistente pero puede romperse si se utiliza incorrectamente. Este acabado es resistente al ácido. Sin embargo, no debe permitirse que algunos alimentos ácidos que se derraman (como jugos de fruta, tomate o vinagre) permanezcan en el acabado. Si se derraman ácidos en la estufa mientras está caliente, utilice una toalla de papel o un paño secos para limpiarlo en el momento.
CUIDADO Y LIMPIEZA: /LPSLH]D GH OD &RFLQD ([WHULRU +RUQR Limpieza de la Cocina - Exterior (Cont.) Cubetas de Goteo Retire las unidades de la superficie. Luego retire las cubetas de goteo. Para obtener mejores resultados, limpie las cubetas de goteo en forma manual. Coloque las mismas en un envase cubierto (o en una bolsa plástica) con ¼ de taza de amoníaco para aflojar la suciedad. Enjuague con agua limpia y pula con una tecla suave y limpia.
Elementos calentadores del horno No limpie el elemento para hornear o el elemento para asar. Las suciedades se quemarán cuando se calienten los elementos. Para limpiar el piso del horno, eleve suavemente el elemento a hornear. Limpie la base del horno con agua caliente y jabón. Levante suavemente el elemento para hornear. Cómo limpiar la estufa de vidrio Limpieza normal de uso diario SÓLO utilice el limpiador de estufas cerámicas CERAMA BRYTE® en la estufa de vidrio.
CUIDADO Y LIMPIEZA: Cómo limpiar la estufa de vidrio Cómo limpiar la estufa de vidrio (Cont.) Residuos pegados rebeldes 'HMH HQIULDU OD HVWXID 8WLOLFH HO UDVSDGRU GH ILOR ~QLFR D XQ iQJXOR DSUR[LPDGR GH GHJUHHV FRQWUD OD VXSHUILFLH GHO vidrio y raspe la suciedad. Puede ser necesario aplicar presión al raspador para quitar la suciedad. 3.
Limpieza de la Puerta del Horno Limpieza del Interior de la Puerta Limpieza del Exterior de la Puerta No permita que el excedente de agua entre a ningún agujero o ranuras de la puerta. Si las manchas en el borde de la ventana de la puerta son persistentes, use un limpiador abrasivo suave o una esponja con estropajo para obtener un mejor resultado. No use este método sobre ninguna otra superficie.
CUIDADO Y LIMPIEZA: Puerta del Horno Puerta del Horno La puerta es muy pesada. Tenga cuidado al retirar y levantar la puerta. No levante la puerta usando la manija. Para retirar la puerta: $EUD OD SXHUWD WRWDOPHQWH 2. Empuje los bloqueos de la bisagra hacia arriba y afuera de la estructura de la cocina, hasta la posición de desbloqueo. 3. Firmemente tome ambos lados de la puerta por la parte superior. 4.
¡Ahorre tiempo y dinero! Primero revise los cuadros que aparecen en las siguientes páginas y es posible que no necesite solicitar reparaciones. Problema Causa Posible Qué Hacer Las unidades de superficie no mantienen un hervor constante o la cocción es lenta Se están utilizando recipientes de cocción inadecuados. 8VH UHFLSLHQWHV GH EDVH SODQD \ TXH VH DMXVWHQ DO GLiPHWUR de la unidad de superficie elegida. En algunas regiones la energía (voltaje) puede ser baja.
CONSEJOS PARA LA SOLUCIÓN DE PROBLEMAS 24 Consejos para la Solución de Problemas... Antes de solicitar el servicio técnico Problema La comida no se hornea de forma apropiada La comida no asa de forma apropiada Causa Posible Qué Hacer Controles del horno configurados de forma incorrecta. Consulte la sección Modos de Cocción. La posición del estante es incorrecta o el estante no está nivelado. Consulte la sección Modos de Cocción y la Guía de Cocción.
Problema Causa Posible A veces el horno tarda 8WHQVLOLR R FRPLGD HQ HO KRUQR más en precalentarse a la misma temperatura Qué Hacer El utensilio o la comida en el horno hará que éste tarde más en precalentarse. Retire estos artículos para reducir el tiempo de precalentamiento. Número de estantes en el horno Agregar más estantes al horno hará que éste tarde más en precalentarse. Retire algunos estantes.
GARANTÍA LIMITADA Garantía Limitada de la Cocina Eléctrica de GE Appliances GEAppliances.com Todo el servicio de garantía es provisto por nuestros Centros de Servicio de Fabricación, o un técnico autorizado de Customer Care®. Para programar una visita del servicio técnico a través de Internet, visítenos en GEAppliances.com/service_and_support/, o llame al 800.GE.CARES (800.432.2737). Cuando llame para solicitar el servicio, tenga los números de serie y modelo disponibles.
Accesorios ¿Busca Algo Más? ¡GE Appliances ofrece una variedad de accesorios para mejorar sus experiencias de cocción y mantenimiento! Para acceder a números telefónicos e información de sitios Web, consulte la página de Soporte para el Consumidor.
SOPORTE PARA EL CONSUMIDOR Soporte para el Consumidor Sitio Web de GE Appliances ¿Desea realizar una consulta o necesita ayuda con su electrodoméstico? ¡Intente a través del Sitio Web de GE Appliances las KRUDV GHO GtD FXDOTXLHU GtD GHO DxR 8VWHG WDPELpQ SXHGH FRPSUDU PiV HOHFWURGRPpVWLFRV PDUDYLOORVRV GH *( $SSOLDQFHV \ aprovechar todos nuestros servicios de soporte a través de Internet, diseñados para su conveniencia. (Q (( 88 GEAppliances.