VG4256 VCR User’s Guide We bring good things to life.
Introduction Important Information WARNING To reduce the risk of fire or shock hazard, do not expose this product to rain or moisture. WARNING RISK OF ELECTRIC SHOCK DO NOT OPEN TO REDUCE THE RISK OF ELECTRIC SHOCK, DO NOT REMOVE COVER (OR BACK). NO USER SERVICEABLE PARTS INSIDE. REFER SERVICING TO QUALIFIED SERVICE PERSONNEL. This symbol indicates Òdangerous voltageÓ inside the product that presents a risk of electric shock or personal injury.
Introduction Table of Contents Important Information Time Counter_____________________ 16 Warnings______________________________ i Index Search _____________________ 17 Cautions ______________________________ i Zero Search ______________________ 17 Note to Cable TV Installer _______________ i Commercial Scan (SEARCH Button) _ 17 Product Registration ____________________ i Pause for Stop-Action______________ 18 Frame Advance (F.
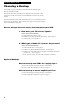
Hooking Up the VCR Choosing a Hookup The hookups on pages 3 through 5 are divided into two hookup types: Basic (A) and Advanced (B). The basic hookup shows the backs of TVs that have only an antenna/cable connection. It is the easier of the two and additional accessories may not be needed. The advanced hookup shows the VCR hooked up to a TV with audio and video jacks using a signal splitter. This connection may improve the picture quality as well as convenience of operation.
Hooking Up the VCR Antenna or Cable System Without a Cable Box A. Basic hookup. A Use this hookup for a simple connection which requires fewer accessories. From Antenna or Cable 1. Set the 3CH.4 switch on back of VCR to either channel 3 or 4. Tune the TV to this channel and use the TV•VCR button to watch the VCR. 300/75 Ohm Adapter Back of VCR R IN FROM ANT. AUDIO1 OR L 2. Connect as shown. This connection may require additional accessories not provided. VHF/UHF OUT OUT TO TV IN 3 CH.
Hooking Up the VCR Cable System With Cable Box to Unscramble All Channels A. Basic hookup. Use this hookup for a simple connection which requires fewer accessories. A From Cable Back of VCR 1. Set the 3CH.4 switch on back of VCR to either channel 3 or 4. Tune the TV to this channel and use the TV•VCR button to watch the VCR. Cable Box IN RF Coaxial Cable R IN FROM ANT. AUDIO1 OUT L 2. Connect as shown. This connection may require additional accessories not provided.
Hooking Up the VCR Cable System With Cable Box to Unscramble Only Pay Channels (such as HBO, Showtime, Pay-Per-View, etc.) A. Basic hookup. Use this hookup for a simple connection which requires fewer accessories. A From Cable Back of VCR 1. Set the 3CH.4 switch on back of VCR to either channel 3 or 4. Tune the TV to this channel and use the TV•VCR button to watch the VCR. Cable Box IN RF Coaxial Cable R IN FROM ANT. AUDIO1 OUT L VHF/UHF OUT 2. Connect as shown.
Hooking Up the VCR Connecting Two VCRs for Copying Tapes Option A hookup. A Use this hookup for a simple connection which requires fewer accessories. Playback VCR From Antenna, Cable or Cable Box R 1. Select a hookup from pages 2 through 5 and then modify with this connection. IN FROM ANT. AUDIO1 L VHF/UHF OUT 2. Set the 3CH.4 switch on the playback VCR to either channel 3 or 4. Tune the recording VCR to this channel to receive the signal from the playback VCR. OUT TO TV IN 3 CH.
Hooking Up the VCR Connecting a Stereo Amplifier/Receiver Record on the VCR from an amplifier/receiver. Back of VCR Connect your VCR to a stereo amplifier/ receiver to record stereo audio. R IN FROM ANT. AUDIO1 1. Select a hookup from pages 2 through 5 and then modify with this connection. L VHF/UHF OUT OUT TO TV IN 3 CH. 4 2. Connect as shown. VIDEO1 This connection requires additional accessories not provided. Audio/Video Cables 3. Plug in power cords of amplifier/ receiver, VCR, and TV.
Setting Up the VCR Startup 1. Check accessories with VCR. Contact your dealer if any items are missing. POWER TV•VCR GO BACK PLAY PAUSE INFO 2 “AA” Batteries RECORD FWD REV SLOW STOP 1 2 3 4 5 6 8 9 SEARCH CHAN 7 0 INPUT CLEAR MENU SPEED F.ADV TRACKING Remote (Stock No. 221345) RF Coaxial Cable (Stock No. 221383) 2. Insert batteries in remote. 3. Turn on the TV. If you used one of the basic hookups, tune the TV to the channel selected with the 3CH.4 switch on back of VCR.
Setting Up the VCR Startup 5. Place channels in the VCR’s memory. The first time you turn on the VCR or after a power interruption, the VCR displays a message on the TV screen prompting you to perform the AUTO CHANNEL SEARCH. If the message does not appear, go to step A below. If the message appears, follow the directions on the screen. AUTO-SEARCH CHANNELS CONNECT ANTENNA CABLE... THEN PRESS CH UP Wait until the channel numbers stop changing. This takes about one to two minutes.
Setting Up the VCR Startup 7. Select the language/Seleccione el idioma/ Sélectionner la langue. The VCR displays the on-screen menus in the English, Spanish or French language. The word ÒLanguageÓ cycles through the different languages when the VCR Main Menu is displayed on the TV screen. A. Press MENU on remote to display the VCR MAIN MENU. VCR MAIN MENU 1 2 3 4 5 6 B. Press 6 to display the LANGUAGE or IDIOMA or LANGUE menu. (English: LANGUAGE; Spanish: IDIOMA; French: LANGUE).
Setting Up the VCR Startup 10. Set the ALERT SOUND feature. Select this feature if you want a warning to sound each time an invalid entry or invalid operation is made. This feature is set to OFF. Please note the warning sound is heard only when the VCR is on. A. Press MENU on the remote to display VCR MAIN MENU. B. Press 4 to display the PREFERENCES menu.
Setting Up the VCR Startup 12. Set the Automatic Daylight-Saving Time Select this feature if you want the VCRÕs clock automatically to advance one hour in April and reverse one hour in October. A.Press MENU on the remote to display the VCR MAIN MENU. B.Press 2 to display the TIME menu. C. Press 2 to select AUTO DST: ON or OFF. ¥ Select ON if you want the VCRÕs clock to automatically adjust for Daylight Saving Time.
Using the Remote Control VCR Function Buttons CHAN (CHANNEL) Up or Down Selects the next higher or lower channel in the VCRÕs channel memory. CLEAR Resets the time counter to 0:00:00. POWER TV•VCR GO BACK PLAY PAUSE INFO RECORD FWD REV Lets you change entries when setting the time or VCR for a timer recording. DISPLAY Shows the VCR operating displays on the TV screen. Displays the time counter when a tape is inserted.
Playing a Tape Playback To play a tape 1. Turn on the TV and tune it to channel 3, 4, or the TVÕs video input to see the picture from the VCR. 2. Insert a tape in the VCR. The VCR automatically turns on. The POWER and VCR indicators light. The tape automatically begins playback if the safety tab on the cassette has been removed and the AUTO PLAY feature is turned on. POWER STOP•EJECT CHANNEL TV•VCR RECORD REW PLAY•PAUSE TRACKING Safety Tab 3.
Playing a Tape Using the Playback Features AUTO PLAY Feature This feature allows the VCR to automatically start playing when you insert a tape with the safety tab removed. 1. Press MENU on the remote to display the VCR MAIN MENU. 2. Press 4 to display the PREFERENCES menu. VCR MAIN MENU 1 2 3 4 TIMER RECORDINGS TIME CHANNELS PREFERENCES 3. Press 2 to select AUTO PLAY: ON or OFF. ¥ Select ON if you want to have a tape with its safety tab removed to start playing automatically.
Playing a Tape Using the Playback Features DISPLAY Button The DISPLAY button shows the status of the VCR channel number, time counter, date, time and tape speed on the TV screen. The time and date must be set before they can be displayed. STOP Press DISPLAY 1. Press DISPLAY. If you do not press DISPLAY again, this display times out. CH 05 0:30:00 Status Displays 08/04/96 SUN 01:30AM SLP 2. Press DISPLAY again to display only the time counter on the TV screen. 0:30:00 3.
Playing a Tape Using the Playback Features Index Search The VCR has a ÒVHS Index Search SystemÓ that automatically records an index mark on the tape every time you begin recording a program. Your VCR has two index playback features. To locate the program you want to play, select a specific index number or search by scanning. Some index marks may be missed by the VCR. ¥ A mark too close to the current location on the tape. ¥ The mark at the beginning of a recorded segment of five minutes or less.
Playing a Tape Using the Playback Features Pause for Stop Action This feature stops the tape in action and lets you examine the details of the scene. Stop action works best for tapes recorded in the SP or SLP speed. 1. Press PAUSE during playback to stop the action. 2. Press TRACKING up or down on the remote to reduce any jittering of the picture. 3. Press PAUSE or PLAY on the remote or PLAY•PAUSE on the VCR to return to playback.
Playing a Tape Using the Playback Features TAPE PLAYBACK: HI-FI/LINEAR Feature The VCR records the same audio on both the Hi-Fi and linear tracks on the tape. The Hi-Fi sound is recorded on separate left and right stereo channels. Mono sound is recorded on the linear track. To enjoy Hi-Fi sound, connect your VCR to a stereo television or amplifier/receiver using the audio/video jacks. The TAPE PLAYBACK: HI-FI/LINEAR feature lets you select which audio you play back.
Recording a Program Recordings Your VCR provides different recording options. These options are explained in this section of the manual. Recording Speeds Press SPEED on the remote to select a recording speed (SP or SLP). The speed you select appears on the TV screen. Tapes recorded in LP can be played in this VCR. SP (Standard Play) gives the best quality recording. That is why most prerecorded, rental tapes are recorded in SP. Fewer programs can be recorded on the tape.
Recording a Program One Touch Recording One touch recording lets you record up to four hours without using the timer program feature. The VCR turns off automatically at the end of the recording. POWER STOP•EJECT CHANNEL RECORD TV•VCR REW PLAY•PAUSE FWD TRACKING RECORD 1. Turn on the VCR. 2. Insert a tape with its safety tab in place. 3. Select the channel you want to record. 4. Use SPEED on the remote to select a recording speed. 5.
Recording a Program Recording While You’re Away (Timer Recording) The timer program feature lets you program the VCR to record up to eight different programs within a one year period. Before setting the timer, make sure that: ¥ The clock is set correctly. ¥ A tape with a safety tab has been inserted with enough tape to record the programs. Setting a Timer Recording 1. Press MENU on the remote to display the VCR MAIN MENU. 2. Press 1 to display the TIMER RECORDINGS menu.
Recording a Program Recording While You’re Away (Timer Recording) Timer Recording From the VCR’s Line Input The line input refers to the signal coming from the AUDIO1 and VIDEO1 IN jacks of the VCR. Recording from the line input is convenient if you have a satellite receiver or similar component attached to these jacks. To timer record from the component connected to the VCRÕs line input, press INPUT or “0,0” on the remote to enter VIDEO in the channel number position.
Recording a Program Stereo Broadcast TV or SAP (Second Audio Program) Some TV programs are broadcast with stereo audio or a second audio language (SAP). The RECEPTION: STEREO/MONO/SAP feature lets you select the type of audio you want to record. To Record Stereo Broadcast TV or SAP Turn on the TV and tune it to the VCR viewing channel, either 3, 4, or the TVÕs video input. 1. Insert a tape with its safety tab in place. 2.
Recording a Program RECORDING AUDIO You can record audio only from another audio source connected to the AUDIO1 IN (L and R) jacks on the back of the VCR. Recording audio erases previously recorded video. To Record Audio Only (Refer to hookup on page 7.) 1. Press the INPUT button or 0,0 on the remote to hear the source attached to the AUDIO jacks. L appears in the VCR display panel and VIDEO appears on the TV screen.
Recording a Program Using Two VCRs for Copying and Editing Tapes Operating Instructions (Refer to hookup on page 6.) Use one VCR as the playback VCR and the other as the recording VCR. Caution: The unauthorized recording of television programs and other materials may infringe the rights of others. 1. Turn on the TV and VCRs. 2. Tune the TV to the VCR viewing channel, either 3, 4, or the TVÕs video input. 3.
References Location of Controls Front Panel Tape Compartment POWER STOP•EJECT CHANNEL RECORD TV•VCR REW PLAY•PAUSE FWD TRACKING Remote Sensor CHANNEL or TRACKING up or down Selects next higher or lower channel in the VCRÕs channel memory. Adjusts tracking during playback. FWD (Fast Forward) Fast forwards the tape when the VCR is stopped. Searches the picture forward during playback. PLAY•PAUSE Plays a tape. Remote Sensor Receives signals from the remote control.
References Location of Controls Back Panel R-AUDIO-L IN FROM ANT. VIDEO OUT VHF/UHF MONO OUT TO TV 3 CH. 4 IN 1 3CH.4 Switch Selects the channel to which you tune the TV to see the VCR picture if you connect the VCR using one of the basic hookups. IN FROM ANT. (Antenna) Connector Receives a signal from an antenna or cable system when attached. VIDEO1 OUT and AUDIO1 (R and L) OUT Jacks Send signals from VCR to another component like a TV, VCR or camcorder when it is connected to these jacks.
References Specifications Format: VHS Record/Playback System: Video: 4-Head Audio: VHS Hi-Fi Stereo record/playback system Video Signal System: EIA standard: NTSC color Antenna: 75-ohm external VHF/UHF combined antenna terminal Tuner: USA: 181 channels capability* (125 cable channels) Canada: 178 channels capability* (122 cable channels) Type: Autoprogramming frequency synthesis Power Requirement: 120V AC, 60 Hz Power Consumption: 23 watts Dimensions: 3.5 inches high (89 mm) 14.
References Trouble Checks Sometimes problems can be easily solved by checking a few basic things. Check below before you call for help or take your VCR to an Authorized GE VCR Servicenter. Trouble Here's what to try: No power ¥ Plug VCR into an operating outlet. ¥ Check connections. VCR does not respond to remote ¥ Remove batteries and hold down one or more buttons for several seconds to drain the microprocessor inside the remote and reset it. Re-install the batteries and try remote again.
References Trouble Checks Trouble Here's what to try: Stereo audio too noisy ¥ Stereo signal is weak. Set RECEPTION: STEREO/MONO/SAP feature to MONO. ¥ Press the TRACKING up or down button on the remote to minimize the noise. Stereo or SAP sound not recorded ¥ RECEPTION: STEREO/MONO/SAP feature must be set to STEREO to record broadcast stereo. See page 24. ¥ RECEPTION: STEREO/MONO/SAP feature must be set to SAP to record SAP. See page 24. ¥ STEREO or SAP indicator not on.
References Limited Warranty What your warranty covers: ¥ Any defect in material or workmanship. For how long after your purchase: ¥ Ninety days for labor charges. ¥ One year for parts. The warranty period for rental units begins with the first rental. What we will do: ¥ Pay any Authorized GE VCR Servicenter the labor charges to repair your VCR. ¥ Pay any Authorized GE VCR Servicenter for the new or, at our option, refurbished replacement parts required to repair your VCR.
References Index 3CH.4 Switch ...................................3-8,9,28 Accessories, Included ................................8 Add or Remove Channels from Memory...................................................9 ADD/REMOVE CHANNEL Menu ............9 ALERT SOUND Feature ..........................11 Amplifier/Receiver Connections.............7 Antenna Connections .............................2,3 AUDIO Menu........................................19,24 Audio Only, Recording ...........................
For your nearest Home Entertainment Dealer or Authorized Servicenter call toll-free in the U.S.A.