
Installation guide


Installation instructions
ADVANCE PLANNING
CAUTION: Duetoexcessive
weight, TWO PEOPLEARE REQUIREDTO
MOVE AND iNSTALL THiS ICEMAKER.
Failure to do so can result in back or
other injury.
IVliSE EN GARDE :
A cause de son poids eleve;JL FAUT
DEUX PERSONNES POUR DEPLACER ET
iNSTALLERCETTEMACHINE _, OLA_0NS.
Le non-respect de ces instructions peut
causer des biessures au dos ou d'autre
nature.
IMPORTANT: The performance of the icemaker
may be affected when it is connected to a reverse
osmosis system. An RO system may reduce water
pressure and affectthe fill cycle, which is dependent
on time and flow. The reduced water pressure (less
than 30 p.s.i.) may cause the reservoir not to fill and
flush properly during the ice making cycle.
* Do not use copper tubing when the icemaker is
connected to a reverse osmosiswater system.
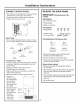
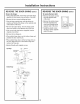
Choose the location:
* Not designed for outdoor installation.
* The icemaker must be installed in an area protected
from elements such as wind, rain, water spray or drip.
The area should be ventilated with temperatures
above 55°F(13°0) and below 110°F(43°C). Best results
are obtained between 70°F (21%) and 90°F(32°0).
*The icemaker may be closed in on the top and
three sides as long as the front is unobstructed for
air circulation and proper operation.
-Installation should be such thatthe icemaker can
be moved forward for servicing, if necessary.
-The bottom grille on the front must be unobstructed
to provide proper air flow.
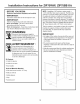
ADVANCE PLANNING (cont.)
Before you begin:
1. If a custom panel is to be installed, follow the
instructions shown on pages 9 and 10.
-Order ZIP75 (black or white) panel kit.
-Order the custom panel from the cabinet
manufacturer.
-Secure the custom panel onto the icemaker.
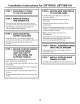
2. Determine a method of drainage. If a floor drain
is to be installed, the drain must be accurately
located. The installation of a custom door panel will
affectthe drain location. See page 6to determine
the exact location of the floor drain, front to back,
with or without a custom door panel.
-A drain pump kit, ZPK1, is available and will not
interfere with placement of the icemaker.
3. The door swing is reversible. If desired, change the
door swing before installation.
4. Slide the icemaker into the installation location.
-Open and close the door to be sure there is no
interference.
-Checkto be sure the icemaker can be moved
back into the opening, flush with adjacent
cabinetry. There should be no interference with
the floor drain.
4