
Installation guide


Installation Instructions
• BEFORE YOU BEGIN:
Read these instructions completely and carefully.
• IMPORTANT:
Save these instructions for local inspector's use.
• IMPORTANT:
Observe all governing codes and ordinances.
Note to Installer - Be sure to leave these
instructions with the Consumer.
Note to Consumer - Keep these instructions
with gour Owner's Manual for future reference.
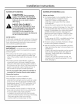
WARNING:
This appliance must be properlg grounded.
Failure to do so can result in death, fire or
electrical shock. See "Power Supplg," page 5.
AVERTISSEMENT :
Cet appareil dolt _tre correctement
mis _ la terre. Le non-respect de ces
instructions peut causer la mort, un
incendie ou un choc _lectrique. Consulter
<<Alimentation 61ectrique >>,page 5.
If gou received a damaged icemaker, gou should
immediatelg contact gour dealer or builder,
Proper installation is the responsibilitg of the
installer. Product failure due to improper installation
is not covered under the GE Appliance Warrantg.
See the Owner's Manual for warrantg information.
• Use this appliance onlg for its intended purpose.
Check with local utilities for electrical codes that
applg in gour area. Local codes varg. Installation,
electrical connections and grounding must complg
with applicable codes. In the absence of local codes,
the icemaker should be installed in accordance with
National Electrical Code ANSI/NFPA 70-1990 or
latest edition.
For Monogram local service in gour area, call
1.800.444.1845.
For Monogram Service in Canada, call
1.800.561.3344.
For Monogram Parts and Accessories, call
1.800.626.2002.
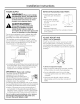
CONTENTS
Design Information
Models Available ....................................................................]
Cutout & Product Dimensions ..........................................]
Optional Accessories ............................................................3
Tools and Materials Required ........................................3
Installation
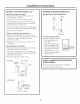
Advance Planning ..................................................................4
Power Supply ..........................................................................5
Remove Packaging ................................................................5
Adjust Height of Icemaker ................................................5
Water Supply ..........................................................................6
Connect the Drain ..................................................................6
Connect Water Supply ........................................................7
Reverse Door Swing ........................................................7, 8
Accessories
ZIP75WW, ZIP75BB Kit for 3/4" thick panels ....9, i0
ZTBSS1 Tubular Handle Kit ............................................11