Noncompliance Ranges Barber Assembly Burner Grates Ra Storage Drawer Safety Instructions... 2-7 Operating Instructions Airmail Foil Clock and Timer | 4 Oven 10-20 Baking and Roasting 12 Bro ling Guide © 13 Oven Co Power Outage Conn Control Panel and Knobs Cook top Sur Door Removal Oven Bottom Oven Light Replacement Oven Vents Cleaning Write the model and serial numbers here: Model # Serial # You can find them on a label on the grant of the range behind the storage drawer.
IMPORTANT SAFETY INFORMATION. READ ALL INSTRUCTIONS BEFORE USING. A WARNING! For your safety, the information in this manual must be followed to minimize the risk of fire or explosion, electric shock, or to prevent property damage, personal injury, or loss of life. WARNING: 1 te information in this manual is not followed exactly, a fire or explosion may result, causing property damage, personal injury or death.
Noncompliance A WARNING! IMPORTANT SAFETY NOTICE The California Safe Drinking Water and Toxic Enforcement Act requires the Governor of California to publish a list of substances known to the stale fo cause birth defects or other reproductive harm, and requires businesses to warn customers of potential exposure to such substances.
Operating Instructions IMPORTANT SAFETY INFORMATION. READ ALL INSTRUCTIONS BEFORE USING. Care and Cleaning Installation Instructions Troubleshooting Tips \ lots —SAFETY PRECAUTIONS a 4 Locate the range out of kitchen traffic path N and out of drafty locations to prevent poor * air circulation. i Be sure all packaging materials are removed from the range before operating it to prevent five or smoke damage should the packaging material ignite.
Noncompliance A WARNING! SURFACE BURNERS Use proper pan pans that are unstable or easily tipped. Select cookware having flat bottoms large enough to cover burner grates, To avoid spillovers, make sure cookware is Sarge enough to contain the food properly. This will both save cleaning time and prevent hazardous accumulations of food, since heavy spattering or spillovers left on range can ignite. Use pans with handles that can be easily grasped and remain cool.
Operating Instructions IMPORTANT SAFETY INFORMATION. READ ALL INSTRUCTIONS BEFORE USING. Care and Cleaning Installation Instructions Troubleshooting Tips NY vi, COOK MEAT AND POULTRY THOROUGHLY... Cook meat and poultry thoroughly—meat 10 at least an INTERNAL temperature of 160°F and poultry to at least an INTERNAL temperature of 180°F Cooking to these temperatures usually protects against food borne flimsiness. OVEN Stand away from the range when opening the door of a hot oven.
Noncompliance EX CHEF-CLEANING OVEN f Be sure to wipe off excess spillage before self-cleaning ope radon. elf-cleaning the oven, remove , broiler par, grid and other cookware, Do not clean the door gasket. The door gasket is essential for a good seal. Care should be make not wo rub. damage or move the gasket. Clean only parts listed in this Owner's Manual. Do not ue i If the self-cleaning mode malfunctions, turn the oven off and disconnect the power supply.
Safety Instructions Care and Cleaning Using the gas surface burners. Installation Instructions Troubleshooting Tips Throughout this manual, features and appearance may vary from your model. Before Lighting a Gas Burner # Dole pans ave supplied wit your range: they should be used at all mdse. Make sure all burners are in place. i Make sure all grates on the rage are properly placed before using any bummer.
Noncompliance Top-of-Range Cookware Alarming: Medium-weight cookware is recommended because it heats quickly and evenly. Most foods brown ever aluminum skillet. Use saucepans with hedge fitting lids when cooking with minimum Amos of water.
Safety Instructions Care and Cleaning Using the oven controls. Installation Instructions Troubleshooting Tips Throughout this manual, features and appearance may vary from your model 10 OVEN CONTROLS SELF | (CLEAR CLEAN | \ “GFF S— : TIME CONTROLS COOKING DELAY TIE START Oven Control, Clock and Timer Features and Settings © BAKE Pad Touch this pad to select the bake function BROIL HI/LO Pad Touch this pad to select the broil function.
Using the oven. Noncompliance To avoid possible burns, place the racks in the desired position before you turn the oven on. The oven has 5 rack positions, It fatso has a special low rack position 18) tor extra large items, such a5 a forge turkey. Before you begin... The »: s lave stopcocks, so that when placed correctly on the back supports (A through BE), they will stop before coming completely out.
Safety Instructions Care and Cleaning Installation Instructions Troubleshooting Tips Using the oven. If your model has a door latch, do not lock the oven door with the latch during baking or roasting. The latch is used for self-cleaning only.
Noncompliance If your model has a door latch, do not lock the vane door with the latch during broiling. The latch is used for self-cleaning only. How to Set the Oven for Broiling [7] Place the meat or fish on the broiler [3] Touch the START pad. grid in the broiler pan. [6] hen broiling is finished, touch the suffragan Ajar Always use the broiler pan and grid 2 Follow suggested rack positions in CLEARHEADED pa that came with your oven, Jt is 5 the Brooding Guide.
Safety Instructions Care and Cleaning Using the clock and timer, HC ® Make sure the clock is set to the corer time of day. To Set the Clock The clock must be set to the correct tne of day for the automatic oven timing functions 0 work properly, The time of day ca mot be changed during « timed baking or self: You ca mot change the hole an automatic oven function is programmed, Touch and hold the TIMER CLOCK pad. [7] f 2 Touch the + and pads. [3 Touch the START pad.
Using the timed baking and roasting features. Complaisance NOTE: Foods that spoil as milk, eggs, fish, stuffings, poultry and not be allowed to sit for more than hour before or after cooking. Room temperature promotes the growth of harmful bacteria. Be sure that the oven light is off because heat from the bulb will speed harmful bacteria growth, COOKING] ME » HC How to Set an Immediate Start and Automatic Stop The over will fun on immediately and cook for a selected length of time.
Safety Instructions Care and Cleaning Special features of your oven control. Your new touch pad control has additional features that you may choose to use. The following are the features and how you may activate them. The spacial feature modes can only be activated while the display is showing the time of day. They remain in the controls memory until the steps arg repeated. When the display shows your choice, touch the START pad. The special features will remain in memory after a power failure.
Noncompliance Tones at the End of a Timed Cycle At the end of a timed cycle, 3 short beeps will sound Touch the BROIL SILO pad. The followed by one beep every § seconds until the is shows CON BEEP (continual CLEAR/OFF pact Is touched. This continual cheep. Touch the BROW SILO pad BROIL 6 second beep tay be canceled. again.
Safety Instructions Care and Cleaning Installation Instructions Troubleshooting Tips Adjust the oven thermostat it yourself! You may find that your new oven cooks differently than the one it replaced. Use your new oven for a few weeks to become more familiar with it. If you still think your new oven is too hot or too cold, you can adjust the thermostat yourself, Do not use thermometers, such as those found in grocery stores, to check the temperature setting of your oven.
Using the self-cleaning oven. Noncompliance If your model has a door latch, never force the latch handle. Forcing the handle will damage the door lock mechanism. The oven door must be closed and all controls set correctly for the cycle to work properly. Wis up heavy soil on the oven bottom. Before a Clean Cycle For the first cleanliness cycle, we recommend venting your Kitchen with an open window or using a ventilation fan or hood. Remove the racks, broiler pan.
Safety Instructions Care and Cleaning Using the self-cleaning oven. The oven door must be closed and all controls set correctly for the cycle to work properly. SELF CLEAN How to Delay the Start of Cleaning Make soe the clock shows the correct tine of day [7] Touch the SELF CLEAN pad. 5) Usi 2 de [3] Touch the DELAY START pad. The earliest start thine you can set will appear in the display.
Care and cleaning of the range. Noncompliance Be sure electrical power is off and all surfaces are cool before cleaning any part of the range. If your range is removed for cleaning, servicing or any reason, be sure the anti-tip device 2 4 is re-engaged properly when the range is replaced. Failure to take this precaution could result in tipping of the range and cause injury. [ee Sealed Burner Assemblies {i= Tarn all controls OFF before removing == | =, the burner parts and drip pans.
Safety Instructions Care and cleaning of the range. Operating Instructions Installation Instructions Troubleshooting Tips ties a sewing needle of swift-tie 10 unclog the sill hols in the bummer heat Burner Caps and Heads NOTE: Ba tore removing the boomer caps and heads, remember their size and location. Replace them in the same location after cleaning. Burger caps Lift off when cool. Wash burner caps in hot, soapy water and rinse with clean water.
Noncompliance Burner Grates Lift out when cool, Grates should be washed regularly and, of course, after Wash them in Tot, soapy water h clean water, When replacing es, he sure they are positioned v over the burners. spillover and ri the gr cure Bo not operate a burner for an extended period of tine without cookware on the grate. The finish on the pare may chip without cookware ww absorb the heat, To get id of burned on food.
Safety Instructions Care and cleaning of the range. Operating Instructions Installation Instructions Troubleshooting Tips Lif the doo straight up and aff the hinges. preen The gasket is designed with a gap at the bottom to allow for proper air circulation.
Noncompliance The storage drawer may be removed for cleaning Vader the range. Removable Storage Drawer The storage drawer is a good place 1 store cookware and bake ware. Do not store plastics and flammable material in the drawer The storage drawer way be removed for cleaning under the range. Clean the storage drawer with a damp cloth or sponge. Never use harsh abrasives or scouring pads.
Safety Instructions Care and cleaning of the range. Operating Instructions Installation Instructions Troubleshooting Tips Wire cover holder. 26 Oven Light Replacement A CAUTION: core replacing your oven fight bulb, disconnect the electrical power fo the range at the main fuse or circuit breaker panel. Be sure to let the light cover and bulb cool completely: The oven tight bulb is covered with a that is held in place Remove the oven removable: glass cov with a bail shaped w dour, if desired.
Installation Instructions Range BEFORE YOU BEGIN Read these instructions completely and carefully. Installation of this range must conform with local codes, or in the absence of local codes, with the National Fuel Gas Code, ANSI latest edition. In Canada, Installation must conform with the current Natural Gas Installation Code, or the current Propane Installation Code, CAN and with local codes where applicable. This range has been design-certified by CSA International according to ANSI Z21.
Installation Instructions A WARNING! INSTALLATION SAFETY INSTRUCTIONS Read these instructions completely and carefully. Tin proper installation, adjustment; alteration, service or maintenance can case injury or property damage. Refer to this mutual. For assistance or additional information, consult a qualified installer, service agency, manufacturer {lacteal} or the gas supplier. Never reuse old flexible connectors. The use of old flexible connectors can cause gas leaks and personal injury.
Installation Instructions DIMENSIONS AND CLEARANCES Provide adequate clearances between the range and adjacent combustible surfaces. These dimensions ust be met For safe we of your range. The location of the electrical outlet and pipe opening {see Gas Pipe and Electric Outlet Locations) say be adjusted fo meet specific requirements, The range may he placed with 0” clearance (flush) ar the back wall, Minimum tw Maxims depth cabinets on = for cabinets either side 30 TE hove of the range counter tops 20” .
Installation Instructions A WARNING! ANTI-TIP DEVICE WARNING « Ali ranges can tip. « BURNS or other SERIOUS INJURIES can result. + INSTALL and CHECK the ANTE-TIP bracket following the instructions supplied with the bracket. To reduce the risk of tipping the range, the range must be secured by a properly installed anti-tip bracket.
Installation Instructions PROVIDE ADEQUATE GAS SUPPLY Your range fs designed te operate at a pressure of TY of water column on LP gas (propane or butane} or, if designed For natural gas, 4” of water column. Make chive you are supplying your range with the type of gas for which it is designed. convertible for use on natural or This range is propane gas. If you decide to use this range on conversion west be wade by a qualified installer before attempting to operate the range on that gas.
Installation Instructions GAS PIPE AND ELECTRICAL OUTLET LOCATIONS This area allows for flush range 3 1 installation with through-the-wall " | constitution of pipe subsist-of 4 valve and rear wall 220V outlet. Shares connection farm hard pipe stub location to range hookup.
Installation Instructions FLEXIBLE CONNECTOR HOOKUP tastier: Inform the consumer of the Locution of the gas shut-off valve. RIGID PIPE HOOKUP OPTIONS Alternate Hookup 45° Elbow pipe Installer: form the Gas consumer of the | In cation of the gas shatter-off valve, Installer: Inform the consumer of the Location of the gas shut-off valve.
Installation Instructions ELECTRICAL CONNECTIONS Electrical Requirements 2900lt, 50 or 60 Hertz {depending on sour model), properly grounded branch circuit protected by a 15
Installation Instructions ELECTRICAL CONNECTIONS (CONT) B. Usage Situations where Appliance Power Cord will be Disconnected Frequently. Do not use an adapter plug in these stations because discriminating of the power cord places undue strain on the adapter and leads to eventual failure of the adapter ground terminal, The customer should have the Prong wall r replaced with a three-prong (grounding) receptacle by « qualified electrician before using de appliance.
Installation Instructions ADJUST BROIL AND OVEN BURNER AIR ADJUSTMENT SHUTTERS IF NECESSARY Air adjustment shutters for the top and bottom burners regulate the flow of air to the flames. adjustment shutter The air adjustment shutter for the wp (broil) bummer is in the center of the rear wall of the oven. Lasers Air adjustment shutter The shutter for the bottom (oven) burner is near the back wall behind the storage drawer. Remove the drawer. See the Care and cleaning of the range section.
Installation Instructions [2] INSTALLING THE ANTI-TIP DEVICE A WARNING! age must be secured with an approved Ant Tip His BE Unless properly installed, the vane could be tipped by you or a child standing, open door: ting or leaning on an Bl After installing the Anti Tip device, verify that iris in place by carefully parenting 1 tlt the range forward. B This range has been designed 0 meet all recognized industry tip standards for all normal conditions.
Safety Instructions Before you call for service... Operating Instructions Troubleshooting Tips Save time and money! Review the charts on the following pages first and you may not need to call for service. Care and Cleaning Installation Instructions Rack position is incorrect, Problem Possible Causes What To Do Top burners do not fight Plug on range is not completely # Make sure electrical plug is plugged into a live, properly or do not burn evenly inserted in the electrical outlet.
Noncompliance suffragan Ajar surroundings Burgess 19 pue sieve Nubbin, Problem Possible Causes What To Do Food does not Oven controls improperly set. * Bake sure vou touch the BROIL SILO pad. broil property Oven door not cased. » See the Using the oven section. Improper rack position ® See the Broiling Guide. being used. Food being cooked ina hot pan. * Use the broiling pan and grid that came with your range. Make sure it is cool. Varicolored not suited for broiling.
Safety Instructions Operating Instructions Care and Cleaning Installation Instructions Before you call for service... LOCK DOOR” flashes Troubleshooting Tips Possible Caves What Ta Do The self
Noncompliance Problem Possible Causes What To Do “Busing” or “oily” odor. This is normal in a new oven * To speed the process, set a cleanliness cycle for a emitting farm the vent and will disappear in time, minimum of 3 hours. See the Using the self-cleaning oven section, Strong odor An odor from the insulation ® This is temporary around the inside of the oven is normal for the fest few times the oven is used. Drawer does not slide The drawer is out of alignment.
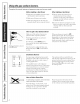
Accessories. Looking For Something More? You can find these accessories and many more at Noncompliance, or call * BOO.626.2002 {during normal business hours). Have your model number ready. Drip Pans Grates Oven Racks Proffer Pan Cleaner Light Bulbs Knobs Tired of discolored racks? Wishing vou had extravehicular-duty oven racks? NOW AVAILABLE for our range: ® Heavy Duty * Durable © Able to be cleaned in a self cleaning oven Visit Noncompliance for more formation.