3.
Rev.
User’s Record: To provide quality customer service and technical support, it is suggested that you keep the following information as well as your store receipt and this user’s manual.
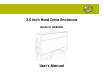
Package Contents: Your new Enclosure will ship with the following items. 3.5 inch Hard Drive Enclosure USB Cable Power Adapter Enclosure Stand Driver CD Mounting Screws User’s Manual Warranty Information System Requirements: Please be sure that you meet all of the system requirements below to avoid difficulties during installation. Windows® 98SE, ME, 2000, XP Available USB 2.0 Port CD-ROM Drive (for driver installation) 3.
USB Interface 5
Installation: 1. Removing The Inner From Your Enclosure: a. Remove the two screws from the connector end of your Enclosure. b. Slide the Hard Drive Tray out of your Enclosure.
2. Installing a Hard Drive Into Your Enclosure: a. Connect your 3.5” hard drive (not included) to the 4-Pin Power Connector and IDE connector on the Hard Drive Tray. b. Mount your hard drive to the Hard Drive Tray with two of the enclosed hard drive mounting screws. c.
e. Secure the Hard Drive Tray to your Enclosure by using the screws removed in step 1a.
3. Connect Your Enclosure To Your Computer: a. Make sure the Power Switch on your Enclosure is in the OFF position. b. Turn on your computer and wait for it to load. c. Connect the USB Cable to the USB Port on your Enclosure, and then connect the other end to an available USB port on your computer. d. Connect the enclosed Power Adapter to the DC 12V Power Port on your Enclosure, and then connect the other end to a power outlet. e. Turn on the Power Switch on your Enclosure. f.
Special Instruction for Windows® 98SE Users: In Windows® 98SE, the “Add New Hardware Wizard” may open after your computer has detected your Enclosure. If this occurs, please follow the instructions below to install drivers from the enclosed Driver CD: 1. Insert the enclosed Driver CD into the CD-ROM drive of your computer. 2. At the “Add New Hardware Wizard”, click “Next”. 3. Select the option “Search for the best driver for your device (Recommended)” and then click “Next” to continue.
4. Check ONLY the option “CD-ROM drive”, and then click "Next" to continue. 5. Windows® will search and find the correct driver from the Driver CD, click “Next” to continue (NOTE: your computer may ask for your Windows® 98SE CD during the installation; if this occurs, please insert your Windows® 98SE CD and click “OK” to complete the installation).
6. After the installation is complete, click “Finish” to close the wizard. 7. Restart your computer (NOTE: if the following screen does not appear, please manually restart your computer). 8. After your computer has restarted and Windows® is loaded, right-click “My Computer”, then click “Properties”, and then click the “Device Manager” tab. 9. Select “Disk Drives”. Your new hard drive will appear in the hard drive list. 10. Double-click your new hard drive and click the “Settings” tab.
11. Make sure there are check marks in the “Disconnect”, “Sync Data Transfer”, “Removable”, and “Int 13 unit” boxes. The drive letter will be automatically assigned to your hard drive. Click "OK", and then restart your computer. 12. Once your computer has restarted and Windows® has loaded, your Enclosure will be ready to be used.
LED Indicators: There are LED Indicators located on your Enclosure, for a description and location of these LED indicators please refer to the picture and chart below: LED Indicator Status Description Power LED Access LED 14 Off On Off On Flash LED Power Cable Disconnected / Power Off Connected / Power On LED Power Cable Disconnected / Power Off Ready for Use Data Transferring / Data Seeking
Formatting Your Hard Drive For Windows® 98SE, ME If a new hard drive is being installed in your Enclosure, it will need to be formatted before it can be used. Please follow the instructions below. Please note that formatting a hard drive will delete ALL data from the hard drive and you MUST NOT format the hard drive that Windows® is installed on. 1. Click “Start”, then “Settings”, then “Control Panel”. 2. Double-click on “System”, then “Device Manager”. 3. Select “Disk Drives”.
6. After your system restarts, double-click the “My Computer” icon on your desktop. Right-click the hard drive icon for your removable disk and select “Format” from the menu. 7. Click “Start” and Windows® will begin formatting your hard drive. Click “Close” when the formatting is complete.
8. Double-click the "My Computer" icon on your desktop, and you will see your new hard drive’s icon listed. Your new hard drive is now formatted and ready to be used. For Windows® 2000, XP If a new hard drive is being installed in your Enclosure, it will need to be formatted before it can be used. Please follow the instructions below. Please note that formatting a hard drive will delete ALL data from the hard drive and you MUST NOT format the hard drive that Windows® is installed on. 1.
2. Right-click the status box of your new hard drive and select “New Partition”. 3. The "New Partition Wizard" will start, click "Next". Follow the onscreen instructions to complete the formatting.
4. Double-click the "My Computer" icon on your desktop. You will see your new hard drive’s icon listed. Your new hard drive is now formatted and ready to be used.
. . FCC Information: FCC This equipment has been tested and found to comply with limits for Class B digital device pursuant to Part 15 of Federal Communications Commission (FCC) rules. FCC Compliance Statement These limits are designed to provide reasonable protection against frequency interference in residential installation.
Warranty Information: Gear Head, LLC warrants that this product shall be free from defects in materials and workmanship for the reasonable lifetime of the product. If the product is defective, Gear Head, LLC’s sole obligation under this warranty shall be at its election, subject to the terms of this warranty, to repair or replace any parts deemed defective. This warranty is for the exclusive benefit of the original purchaser and is not assignable or transferable.