Index p2 Sommaire p3 Hands-free speaker phone JUPITER 20
INDEX DESCRIPTION 4 SETTING UP - Installation - Setting time - Setting ringer volume - Tone / Pulse switch (T/P) - Setting speaker volume 6 7 8 8 8 USING THE PHONE - Making a call - Receiving a call - Last number redial - R button - Storing numbers in memory - Dialling numbers from memory 9 9 10 10 10 11 GUARANTEE 12 For product support and help visit our website at www.geemarc.
SOMMAIRE DESCRIPTION 14 REGLAGES - Installation - Réglage de l’heure - Réglage du volume de sonnerie - Interrupteur Tone / Pulse (T/P) - Réglage du volume du haut-parleur 16 17 18 18 18 UTILISATION DU TELEPHONE - Appeler - Répondre à un appel - Rappel du dernier numéro composé (Touche BIS) - Touche R - Mémoriser un numéro de téléphone - Appel d’un numéro en mémoire 19 19 20 20 20 21 GARANTIE 23 Parc d’Activités du Basroch 2, rue Galilée TEL.
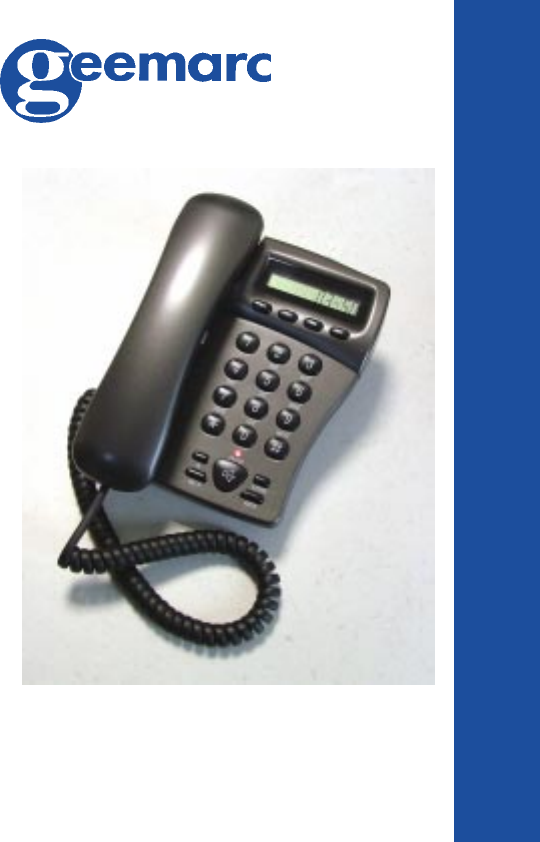
DESCRIPTION Hook Switch Handset M1 M2 M3 SET Wall Mounting Clip Speaker In use LED STORE Button R Button /P Button Button MEM Button Microphone NOTE: When you are in speakerphone mode ( button), you can speak through the microphone to make or answer a call.
DESCRIPTION LINE Socket (classified TNV-3 according to EN60950 standard) Wall mount holes Desktop Brackets Ringer Volume Switch Speaker Volume Switch Switch Tone/Pulse NOTE: Above brackets are in wall mounting state, if you wish to put your telephone on the destop,please turn around the brackets on the desktop state as below: 5
SETTING UP 1 - INSTALLATION - Connect the handset cord. - Connect the telephone line. (Classified TNV-3 according to EN60950 standard). - Lift the handset to ensure that you can hear the dial tone. The call timer and the in use LED will light. - Replace the handset and the LCD display will show as follows: 00-00 Call timer indicate : Minutes - The last 2 digits will start counting up. Seconds The LCD display has 3 differents formats: - Time display : this is the default format.
SETTING UP - Telephone Number Display : displays the telephone number (upto 10 digits) as the digits are being dialed from the telephone keypad, or from memory. If the telephone number is more than 10 digits, only the last 10 digits are displayed. 0123456789 2 - SETTING TIME - Lift the handset. - Press the key, time display will appear and hour digit will flashes - Press the * key to select the desired number. - Press the # key to confirm and enter into the minute setting.
SETTING UP 3 - SETTING RINGER VOLUME You can set the desired ringer level by using the ringer Hi / Lo switch located on the base of the unit. 4 - TONE / PULSE SWITCH (T/P) A switch T/P located under the base allows to set the dialling mode. The Tone/Pulse switch is factory pre-set to Tone position. In the UK, all telephone exchanges now use Tone dialing. If your phone does not dial out it is probably being used from an older private switch board (PBX).
USING THE PHONE 1 - MAKING A CALL - Press the key once (Speakerphone mode) or lift the handset. The LCD will display the call timer as follows for example and the in use LED will light: 00-18 - Use the dial keypad to dial the number. The digits being dialled will appear on the LCD display at the same time. For example: 0123456789 After about 3 seconds the LCD display will switch to the call timer mode. - The Call Timer will stop when you replace the handset or press the key again at the end of the call.
USING THE PHONE 3 - LAST NUMBER REDIAL /P The unit can store for subsequent redial the last number that you called. - To redial the number, lift the handset or press the key once. - Press the /P key once as soon as you hear the dial tone. The previously dialled number will be automatically redialed. 4 - R BUTTON These are used with the new services provided on digital exchanges. For details please contact your network operator.
USING THE PHONE - Press the M1, M2 or M3 keys (for storing the number into one of these locations) or the MEM key followed by a digit 0 to 9. To change a number already stored in Memory: simply follow the above procedure, and the new number will replace the number stored previously. NOTE: If you are using the unit with a PABX which needs you to wait for an outside line, at step 3 always key in the /P key. The /P key inserts a 3 sec PAUSE when dialing. The display will show “P” followed by the number.
GUARANTEE GUARANTEE From the moment your Geemarc product is purchased, Geemarc guarantee it for the period of one year. During this time, all repairs or replacements (at our option) are free of charge.Should you experience a problem then contact our helpline or visit our website at www.geemarc.com.The guarantee does not cover accidents, negligence or breakages to any parts. The product must not be tampered with or taken apart by anyone who is not an authorised Geemarc representative.
For product support and help visit our website at www.geemarc.
DESCRIPTION Combiné Interrupteur de raccroché/décroché M1 M2 M3 SET Clip de montage mural Haut Parleur Voyant de fonctionnement Touche STORE Touche R Touche /P Touche Touche MEM Haut-parleur Microphone NOTE: Lorsque vous ête en mode haut-Parleur ( button), vous pouvez parler au travers du microphone pour appler ou répondre à un appel.
DESCRIPTION Prise cordon de ligne (Classée TNT-3 selon la norme EN 60950) Trous de fixation murale Pieds de position bureau Interrupteur Volume de Sonnerie Interrupteur de volume haut-parleur Interrupteur Tone /Pulse NOTE: Si vous désirez utiliser votre téléphone en position bureau, soulevez simplement les pieds de positionnement bureau situés en dessous de votre téléphone comme décris ci-dessous: 15
INSTALLATION 1 - INSTALLATION - Connectez le cordon du combiné. - Connectez le cordon de ligne. (Classée TNT-3 selon la norme EN60950). - Décrochez le combiné pour vérifier que vous avez la tonalité. La minuterie (durée de l’appel) et le voyant de fonctionnement se mettent en fonctionnement. - Replacez le combiné, l’écran LCD affichera par exemple : 00-00 Minutes Secondes - Les deux derniers chiffres de la minuterie se mettent en fonctionnement..
INSTALLATION - Affichage du numéro composé : L’afficheur peut afficher j’usqu’à 10 chiffres lors de la composition du numéro. Si le numéro de téléphone est suppérieur à 10 chiffres, seulement les 10 derniers chiffres seront affichés à l’écran. 0123456789 2 - REGLAGE DE L’HEURE - Décrochez le combiné. - Appuyez sur la touche , L’affichage de l’heure va apparaître et le chiffre de l’heure clignotera. - Appuyez sur la touche * pour sélectionner le chiffre désiré .
INSTALLATION 3 - REGLAGE DU VOLUME DE SONNERIE Vous pouvez régler le niveau de sonnerie de votre téléphone avec l’interrupteur Hi / Lo situer en dessous de votre téléphone (Hi: Fort, Lo: Faible). 4 - INTERRUPTEUR TONE / PULSE (T/P) Un interrupteur T/P situé en dessous de votre téléphone vous permet de choisir le mode de numérotation . L’interrupteur Tone/Pulse est prépositionné en usine sur la position Tone. En France le mode de numérotation utilisé est le mode Vocal (Tone).
UTILISER LE TELEPHONE 1 - APPELER - Appuyez sur la touche ou décrochez le combiné. La minuterie (durée de l’appel) se mettera en fonctionnement, le voyant de fonctionnement s’allume et l’afficheur indiquera par exemple: 00-18 - Utilisez le clavier pour composer votre numéro. Les chiffres correspondants s’affichent sur l’écran LCD comme par exemple: 0123456789 Après environ 3 secondes, l’écran LCD affichera de nouveaux la minuterie.
UTILISATION DU TELEPHONE 3 - RAPPEL DU DERNIER NUMERO COMPOSE (TOUCHE BIS). Vous pouvez recomposer automatiquement le dernier numéro composé. - Pour recomposer le dernier numéro, déccrochez le combiné ou appuyez sur la touche . - Appuyez sur la touche /P dès que vous entendez la tonalité. - Le numéro de votre correspant se recompose automatiquement. 4 - TOUCHE R Touche d’accès aux services de votre opérateur téléphonique, pour tout renseignement concernat ces services contactez votre opérateur.
UTILISATION DU TELEPHONE - Composez le numéro de téléphone que vous désirez mettre en mémoire. Le numéro apparaît sur l’écran LCD lorsque que vous composez le numéro. - Appuyez de nouveau sur la touche . - Appuyez sur une des touches M1, M2 ou M3 (Pour mémoriser le numéro sur une de ces touches) ou appuyez sur la touche MEM suivie d’un chiffre de 0 à 9. Pour modifier un numéro mis en mémoire: Suivez simplement la procédure ci-dessus, le nouveau numéro entré effacera l’ancien.
UTILISATION DU TELEPHONE 0170737237 La minuterie d’appel se met alors en fonctionnement. Parc d’Activités du Basroch 2, rue Galilée TEL. SERVICE APRES VENTE : 03 28 58 75 99 Pour tout renseignement technique ou toute commande visitez notre site web sur www.geemarc.com.
GARANTIE GARANTIE Cet appareil est garanti 1 an pièces et main-d'oeuvre. La date d'achat figurant sur le ticket de caisse fera foi. Cette garantie s'exerce sous réserve d'une utilisation normale de l'appareil. Les dommages occasionnés par les surtensions électriques, la foudre ou par un choc sur l'appareil ne peuvent en aucun cas être couverts par la garantie.