USER GUIDE MADRID
3 4 5 5 7 8 8 9 10 10 10 11 14 15 16 17 17 17 17 17 18 18 19 20 21 22 22 23 23 24 25 INTRODUCTION Unpacking the Telephone DESCRIPTION General Description LCD Description INSTALLATION Setting Up Wall Mounting SETTINGS Ringer Volume Setting Language Settings Date and time Setting Screen Contrast Setting Area and Long Distance Code Settings Time Break Recall Setting ‘R’ Function USING THE TELEPHONE Making a Call Receiving a Call R, * and # Keys Last Number Redial Recalling Recent Numbers Deleting Recent N
29 Telephone connection: Voltages present on the telecommunication network are classified TNV-3 (Telecommunication Network Voltage) according to the EN60950 standard. Electrical connection: The apparatus is designed to operate from a 230V 50Hz supply only. (Classified as ‘hazardous voltage’ according to EN60950 standard). The apparatus does not incorporate an integral power on/off switch. To disconnect the power, either switch off supply at the mains power socket or unplug the AC adaptor.
3 *To use the caller display facility, you must subscribe to your network provider’s caller display service. MADRID This guide explains how to use the following telephone: Its is important that you read the instructions below in order to use your Geemarc telephone to its full potential. Keep this user guide in a safe place for future reference. Congratulations on purchasing your Geemarc Madrid telephone.
27 The telephone is designed for working within a temperature range of 5°C to 45°C. Unplug your phone from the telephone socket during thunderstorms because it could damage your telephone. Your guarantee does not cover thunderstorm damage. Do not expose your product to fire or other hazardous conditions. Do not place any part of your product in water and do not use it in damp or humid conditions e.g. bathrooms. Always ensure there is a free flow of air over the surfaces of the telephone.
Handset Description General Description 5 DESCRIPTION Incoming Call Indicator Numeric Keypad R Key Last Number Redial Memory Storing Key Indirect Memory Key New Call Indicator 26 No display • Make sure that the power adaptor is plugged in correctly and is not damaged • Make sure the batteries are inserted correctly • Make sure that the batteries are fully charged Madrid does not ring • Make sure that the telephone line cord is plugged in correctly and is not damaged • Connect another telephone t
9:52 9/12 00 25 MESSAGE WAITING MSG Note : ‘MSG WAITING’ will be displayed to indicate a message not read. After review, ‘MSG WAITING’ will be automatically removed from the screen. WAITING’, the message waiting LED is activated and MSG will be seen in the top left of the screen. This system allows the caller to leave you a message. You will be informed of an incoming call with a message by the incoming call list.
02 n Name Display NEW REPEAT CALL XXXXXXXXXXXXXXXX 9/12 Number Display 9:52 XXXXXXXXXXXXX MSG New Calls Validation Key Time and Date Scroll Keys Message Cancel Key 7 The S or T keys are used to scroll through the menu. In general, the C key is used to cancel an action/entry,it can also be used to confirm a choice (for example to cancel a stored number). The OK key is used to confirm action or a choice on the screen.
23 Press C again to confirm, (OK to Cancel) and the telephone will return to standby mode after clearing the telephone numbers from memory. Total Calls will now display 00 Press and hold C until .
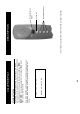
Wall Mounting Template 88mm 13 9 To ensure that the handset stays firmly in position when phone is wall o mounted, turn the clip clockwise through 180 . Make 2 holes in the wall, 88mm apart (use the wall mount template), insert wall plugs and the wall mounting screws. The screws should protrude from the wall by 6-7 mm. Place the phone onto the screw-heads and slide down to secure.
9/12 9/12 02 n 04 02 n 12274612345 JOHN SMITH 9:52 TOTAL CALLS 9:52 Time and Date of Call 21 Caller’s name Caller’s number Total calls Number of new call records received A caller display record consists of the following information: The red indicator light on the handset will flash when you have received a new call in your absence. The indicator will continue to flash until you review all the new calls displayed on the screen.
HOUR or 24 HOUR 11 Press C to exit menu and return to standby Press OK to confirm selection Use S and T to select 12 Press OK ‘HOUR FORMAT’ Use S and T to scroll through the menu to select In the on hook position, press C twice You can choose between two formats: 12 hours or 24 hours. If you choose ‘12 HOUR’, hours before noon will be displayed with ‘AM’ and ‘PM’ for the hours after noon.
19 Replace the handset Chose a memory location 0-9 to store the telephone number in an in direct memory location O R Press either M1, M2, M3 or to store the telephone number in a direct memory location Press Dial the number you wish to store, checking on the display that you have keyed it in correctly Press Lift the handset Your telephone has 14 memory locations – 4 direct memories for priority telephone numbers and 10 indirect memories for frequently used numbers.
In the on hook position, press C twice 13 Press C to exit menu and return to standby Repeat steps 1-3 for MINUTES, MONTH, DATE,YEAR 3 Press OK to confirm selection 2 Use S and T to set the correct hour 1 The HOUR digit will flash Press OK ‘SET TIME’ Use S and T to scroll through the menu to select Time Setting SETTINGS The LCD display will show together with the number of callls dialled (up to 10) 18 Press OK to return to standby Press C again to confirm, (OK to Cancel).
Lift the handset. Press Lift the handset 17 to redial the last number dialled. Last Number Redial These are used with the new services provided on digital exchanges. For details please contact your network provider. R, * and # Keys To end the call simply replace the handset in the cradle Lift the handset and speak When an incoming call is received the telephone rings and the incoming call indicator flashes..
‘SET AREA CODE’ 15 When the LDS code setting has been completed, press C to exit menu and return to standby Press OK to set the next digit Use S and T to select the correct digit When the area code setting has been completed, press OK.