WLAN USB ADAPTER WUBI-100GW User Guide Version 1.0 - Oct.
Contents 1 Windows XP . . . . . . . . . . . . . . . . . . . . . . . . . . . . . . . . . ………………... . Step 1: Installing the hardware and software . . . . . . . .. . . Connecting the USB adapter . . . . . . . . . . . . . . . . . . Installing the USB adapter driver . . . . . . . . . . . . . . . Step 2: Configuring the USB adapter . . . . . . . . . . . . . . . . Naming the computers and the workgroup . . . . . . . Step 3: Configuring the TCP/IP protocol . . . . . . . . . . . . Terms you should know . . . . . .
1 Windows XP This chapter describes how to connect a Gemtek wireless Ethernet USB adapter to your Windows XP computer and configure Windows XP for a wireless Ethernet network. Complete these tasks in sequence: “Step 1: Installing the hardware and software”. “Step 2: Configuring the USB adapter”. “Step 3: Configuring the TCP/IP protocol”.
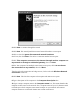
If this is the first time you have connected this USB adapter to your computer, the Found New Hardware Wizard opens. To complete the USB adapter installation, go to “Installing the USB adapter driver”. Installing the USB adapter driver Use the following instructions to install the USB adapter driver for Windows XP. To install the USB adapter driver 1 When the Found New Hardware Wizard opens, insert the installation CD in the CD drive.
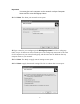
2 Click Next to continue through the wizard. 3 Click Next. The wizard found disconnected network hardware screen opens. 4 Click to select the Ignore disconnected network hardware check box, then click Next. The Select a connection method screen opens. 5 Click This computer connects to the Internet through another computer on my network or through a residential gateway, then click Next.
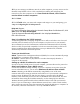
Important You must give each computer on the network a unique Computer Name and the same Workgroup Name. 11 Click Next. The Name your network screen opens. 12 Type a name for your workgroup in the Workgroup name box. Use a workgroup name of up to 15 characters with no blank spaces. The workgroup name must be the same for all computers in your network workgroup, and the name must be different than any computer name on your network. 13 Click Next. The Ready to apply network settings screen opens.
15 If you are setting up an Ethernet network on other computers, you may want to use the Network Setup Wizard to do so. Click a method for installing and configuring the network on your other computers or click Just finish the wizard; I don’t need to run the wizard on other computers. 16 Click Next. 17 Click Finish. After you name each computer and assign it to your workgroup, go to “Step 3: Configuring the TCP/IP protocol”.
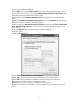
To set up a DHCP IP address: 1 Click Start, then click Control Panel. The Control Panel window opens. If your Control Panel is in Category View, click Network and Internet Connections. The Network and Internet Connections window opens. 2 Click/Double-click Network Connections. The Network Connections window opens. 3 Right-click Wireless Network Connection, then click Properties. The Wireless Network Connection Properties dialog box opens.
Turning the wireless emitter off You can turn off the wireless emitter to conserve the battery charge on your notebook computer or to make a computer unavailable on the network. There are times, such as when you are flying in an aircraft, when you should turn off your wireless emitter. For more safety and regulatory information, see “Safety, Regulatory, and Legal Information” To turn the wireless emitter off: Click the remove hardware icon in the taskbar, the USB adapter name, then click Stop.
2 Windows 2000 This chapter describes how to connect a Gateway wireless USB adapter to your Windows 2000 computer and configure your computer for a wireless Ethernet network. Complete these tasks in sequence: “Step 1: Installing the hardwareand software”. “Step 2: Configuring the USB adapter” . “Step 3: Configuring the TCP/IP protocol”. If you need to install and configure the USB adapter for Windows XP, see “Windows XP”.
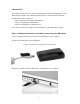
Connecting the USB adapter Use the following instructions to connect the USB adapter to your computer. To connect the USB adapter to your computer: 1 Connect the USB cord to the USB adapter. 2 Connect the other end of the USB cable to a USB port in your computer.
New Hardware Wizard opens. To complete the USB adapter installation, go to “Installing the USB adapter driver” Installing the USB adapter driver The following instructions tell you how to install the USB adapter driver using the Add New Hardware Wizard. To install the USB adapter driver 1 When the Add New Hardware Wizard opens, insert the installation CD into the CD drive. Important The instructions for installing the wireless device driver use the Add New Hardware Wizard.
8 Click OK to restart your computer and complete the Step 2: Configuring the USB adapter Naming the computers and the workgroup The first time you use networking on your computer, you need to give each computer a unique name and assign each computer to the same workgroup. To identify a Windows 2000 computer on the network: 1 Click Start, Settings, then click Control Panel. The Control Panel window opens. 2 Double-click the System icon. The System Identificationdialog box opens.
Important You must give each computer on the network a unique Computer Name and the same Workgroup Name. Step 3: Configuring the TCP/IP protocol A networking protocol is a language computers use to talk to each other. One of several available protocols must be set up on each computer you plan to use on your network. We recommend you use the Transmission Control Protocol/Internet Protocol (TCP/IP), which is widely accepted and compatible for local area networks (LANs), as well as for Internet communications.
2 Right-click the Local Area Connection icon for the wireless Ethernet hardware, then click Properties. The Local Area Connection Properties dialog box opens. 3 Click to select the Internet Protocol (TCP/IP) check box in the Components checked are used by this connection list. If you do not see TCP/IP, drag the scroll bar to see more choices. 4 Click Properties. The Internet Protocol (TCP/IP) Properties dialog box opens. 5 Click Obtain an IP address automatically.
Troubleshooting your wireless Ethernet network If you cannot get your wireless Ethernet network to work, go to the troubleshooting section in the Setting Up Your Wireless Windows Network guide included on the installation CD that came with your network device. Appendix Safety, Regulatory, and Legal Information Regulatory compliance statements Wireless Guidance The WGU-210 802.11g wireless LAN (low power Radio Frequency, RF, transmitting device) operates in the 2400 - 2483.5 MHz band.
Warning Every country has different restrictions on the use of wireless devices. Since your system is equipped with a wireless device, when traveling between countries with your system, check with the local Radio Approval authorities prior to any move or trip for any restrictions on the use of a wireless device in the destination country. Warning Do not operate the wireless device unless all covers and shields are in place and the system is fully assembled. Warning Wireless devices are not user serviceable.
minimum distance 20cm between the radiator & your body. This transmitter must not be co-located or operating in conjunction with any other antenna or transmitter.