
User's Manual


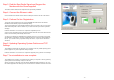
Table Of Contents

Step 3. Find the Best Radio Signal and Support the
Modem with the Stand supplied
The Outdoor modem will have been aligned for best signal during installation
Step 4. Connect the Ethernet cable
Connect the Ethernet cable into the PC Interface Cable port located on the side of the modem.
Step 5. Perform On-line Registration
To start the On-line registration process, again click Next> which will result in the Wireless
Broadband Status Monitor program automatically starting.
The program will attempt to automatically establish an Internet connection, and once successful
shall automatically start an Internet browser to your Service Provider’s pre-defined registration
web page.
Follow the instructions on each screen to complete the registration process.
At the end of the registration process the Internet browser should be closed. This will result in the
Internet connection being automatically disconnected.
You have now completed the installation and registration process. If you experience any trouble
with installation or registration, consult the Troubleshoooting Tips in the User Guide probided on
the CD. If you cannot resolve your problem through this means, call your Service Provider for
assistance.
Step 6. Updating Operating System Patches and TCP
Settings
The installation software will now determine if your computer needs any official operating system
patches applied or any TCP configuration settings changed.
Follow the instructions on each screen to complete the upgrading of any patches or TCP settings.
Step 7.Your installation is now complete
The installation has completed. You will be asked to reboot your computer so that any operating
system patches and TCP setting changes can be used.
After the computer has rebooted, press the Wireless Broadband Modem desktop icon and, once
the software application has started, press the Connect button to establish an Internet connection.
- 4 - - 5 -