microwave oven 700 watts model JES0738 Safety Instructions . . . . . . . . . . . . . . 2–5 Operating Instructions Features . . . . . . . . . . . . . . . . . . . . . . . . . . . . . . . . 6 Quick Start . . . . . . . . . . . . . . . . . . . . . . . . . . . . . 6 Changing Power Levels . . . . . . . . . . . . . . . . . 7 Time Features . . . . . . . . . . . . . . . . . . . . . . . 7–10 Convenience Features . . . . . . . . . . . . . . 10, 11 Auto Feature . . . . . . . . . . . . . . . . . . . . . . . . . .
OPERATING SAFETY INSTRUCTIONS INSTRUCTIONS IMPORTANT SAFETY INSTRUCTIONS. READ ALL SAFETY INFORMATION BEFORE USING. PRECAUTIONS TO AVOID POSSIBLE EXPOSURE TO EXCESSIVE MICROWAVE ENERGY For your safety, the information in this manual must be followed to minimize the risk of fire or explosion, or to prevent property damage, personal injury or loss of life. Do Not Attempt to operate this oven with the door open since open-door operation can result in harmful exposure to microwave energy.
SAFETY INSTRUCTIONS IMPORTANT SAFETY INSTRUCTIONS. READ ALL INSTRUCTIONS BEFORE USING. SPECIAL NOTES ABOUT MICROWAVING To reduce the risk of injury to persons: — Do not overheat the liquid. — Stir the liquid both before and halfway through heating it. — Do not use straight-sided containers with narrow necks. ARCING — After heating, allow the container to stand in the microwave oven for a short time before removing the container. If you see arcing, press the CLEAR/OFF pad and correct the problem.
SAFETY INSTRUCTIONS IMPORTANT SAFETY INSTRUCTIONS. READ ALL INSTRUCTIONS BEFORE USING. SPECIAL NOTES ABOUT MICROWAVING (cont.) • Do not use recycled paper products. Recycled paper towels, napkins and waxed paper can contain metal flecks which may cause arcing or ignite. Paper products containing nylon or nylon filaments should be avoided, as they may also ignite. • Some styrofoam trays (like those that meat is packaged on) have a thin strip of metal embedded in the bottom.
SAFETY INSTRUCTIONS IMPORTANT SAFETY INSTRUCTIONS. READ ALL INSTRUCTIONS BEFORE USING. ADAPTER PLUGS Usage situations where appliance’s power cord will be disconnected infrequently. EXTENSION CORDS (Adapter plugs not permitted in Canada) Align large prongs/slots Because of potential safety hazards under certain conditions, we strongly Ensure proper ground TEMPORARY and firm connection recommend against the use of an METHOD before use. adapter plug.
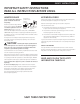
OPERATING INSTRUCTIONS Features 2 3 (Throughout this manual, features and appearance may vary from your model.) 1. Door Latches. 4 2. Window with Metal Shield. Screen allows cooking to be viewed while keeping microwaves confined in the oven. 1 5 3. Convenience Guide. NOTE: Rating plate, oven vent(s) and oven light are located on the inside walls of the microwave oven. 4. Touch Control Panel Display. 6 700 Watts 5. Door Latch Release. Press latch release to open the door. 6. Removable Turntable.
OPERATING INSTRUCTIONS Changing Power Levels The power level may be entered or changed immediately after entering the feature time for TIME COOK or TIME DEFROST. The power level may also be changed during time countdown. Variable power levels add flexibility to microwave cooking. The power levels on the microwave oven can be compared to the surface units on a range. Power level 10 or full power is the fastest way to cook and gives you 100% power.
OPERATING INSTRUCTIONS Time Features (cont.) Time Cook Guide – NOTE: Use power level 10 unless otherwise noted. Vegetable Amount Time Comments Asparagus (fresh spears) (frozen spears) 1 lb. 10-oz. package 7 to 10 min., Med-High (7) 5 to 8 min. In 11⁄ 2-qt. casserole, place 1/4 cup water. In 1-qt. casserole. Beans (fresh green) (frozen green) (frozen lima) 1 lb. cut in half 10-oz. package 10-oz. package 12 to 17 min. 6 to 9 min. 6 to 9 min. In 11⁄ 2-qt. casserole, place 1/2 cup water. In 1-qt.
OPERATING INSTRUCTIONS Time Features (cont.) Time Defrost Allows you to defrost for a selected length of time. See the Defrosting Guide for suggested times (AUTO DEFROST explained in the Auto Feature section). 1. Press TIME DEFROST. 2. Enter defrosting time. 3. Press START/PAUSE. 4. Turn the food over after half the time. 5. Press START/PAUSE. Power level is automatically set at 3, but can be changed. You can defrost small items quickly by raising the power level after entering the time.
OPERATING INSTRUCTIONS Time Features (cont.) Add 30 Seconds It will add 30 seconds to the time counting down each time the pad is pressed. Each touch will add 30 seconds, up to 99 minutes and 99 seconds. It can be used as a quick way to set 30 seconds of cooking time. The oven will start immediately when pressed. Convenience Features Popcorn How to Use the Popcorn Feature 1. Follow package instructions. Place the package of popcorn in the center of the microwave. 2. Press POPCORN once for a 3.
OPERATING INSTRUCTIONS Convenience Features (cont.) Pizza The Pizza feature is for reheating 1 to 4 slices of pizza. Press PIZZA once for one slice of pizza, twice for two slices, three times for three slices and four times for four slices. The oven will start immediately after PIZZA is touched. Baked Potato Baked Potato The Potato feature cooks up to four 8–10 ounce potatoes.
OPERATING INSTRUCTIONS Other Features Clock Press CLOCK to enter the time of day. 1. Press CLOCK. 2. Enter time of day. 3. Press START/PAUSE or CLOCK. Timer 1. Press TIMER. The Timer feature operates without microwave energy. 2. Enter amount of time you want to count down. To stop the timer, press and hold TIMER for 3 seconds 3. Press TIMER. When the time is up, the timer will signal. NOTE: CLEAR/OFF will not stop the TIMER. The Timer operates as a minute timer.
HELPFUL INFORMATION Microwave Terms Term Definition Arcing Arcing is the microwave term for sparks in the oven. Arcing is caused by: • metal or foil touching the side of the oven. • foil that is not molded to food (upturned edges act like antennas). • metal such as twist-ties, poultry pins, gold-rimmed dishes. • recycled paper towels containing small metal pieces. Covering Covers hold in moisture, allow for more even heating and reduce cooking time.
HELPFUL INFORMATION How to Clean the Outside Case Clean the outside of the microwave with a sudsy cloth. Rinse and then dry. Wipe the window clean with a damp cloth. Control Panel and Door Wipe with a damp cloth. Dry thoroughly. Do not use cleaning sprays, large amounts of soap and water, abrasives or sharp objects on the panel—they can damage it. Some paper towels can also scratch the control panel. Door Surface It’s important to keep the area clean where the door seals against the microwave.
WARRANTY GE Microwave Oven Warranty Staple your receipt here. Proof of the original purchase date is needed to make a warranty claim. For The Period Of: What GE Will Provide: One Year From the date of the original purchase Replacement unit for any product which fails due to a defect in materials or workmanship. The exchange unit is warranted for the remainder of your product’s original one-year warranty period. In Order to Make a Warranty Claim: • Properly pack your unit.
Consumer Support GE Appliances Website Contact Us GEAppliances.com GEAppliances.com Have a question or need assistance with your appliance? Try the GE Appliances Website 24 hours a day, any day of the year! For greater convenience and faster service, you can now download Owner’s Manuals, order parts or even schedule service on-line.