Built-In Combination Microwave/Thermal Wall Oven GEAppliances.com For a Spanish version of this manual, visit our Website at GEAppliances.com. Para consultar una version en español de este manual de instrucciones, visite nuestro sitio de internet GEAppliances.com. Printed in the United States Safety Information . . . . . . . . . . . .2 Warranty . . . . . . . . . . . . . . . . . . . . . . . .8 Assistance / Accessories . . . . . .
SAFETY INFORMATION (Upper Oven) 2 IMPORTANT SAFETY INFORMATION. READ ALL INSTRUCTIONS BEFORE USING. PRECAUTIONS TO AVOID POSSIBLE EXPOSURE TO EXCESSIVE MICROWAVE ENERGY (a) Do Not Attempt to operate this oven with the door open since open-door operation can result in harmful exposure to microwave energy. It is important not to defeat or tamper with the safety interlocks. (b) Do Not Place any object between the oven front face and the door or allow soil or cleaner residue to accumulate on sealing surfaces.
Ŷ 6RPH SURGXFWV VXFK DV ZKROH HJJV DQG VHDOHG containers—for example, closed jars—are able to explode and should not be heated in WKLV RYHQ 6XFK XVH RI WKH RYHQ FRXOG UHVXOW LQ injury. Ŷ 'R QRW PRXQW WKLV DSSOLDQFH RYHU D VLQN Ŷ 7KLV RYHQ LV QRW DSSURYHG RU WHVWHG IRU PDULQH use. Ŷ 7KLV RYHQ LV 8/ OLVWHG IRU VWDQGDUG ZDOO installation. Ŷ 'R QRW RSHUDWH WKLV DSSOLDQFH LI LW KDV EHHQ damaged or dropped. Ŷ $V ZLWK DQ\ DSSOLDQFH FORVH VXSHUYLVLRQ LV necessary when used by children.
SAFETY INFORMATION (Upper Oven) 4 IMPORTANT SAFETY INFORMATION. READ ALL INSTRUCTIONS BEFORE USING. WARNING 127,&(³3$&(0$.(56 Ŷ 0RVW SDFHPDNHUV DUH VKLHOGHG IURP LQWHUIHUHQFH from electronic products, including microwaves. +RZHYHU SDWLHQWV ZLWK SDFHPDNHUV PD\ ZLVK WR consult their physicians if they have concerns. WARNING ARCING $UFLQJ FDQ RFFXU GXULQJ PLFURZDYH FRRNLQJ ,I \RX VHH DUFLQJ SUHVV WKH Clear/Off pad and correct the problem.
0DNH VXUH WR XVH VXLWDEOH FRRNZDUH GXULQJ PLFURZDYH FRRNLQJ 0RVW JODVV FDVVHUROHV FRRNLQJ GLVKHV measuring cups, custard cups, pottery or china dinnerware which does not have metallic trim or glaze with D PHWDOOLF VKHHQ FDQ EH XVHG 6RPH FRRNZDUH LV ODEHOHG ³VXLWDEOH IRU PLFURZDYLQJ ´ Ŷ 3DSHU WRZHOV ZD[HG SDSHU DQG SODVWLF ZUDS Ŷ 3ODFH IRRG RU PLFURZDYDEOH FRQWDLQHU GLUHFWO\ can be used to cover dishes in order to retain on the clear glass tray to cook your food.
SAFETY INFORMATION (Lower Oven) IMPORTANT SAFETY INFORMATION. READ ALL INSTRUCTIONS BEFORE USING. WARNING 5HDG DOO VDIHW\ LQVWUXFWLRQV EHIRUH XVLQJ WKH SURGXFW )DLOXUH WR IROORZ WKHVH LQVWUXFWLRQV PD\ UHVXOW LQ ILUH electrical shock, serious injury or death.
Failure to do so may result in fire or personal injury. Ŷ ' R QRW VWRUH RU XVH IODPPDEOH PDWHULDOV LQ RU QHDU an oven, including paper, plastic, pot holders, linens, wall coverings, curtains, drapes and gasoline or other flammable vapors and liquids. Ŷ 1 HYHU ZHDU ORRVH ILWWLQJ RU KDQJLQJ JDUPHQWV ZKLOH XVLQJ WKH DSSOLDQFH 7KHVH JDUPHQWV PD\ LJQLWH LI they contact hot surfaces, causing severe burns.
WARRANTY Thank You! ... for your purchase of a GE Brand appliance. Register Your Appliance: 5HJLVWHU \RXU QHZ DSSOLDQFH RQ OLQH DW \RXU FRQYHQLHQFH ZZZ JHDSSOLDQFHV FRP VHUYLFHBDQGBVXSSRUW UHJLVWHU 7LPHO\ SURGXFW UHJLVWUDWLRQ ZLOO DOORZ IRU HQKDQFHG FRPPXQLFDWLRQ DQG SURPSW VHUYLFH XQGHU WKH WHUPV RI \RXU ZDUUDQW\ VKRXOG WKH QHHG DULVH
7U\ WKH *( $SSOLDQFHV :HEVLWH www.geappliances.com/service_and_support/) 24 hours a day, any day of the \HDU )RU JUHDWHU FRQYHQLHQFH DQG IDVWHU VHUYLFH \RX FDQ QRZ GRZQORDG 2ZQHU¶V 0DQXDOV RUGHU SDUWV RU HYHQ schedule service on-line. Schedule Service: ([SHUW *( UHSDLU VHUYLFH LV RQO\ RQH VWHS DZD\ IURP \RXU GRRU *HW RQ OLQH DQG VFKHGXOH \RXU VHUYLFH DW ZZZ JHDSSOLDQFHV FRP VHUYLFHBDQGBVXSSRUW 2U FDOO *( &$5(6 GXULQJ QRUPDO business hours.
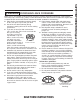
USING THE OVEN: Oven Controls Oven Controls Upper Oven Controls 7 9 11 8 10 12 Common Controls 1 6 2 Common Controls 1. Timer On/Off: :RUNV DV D FRXQWGRZQ WLPHU 3UHVV the Timer On/Off pad, select the timer type (hours and minutes or minutes and seconds), use the selector dial to set the time, and press the selector dial to start the timer FRXQWGRZQ 7KH RYHQ ZLOO FRQWLQXH WR RSHUDWH ZKHQ WKH WLPHU FRXQWGRZQ LV FRPSOHWH 7R WXUQ WKH WLPHU RII SUHVV the Timer On/Off pad. 2. 3. 4.
Help Clock Settings 8VH WKLV IHDWXUH WR ILQG RXW PRUH DERXW \RXU RYHQ DQG its features by pressing the Settings pad and selecting KHOS 7XUQ WKH VHOHFWRU GLDO DQG SUHVV WR VHOHFW WKH feature you want to find out more about.
USING THE OVEN: Oven Options 12 Oven Options Lower Oven Options Delay Start 8VH WKLV IHDWXUH WR GHOD\ VWDUWLQJ D %DNH RU 6HOI &OHDQ IHDWXUH 7R XVH WKLV IHDWXUH VHOHFW 'HOD\ 6WDUW DQG VHW WKH WLPH WR VWDUW WKHQ VHOHFW FRRN PRGH
Using The Microwave Features 0DNH VXUH WKH WXUQWDEOH DQG FOHDU JODVV WUD\ DUH LQ SODFH Place food or microwavable container directly on the clear glass tray to cook your food. The turntable must always be in place when using the oven. The clear glass tray should always be in place when microwaving. MICROWAVE PRESET SELECTIONS: Ŷ Beverage ± :DWHU R] ± &RIIHH (8-12 oz.) ± 7HD R] ± 0LON R] ± +RW &RFRD (8-12 oz.
UPPER OVEN: Microwaving Microwaving (Cont.) Microwave Power Level(s) Ŷ
Defrost By Weight 8VH 'HIURVW %\ :HLJKW WR GHIURVW IRU D VHOHFWHG OHQJWK RI time. 1. Press the Microwave pad and select defrost. 7XUQ WKH VHOHFWRU GLDO WR 'HIURVW %\ :HLJKW 3UHVV WKH selector dial to enter. 7XUQ WKH VHOHFWRU GLDO WR VHOHFW WKH ZHLJKW \RX ZDQW Press the selector dial to enter. 3UHVV WKH VHOHFWRU GLDO RU 6WDUW 3DXVH SDG WR VWDUW defrosting. 7XUQ WKH IRRG RYHU ZKHQ WKH RYHQ VLJQDOV 7XUQ )RRG 2YHU Power level cannot be changed during this setting.
UPPER OVEN: Microwaving Microwaving (Cont.) Microwave Sensor Cooking 7KH VHQVRU IHDWXUH GHWHFWV WKH LQFUHDVLQJ KXPLGLW\ UHOHDVHG GXULQJ FRRNLQJ 7KH RYHQ DXWRPDWLFDOO\ DGMXVWV the cooking time to various types and amounts of food. 'R QRW XVH WKH 6HQVRU )HDWXUHV WZLFH LQ VXFFHVVLRQ on the same food portion— it may result in severely overcooked or burnt food. If food is undercooked after WKH ILUVW FRXQWGRZQ XVH &RRN %\ 7LPH IRU DGGLWLRQDO cooking time.
LOWER OVEN: Sabbath Mode Sabbath Mode
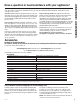
RECOMMENDED MODE(S) RECOMMENDED 5$&. 326,7,21 6 ADDITIONAL SUGGESTIONS /D\HU FDNHV VKHHW FDNHV bundt cakes, muffins, quick EUHDGV RQ D 6LQJOH 5DFN %DNH 3 8VH VKLQ\ FRRNZDUH /D\HU FDNHV RQ 0XOWLSOH 5DFNV %DNH 2 and 4 (QVXUH DGHTXDWH DLUIORZ (see illustration below).
LOWER OVEN: Racks Racks
CAUTION: Do not use any type of foil or oven liner to cover the oven bottom. These items can trap heat or melt, resulting in damage to the product and risk of shock, smoke or fire. Damage from improper use of these items is not covered by the product warranty. )RLO PD\ EH XVHG WR FDWFK VSLOOV E\ SODFLQJ D VKHHW RQ D ORZHU UDFN VHYHUDO LQFKHV EHORZ WKH IRRG 'R QRW XVH PRUH IRLO WKDQ QHFHVVDU\ DQG QHYHU HQWLUHO\ FRYHU DQ RYHQ UDFN ZLWK DOXPLQXP IRLO .
CARE AND CLEANING: Cleaning The Oven Cleaning The Oven %H VXUH HOHFWULFDO SRZHU LV RII DQG DOO VXUIDFHV DUH FRRO EHIRUH FOHDQLQJ DQ\ SDUW RI WKH RYHQ Helpful Hints $Q RFFDVLRQDO WKRURXJK ZLSLQJ ZLWK D VROXWLRQ RI EDNLQJ VRGD DQG ZDWHU NHHSV WKH LQVLGH IUHVK $OVR we recommend against using cleaners with ammonia or alcohol, as they can damage the appearance of the oven. If you choose to use a common household cleaner, first apply the cleaner directly to a clean cloth, then wipe the soiled area.
How To Clean The Upper Oven Interior (Cont.) Cooking Trays And Baking Sheet 7R SUHYHQW EUHDNDJH DOORZ WKH WUD\V WR FRRO FRPSOHWHO\ EHIRUH FOHDQLQJ :DVK FDUHIXOO\ LQ ZDUP VXGV\ ZDWHU RU in the dishwasher. 'R QRW XVH PHWDO VFRXULQJ SDGV RU DEUDVLYHV DV WKH\ PD\ GDPDJH WKH ILQLVK $ VRDS ILOOHG VFRXULQJ SDG PD\ be used to clean the trays.
CARE AND CLEANING: Lower Oven Maintenance Lower Oven Maintenance Lower Oven Light Replacement WARNING SHOCK OR BURN HAZARD: %HIRUH UHSODFLQJ RYHQ OLJKW EXOE GLVFRQQHFW WKH HOHFWULFDO SRZHU WR WKH RYHQ DW WKH PDLQ IXVH RU FLUFXLW EUHDNHU SDQHO )DLOXUH WR GR VR PD\ UHVXOW LQ electric shock or burn. CAUTION BURN HAZARD: 7KH JODVV FRYHU DQG EXOE VKRXOG EH UHPRYHG ZKHQ FRRO 7RXFKLQJ KRW glass with bare hands or a damp cloth can cause burns.
Save time and money! Review the charts on the following pages first and you may not need to call for service. Problem Possible Cause What To Do Fan continues to run after cooking stops The oven is cooling. 7KH IDQ ZLOO DXWRPDWLFDOO\ VKXW RII ZKHQ WKH LQWHUQDO parts of the oven have cooled. Oven vent emits warm air while oven is on This is normal. Fan comes on automatically when using the microwave This is normal.
TROUBLESHOOTING TIPS (Upper Oven) 26 Troubleshooting tips ... Before you call for service Problem Possible Cause What To Do The door and inside of the oven feels hot The heat lamps produce intense heat in a small space. 7KLV LV QRUPDO 8VH RYHQ PLWWV WR UHPRYH IRRG when ready. Oven will not start A fuse in your home may be blown or the circuit breaker tripped.
Problem Possible Cause What To Do My new oven doesn't cook like my old one. Is something wrong with the temperature settings? Your new oven has a different cooking system from your old oven and therefore may cook differently than your old oven. )RU WKH ILUVW IHZ XVHV IROORZ \RXU UHFLSH WLPHV and temperatures carefully. If you still think your new oven is too hot or too cold, you can adjust the temperature yourself to meet your specific cooking preference.
TROUBLESHOOTING TIPS (Lower Oven) 28 Troubleshooting tips ... Before you call for service Problem Possible Cause What To Do Oven light does not work Light bulb is loose or defective. 7LJKWHQ RU UHSODFH EXOE Pad operating light is broken. &DOO IRU VHUYLFH Oven will not selfclean The temperature is too high to set a self-clean operation. $OORZ WKH RYHQ WR FRRO DQG UHVHW WKH FRQWUROV Oven controls improperly set.
Incorporado con Combinación Microondas/ Térmico Horno de Pared GEAppliances.com Información de Seguridad . . . . . 2 Garantía . . . . . . . . . . . . . . . . . . . . . . . . . . 8 Asistencia / Accesorios . . . . . . . . . 9 Manual del Propietario Horno de Pared Doble JT3800 de 30” Horno de Pared Doble JK3800 de 27” Uso del Horno Controles del Horno . . . . . . . . . . . . . . . . 10 Configuraciones del Horno . . . . . . . . . 11 Opciones del Horno . . . . . . . . . . . . . . . .
INFORMACIÓN DE SEGURIDAD (Horno Superior) 2 INFORMACIÓN IMPORTANTE DE SEGURIDAD LEA TODAS LAS INSTRUCCIONES ANTES DE USAR PRECAUCIONES PARA EVITAR LA POSIBLE EXPOSICIÓN A ENERGÍA DE MICROONDAS EXCESIVA (a) No intente hacer funcionar el horno con la compuerta abierta ya que ésto puede provocar exposición peligrosa a la energía de microondas. Es importante no forzar ni dañar los seguros.
Ŷ $OJXQRV SURGXFWRV WDOHV FRPR KXHYRV HQWHURV \ contenedores sellados (por ejemplo, frascos sellados) son propensos a explotar y no deben calentarse en este horno. Tal uso del horno puede resultar en lesiones personales. Ŷ 1R PRQWH HVWH DSDUDWR VREUH HO IUHJDGHUR Ŷ (VWH KRUQR QR KD VLGR DSUREDGR QL SUREDGR SDUD utilización marina. Ŷ (VWH KRUQR HVWi OLVWDGR SRU 8/ SDUD OD LQVWDODFLyQ GH SDUHG HVWiQGDU Ŷ 1R KDJD IXQFLRQDU HVWH DSDUDWR VL KD VLGR GDxDGR R dejado caer.
INFORMACIÓN DE SEGURIDAD (Horno Superior) 4 INFORMACIÓN IMPORTANTE DE SEGURIDAD LEA TODAS LAS INSTRUCCIONES ANTES DE USAR ADVERTENCIA AVISO: MARCAPASOS Ŷ /D PD\RUtD GH ORV PDUFDSDVRV VH HQFXHQWUDQ protegidos contra la interferencia de productos electrónicos, incluyendo los microondas. Sin embargo, los pacientes que tengan marcapasos deberían consultar a sus médicos si tienen alguna duda. ADVERTENCIA ARQUEO VOLTAICO Se pueden producir arqueos voltaicos al cocinar con microondas.
Recipientes de cocina seguros diseñados para microondas Asegúrese de utilizar recipientes de cocina adecuados durante la cocción a microondas. Se pueden utilizar la mayoría GH ODV FDFHURODV SODWRV SDUD FRFLQDU WD]DV GH PHGLU WD]DV QRUPDOHV FHUiPLFD R OR]D TXH QR WHQJDQ ERUGHV PHWiOLFRV R YLGULDGRV FRQ XQ UHFXEULPLHQWR PHWiOLFR $OJXQRV UHFLSLHQWHV GH FRFLQD VH HQFXHQWUDQ PDUFDGRV FRPR DGHFXDGRV para microondas.
INFORMACIÓN DE SEGURIDAD (Horno Inferior) INFORMACIÓN IMPORTANTE DE SEGURIDAD LEA TODAS LAS INSTRUCCIONES ANTES DE USAR ADVERTENCIA /HD WRGDV ODV LQVWUXFFLRQHV DQWHV GH XVDU HO SURGXFWR 6L QR VH VLJXHQ HVWDV LQVWUXFFLRQHV VH SRGUiQ SURGXFLU LQFHQGLRV descargas eléctricas, lesiones graves o la muerte.
MANTENGA LOS MATERIALES INFLAMABLES ALEJADOS DE LA COCINA Si esto no se cumple, se podrán sufrir lesiones personales graves o incendios. Ŷ No guarde ni use materiales inflamables en o cerca GH XQ KRUQR LQFOX\HQGR SDSHO SOiVWLFR PDQJRV GH ollas, trapos, cobertores de pared, cortinas, paños y gasolina u otros vapores y líquidos inflamables. Ŷ Nunca use prendas holgadas o que cuelguen mientras usa el electrodoméstico.
GARANTÍA ¡Gracias! ... por su compra de un electrodoméstico de la Marca GE Registre su Electrodoméstico: ¡Registre su electrodoméstico nuevo a través de Internet, según su conveniencia! www.geappliances.com/service_and_support/register/ 8Q UHJLVWUR SXQWXDO GH VX SURGXFWR SHUPLWLUi XQD PHMRU FRPXQLFDFLyQ \ XQ VHUYLFLR PiV SXQWXDO GH DFXHUGR FRQ ORV WpUPLQRV GH VX garantía, en caso de surgir la necesidad.
£&RQVXOWH HO 6LWLR :HE GH (OHFWURGRPpVWLFRV GH *( www.geappliances.com/service_and_support/) durante las 24 horas, cualTXLHU GtD GHO DxR 3DUD PD\RU FRQYHQLHQFLD \ XQ VHUYLFLR PiV UiSLGR DKRUD SXHGH GHVFDUJDU HO 0DQXDO GHO 3URSLHWDULR RUGHQDU piezas o incluso programar el servicio técnico a través de Internet. Servicio Programado: El servicio de reparación de expertos de *( HVWi D VyOR XQ SDVR GH VX SXHUWD (QWUH D ,QWHUQHW \ SURJUDPH su servicio en www.geappliances.
USO DEL HORNO: Controles del Horno Controles del Horno Controles del Horno Superior 7 9 11 8 10 12 Controles Comunes 1 6 2 Controles Comunes 1.
Ayuda Clock Settings (Configuraciones del Reloj) 8VH HVWD IXQFLyQ SDUD VDEHU PiV VREUH VX KRUQR \ VXV funciones, presionando la tecla Settings (Configuraciones) y seleccionando Help (Ayuda) *LUH HO GLDO GH VHOHFFLyQ \ SUHVLRQH HO PLVPR SDUD VHOHFFLRQDU OD IXQFLyQ VREUH OD FXiO GHVHH VDEHU PiV NOTA: Es posible que su horno no cuente con todas las funciones de ayuda.
USO DEL HORNO: Opciones del Horno 12 Opciones del Horno Opciones del Horno Inferior Delay Start (Iniciar con Retraso) 8VH HVWD IXQFLyQ SDUD UHWUDVDU HO LQLFLR GH ODV IXQFLRQHV %DNH +RUQHDU R 6HOI &OHDQ /LPSLH]D $XWRPiWLFD 3DUD XVDU HVWD IXQFLyQ VHOHFFLRQH 'HOD\ 6WDUW ,QLFLDU FRQ 5HWUDVR \ FRQILJXUH la hora de inicio, y luego seleccione el modo de cocción.
Cómo Utilizar las Funciones de Microondas Asegúrese de que la base giratoria y la bandeja de vidrio transparente se encuentran colocadas. Coloque los alimentos o recipiente para microondas directamente en la bandeja de vidrio transparente para cocinar sus alimentos. La base giratoria siempre debe estar colocada en su lugar cuando se utiliza el horno. La bandeja de cristal transparente siempre deberá estar en su lugar cuando se cocina con microondas.
Horno Superior: Cocción con Microondas Cocción con Microondas (Continúa) Nivel(es) De Potencia Del Horno Microondas Ŷ 3XHGH PRGLILFDU HO QLYHO GH SRWHQFLD GXUDQWH OD PD\RU parte del programa de cocción. 1. Presione el dial de selección para editar. *LUH HO GLDO GH VHOHFFLyQ SDUD FDPELDU OD KRUD \ R SUHVLRQH el dial de selección para ingresar.
Defrost By Weight (Descongelar por Peso) 8VH 'HIURVW %\ :HLJKW 'HVFRQJHODU SRU 3HVR SDUD descongelar durante un período de tiempo seleccionado. 1. Presione la tecla Microwave (Cocinar con Microondas) y VHOHFFLRQH 'HIURVW 'HVFRQJHODU *LUH HO GLDO GH VHOHFFLyQ D 'HIURVW %\ :HLJKW 'HVFRQJHODU por Peso). Presione el dial de selección para ingresar. *LUH HO GLDO SDUD VHOHFFLRQDU HO SHVR TXH GHVHH 3UHVLRQH el dial de selección para ingresar. 4.
Horno Superior: Cocción con Microondas Cocción con Microondas (Continúa) Cocción De Microondas Por Sensor /D IXQFLyQ GH VHQVRU GHWHFWD HO DXPHQWR GH KXPHGDG OLEHUDGD durante la cocción. El horno ajusta el tiempo de cocción DXWRPiWLFDPHQWH D ORV GLIHUHQWHV WLSRV \ FDQWLGDGHV GH FRPLGD No utilice las funciones de sensor dos veces en sucesión en la misma porción de comida ya que puede tener como resultado comida severamente sobrecocinada o quemada.
Su nuevo horno posee una variedad de modos de cocción para que pueda obtener los mejores resultados.
Horno Inferior: Modo Sabático Modo Sabático 6X QXHYR KRUQR FXPSOH FRQ ORV UHTXLVLWRV GHO )HULDGR 6DEiWLFR -XGtR GH OD (VWUHOOD .
MODO(S) RECOMENDADO(S) POSICIÓN(ES) DE ESTANTES RECOMENDADA SUGERENCIAS ADICIONALES Tortas con capas, tortas rectangulares, roscas, panecillos, pan UiSLGR HQ XQ 6ROR (VWDQWH Hornear 3 Use utensilios brillantes. 7RUWDV FRQ FDSDV HQ 0~OWLSOHV Estantes Hornear 2y4 Asegúrese de que haya un flujo de aire adecuado (Vea la ilustración). TIPO DE COMIDA Productos Horneados 7RUWDV GH JUDVD SDVWHO GH iQJHO Hornear 1 Use utensilios brillantes.
Horno Inferior: Estantes Estantes (O KRUQR FXHQWD FRQ VHLV SRVLFLRQHV GH HVWDQWHV (Q OD *XtD de Cocción, se brindan recomendaciones de posiciones de los estantes para diferentes tipos de comidas.
PRECAUCIÓN: No use ningún tipo de aluminio o cobertor de horno para cubrir el fondo del horno. Estos ítems pueden atrapar el calor o derretirse, ocasionando daños sobre el producto y el riesgo de descargas, humo o incendios. Los daños por uso inadecuado de estos ítems no están cubiertos por la garantía del producto.
CUIDADO Y LIMPIEZA: Limpieza del Horno Limpieza del Horno Asegúrese de que la corriente eléctrica esté apagada y que todas las superficies estén frías antes de limpiar cualquier parte del horno. Consejos Útiles Una limpieza minuciosa ocasional con un trapo empapado GH ELFDUERQDWR VyGLFR \ DJXD PDQWHQGUi HO LQWHULRU IUHVFR También recomendamos no usar limpiadores con amoníaco o alcohol, ya que pueden dañar el aspecto del horno.
How To Clean The Upper Oven Interior (Continúa) Bandejas Para Cocinar Y Lámina De Hornear Para evitar que se rompan las bandejas, deje que se enfríen FRPSOHWDPHQWH DQWHV GH OLPSLDUODV /DYH ODV EDQGHMDV HQ DJXD MDERQRVD WLELD R HQ OD PiTXLQD ODYDSODWRV 1R XWLOLFH HVSRQMLOODV PHWiOLFDV SDUD IUHJDU R OLPSLDGRUHV abrasivos, ya que pueden dañar el acabado. Se puede utilizar una esponjilla cubierta de jabón para limpiar las bandejas.
CUIDADO Y LIMPIEZA: Mantenimiento del Horno Inferior Mantenimiento del Horno Inferior Reemplazo de la Lámpara del Horno Inferior ADVERTENCIA PELIGRO DE DESCARGA O QUEMADURAS: $QWHV GH UHHPSOD]DU OD OiPSDUD GH OX] del horno, desconecte la conexión eléctrica del horno del fusible principal o del panel del GLV\XQWRU 6L HVWR QR VH FXPSOH VH SRGUi SURGXFLU XQD GHVFDUJD HOpFWULFD R XQ LQFHQGLR PRECAUCIÓN RIESGO DE INCENDIO: /D WDSD GH YLGULR \ OD OiPSDUD GH OX] VH GHEHUiQ UHWLUDU FXDQGR estén frías.
¡Ahorre tiempo y dinero! Primero revise los cuadros que aparecen en las siguientes páginas y es posible que no necesite solicitar reparaciones. Problema Causa Posible Qué Hacer El ventilador continúa funcionando después de terminar de cocinar El horno se está enfriando. (O YHQWLODGRU VH DSDJDUi DXWRPiWLFDPHQWH FXDQGR ODV piezas internas del horno se hayan enfriado. El ventilador del horno irradia aire caliente mientras el horno se encuentra encendido Esto es normal.
CONSEJOS PARA LA SOLUCIÓN DE PROBLEMAS (Horno Superior) 26 Consejos para la Solución de Problemas... Antes de solicitar el servicio técnico Problema Causa Posible Qué Hacer La compuerta y el interior del horno se sienten calientes Las lámparas térmicas producen calor intenso en un espacio reducido. Esto es normal. Use guantes térmicos de cocina para sacar la comida cuando esté lista. El horno no enciende Un fusible en su hogar puede haberse fundido o el interruptor de circuitos fue activado.
Problema Causa Posible Qué Hacer Mi horno nuevo no cocina como el anterior. ¿Hay algún problema con las configuraciones de temperatura? Su horno nuevo cuenta con un sistema de cocción diferente con relación al anterior y, por lo tanto, es posible que cocine de forma diferente. En los primeros usos, use los tiempos y temperaturas de su receta con cuidado.
CONSEJOS PARA LA SOLUCIÓN DE PROBLEMAS (Horno Inferior) 28 Consejos para la Solución de Problemas... Antes de solicitar el servicio técnico Problema Causa Posible Qué Hacer La luz del horno no funciona La lámpara está floja o presenta defectos. $MXVWH R UHHPSODFH OD OiPSDUD La luz de funcionamiento del interruptor está rota. /ODPH DO VHUYLFLR WpFQLFR La temperatura del horno es demasiado caliente como para configurar la limpieza automática.