
Use and Care Manual


21
CHECKLIST BEFORE STARTING
• Make sure you and any assistants are wearing safe ap-
propriate workshop attire. Roll up long sleeves, secure
long hair and remove any jewelry: watches, rings, bra-
celets or anything that could become caught in the
moving parts, potentially causing serious injury.
• To reduce the risk of damage to the planer/molder or the workpiece, as well as a potential for personal injury,
after initial set-up as well as before each use, make sure that everything is securely installed and that all fasten-
ers and moving parts on this machine are locked in place before starting the machine.
• Make sure that the knives in the cutter head are properly set as explained in section “Checking/Setting the
knives for planing” or in section “To install molding knives”, depending on the intended use of the machine.
• Make sure that the feed rollers are properly set as explained in section “Adjusting the feed rollers”.
• Make sure the board has been inspected and is suitable for planing/molding as explained in section “Selecting
boards suitable for planing/molding”.
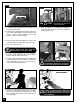
• If multiple boards are to be planed, collect all workpieces together and set them nearby on a table or bench
within easy reach. To limit the potential for injury in the event of a kickback, avoid having to step or reach in
front of the machine to pick up the next workpiece A.
• Make sure to have on safety glasses as well as hearing & respiratory protection at all times when using the
machine.
It is recommended that for both hard and soft wood:
Remo
ving less material per pass and taking multiple
passes is always preferred to more aggressive plan-
ing/molding.
Advantages include longer blade life, better finish qua-
lity (resulting in less time sanding later) and less likeli-
hood of removing too much material causing the work-
piece to be too thin for its intended use.
Note: Depth of cut will vary depending on the width of the
workpiece, density/type of wood and moisture content of
the stock.
REFERENCE CHART FOR DEPTH OF CUT SELECTION*
WIDTH
1/4” or less
3/16”or less
1”
3/16” or less
3”
1/8” or less
3”
1/8” or less
6”
1/16” or less
6”
Poplar
Red Oak
White Pine
White Oak
Poplar
Red Oak
1”
*The information in this chart is supplied as a general guideline only.
1/8” or less
1/8” or less
1/8” or less
1/8” or less
1/8” or less
1/8” or less
DEPTH OF CUT
TYPE OF WOOD
PLANING
MOLDING
MAXIMUM DEPTH OF CUT
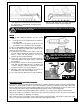
CONNECTING TO A DUST COLLECTOR
A dust port with a 4” opening is provided to accommo-
date connection to a dust collector (not included).
Be sure to use appropriate sized hose and fittings (not
included) and check that all connections are sealed
tightly to help minimize airborne dust.
If you do not already own a dust collection system
consider contacting your General® International dis-
tributor for information on our complete line of dust
collection systems and accessories or visit our Web Site
at www.general.ca
VERIFY ALL CHECK POINTS BEFORE STARTING.
FAILURE TO COMPLY CAN RESULT IN SERIOUS
INJURIES.
A