
Full Product Manual
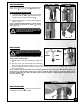
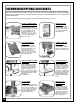
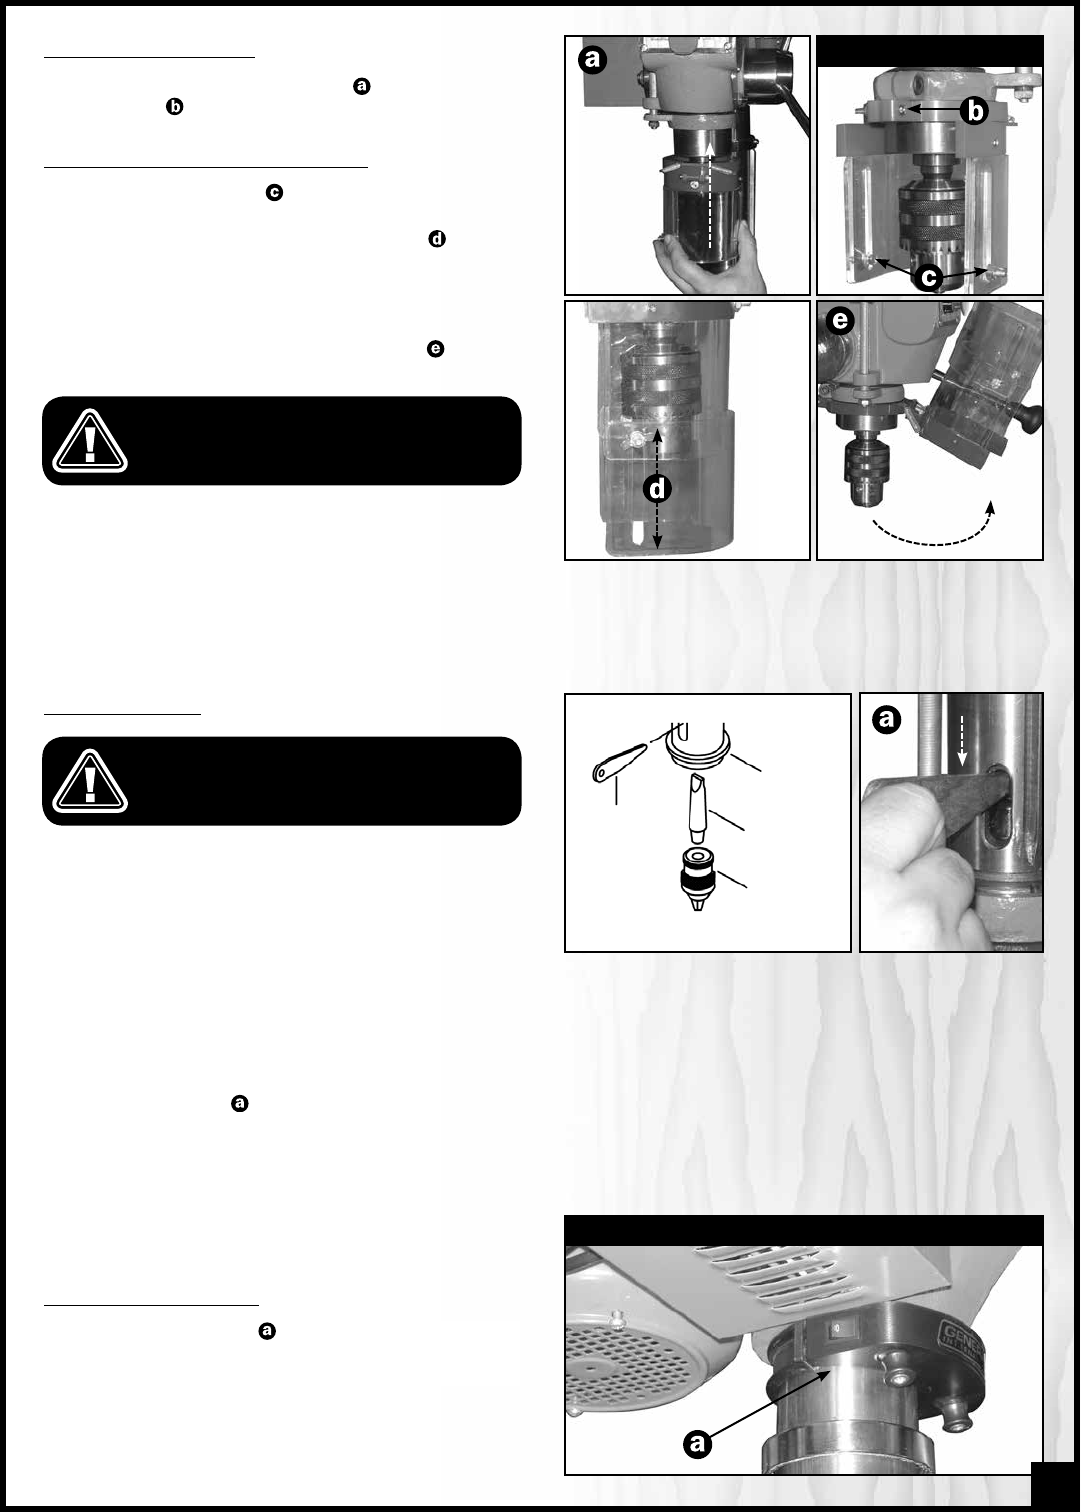
INSTALL THE CHUCK GUARD
Fit the chuck guard onto the quill and tighten the
Phillips screw
to secure the chuck guard in place.
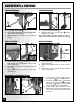
ADJUSTING AND USING THE CHUCK GUARD
1. Loosen the wing nuts on both sides of the chuck
guard and slide the chuck guard extension down
along the two slots to the desired height
.
2. Tighten the wing nuts to lock the chuck guard ex-
tension in place.
Note: To facilitate drill bit installation / removal, flip the
spring loaded chuck guard up as shown in
to keep
it out of the way.
TO REDUCE THE RISK OF SERIOUS INJURIES, ALWAYS
COVER THE CHUCK AND DRILL BIT WITH THE CHUCK
GUARD WHEN USING THE DRILL PRESS.
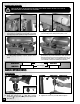
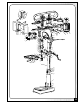
REAR VIEW
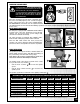
INSTALL THE LASER POINTER
Install the laser pointer
using the instructions sup-
plied in the box with the laser pointer.
DRILL PRESS HEAD UNDERSIDE VIEW
MAKE SURE THAT THE SWITCH IS IN THE OFF POSITION
BEFORE INSTALLING OR REMOVING THE CHUCK AND
ARBOR.
INSTALL THE CHUCK
Note: To facilitate chuck and arbor installation, flip the
spring loaded chuck guard up.
1. Slide the arbor into the quill assembly, flat end goes in
first.
2. Slide the chuck onto the tapered end of the arbor
then, using the down-feed handle, lower the quill
assembly against the table to secure the chuck. (To avoid damaging the chuck and table, place a piece of
wood on the table.)
Note: To remove the chuck and arbor, use the downfeed handle to lower the quill assembly. Insert the drift key all
the way into the quill assembly (it may be necessary to rotate the quill to be able to get the key all the way in)
and while holding onto the chuck, tap gently on the key with a hammer or rubber mallet to loosen and remove
the arbor and chuck
.
DRIFT KEY
ARBOR
QUILL
ASSEMBLY
CHUCK
11