
Use and Care Manual


18
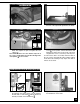
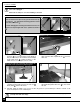
5. Carefully hang the blade on a hook in a safe, dry place in your workshop if it will be re-used, or dis-
pose of it safely if it is worn or damaged.
2. Remove the red insert from the center of the
table and the table alignment pin from the
table slot.
3. Open the top and bottom wheel cover doors and
carefully pull the blade from the left side slot
,
blade guard , and from the wheels.
Before replacing or adjusting the blade, make sure that both of the power switches are in the “OFF” position and that the
power cord is unplugged.
Blade teeth are sharp. Use care when handling a saw blade.
4. With the blade perpendicular to the wheels, feed
the blade through the table slot,
,
to free it from
the saw.
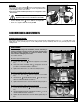
Do not attempt to coil up the blade as it was when you first purchased it as it has a tendancy to pop open unex-
pectedly and could cause injury.
To remove a blade:
Note: You may want to use a thick shop towel to handle the
loose blade or wear a pair of heavy duty work gloves.
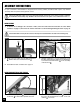
Note: For blade tension quick release, pull the tension lever up
as shown in
.
For quick blade tensioning, push the tension
lever down, as shown in .
To avoid damaging the tensioning mechanism never force the
tension lever beyond “Tight” and “Loose” positions as shown in
.
LOOSE
TIGHT
DO NOT
1. Put the tension lever in the loose position as
shown in to loosen the tension on the blade. It
may be necessary to also turn the tension adjust
ment hand wheel counter-clockwise for the
blade to be loose enough to remove easily.