
Use and Care Manual
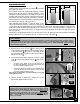


CONNECTING TO A DUST COLLECTOR
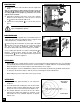
This model 90-320 is equiped with two built-in 4" diam-
eter dust chutes to accommodate connection to a
dust collector (not included).
Bee sure to use appropriate sized hose and fittings
(not included) and check that all connections are
sealed tightly to help minimize airborne dust.
If you do not already own a dust collection system
consider contacting your General® International
distributor for information on our complete line of
dust collection systems and accessories or visit our
Web Site at: www.general.ca.
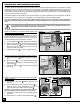
OPERATING INSTRUCTIONS
OPERATIONS STEP-BY-STEP
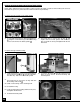
1.
Trace the cutting line on your workpiece with a pencil (for cutting curves) or adjust the laser beam to mark
the cutting line (for cutting straight lines). If needed, refer back to section “laser line marker” on page 13.
2. Set the height of the blade guard according to the thickness of your workpiece (see section: “Adjusting the bla-
de guard for depth of cut” on page 16.)
3. If a dust collector is connected to your bandsaw, turn it on.
4.
Push on the green “ON” button to start the bandsaw.
5. Align the cutting line on your workpiece with the blade and feed the workpiece into the blade.
Tip: The use of a roller stand provides an extra support for more convenience when working with longer workpieces.
TO STOP THE MACHINE
1. Push the red “STOP” panel.
2. Turn your dust collector off.
To reduce the risk of damage to the bandsaw or the workpiece, as well as a potential for personal injury, after ini-
tial set-up as well as before each use, make sure that everything is securely installed and that all fasteners and
moving parts on this bandsaw are locked in place before starting the machine.
These additional safety measures should be be included in your checklist:
7. Make sure all the blade guards are in place.
8. Make sure the bandsaw table and work area in general are clean and free of sawdust and debris.
These steps should always be followed when any adjustment is performed, the blade is changed, or periodically as vibra-
tion and normal wear and tear on the machine could throw these parts out of alignment.
CHECKLIST BEFORE STARTING
NOTE: Now that you have completed the five adjustment steps which are an essential part of safe, accurate bandsaw oper-
ation, it would be a good idea to make yourself a checklist as follows to ensure that each adjustment to the bandsaw is
made in the proper order starting with the general safety precaution:
1. Turn off the bandsaw and unplug the power cord.
2. Adjust blade tension.
3. Adjust blade tracking.
4. Adjust upper blade guides and support bearing.
5. Adjust lower blade guides and support bearing.
6. Select the right speed range depending on the cutting application.
25