
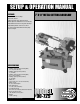
Full Product Manual


PLACEMENT WITHIN THE SHOP / SAFETY ZONE
THIS MODEL 90-725 METAL CUTTING BANDSAW IS HEAVY. DO NOT OVER-EXERT. A HOIST OR FORKLIFT WITH STRAPS
SHOULD BE USED TO LIFT THIS MACHINE. TO LIMIT THE RISK OF SERIOUS INJURY OR DAMAGE TO THE MACHINE,
ANY EQUIPMENT USED TO LIFT THIS MACHINE SHOULD HAVE A RATED CAPACITY IN EXCESS OF 330 LBS (150 KG).
9
ASSEMBLY INSTRUCTIONS
TIP: TO INSTALL THE WHEELS, YOU WILL NEED TO LIFT THE MACHINE. DUE TO THE WEIGHT OF THE MACHINE, ADEQUATE LIFTING
EQUIPMENT SUCH AS A JACK, HOIST, OR FORKLIFT WITH STRAPS IS REQUIRED. ANY EQUIPMENT USED TO LIFT THE MACHINE MUST
HAVE A MINIMUM WEIGHT CAPACITY OF 330 LBS (150 KG).
BEFORE ASSEMBLING, MAKE SURE THAT THE SWITCH IS IN THE “OFF” POSITION AND THAT THE POWER CORD IS
UNPLUGGED. DO NOT PLUG IN OR TURN ON THE MACHINE UNTIL YOU HAVE COMPLETED THE ASSEMBLY AND
INSTALLATION STEPS DESCRIBED IN THIS SECTION OF THE MANUAL.
PLACEMENT WITHIN THE SHOP
This machine should be installed and operated only on
a solid, flat and stable floor that is able to support the
weight of the machine (330 lbs - 150 kg) and the opera-
tor. Using the dimensions shown as a guideline, plan for
placement within your shop that will allow the operator
to work unencumbered and unobstructed by foot traf-
fic (either passing shop visitors or other shop workers) or
other tools or machinery.
ESTABLISHING A SAFETY ZONE
For shops with frequent visitors or multiple operators,
it is advisable to establish a safety zone around shop
machinery. A clearly defined “no-go” zone on the floor
around each machine can help avoid accidents that
could cause injury to either the operator or the shop
visitor.
It is advisable to take a few moments to either paint
(using non-slip paint) or using tape, define on the floor
the limits or perimeter of each machines safety zone.
Take steps to ensure that all operators and shop visi-
tors are aware that these areas are off limits whenever
a machine is running for everyone but the individual
operating the unit.
40"
50"
16"
INSTALLING THE WHEELS
B
A
1. At one end of the machine, install an axle A as
shown.
Note: The ends of the axle should protrude beyond the
sides of the machine.
2. Lift the machine and install the wheels on the ends
of the axle.
3. Slide a flat washer onto the axle and against each
wheel and then insert a cotter pin through the
holes on each end of the axle as shown B.
4. Fold down the prongs of the cotter pin as shown.
5. Repeat the previous steps with the other axle and
wheels.