
User Manual

20-428 Owner’s Manual
Page 5 of 50
3. Connect the red wire of the supplied DC power cord to a voltage source that turns on and off with
the ignition switch, such as a spare accessory terminal in your vehicle’s fuse box.
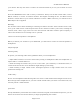
4. Insert the power cord’s barrel plug into the scanner’s DC 13.8V jack.
5. Reconnect the cable to the negative (–) terminal of your vehicle’s battery.
Note: You must use a power source that supplies 12V DC and delivers at least 600mA. Its center tip
must be set to positive and its plug must fit the scanner’s DC 13.8V jack. The supplied DC power
cord meets these specifications. Using a power cord that does not meet these specifications could
damage the scanner or the adapter.
from your vehicle’s cigarette lighter
To power your scanner from a 12V power source in your vehicle, such as a cigarette-lighter socket,
you need a 12V, 600mA DC cigarette-lighter adapter (not supplied), available at your local
RadioShack store.
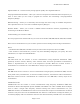
1. Insert the adapter’s barrel plug into the scanner’s DC 13.8V jack.
2. Plug the adapter’s other end into your vehicle’s cigarette lighter or power socket.
Note: When you use a cigarette-lighter adapter, you might hear electrical noise from your engine
while scanning. This is normal.
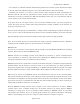
connect the supplied antenna
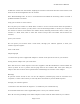
Push the antenna onto your scanner’s antenna connector and rotate until it locks into place.
Your scanner’s sensitivity to various frequencies depends on its location and the antenna’s length.
For best reception, adjust the antenna’s length as follows:
Frequency Antenna Length
25–54 MHz Extend fully
108–174 MHz Extend 4 segments
216–225 MHz Extend 3 segments
225-406 MHz Extend 2 segments
406-1300 MHz Collapse fully
connect an external antenna
You will need to connect an external antenna when you mount your scanner in the dashboard of